Home Blog Page 14

TCL TV Black Screen: Fix in Seconds 2024

0

Roku Remote Flashing Green Light

You have reached the right destination if you have any queries regarding TCL TV Black Screen. This detailed guide will equip you with all the information you need.

Are you facing the TCL black screen issue? It is a common issue that you can fix yourself. All you need is the right guidance and you are at the right place. This TCL TV screen black can be caused due to a lot of different problems, the most common of which include:

  1. HDMI or Cable Issues
  2. Power Problem
  3. Backlight or Panel Failing
  4. Software issues

In order to fix your TCL black screen, begin by checking your power connections before moving on to ensuring proper cable connections as well. Perform a power cycle on your device and then get your backlight or panels checked for damage. Finish any pending software updates or finally try factory resetting your device. If nothing works, contact TCL TV support.

Recommended Reading – Roku Remote Flashing Green Light: Fix in Seconds

Analyzing the Problem

Analyzing the Problem

Before we can jump into why your TCL TV screen goes black but the sound still works and other technical aspects of this problem, let us quickly and briefly analyze it! 

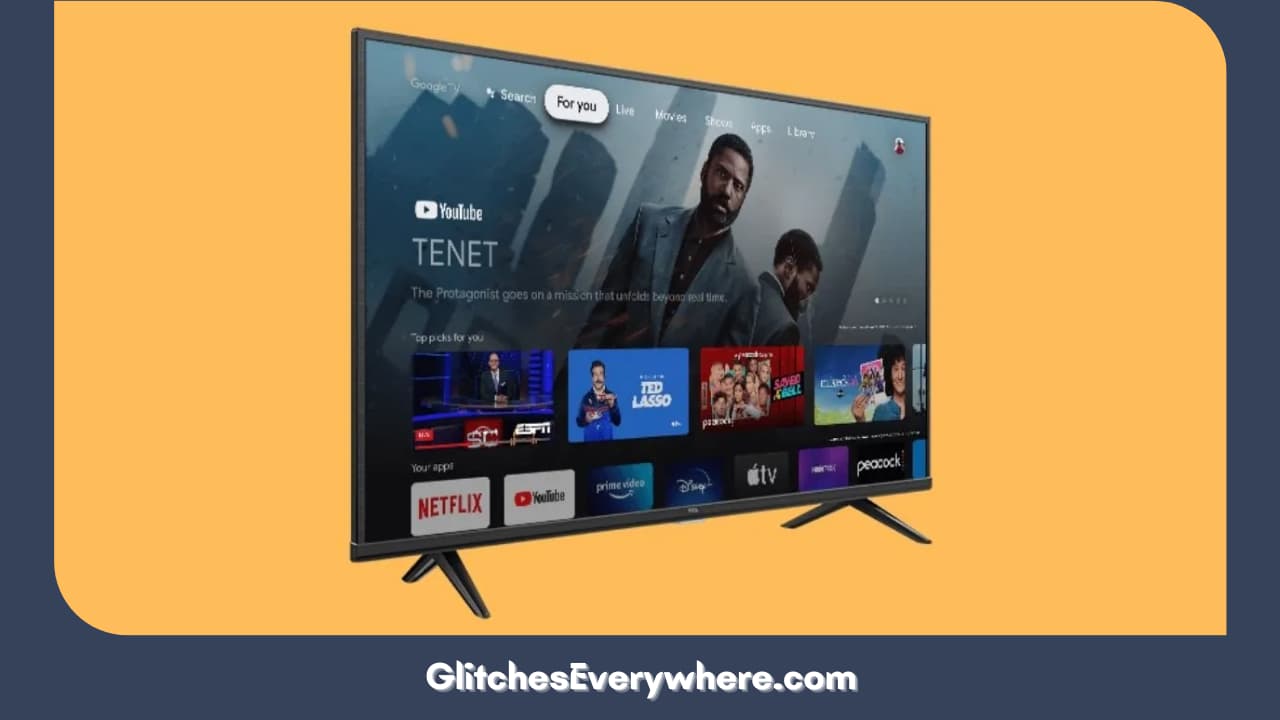
TCL TV is a popular smart TV provider. They are known for their affordable prices that come with amazing features at their price. Like all TVs, these also run into their fair share of problems.

A black screen is self-explanatory, but it can occur in different ways, you can experience TCL TV black screen with sound or without it, and you can experience that your screen is working completely but not showing on the screen. Most of these problems can be fixed with the same troubleshooting methods discussed in this article. 

Recommended Reading – Roku Sound out Of Sync: Fix in Seconds

Causes of a TCL TV Black Screen

Causes of a TCL TV Black Screen

Wondering how to reset TCL TV with black screen? Hold up, the answer to this will depend on the cause of the problem. So let us analyze what reasons cause this TCL black screen problem.

HDMI and Cable Issues

As expected, TCL TVs are equipped with many cables, HDMI ports, and connecting wires. Loose wire connections or worn-out cables significantly cause your TCL Roku TV black screen problem. Rectifying the cable issues will help you with using iPad as HDMI Moniter

Power Issues

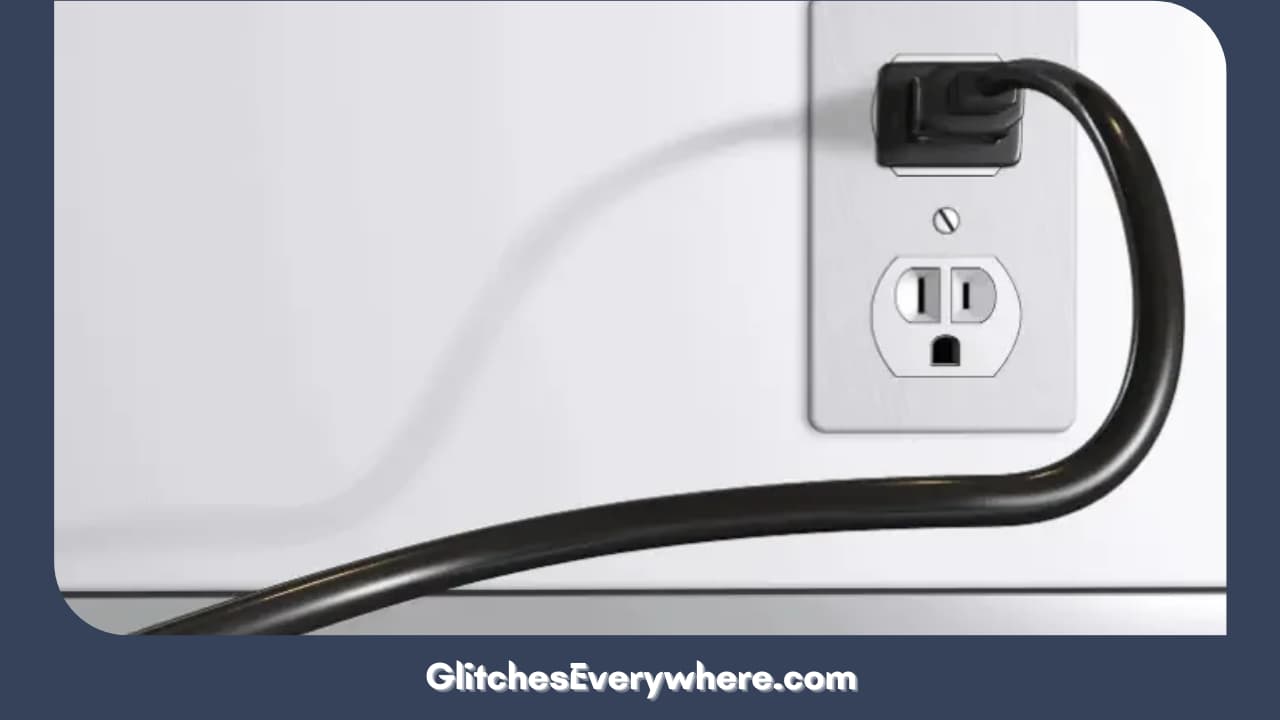
Another common reason for the TCL black screen is insufficient power for the smooth functioning of your TV. This is caused by loose power cords, blown fuses, faulty power outlets, or other similar reasons.

Backlight or Panel Failing

The light on your TV screen is directly a by-product of your backlight. If this is damaged, it will cause issues with your display and can also lead to your TCL TV black screen with sound or not issues. 

Software Issues

As you would guess, this TV also works on software or firmware that overlooks the TV’s operations. Any bugs in your software will have a direct impact on your display.

Software issues are prevalent for all companies. to learn Troubleshooting software is also useful for resetting hisense TV and fixing ring motion warning.

Now that we have seen the causes behind the TCL TV screen black headache let us move on to its fixes!

Recommended Reading – Roku Green Screen Issue: Fix in Seconds

Solution Guide to your TCL TV Black Screen

Solution Guide to your TCL TV Black Screen

There are a bunch of ways you can try to fix your TCL black screen, ranging from extremely simple to technical solutions. We have listed all the different fixes you can try to eliminate your problem.

Follow our ten-step guide, by the end of which you should be able to have gotten rid of your how to reset TCL TV with black screen dilemma!

Check your Power connection

As mentioned above, the insufficient power supply is a common cause of the TCL TV screen black problem. Ensure your power cord is properly connected to a functioning outlet to check this.

Reconnect your power cable properly. If you see a blown fuse, replace it or seek professional help. This should help you fix your TCL black screen.

Check your HDMI Connection

Check Your Hdmi Connection

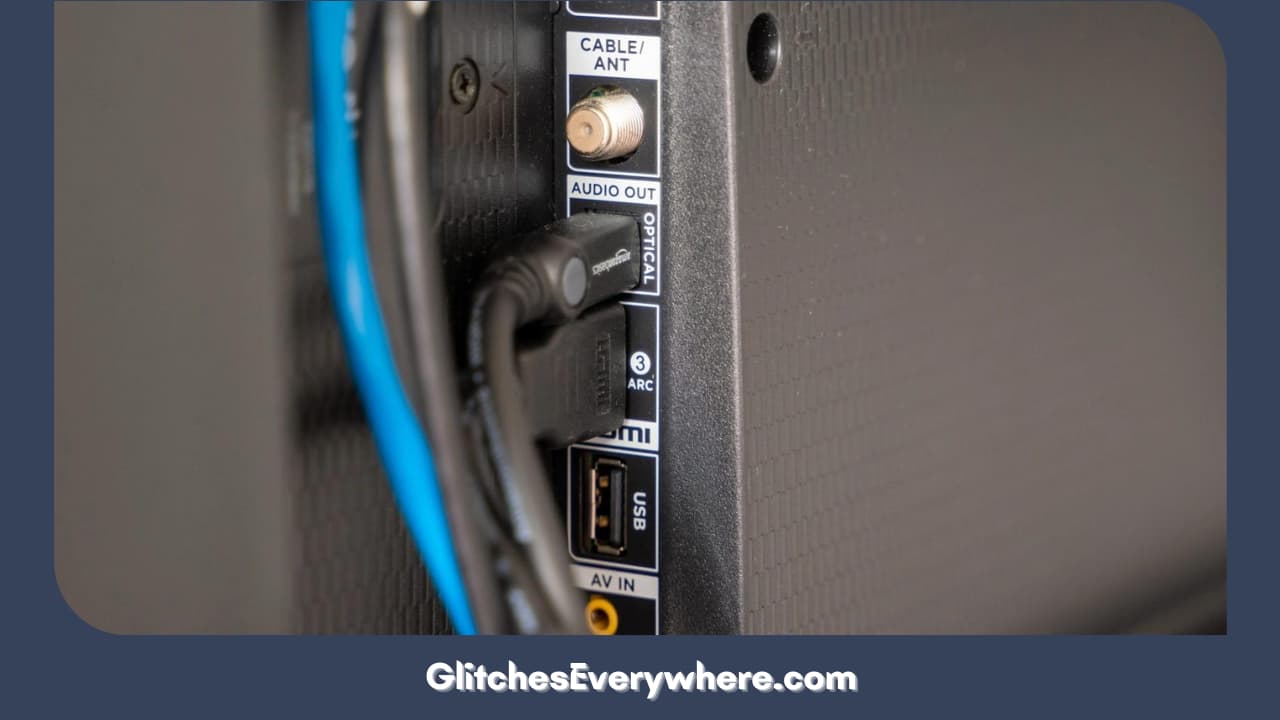
Are you facing TCL TV black screen with sound? Or is it without sound? This fix is for both! In the same way, you checked your power cables and the rest of them. Verify that your HDMI cable is properly connected and has not been damaged or worn out.

These wires are generally present at the back of the TV. Make sure that you do not touch any cables with your bare hands. Checking the HDMI connection can tell if your iPad is charging or not. After all, connections are in place check if you still have the TCL TV black screen.

Restart your TV

Restart Your Tv

Another way to fix your TCL TV black screen is to restart your device. You can do this in a couple of ways. One is by pressing a key combination on your remote. Here is how you can do it simply:

  1. Begin with five presses on your Home button.
  2. Press Up one time.
  3. Press the  Rewind button twice now.
  4. Press the Fast Forward button two times at the end.

Do this combination without any pauses, and your TV should automatically restart. Still experiencing the TCL black screen? Do not worry, we have many more solutions to go; keep reading!

Perform a Power Cycle on your TV

TCL TV screen goes black, but the sound still works? Or is it completely unresponsive? Do not worry; this fix is for both of these cases!

A common way to get rid of technical bugs is to power-start your device. It is as simple as it sounds and helps you eliminate minor software glitches. Here is how you can do it:

  1. Ensure your TV is turned off before you start power cycling your device.
  2. Make sure that your status lights are off.
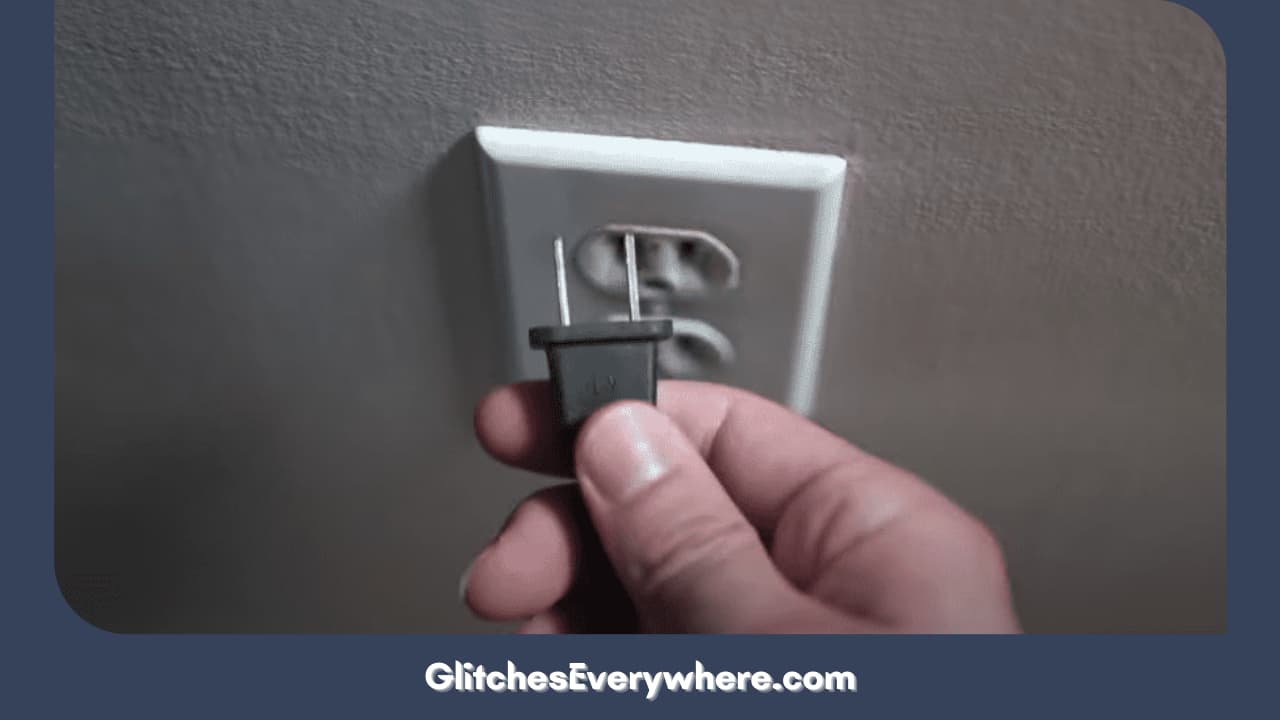
  3. Unplug your TV cable from your power outlet.
  4. Wait for another minute or two.
  5. Plug your cable back on and start it again.

You can also power cycle the remote! Here is how you can do it:

  1. Remove all your batteries from the remote.
  2. Again, wait for another one to two minutes.
  3. Put the batteries back in.
  4. Use your remote on your TV again!

You can also use a paperclip to power cycle your TV; here is how you can do it:

  1. Again, turn your TV off before anything else.
  2. Look at the side of your TV to find the Reset button; it is a tiny hole that can be reached through a paper clip.
  3. Press down that button with the clip for a good thirty seconds.
  4. Finally, power on your TV again.

Once the power cycle completes, check if you still have the TCL TV black screen issue.

Update your Software

Update Your Software

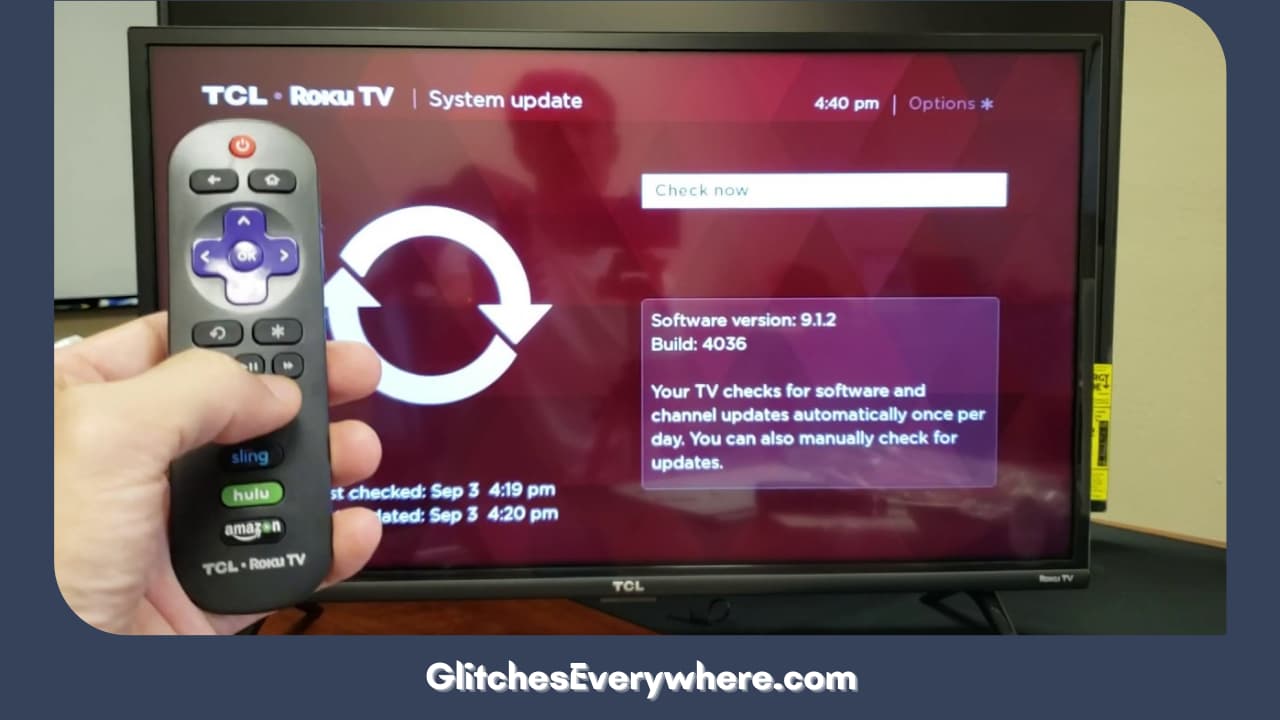
Another way to remove your TCL TV black screen is to update your firmware. This is going to help you get rid of your device’s bugs and issues. Here is how you can update your TCL software:

  1. Press the Home button on your remote.
  2. Go to your Settings menu,
  3. Go down to the More Settings option.
  4. You will find the Device Preferences option; click on it.
  5. Move on to About.
  6. Choose Select System Update.
  7. From the displayed box, choose Network Update.
  8. If there is a software update, it will download it.
  9. Click OK to confirm.

Be it TCL Roku TV black screen or Android black screen, they can have common issues, the next two solutions will take a look at the same!

Cross Check your Backlight

A more technical culprit for the TCL TV black screen issue is a malfunctioning or broken backlight. Fixing it can be extremely difficult on your own, so in this case, you should consider getting a professional to look at it.

But first, let us see how this backlight failure can cause your TCL TV black screen. These backlights on any TV are made up of multiple LED strips. If even one light in a strip breaks, the strip will not work anymore!

So, in cases like these, you must replace the entire strip. This will require you to disassemble the whole TV. Then you will have to remove the bezels and the glass panel. As you can assume, this is a complicated process and if not done properly can damage your TV even more.

Even though hiring a professional can be a little more expensive, I suggest you go down that route as it is safer.

The replacement cost will depend upon the number of strips you need to get fixed and cost you anything from a hundred to two hundred dollars, but it is a more permanent fix for the TCL TV screen black problem.

Replace your the T-CON Board

TCL TV screen goes black, but the sound still works? Not that huge of a deal, but how does that go about? How are you unable to see any images on the screen? Even with direct light on it?

There is a chance that you have damaged your T-CON board. Part of your TV is directly responsible for creating the image on your screen.

As it is a technical process to fix it, get a professional if you are not handy with tools and your TV. But if you are, you can do it yourself using this guide!1

  1. Go to an online marketplace and search for the T-CON board corresponding to your TV model number. They should cost you about a hundred dollars.
  2. Remove the rear end of the panel of your TV.
  3. Disconnect the ribbon cables that you will see on your current T-CON board.
  4. Remove the screws holding it and take it out completely.
  5. Place the new one in the same place and add back the screws, ribbons, and panel.

And just like that, it is done! Keep in mind that there might be around four screws and ribbon cables, so be patient with it and use the right tools it will help you get rid of your TCL TV black screen for good.

Factory Reset your TV

Factory Reset Your Tv

If none of the above solutions has worked for you, let us move on to our last resort. There are two ways you can do it. First, use this remote combination:

  1. Press the Home button five times.
  2. Then, press the Up arrow button just once.
  3. Press the rewind button two times.
  4. Finally, press the forward button two times.

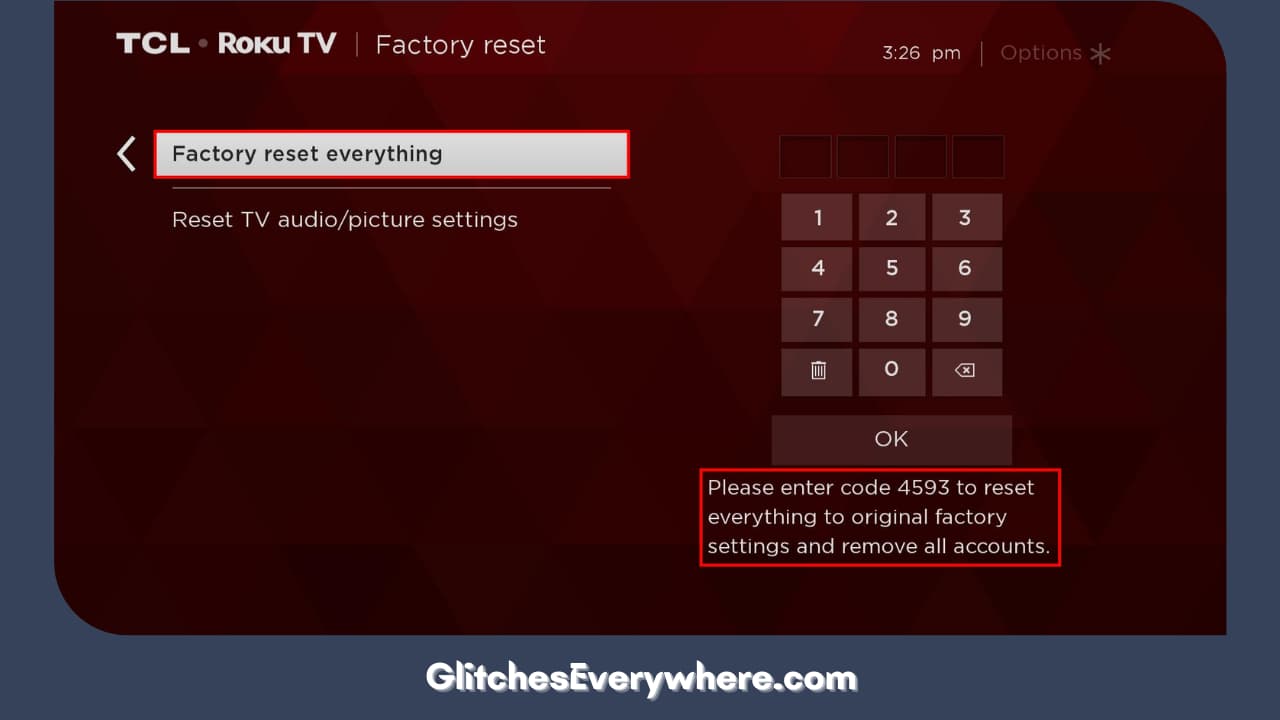
This should do it! There is another way you can do it if the screen in not wholly black but dull; follow this guide:

  1. Ensure your TV has a stable power source before you do this.
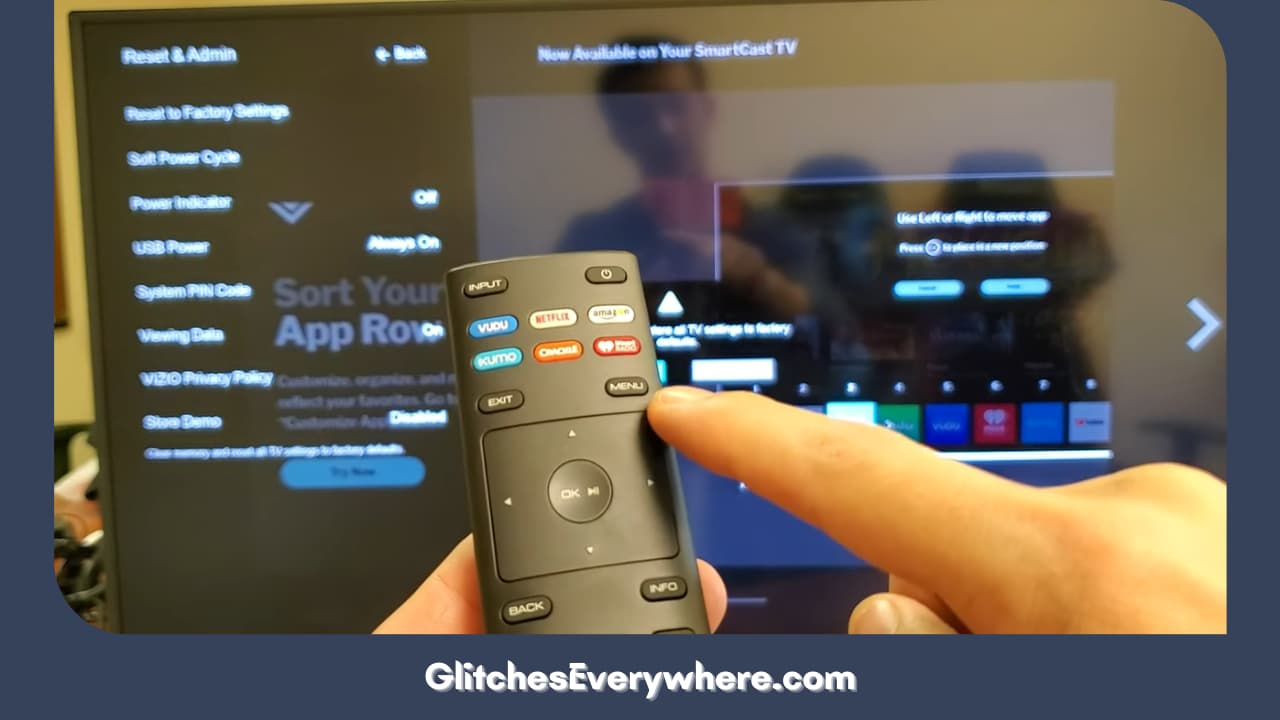
  2. Using your remote, go to the main menu using the Home or Menu button.
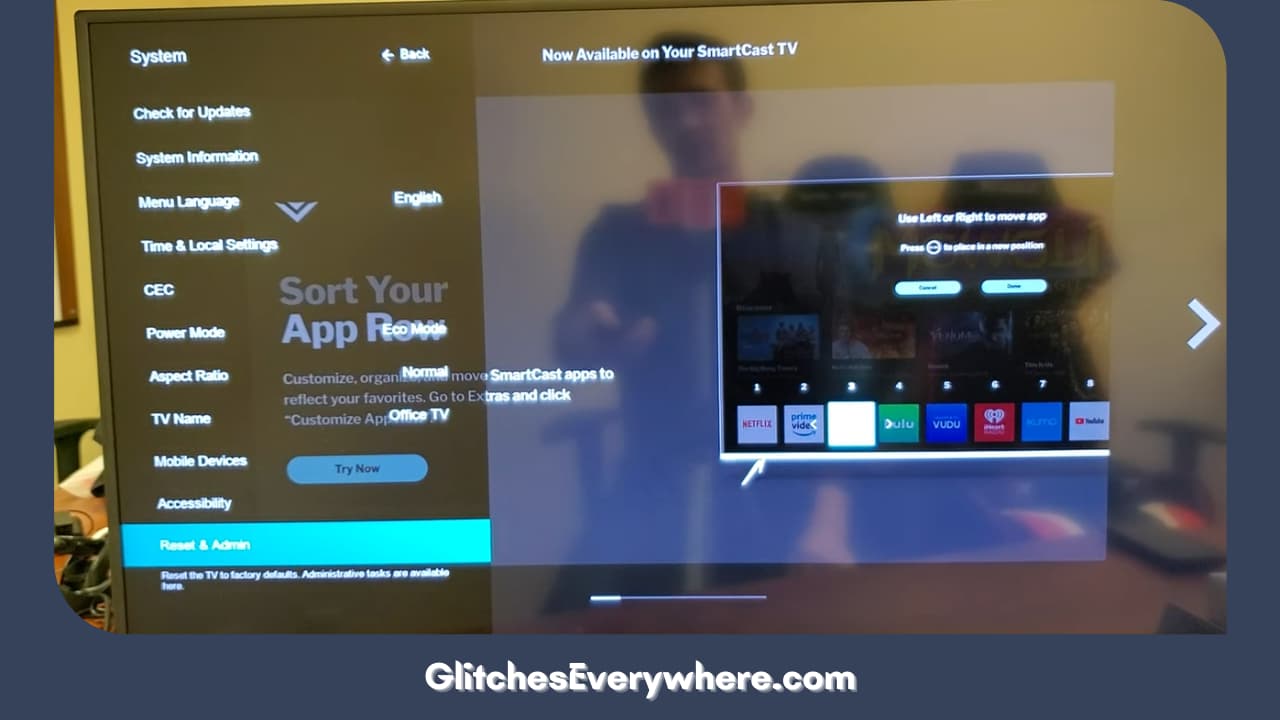
  3. Using the arrow keys, go to the Settings or System menu.
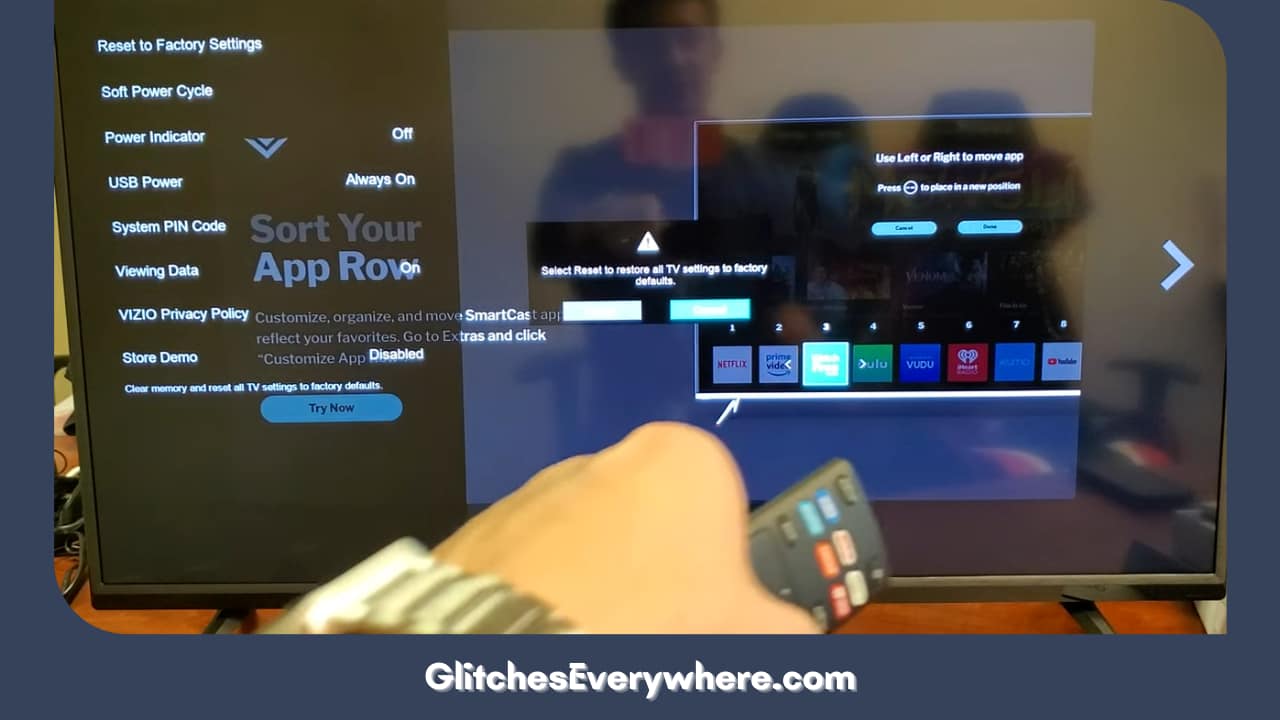
  4. Here, navigate the screen to find the Reset or Factory Reset option.
  5. When you select this option, your TV may ask you for a PIN or a password.
  6. It is generally 0000 or 1234.
  7. Confirm the factory reset by pressing Yes or OK.

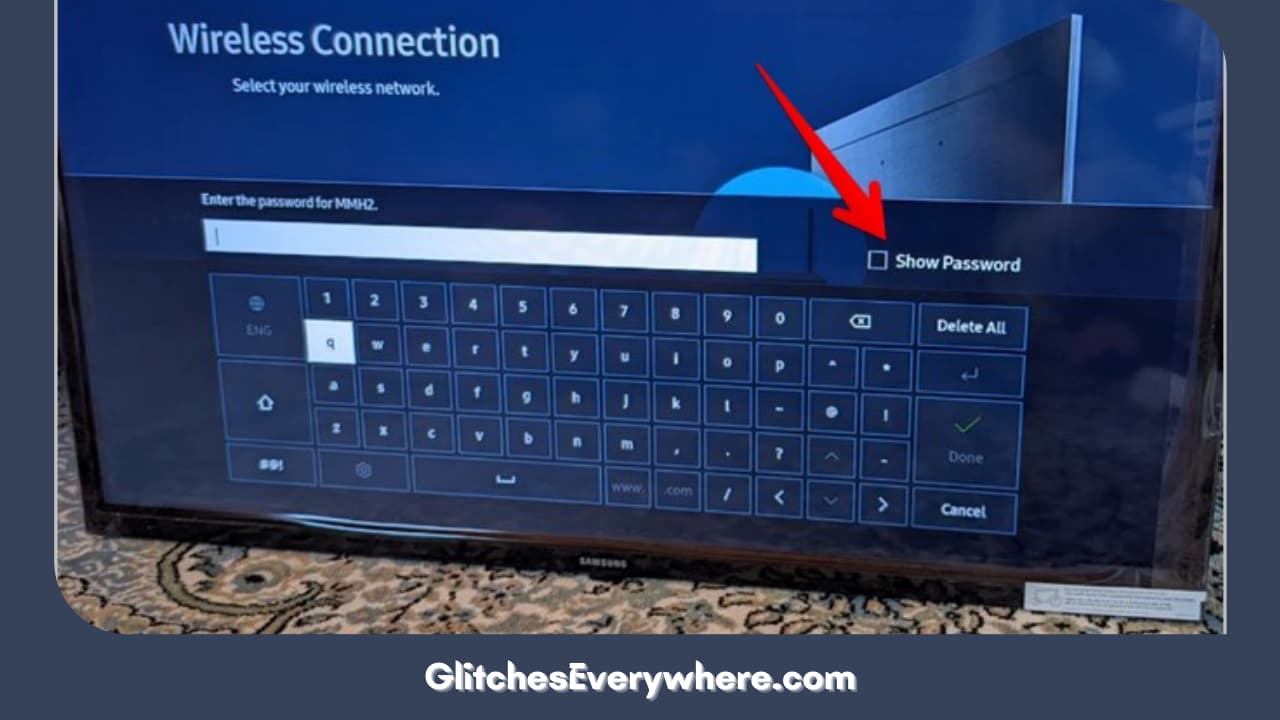
Once your reset is done, you must go through your TV’s initial setup again. Connect your internet, choose your language, and all other necessary settings options.

Keep this as your last resort as you will lose your saved data. It can help you solve the TCL TV black screen, so it is worth a shot!

Try the Tweak Fast Start Option

The Tweak Fast Start option is another way to get rid of your TCL TV black screen. Though this option may not always work, it is still worth a shot if the other options in the list have not worked for you yet. This option will only work if the screen is dull and not completely dead.

This process will also work in the case of a TCL Roku TV black screen. Here is what you can do:

  1. Use your Roku TV screen and press the Home button.
  2. Find the Settings option.
  3. Go to System.
  4. Find the Fast TV Start.
  5. As per your situation, enable or disable it.

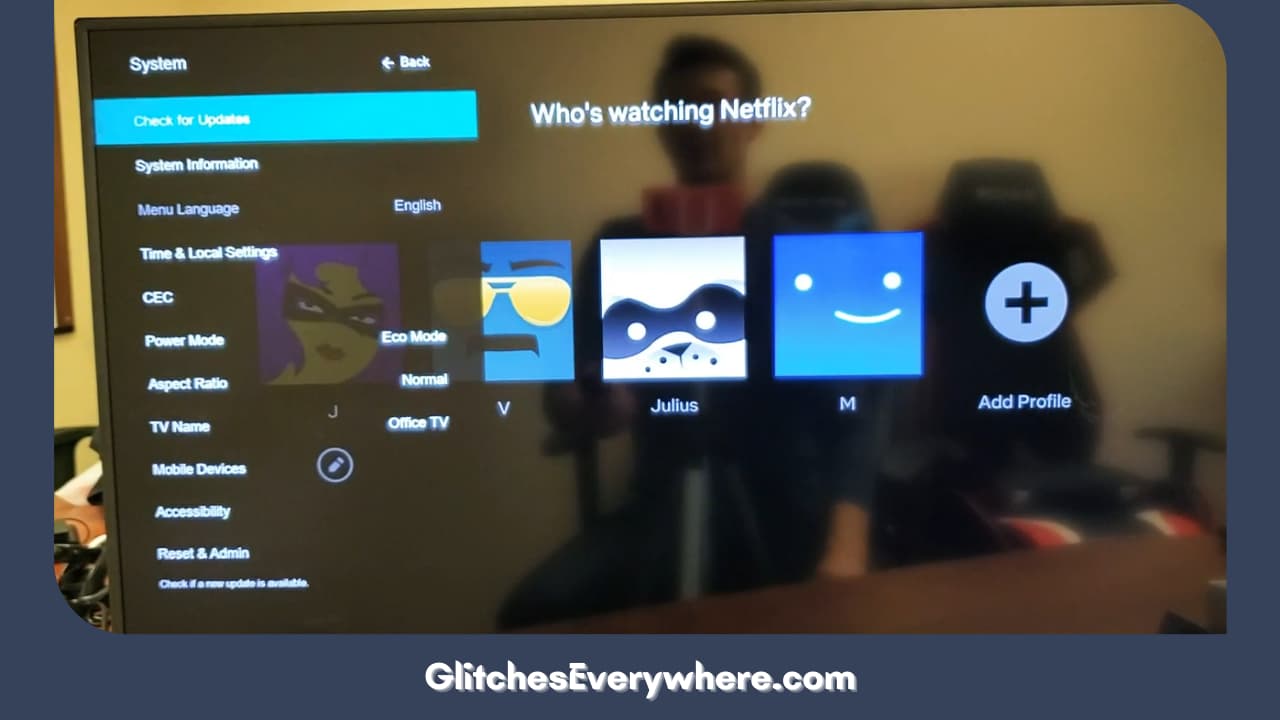
In case of an Android TV, you can do this:

  1. Go to the Settings option.
  2. Find the power option.
  3. This time, look for the ‘instant power on’ setting option and change it according to your need.

Check if your TCL TV screen goes black but the sound still works or has the problem resolved itself completely!

TCL TV Support

If none of the solutions has worked for you, it is time to get the TCL television support line. You can contact them on the following number: 1-877-300-8837. Call them anytime between 9 am to 12 am, ET from Monday to Friday or from 9 am to 6 pm, ET on Saturdays and Sundays.

Describe your TCL TV black screen problem to them in detail and they will help you with what you can do!

Recommended Reading – Apple TV Remote Volume Not Working: Fix in Seconds

Wrapping Up

It can feel extremely helpless if your TCL TV screen goes black but the sound still works or has sound, even more, if it does not respond at all! Though the TCL TV black screen is a common issue, you should take proper care of your device to ensure it does not happen too often!

Make sure you are up to date with all your software updates, ensure minimal physical damage and keep checking on the cables! This will help you achieve a smooth streaming time for long stretches of time.

How to Activate BlueCross Blue Shield of Massachusetts Insurance Card

0

To activate your Blue Cross Blue Shield of Massachusetts insurance card, you need to log in to your account on the BCBS Massachusetts website. Once logged in, find the ‘Card Activation‘ section and enter your card details accurately. If you face any issues during the process, don’t hesitate to contact their technical support.

How To Activate Bluecross Blue Shield Of Massachusetts Insurance Card

Take a few moments to ensure your account is secure. Regularly update your password and implement two-factor authentication to boost security. More tips for password creation and ensuring your account’s safety await you further on.

Accessing BCBSA Activation Page

To begin the process of activating your Blue Cross Blue Shield (BCBSA) insurance card, first, open any web browser on your device and go to the bcbsma.info/activate URL. This will take you to the activation page where you’ll find the option to activate your card.

Don’t worry if you encounter issues during this initial step, as activation troubleshooting is at your disposal. You may also seek assistance from the activation helpdesk support team, who are skilled in handling these sorts of concerns. They’re proficient in guiding users through the process and resolving any hiccups along the way.

Also Read – How to Activate Fox News on on Smart Devices

Steps for Online Activation

If you’re prepared to activate your BCBSA card online, first make sure you’ve logged in to your account on the Blue Cross (Massachusetts) homepage. Here’s your step-by-step guide to online activation:

  1. Locate the ‘Card Activation’ section.
  2. Enter your card details, including the card number and the cardholder’s name. Make sure all details are accurate to avoid any activation issues.
  3. Click on ‘Activate’. If you encounter any problems, don’t panic. Keep some troubleshooting tips in mind: refresh the page, clear your cache, or try a different browser.
  4. If the issues persist, reach out for technical support. They’re there to assist you.

Alternative Activation Method

Should the standard method of card activation give you a hard time, there’s an alternative method you can turn to on the Blue Cross (Massachusetts) homepage.

Begin by opening your web browser and moving to the homepage. Once there, locate and click the sign-in button. If you’ve forgotten your username, don’t panic. There’s a username recovery option readily available.

Input your login details and proceed to the activation section. If you encounter any sign in troubleshooting issues, don’t hesitate to click on the ‘Need Help Signing In?’ link.

This alternative activation method is straightforward and user-friendly, designed to make your insurance card activation process as simple and stress-free as possible. With these options at your disposal, activating your card should be a breeze.

Also Read – How to Activate Showtime Anytime on Smart Devices

Account Recovery and Registration

Moving through the card activation process, you might also wonder about account recovery and registration; let’s address that next.

  1. If you’ve forgotten your username or password, simply click on the respective option on the login screen. Follow the on-screen prompts for recovery or reset, ensuring your account security is maintained.
  2. To register, look for the ‘Register Now’ option on the login page. Here, you’ll initiate your journey into the Blue Cross Blue Shield system.
  3. You’ll be asked to enter your email and create a password. This is an important step in password management; your chosen password will be your key to access your insurance benefits.
  4. For added security, you can also register using your mobile number. This provides an extra layer of authentication, bolstering your account security.

In essence, account recovery and registration are straightforward and secure processes.

Tips for Password Creation

Creating a strong password is a crucial step in securing your Blue Cross Blue Shield account. When crafting robust passwords, keep in mind that complexity is crucial. Your password should be at minimum eight characters long and consist of a combination of numbers, uppercase and lowercase letters, and special characters. Avoid common phrases or information easily associated with you, such as birthdays or pet names.

Instead, consider using a passphrase, a sequence of random words or a sentence, for improved password security. Don’t recycle passwords across different accounts. It’s tempting, but it can leave you exposed if one account is compromised.

Lastly, consider utilizing a password manager. They’re secure, user-friendly, and can generate and store strong, unique passwords for you.

Also Read – How to Activate TBS Android on Smart Devices

Ensuring Account Safety

After you’ve established a strong password, it’s crucial to keep protecting your account by taking additional security measures. Your account security is of utmost importance and to guarantee the highest level of data protection, please follow these steps:

  1. Consistently Update Your Password: Changing your password regularly can help prevent unauthorized access.
  2. Implement Two-Factor Authentication: This adds an extra layer of security, requiring not only your password but also a second piece of information.
  3. Monitor Account Activity: Regularly check your account for any unusual activity.
  4. Refrain from Sharing Account Details: Never disclose your account details to anyone to prevent potential security breaches.

Contacting Customer Support

If you’re facing any issues with your Blue Cross Blue Shield insurance card activation, don’t hesitate to contact the customer support team for help. They’re readily available to provide the technical assistance you need.

You can find the various support options on the Blue Cross Blue Shield of Massachusetts website. Scroll down to the bottom of the homepage, and click on the ‘Contact Us‘ link. Here, you’ll find email addresses, phone numbers, and other ways to reach out.

The customer support team is highly trained, knowledgeable, and equipped to handle your queries. So, whether you’re encountering technical issues during activation or have questions about the process, don’t hesitate to reach out. Remember, assistance is just a click or a call away.

Also Read – How to Activate Unreal Mobile SIM Card Online

Troubleshooting Activation Issues

Despite your best efforts, you might still run into some activation issues with your Blue Cross Blue Shield insurance card. The activation process, while designed to be straightforward and user-friendly, may present technical difficulties. Here’s a quick guide to help you troubleshoot:

  1. Check your internet connection: Make sure you’re connected to a reliable network. Slow or unstable internet can interrupt the process.
  2. Confirm your details: During activation, make certain the personal details you’re entering match those on file. Any inconsistency can cause an error.
  3. Browser issues: If the site isn’t responding, try switching to a different browser or clearing your cache and cookies.
  4. Contact support: If you’ve tried everything and still can’t activate, reach out to the customer service team for assistance.

Conclusion

So, you’ve conquered the BCBSA activation journey, just like climbing a challenging mountain peak. Remember, 84% of BCBSA users report a smoother healthcare experience after activation. So it’s worth the initial ascent.

Your health should never be a mystery, and with your activated card, it won’t be. If you ever falter, BCBSA support is there to catch you. Now, you’re equipped to navigate the insurance landscape like a seasoned adventurer.

Keep marching, your health is worth every step.

How to Activate the LWW Products Online: 2024

0

To activate your LWW product on thepoint.lww.com/activate, first locate your unique 12-digit access code, found on purchase cards, books, DVD/CD cases, or product boxes. Next, navigate to the LWW activation page and input the access code into the appropriate field. Click ‘Submit Code’ and follow the on-screen instructions.

How To Activate The Lww Products Online

In the event of any activation issues, don’t worry, you can hit ‘Help’ for the top 10 FAQs or use the ‘Live Chat’ feature for real-time assistance. Making use of these detailed, step-by-step instructions will get you well on your way. Further down this page, you’ll discover more valuable tips and info to sort any bumps you may experience along the road.

Navigating to LWW Activation Page

To begin activating your LWW product, open a web browser and head straight to thepoint.lww.com/activate. This is your starting point for the activation process. Now, you might think it’s a breeze from here, but sometimes hiccups do occur. Don’t worry though, we’ve got you covered with troubleshooting steps should you hit a snag.

Click on the ‘Help’ option near the activation box. You’ll find a list of the Top 10 FAQs. It’s like a mini-guide, providing you with activation process clarification. Still stuck? Don’t fret. Use the ‘Live Chat’ feature in the menu bar. Just provide the necessary information, hit ‘Chat Now’, and you’ll be connected with a support representative. Activating your LWW product doesn’t have to be a hassle; you’ve got this!

Also Read – How to Activate Your Test Kit at LetsGetChecked Online

Entering the 12-Digit Access Code

Once you’re on thepoint.lww.com/activate, you’ll need to input your unique 12-digit access code in the provided field. This process is important for access code verification, making sure that the product you’re trying to activate is genuine and registered to your account. Be sure to enter each digit carefully, avoiding any typing errors that could cause activation issues.

After entering the code, click the ‘Submit’ button to proceed. If you encounter any issues or receive an error message during this step, don’t worry. Troubleshooting activation errors is usually straightforward. You can find a ‘Help’ option near the activation box, which hosts a range of solutions to common problems.

Locating Your Activation Code

Before activating your LWW product, you’ll need to locate your unique 12-digit activation code. This code is typically found on purchase cards, books, DVD/CD cases, or product boxes. In most cases, the code is hidden under a scratch reveal area for security purposes. Gently scratch off the designated area to reveal your code.

If you’re having trouble locating your code, don’t panic. There are straightforward troubleshooting steps to follow. First, double-check all potential locations. If you still can’t find your code, it might be worth reaching out to the retailer or checking your email for a digital receipt.

Here’s a quick reference table to help:

Potential Code LocationsTroubleshooting Steps
Purchase cardsCheck email receipts
BooksContact the retailer
DVD/CD casesCheck all packaging
Product boxesLook for scratch reveal area

Also Read –How to Activate the LWW Products Online

Submitting Your Activation Code

After you’ve located your 12-digit activation code, navigate to thepoint.lww.com/activate in your web browser to begin the submission process.

On the webpage, you’ll find a designated field for entering your code. Carefully type in the digits, double-checking for accuracy. Once entered, click on the ‘Submit Code’ button.

Following the on-screen instructions will guide you through the rest of the process, helping you in activating your product efficiently. If you encounter any issues, don’t worry. There are options for investigating troubleshooting right on the activation page. Look for the ‘Help’ option near the activation box.

From here, you can check the top 10 frequently asked questions for quick solutions. Remember, accurate code submission is the first step to successful product activation.

Addressing Activation Issues

Should you run into any issues while activating your LWW product, don’t worry – there are numerous resources available to help you troubleshoot and resolve the problem.

Start by revisiting the activation page on thepoint.lww.com/activate and carefully input your 12-digit access code. Some common errors could include entering the code incorrectly or using an expired code.

If you’re still encountering issues, don’t hesitate to check out the website’s troubleshooting tips. These will guide you through potential solutions to common problems.

Also Read – How to Activate Your Spot Device Online

Utilizing the Help Option

If you’re having trouble with the activation process, don’t hesitate to utilize the Help option on thepoint.lww.com/activate for guidance and support. This page is designed to assist you in exploring troubleshooting solutions that can make the activation process smoother.

Here’s a quick guide:

StepActionOutcome
1Click on ‘Help’Opens a dropdown menu
2Select ‘TOP 10 FAQs’Displays common issues and solutions
3Review and apply solutionResolves your issue

Contacting Support via Live Chat

Even with the help of FAQs, you might still encounter challenges during the activation process; this is where the Live Chat function comes into play.

  1. Live Chat: Find the Live Chat option, usually located in the menu bar or at the bottom of the page. Clicking on this will open a chat window.
  2. Troubleshooting tips: Once you’re in the chat, you can ask for help. The support team is trained to provide quick, concise, and accurate solutions to your activation problems.
  3. Real-time Assistance: With live chat assistance, you’re getting real-time support. This means your issues can be resolved promptly, saving you time and effort.

Providing Necessary Information for Support

When reaching out to support via live chat, it’s vital that you provide all the necessary information related to your LWW product and the issues you’re facing. This includes your 12-digit access code, details about the device you’re using, and a clear explanation of the problem.

Providing troubleshooting details, such as the steps you’ve already taken to resolve the issue, is also essential. This information allows the support team to better understand your situation and offer effective solutions.

Conclusion

So, there you have it! Activating your LWW product on thepoint.lww.com/activate was as tricky as pie, right?

Who knew the world of technology could be as easy as entering a 12-digit code?

Now, with your product activated, you’re all set to conquer the tech world.

And remember, if any issues pop up, that friendly live chat support is just a click away.

Enjoy your LWW journey!

How to Activate Your Spot Device Online: 2024

0

To activate your SPOT device, begin by visiting findmespot.com/activate. You’ll need to establish a user account, selecting a username, password, and set up security questions. Language preference can also be chosen. You must then complete the device details, entering the country, device’s ESN, and Auth Code, and give your device a unique name.

How To Activate Your Spot Device Online

Confirm all details are accurate before finalizing device activation. As you progress, you’ll reveal insights about your device’s capabilities, troubleshooting methods, and more. Stick around, there’s plenty more you’ll discover.

Starting SPOT Device Activation

To start the initiation process for your SPOT device, first, open a web browser and go to findmespot.com/activate. You’ll find a simple interface designed to lead you through the initiation process. If you face any obstacles, don’t worry. Troubleshooting initiation issues is relatively straightforward with the assistance of on-screen prompts and a comprehensive FAQ section.

Understanding initiation benefits is vital. Activating your SPOT device not only improves its functionality but also guarantees you’re able to access all of its unique features. It’s a one-time process that opens up a world of convenience and peace of mind, knowing that your device is fully operational and ready to perform at its peak.

Also Read – How to Activate Your Spot Device Online

Setting Up User Account

Creating your user account is the next important step in activating your SPOT device. Start by visiting findmespot.com/activate. Look for the ‘Begin Activation‘ button and click it. You’ll be prompted to provide a username and password. If you’re a new user, create your account by following the on-screen instructions.

Be sure to remember your login details as you’ll need them for managing account settings later on. Setting up crucial questions is an essential part of this process. These questions will help safeguard your account and assist in password recovery, if needed. Carefully select your security questions and provide answers that you can easily recall.

Now, you’re one step closer to activating your SPOT device.

Selecting Language Preference

After establishing your user account, you’ll be prompted to select your language preference from a drop-down menu on the site. This step’s significance can’t be overstated, as it guarantees that all instructions and prompts appear in a language you understand. Here are some language selection tips:

  1. Choose your most proficient language to avoid misunderstanding.
  2. If your native language isn’t available, select English or a language you’re comfortable with.

Next, you’ll secure your account. User security measures involve creating a strong password and setting up a secret question. Follow these password strength guidelines:

  1. Use a combination of letters, numbers, and symbols.
  2. Don’t use easily guessable information like birthdays or names.

The secret question is essential for account recovery, so pick one that only you can answer.

Also Read – How to Activate Ooma Phone Online

Completing Device Details

Once you’ve secured your account with a preferred language and strong password, the next step is filling out your SPOT device details. This involves inputting specific information such as your country and the device’s ESN and Auth Code. Be sure to assign a unique name to your device for easy identification.

While this process is typically straightforward, troubleshooting device activation may be necessary if you encounter any hiccups. Don’t fret – it’s a common part of the journey to enhancing device features. If issues persist, consider reaching out to customer support for guidance.

Finalizing Device Activation

Finalizing the activation of your SPOT device typically involves following a few more on-screen prompts, making sure that all details provided are accurate and up-to-date. You’re now at the last stage, and it’s important to keep a few key points in mind:

  1. Review and Confirm: Double-check all entered details. Inaccuracies can lead to issues further down the line.
  2. Understand Advanced Features: Familiarize yourself with your device’s capabilities. This will help maximize its utility.
  3. Explore Troubleshooting Methods: Have a basic understanding of troubleshooting techniques. This can save you time and stress if a problem arises.

Once you’ve completed these steps, your device is ready for use. Remember, correct activation sets the foundation for a smooth user experience. Don’t rush this process. Take your time, and make sure everything is done right.

Also Read – How to Activate New BMO Card Online: 2024

Recovering Forgotten Credentials

While you’ve successfully activated your SPOT device, there might be instances where you forget your login credentials; let’s discuss how to recover them. The credential retrieval process on Findmespot.com/activate is designed with user authentication and security measures in mind.

StepsDescription
Step 1Click ‘Forgot Username or Password’
Step 2Follow on-screen instructions
Step 3Provide necessary information for verification
Step 4Create a new password if needed
Step 5Login using recovered credentials

Exploring Related Activations

In addition to your SPOT device, there are various other devices and platforms that you can activate for improved connectivity and entertainment. It’s crucial to investigate troubleshooting tips and understand device compatibility to make the most out of them.

Here are three related activations you might consider:

  1. Activating a new Roku Device using roku.com/link: This process is simple, but troubleshooting issues like incorrect link codes may arise.
  2. Activation of NBC Sports Channel via nbc.com/activate: Compatibility with your device is crucial here. Not all devices support this platform.
  3. HP DeskJet All-in-One Printer activation at 123.hp.com/setup: While setting up, make sure you have the correct drivers to avoid compatibility issues.

Activating Other Popular Devices

There’s a wide array of popular devices you can activate to enhance your digital experience, ranging from streaming services like DisneyNow.com on Roku, iOS, or Android, to essential communication tools like the Ooma Phone on ooma.com/activate.

While exploring troubleshooting, understanding device compatibility is important. Check the manufacturer’s website for compatibility information before you start the activation process.

Here’s a helpful table to guide you:

DeviceActivation Link
DisneyNowDisneyNow.com
Ooma Phoneooma.com/activate
RokuRoku.com/link
LWW Productthepoint.lww.com/activate

In case of any hiccups, don’t hesitate to contact the device’s customer support. They’re there to help you navigate any potential activation issues. With this guide, you’re on your way to accessing a whole new world of digital experiences.

Conclusion

That’s it! Activating your SPOT device on findmespot.com/activate is a simple process. From setting up your user account to finalizing device activation – you’ve got it all covered now.

And remember, even if you forget your credentials, recovery is a breeze. Now, you’re all set to discover the full potential of your device.

Happy adventuring with your activated SPOT device!

How to Activate Bi Pet Rebates Card Online: 2024

0

To activate your Bi Pet Rebates Card, head over to Prepaid.bipetrebates.com/Activate with your card handy. Make sure you’re connected to a reliable internet source. Once on the site, you’ll need to input personal details like your full name and contact information.

How To Activate Bi Pet Rebates Card Online

Keep following the site’s instructions and in no time, your card will be activated. Checking the status of a rebate claim or even how to upload necessary documents for a claim are just a few extras you’ll pick up by sticking around.

Background on Bi Pet Rebates Card

Whether you’re a pet owner or a veterinary professional, the Bi Pet Rebates Card is a beneficial tool, offering exclusive rebates and incentives for eligible pet product purchases.

The card activation process is simple and user-friendly, ensuring you can start reaping the benefits of Bi Pet Rebates in no time.

Requisites for Card Activation

Before you can start enjoying the benefits of your Bi Pet Rebates Card, there are certain prerequisites for card activation that you’ll need to fulfill.

  1. High-Speed Internet Connection: The card activation process is performed online, therefore a stable and high-speed internet connection is essential.
  2. Valid Bi Pet Rebates Card: You’ll need your physical card at hand. The first six digits of your card number are part of the required information for activation.
  3. Official Website Access: You must have the official website’s address, which is prepaid.bipetrebates.com/activate.
  4. Personal Information: Your personal details, including your full name and contact information, will be necessary for card activation.

Follow these prerequisites diligently to guarantee a smooth activation process for your Bi Pet Rebates Card.

Also Read – How to Activate NBC Sports App on Smart Devices

Applying for Bi Pet Rebate VISA

Applying for a Bi Pet Rebate VISA card is a simple process that starts with purchasing one or more qualifying products. Once your purchase is finished, you’ll need to take advantage of online promotions and apply for the rebate. You can do this directly on their website.

The card benefits are plentiful, providing you with significant savings on future pet care purchases. Rebate processing is efficient, taking just a few weeks to reflect in your account.

If you encounter any difficulties during the application process, don’t hesitate to reach out to their customer support. They’re there to assist you in navigating the process and make sure you’re able to take full advantage of the Bi Pet Rebate VISA card.

Steps to Submit Rebate Claim

After you’ve made your qualifying purchase, it’s time to submit your Bi Pet Rebate claim online to start enjoying the perks of your VISA card. The process is simple and user-friendly, but make sure you follow these steps diligently:

  1. Visit the official Bi Pet Rebates website.
  2. Navigate to the ‘Submit a Rebate’ section.
  3. Enter the required details including your offer code and date of purchase.
  4. Submit your rebate claim.

Your claim status and rebate processing timelines will be communicated via email. If you encounter any issues during your rebate claim process, reach out to the customer support team for assistance. Remember, the key to a successful claim is attention to detail and following the outlined steps correctly. Happy saving!

Also Read – How to Activate Your Test Kit at LetsGetChecked Online

How to Upload Necessary Documents

Once you’ve submitted your rebate claim, it’s crucial to upload the necessary documents to ensure the process moves forward smoothly. This process involves uploading documents and going through the verification process.

StepDocument TypeAction
1Purchase ReceiptScan and upload
2Rebate FormComplete, scan and upload
3Personal IdentificationScan and upload for verification

Begin by scanning your purchase receipt, the completed rebate form, and a form of personal identification. Upload these scanned documents on the website. These form part of the verification process, ensuring your claim is legitimate. Keep copies of these documents for your records until your rebate is processed. It’s worth noting that failure to upload correct and readable documents may result in delays or denial of your rebate claim.

Activating LWW Product

To get started with activating your LWW product, first navigate to the website thepoint.lww.com. This is the official platform for LWW product activation, including Bi Pet Rebates. Follow these steps for a successful activation:

  1. Click on the ‘Activate a product’ button on the homepage.
  2. Enter the unique activation code that came with your product.
  3. Create an account or sign in if you already have one.
  4. Follow the on-screen instructions to complete the activation process.

Also Read – How to Activate the LWW Products Online

Process for ATT MicroCell Activation

If you’re looking to improve your network coverage at home, activating your ATT MicroCell is a simple process that you can handle yourself. The MicroCell activation process is user-friendly and straightforward. It starts with connecting your MicroCell to your broadband internet service.

Once connected, visit the ATT MicroCell online portal and log in with your ATT account credentials. Follow the prompts for activation, ensuring you enter your MicroCell’s serial number accurately. This process typically completes within 90 minutes.

After activation, your device will start providing boosted network coverage. Remember, a successful activation is indicated by a solid green signal. So, whether you’re working from home or streaming your favorite shows, you can enjoy a seamless connection with ATT MicroCell.

Guidelines for Leaving Comments

In today’s digital age, leaving comments on online content is a powerful way to engage, show appreciation, or share constructive feedback. It’s a key part of engagement strategies and requires a certain level of comment etiquette.

Here are a few guidelines to help you:

  1. Be respectful and considerate: Always remember, there’s a person on the other side.
  2. Stay on topic: Your comments should be relevant to the post.
  3. Be concise: Keep your thoughts clear and to the point.
  4. Avoid spam: Promotional comments often lead to being marked as spam.

Conclusion

And there you have it! Activating your Bi Pet Rebates Card is as easy as pie.

Just like a master gardener tending to their plants, you’ve carefully followed each step, ensuring your card blooms into its full potential.

Now, you’re all set to reap the benefits and save big on your pet’s health. Remember, the garden of savings is now at your fingertips with your activated Bi Pet Rebates Card.

Happy shopping!

How to Watch/Stream HLN on Roku: 2024

0

You can watch HLN on your Roku device primarily with the CNNgo app. After you’ve switched on your Roku, navigate to the Channel Store, search for ‘CNNgo’, select it, and press ‘Add Channel’.

How To Watchstream Hln On Roku

Once installed, you can launch CNNgo to access an activation code. Head over to cnn.com/activate on a separate device, input that code, and if your cable subscription is valid, you can start streaming HLN.

If CNNgo isn’t for you, there are alternatives like Sling TV, Hulu + Live TV, and Youtube TV. Don’t worry, there is more information to be uncovered if you stick around.

HLN Availability on Roku

Despite the absence of an official HLN app in the Roku Channel Store, you can still enjoy HLN on your Roku device by downloading the CNNgo app. This workaround offers Roku compatibility, giving you access to HLN alongside other CNN channels. The CNNgo app is easy to find in the Roku Channel Store, and once downloaded, it seamlessly integrates into your Roku interface.

Besides this, there are other streaming options available for you to access HLN on Roku. These include popular live TV services like Sling TV, Hulu + Live TV, AT&T TV, and YouTube TV. Each of these services offers different packages, so you can choose the one that best fits your viewing preferences and budget. So, even without a dedicated HLN app, you have multiple ways to watch HLN on Roku.

Also Read – How to Activate YouTube on Fire TV/Fire Stick

CNNgo App: Your HLN Gateway

To start watching HLN on your Roku, the first step is to download the CNNgo app, which serves as a doorway to HLN and other CNN channels. This app provides a wide range of streaming options, allowing you to tune into live broadcasts or browse through an extensive content library filled with thousands of shows.

The CNNgo app becomes a crucial component in your Roku experience, broadening your viewing options beyond the standard lineup. Not limited to HLN, it also offers access to other CNN channels, providing you with a diverse range of news, documentaries, and exclusive specials.

CNNgo App Installation Steps

Installing the CNNgo app on your Roku device is a straightforward process that requires only a few steps. You’ll need to have your Roku setup completed and a good internet connection. Here’s what you need to do:

  • Start by switching on your Roku device.
  • Navigate to the Roku Channel Store from your home screen.
  • In the search bar, type in ‘CNNgo’ and hit search.
  • Select the CNNgo app from the search results and click ‘Add Channel’.
  • Wait for the app to install.

Now, you’ve got CNNgo added to your streaming options. It’s important to keep in mind that this is just the installation process. You’ll need to activate the app to start watching. Stay tuned for the next subtopic ‘Activating CNNgo on Roku’ for the activation process.

Also Read – How to Activate My Health Pays Reward Card Online

Activating CNNgo on Roku

Once you’ve installed the CNNgo app on your Roku device, activating it’s your next step to access HLN. To start the Roku activation, launch the CNNgo app from your channel list. An activation code appears on your screen. Keep this screen open, as you’ll need this code for the next step.

Now, go to cnn.com/activate on a separate device, like your computer or smartphone. Enter the activation code from your Roku screen into the provided box, and hit ‘Submit’. Once the activation is successful, your Roku device updates automatically, and you can start enjoying live streaming options from HLN through the CNNgo app. Remember, you’ll need a valid cable or satellite subscription to access HLN.

Troubleshooting Verification Code Issues

While activating the CNNgo app on your Roku device is generally straightforward, you may sometimes encounter issues with the verification code. If you’re facing such challenges, don’t worry. Here are a few troubleshooting tips to help you get through the activation process smoothly:

  • Confirm the code hasn’t expired: Activation codes are time-sensitive. If it doesn’t work, try generating a new one.
  • Keep your device updated: Make sure your Roku device is updated to the latest software version.
  • Clear cache and cookies: This can help if you’re experiencing glitches during the activation process.
  • Check your internet connection: A stable and strong internet connection is essential for the activation process.
  • Contact support: If all else fails, don’t hesitate to reach out to Roku or CNNgo support for assistance.

Alternative Access to HLN on Roku

If you’re unable to access HLN through the CNNgo app, don’t fret; there are other ways to watch HLN on your Roku device using various streaming services.

Broaden your Roku streaming options by exploring other HLN streaming services. You can subscribe to services like Sling TV, Hulu + Live TV, AT&T TV, or YouTube TV, all of which include HLN in their package.

After subscribing, simply search for these apps in the Roku Channel Store, download them, and sign in with your account details. Then, navigate to the live TV section and select HLN.

Also Read – How to Activate Avast Antivirus Online

Related Posts for Roku Users

For Roku users seeking more guidance, there are related posts available that provide detailed instructions on various aspects, such as activating a new Roku device using roku.com/link, enabling the Tennis Channel on your TV, and setting up the Spectrum TV App on your streaming device.

These posts are packed with Roku tips and streaming hacks, focusing on device compatibility and subscription options. They include:

  • How to set up new Roku devices
  • Activating and using the Tennis Channel
  • Browsing and using the Spectrum TV App
  • Troubleshooting common issues with your Roku device
  • Exploring subscription options for streaming platforms

These resources are aimed at enhancing your Roku experience, making it more convenient and enjoyable.

Guidelines for Comments

Shifting away from Roku-specific pointers, let’s explore the principles for leaving comments on this platform. Your interactions significantly enhance the overall experience, and grasping comment etiquette is crucial.

Do’sDon’ts
Be courteous and succinctAvoid excessive posting or self-advertising
Cultivate engagement approachesSteer clear of offensive language
Provide constructive feedbackRefrain from steering the conversation off track

Utilize these guidelines to sustain a healthy and fruitful conversation. Keep in mind that your comments reflect on you, so always choose your words thoughtfully. Promoting a positive and respectful atmosphere fosters more users to engage in discussions, making the platform livelier, more varied, and insightful. By adhering to these straightforward rules, you will contribute to an enhanced experience for all users.

Conclusion

And there you have it, folks! You’re now equipped with the knowledge to watch HLN on your Roku device.

Remember, a staggering 39.8 million people use Roku, making it one of the most popular streaming platforms.

So, enjoy your news updates and remember, whether it’s via CNNgo or other services like Sling TV or Hulu, HLN is just a few clicks away.

Happy viewing!

How to Activate Movieland TV on Your Roku: 2024

0

To initiate Movieland TV on your Roku device, first, power on your TV and Roku, ensuring they’re connected via an HDMI cable. Press the home button on your Roku remote to access the home screen.

How To Activate Movieland Tv On Your Roku

From there, navigate to ‘Streaming Channels’ to enter the Roku Channel Store. You’ll need to click on ‘Search Channels‘ and locate Movieland TV. The final step is to choose and add the Movieland TV channel to begin the activation process.

It’s straightforward and swift, and with this guide, you’re well on your way to enjoying timeless films and enthralling documentaries. But if you move forward, you might discover some effective troubleshooting tips and learn about the impressive features Movieland TV has to offer.

Activating Movieland.Tv on Roku

To activate Movieland.Tv on your Roku device, first make sure your TV and Roku are powered on and connected via an HDMI cable. Now, pick up your Roku remote and press the home button. This action will lead you to the home screen. From there, navigate to ‘Streaming Channels‘ to access the Roku Channel Store.

Next, click on ‘Search Channels‘. Here’s where you’ll look for Movieland.Tv. Type it in, select it from the list that appears, and choose ‘Add Channel‘. This action begins the activation process. It’s as simple as that!

Also Read – How to Activate YouTube on Fire TV/Fire Stick

The Perks of Movieland.Tv

Once you’ve activated Movieland.Tv on your Roku device, you’ll uncover a wealth of movie genres to investigate, from timeless films and Westerns to action-packed adventures and laugh-filled comedies. This extensive library of cinematic treasures is at your fingertips, ready to be discovered and enjoyed.

Here’s a glimpse of what you’ll get with Movieland.Tv:

PerksDescription
VarietyVarious movie genres including classics, Westerns, action, and comedy
Timeless FilmsDelve into a collection of ageless classics
ConvenienceWatch your favorites anytime on Roku
AffordablePremium content at just $29.95/month

Embrace the joy of uncovering new films or revisiting beloved classics. With Movieland.Tv, you’ll never run out of entertainment options. Activate it on your Roku today and let the movie magic begin.

Impressive Features of Movieland.Tv

Exploring the remarkable features of Movieland.Tv, you’ll discover a wealth of vintage and classic films, monthly content updates, and access to documentaries by notable creators, all accessible on your Roku device at a reasonable monthly rate.

Imagine immersing yourself in the golden era of Hollywood with a vast selection of vintage films. You’ll appreciate the intricate storytelling and timeless performances that these classics offer.

Along with these, Movieland.Tv constantly refreshes its catalogue with monthly updates, ensuring you’ll never run out of content to enjoy. Moreover, the platform provides a unique showcase of classic documentaries from esteemed creators, offering an in-depth exploration into various intriguing subjects.

All these features make Movieland.Tv an irresistible addition to your Roku.

Also Read – How to Activate My Health Pays Reward Card Online

Addressing Common Movieland.Tv Questions

While you’re enjoying the impressive features of Movieland.Tv on your Roku, you might encounter a few questions or issues regarding the use and setup of this channel.

First off, subscription pricing can be a concern. It’s important to note that Movieland.Tv offers an affordable monthly subscription, ensuring unlimited access to classic films and documentaries.

Next, you might wonder about the installation process. Don’t worry, it’s straightforward. From your Roku’s home screen, navigate to ‘Streaming Channels’, then ‘Search Channels’. Search for Movieland.Tv, select it, and click ‘Add Channel’. And voila, you’ve completed the installation process.

Diverse Content on Movieland.Tv

With Movieland.Tv on your Roku, you’ll have access to a vast library of films spanning multiple genres such as horror, drama, and comedy. You’ll uncover a goldmine of content that will definitely keep you entertained for hours on end.

  1. Vintage Movies: You’ll be treated to a wide range of vintage movies, from timeless gems to rarely seen masterpieces.
  2. Documentary Assortment: An impressive documentary assortment is available, giving you a chance to delve into various topics in depth.
  3. Genre Variety: Whether you’re a fan of heart-pounding thrillers, romantic dramas, or side-splitting comedies, there’s something for everyone.
  4. Frequent Updates: The platform regularly updates its library, ensuring you never run out of exciting content to watch.

Embrace the variety of content that Movieland.Tv offers and enhance your viewing experience on Roku.

Also Read – How to Activate Avast Antivirus Online

Understanding Movieland.Tv Subscription

Now that you’re familiar with the various content on Movieland.Tv, let’s talk about how you can access this abundance of films with a Movieland.Tv subscription. This cost-effective subscription, priced at just $29.95/month, allows you to explore a diverse movie collection covering classic movies, Western films, action, and comedy genres.

The subscription perks don’t end there. You’ll also gain entry to popular movies like ‘Gone with the Wind’ and ‘Ben Hur’, as well as documentaries from acclaimed creators like John Wayne.

To activate your subscription, turn on your Roku device and TV. Navigate to Streaming Channels, access the Roku Channel Store, and search for Movieland.Tv. Select it and add the channel. Voila! You’ve just accessed a wealth of cinematic delight!

Troubleshooting Movieland.Tv Issues

Should you come across any issues while using Movieland.Tv on your Roku device, there are a few troubleshooting steps you can take to resolve them. Here are some Roku troubleshooting tips that might help:

  1. Check Your Internet Connection: Make sure your device is properly connected to the internet. A weak signal can prevent streaming channels from working correctly.
  2. Update Your Roku Device: Keeping your Roku device updated can fix potential bugs that may cause issues.
  3. Reinstall Movieland.Tv: If the problem persists, try uninstalling and reinstalling the Movieland.Tv channel.
  4. Contact Support: If all else fails, reach out to Roku or Movieland.Tv’s customer support for assistance.

Exploring Movieland.Tvs Movie Library

Discover Movieland.Tv’s extensive movie collection on your Roku device, where you’ll uncover a plethora of timeless films and documentaries from acclaimed filmmakers.

With an impressive movie selection, the channel offers a diverse genre variety to satisfy your cinematic cravings. Whether you’re a fan of classic romance, action-packed westerns, or insightful documentaries, there’s something for everyone.

From blockbusters like ‘Gone with the Wind’ to acclaimed documentaries by creators such as John Wayne, Movieland.Tv’s library keeps you entertained. The platform updates its content monthly, ensuring fresh and engaging content is always at your fingertips.

Conclusion

And there you have it! Activating Movieland.Tv on your Roku is as simple as pie. Now, you’re ready to investigate a world of vintage cinema, thrilling westerns, and engaging documentaries.

Just like a seasoned film critic, you can navigate, select, and enjoy classic movies with ease. Remember, if you encounter any issues, our troubleshooting tips are here to help.

So, grab your popcorn and immerse yourself in the fascinating world of Movieland.Tv on Roku. Happy viewing!

Vizio TV Not Connecting to WiFi: (Don’t Panic, Easy Fix!)

0

Vizio Tv Not Connecting To Wifi

You have reached the right destination if you have any queries regarding Vizio TV Not Connecting to WiFi. This detailed guide will equip you with all the information you need.

If you try every single one of these quick fixes in chronological order, I am pretty sure one of them will work for you.

Recommended Reading – How to Add, Activate, and Watch NBC on Roku

Vizio TV Wi-Fi Connectivity Issues – Solutions

Solutions

The best way to kill boredom in recent times has become binge-watching with your favorite snack – a healthy way to build family time and explore the World you are not a part of! But an instant solution is needed if a Wi-Fi connection becomes an issue. What could that be? Looking for easy answers as well?

If that is the case, you have come to the best one! There are many reasons behind this, including the slow functioning of the TV’s apps or the servers, hardware failure, software glitches, or simply the TV needing to follow directions. This article will show you how to use all of these to assist you in solving your problem!

Whatever the case, if you have a Vizio Smart TV, we will walk you through some methods to restore everything to working order. You don’t have to be tech-savvy to diagnose and resolve these problems.

Stay tuned with me for this and read the article till the end for the best results!

Recommended Reading – How to Add, Activate, and Watch Bally Sports on Roku

Vizio TV Wi-Fi Connectivity Issues – Causes

Causes

This is an essential aspect to consider and discuss before we jump into the solutions to the problems. To know and have a better understanding of which solution will suit your situation the best, read through these issues. 

Connectivity Issue

The connection between the router and the Vizio Smart TV should be stable enough to be in the sink with each other and work properly, or part from the core issue can also lead to Vizio TV freezing randomly problem.

Router Security Settings

The router needs to be given a settings check for an issue preventing it from working correctly and might also help if your remote is not working.

Internet Issues

One of the simplest yet the most common ones is the internet showing no support; hence, this problem arises with occasional flickering

Wi-Fi Adapter

This assists in connecting two devices and the power flow, so a problem here will reflect a Wi-Fi connection issue. 

Vizio TV Wi-Fi Connectivity Issues – Solutions

Solutions

Once you have gone through the various possible problems, it helps determine which solutions will help further. Let us start with the answers, then!

Updating the TV’s Date and Time

Updating The Tv's Date And Time

At times, there is a possibility that the Vizio TV sets its own Time and schedule after a factory reset or a reboot. 

For instance, if your television loses power and turns back on, the alarms or the clock could be empty. If this happens to you, you must manually set the Time.

This is important as it will clear issues and solve any Wi-Fi issues!

Here are the steps for the same; follow them to derive results.

  • Press the Gear icon on your remote.
  • First, select System and then the Time icon you see there.
  • Click and then look into the check box for Automatic Time to turn it on.
  • Turn the Vizio TV off and then on manually.
  • Press the gear icon you see on the remote control now.
  • Once again, select System, then go for Time.
  • Click the check box for automatically Time to turn it Off.
  • Directly change the time zone according to the situation and location of the device.
  • Recheck the Automatic Time box to turn it On.

Move to the next solution if this does not help.

Software Updates using Ethernet

Software Updates Using Ethernet

Not keeping your Vizio Smart TV updated with the latest software always results in problems. The first step in any troubleshooting effort is to check for updates. If you’ve enabled automatic updates, chances are you’re up to date with the latest version.

Now, if your Vizio TV is not connecting to the Wi-Fi, it is obvious you cannot look for updates. In this case, however, an ethernet cable is proper.

Try connecting an ethernet cable if your TV can accept one, which many Vizio models do. Check on the sides and rear to check, or consult your TV’s manual. That will also solve sound and HDMI related issues. You will need to run the cable directly to your router, and you may need to disable Wi-Fi in your TV’s settings for it to recognize the connection.

Once connected, check for updates by pressing the Menu button on your Vizio remote and go to System > Check For Updates. You may need to navigate to Admin & Privacy > Check for Updates on specific models.

Resetting/Rebooting the Vizio Smart TV

If all the solutions fail and you want a fresh start, factory reset your Vizio Smart TV. This will automatically turn it off and then on again with the original settings. 

This gives any device a fresh and smooth start and helps solve the innumerable issues of software and device glitches due to overload. 

Note: Resetting a TV comes with it automatically deleting all that you had saved before, preferences, usernames, and passwords. Hence, writing them down once and then taking this step is better.

Here are the steps to restart/reset your Vizio Smart TV.

1. Press the ‘Menu’ button you see on the remote control of the Vizio Smart TV.

Press The 'menu' Button

2. Go to System, click Reset & Admin, and then Reset TV to Factory Settings/Defaults.

Click Reset & Admin, And Then Reset Tv To Factory Settingsdefaults

3. If you have not set the parental code manually, enter 0000 as the default code.

4. Highlight Reset and press the OK button. Then, wait for the TV to turn off.

Highlight Reset And Press The Ok Button

5. The Setup App process will begin After the TV turns back on.

Look for the next solution if this does not work.

Incorrect Password

Incorrect Password

A fundamental and straightforward, yet one of the most common scenarios is an incorrect password, resulting in connectivity issues. 

The only solution is to ensure you enter the correct password, as it is case-sensitive and will not work otherwise. 

If you cannot recall it, change it and note it to prevent this from happening again. 

Once you know there is no problem, move to the following solutions if you are still struggling. 

Check your Modem and Router

Check your Modem and Router

The problem might only sometimes be with the Vizio TV itself. The connection issues sometimes occur due to other reasons as well. 

For instance, any connectivity issue in the modem/router will also show up in problems. Also, check with all the other devices connected and see if there is a problem.

In such cases, try rebooting your modem/router by unplugging them for 15-30 seconds. This is called power cycling. Plug the router and modem back in, wait for it to reboot, and establish its connection (check the lights on your internet equipment; most modems and routers show solid green or blue mornings when the link is ready).

 You can do the same to reset your TV by unplugging it throughout the same duration, plugging it back in, and turning it on.

Hard luck if this has not worked for you as well. But do not worry; there is one last resort you can always move to. Read the following solution for the same.

Contact Vizio Technical Support Team

Contact The Vizio Support Team For Help

If your TV still needs to show results based on the solutions given, then bad luck, for there might be a severe issue that we cannot resolve.

The company will likely recommend you run through these same troubleshooting steps but give the support agent’s suggestions a try just to be thorough. They may eventually determine that your TV needs repairing.

Take all the help you can get here. Someone can initiate a repair process and restore your TV to stream all your favourites.

Even if you are asked to change the device, consider looking up the warranty; if that covers the cost, this proves very beneficial!

Recommended Reading – How to Connect Bluetooth Speaker to Roku TV: (EASY!)

Helpful Answers

Helpful Answers

Why do I suddenly lose my internet connection on Vizio Smart TV?

Outages from your ISP could cause you to disconnect the internet randomly. You can check for outages via your ISP’s app or web account or by calling your ISP to ask. You can also ask for information on past outages to see if it is the cause of your persistent disconnections.

How to fix a Vizio Smart TV that won’t connect to the Wi-Fi?

If you face any issues connecting your device to a wireless network, follow the steps below for results.

  • The type of network you are trying to connect.
  • Check to see if your internet connection is currently working.
  • Verify that your password is correct or the Wi-Fi you select is needed. 
  • Power cycle your router. 
  • Reset your TV to Factory Defaults.

How can I improve my Vizio TV’s Wi-Fi connection?

Here are some things you can do to improve your TV’s Wi-Fi connection.

  • Reboot Your Router.
  • Find the Best Place for Your Router.
  • Make Sure Your Router Is Updated.
  • Secure Your Signal.
  • Make Sure You’re on a Clear Channel.
  • See if Apps Are Hogging Your Bandwidth.
  • Use 5GHz at Short Ranges.
  • Get a Repeater/Booster/Extender.

Why is Rebooting a Vizio Smart TV necessary?

Faulty Power Cable: The TV may restart if the power cable is defective. If you have been using the TV for a long time, the power cable might need to be fixed or fixed.

Software Issue: Software problems are prevalent and may be why Vizio TV keeps restarting even on its own sometimes. Outdated Vizio Smart TV firmware, glitches, or even bugs may cause the pain here. 

What are the steps to go to the Settings of VizioTV?

Click on your TV and select the Menu button on your remote. On some remotes, this looks like a gear. When the menu appears on the left side of your screen, scroll down, select the System option available, and press the OK button on your remote.

Recommended Reading – Why Is My Roku Tv So Slow: (Don’t Panic, Easy Fix in!)

Wrapping Up

The article contained several solutions you can look up to for the Vizio Smar TV Wi-Fi connection issues that keep bothering every Vizio TV user. 

These critical solutions are very easy-peasy and can also be without good knowledge of the device. 

I hope they helped you solve your problem!

Thank you for making it to the end! Happy Bing-watching with your family!

How to Program a DirecTV Remote for Vizio TV: (With Pictures!)

0

How To Program A Directv Remote For Vizio Tv

Have you ever misplaced things and tried to compensate using the other unsupportive ones? If yes, we are all together in this haha! 

However, the other day, I lost my Vizio Smart TV remote control, and the idea of connecting/programming the direcTV remote hit me. However, I could not figure it out so quickly, and it took time and effort. But I will ensure that does not happen to you guys and have made this simple guide for doing so!

If you try every single one of these methods in chronological order, I am pretty sure, one of them will work for you.

Recommended Reading – How to Get Twitter on Roku TV (Just Do This ONE THING)

To Program a Directv Remote to Vizio Smart TV

  1. Place and aim the remote control towards the Vizio Smart TV, pressing the Mute and Select buttons simultaneously.
  2. Enter the 991 TV code for older Vizio TVs or the code given on your Directv remote beneath the power button.
  3. At the end, press the power button to finish the programming. 

If this solution has not worked well for you guys, then worry not, for there are several others. This ultimate guide has listed the steps and the issues along with their solutions and is a very easy-peasy guide that does require you to be a tech expert!

Read the article until the end, and I am sure you will figure out the best one for your Vizio Smart TV programming to a directv remote!

Recommended Reading – Why Won’t My Vizio TV Turn On (Avoid Doing THIS!)

Pre-Preparations for Programming

Pre Preparations For Programming

Before jumping straight into the steps, looking at some prerequisites is recommended. 

You might also know that a directv remote works with the directv receiver, and to program it, your receiver should be powered off so you don’t form an interference.

It is also a good idea to keep in mind the model of the directv remote control. If unsure, it can also be checked from the upper-left corner of the front side of the controller’s packing box. 

A list of the codes you need for various models is available on numerous websites online.

Also, make sure the batteries of the remote controller are fresh and not out of use. Also, turn on your directv and lead it up to the home page for it to be ready for receiving the programming request. 

Recommended Reading – Activate the TNT on Roku (Effortlessly in Seconds)

Programming a Directv Remote to Vizio TV – Steps

Programming A Directv Remote To Vizio Tv Steps

Slide the DirecTV Remote Controller’s Switch

The directv remote controls have a programming switch on the tip of their hardware, which should be slid on to switch it on. This switch must be slid with a mild force for the directv remote to recognize your touch.

After you have enabled the programming switch, you can restart your directv box and turn it off to activate the programming mode.

Recognize your Vizio Smart TV’s Code 

Now that the programming switch is turned on, you need to kick start the process for the same with your Vizio Smart TV.

The first step in doing so is recognizing your Vizio Smart TV’s code, which is different for all the models of Vizio TV. Here is a list of the same.

  • RC-71B
  • RC-32 / RC-32RF
  • RC – 24
  • RC-23
  • RC-71
  • RC-66
  • RC-65
  • RC-73
  • RC-72
  • RC-64

To learn what code to insert, have a look at the code that is printed on the very top of your Directv above the power button. Casual Directv remotes usually use RC32RF and RC73, but it depends on your remote’s type and release date.

Now that you have received the code, proceed further with the next step for programming. 

Add your Vizio TV to the DirecTV Remote Control

To find out how to program a Directv remote to a Vizio Smart TV, you will first need to add your Vizio TV to the Directv menu. Once you have the programming code, add your Vizio TV to Directv.

For this, you need to go to the programming menu of the directv, and the steps to follow afterwards are given below. 

  1. Go to your DirecTV remote control programming menu from the options.
  2. Now, hit the “Add New TV” and scroll through the various options.
  3. Look for the “Vizio TV” option and select it. 
  4. Hit on the “I don’t know my number” when prompted to write down your model number.

Now, grab your remote and proceed with the following steps.

Program the DirecTV Remote Control

Here are the steps you should follow for programming the directv remote to your Vizio Smart TV. 

1. Go to the available codes for programming codes page.

Go To The Available Codes For Programming Codes Page

2. Press the mute and the select buttons simultaneously on your remote. 

Press The Mute And The Select Buttons Simultaneously On Your Remote

3. Keep holding them until your directv remote blinks twice, and then release the button.

Keep Holding Them Until Your Directv Remote Blinks Twice, And Then Release The Button

4. Enter the TV code you figured out earlier. 

5. Insert this code discovered from left to right and then press the okay button on your directv remote.  

Note: Flip the switch at the top after your Vizio Smart TV has been programmed to use the set-top box. It will control the modes between TV and cable box usage.

Recommended Reading – Vizio TV Turns On By Itself (Here’s Why & How to STOP It!)

Programming a Directv Remote to Older Model of Vizio TV – Steps

Programming A Directv Remote To Older Model Of Vizio Tv Steps

If you are using an older model of Vizio TV, do not worry, for we have the steps for them as well. Though some of the headlines are similar, the execution for these is different from these models. 

Turn your Vizio TV Off

Ensure your Vizio TV is turned off so you can test the programming once the remote control is ready. Press the power button on your Vizio Smart TV remote to power down the TV.

Initiate the Programming Process 

Ensure that the switch is pushed to the “TV” side on your directv remote control and then perform these steps:

1. Press the mute and the select buttons simultaneously on your remote and hold them. 

Press The Mute And The Select Buttons Simultaneously On Your Remote

2. Wait for your directv remote control to blink twice.

Keep Holding Them Until Your Directv Remote Blinks Twice, And Then Release The Button

3. After the remote blinks, release the buttons.

The programming has now been initiated. Proceed with the next steps mentioned to activate your Vizio Smart TV.

Enter the Vizio TV’s Code

This step will demand you to enter the TV code. The TV code is “991” with older models and remains static for all Vizio TVs.

Follow the steps below to finish the programming with your DirecTV and Vizio TV:

  1. Press 991 in consecutive order on your directv remote.
  2. Press “1” to complete the programming once the code has been written.
  3. The channel up and the channel down buttons need to be constantly pressed about 50-100 times, depending on how old or new your Vizio Smart TV model is. The key is simple – the more older version, the more presses and hits it will require. 

You are ready once your Vizio TV responds to the directv remote’ signal!

Recommended Reading – Roku Won’t Connect to WiFi (Don’t Panic, Easy Fix!)

Can’t Program Directv Remote to Vizio TV? – Easy Fixes!

Easy Fixes!

If you are still facing issues, high chances are that the problem is from your end. Here are some easy fixes you can look forward to for the same.

Power Cycle/Reboot your Vizio TV

Power Cycle Your Tv

One of the foremost steps when facing any Vizio Smart TV issue is power cycling or rebooting. This clears up all the bugs and gives your Vizio TV a smooth start that will support the overall working of the Vizio TV. 

A power cycle test is one of the simplest ways to troubleshoot performance issues on your Vizio Smart TV. When the screen stays black, turns off at random times, or doesn’t come on, it can be the job of a power cycle test.

Here is a step-wise guide if you want to reboot/power cycle your Vizio TV.

  1. First, turn Off your Vizio Smart TV and unplug it from the socket.
  2. Leave your Vizio TV in this state for about 2-3 minutes.
  3. Then, press and hold the power button for about a minute.
  4. Repeat this step a couple of times. 
  5. Plug back the Power cable and power on the Vizio TV.

Our testing found that this simple procedure helped apparent bugs and solved problems from faulty software to bad syncing. Thus, precautions are always better than cure!

However, if it has yet to help, look for the next solution.

Check the Power Cord

Check Power Cord

Sometimes, the Vizio Smart TV’s power cord must be correctly connected to the Power source or the TV itself. This causes a lack of power flow and results in TV blocking and freezing issues. 

Connect the power cord of your Vizio Smart TV directly to the power outlet. Your TV may also turn off during a power outage, so check this first.

Vizio Smart TVs are also affected by power surges that can cause them to shut down. It occurs when a power spike damages your TV’s power supply. Use a surge protector to protect the power supply from random surges.

Hard luck if any of the mentioned solutions did not work for you. While it now seems that the issue is a little severe, here is one last thing you can do.

Check your Internet Connection Speed

Check your Internet Connection Speed

The Internet has a vital role to play when it comes to Smart TVs. A slow internet connection will result in issues as such.

When selecting an internet plan for your home, you must consider how many devices will use the Internet simultaneously and how much data you want to save every month.

If your Vizio Smart TV freezes when accessing streaming services, the problem is likely caused by an unstable or slow internet connection. By performing an internet speed test, you should ensure your Vizio TV has a good internet connection.

If your internet speed is not high enough, check the internet connection on your router. 

Unplugging the router from the outlet wall and letting it stand for a few minutes might also be of help if you want to restart it. Press and hold the router’s power button for a minute (not the reset button).

Recommended Reading – Vizio Smartcast Not Working: (Don’t Panic, Easy Fix)

Helpful Answers

Helpful Answers

Is it necessary to have a Vizio remote control for the functioning of Vizio Smart TV?

The simplest way to turn on your television when you have lost or misplaced the remote control is through the Vizio SmartCast app for iOS or Android. This will help you in streaming the content directly from your phone to the Tv screen. You can also control your Vizio Smart TV without a remote using the remote app. 

How do I program my directv remote to my Vizio Smart TV?

Here are the steps for the same.

  • The Menu button you see on the remote control needs to be hit. 
  • Select Settings > Remote Control > Program Remote.
  • Choose the device you wish to program. If you do not see your Vizio TV or any other device listed, use the code lookup tool to find the 5-digit code.
  • Follow the on-screen prompts to complete your programming process.

What are the various remote codes for Vizio Smart TV?

The codes for the Vizio TV are given below for reference. 

  • 3 Digit TV Remote Codes. 502. 627. 004. 113. 505. 011.
  • 4 Digit TV Remote Codes. 1758. 0178. 1756. 0128. 0117. 1017. 1078. 0030. 0056. 0205. 1292. 1004.
  • 5 Digit TV Remote Codes. 10178. 10117. 11756. 01377. 10885. 10864. 10120.

What type of remote control goes with a Vizio TV?

VIZIO Smart TV Remote XRT140R Universal Remote for VIZIO TV – VIZIO TV Remote Replacement, Bluetooth Remote & Smart Remote Control – Compatible with All SmartCast TV Models, Requires 2 AAA Batteries.

Does Vizio have a TV app?

VIZIO Mobile lets you search, browse, and launch entertainment directly to your TV, plus much more! Your phone or tablet must be connected to the same wireless network as your VIZIO devices to use certain mobile app features. Select elements of VIZIO Mobile require a free VIZIO Account.

Recommended Reading – Vizio Airplay Not Working: (Try THIS Fix First!)

Wrapping Up

Freezing or any other issue may make your day irritating. But it is these small challenges and how we react to them that define our very fighting spirit.

This guide is for the same purpose: to help you resolve these issues of Vizio Smart TV. The article has several easy-peasy solutions that do not require you to be an expert.

A check on all the possible software and hardware issues is good. If none of the answer keys were helpful, your Vizio Smart TV might have a damaged PCB/motherboard. If that is the case, contact the customer services of Vizio for further assistance.

I hope this article was of help! Thank you for reading it till the end.

How to Activate Megamixer Account Online: 2024

0

To activate your Megamixer account, first, visit megamixer.com/activate. Using the email you signed up with, find the unique activation code in your inbox or potentially in your spam/junk folder.

How To Activate Megamixer Account Online

Once obtained, head back to the activation website, input your code and click ‘Activate’. Follow the on-screen instructions and you’ll have completed the activation process swiftly.

Keep in mind, if you encounter activation issues, Megamixer’s dedicated support will be there to assist you every step of the way. Continue on to find out more about post-activation steps and how to tackle any possible activation issues.

Navigating to Mega Mixer’s Website

To start using Mega Mixer’s services, you’ll first need to navigate to their website using your preferred web browser. This initial step is important, as proper website navigation sets the foundation for your Mega Mixer experience. If you encounter any issues, don’t worry. There are troubleshooting tips available to help you get back on track swiftly.

Once you’re on the site, you’re one step closer to activating your account. However, don’t rush your way through this process. Account security should be your top priority. If you encounter activation troubleshooting issues, Mega Mixer’s dedicated support team is just a click away. They’re ready to assist you in ensuring that your account isn’t only activated but also secured. Remember, your security on Mega Mixer is as essential as the exciting services they offer.

Also Read – How to Activate WSMV TV Network On Roku

Completing the Sign-Up Process

After successfully locating the Mega Mixer website, your next step is to get your account up and running through the sign-up process. You’ll need to provide some basic information such as your full name, email, and desired password. Once you’ve filled out the necessary details, you need to agree to the terms and conditions before clicking ‘Create My Account’.

StepGuidance
Provide Your DetailsThis includes your full name, email, and desired password.
Agree to TermsReview them carefully to guarantee your account security.
Create Your AccountOnce completed, click ‘Create My Account’.

If you encounter any issues during sign-up, don’t panic. Here are some troubleshooting tips: try refreshing the page or checking your internet connection. Also, make sure that your chosen password meets the website’s security requirements.

Logging Into Your Account

Once you’ve successfully created your Mega Mixer account, logging in is a breeze with a few simple steps.

  1. Open your web browser and navigate to the Mega Mixer homepage.
  2. Click on the ‘Log In’ button located in the top-right corner of the page.
  3. Enter your username and password in the designated fields and click ‘Log In’ to access your account.

Also Read – How To Activate USTVGO On Roku

Obtaining the Activation Code

Before you can fully enjoy the benefits of your Mega Mixer account, you’ll need to secure an activation code. The account verification process involves obtaining this code for activation. Once you’ve created your account, Mega Mixer will send you an email containing your unique activation code.

Here are key steps and tips:

StepsTips
Check your emailMake sure it’s the one you used for sign up
Find Mega Mixer’s emailCheck spam/junk if not in the inbox
Note down the codeIt’s unique to your account
Having trouble?Refer to activation troubleshooting tips

Activating Your Mega Mixer Account

With your special activation code in hand, you’re now ready to activate your Mega Mixer account and access all its features. The process is simple and straightforward.

  1. Go to megamixer.com/activate.
  2. Enter your activation code and click ‘Activate’.
  3. Follow the on-screen instructions to complete the activation.

During this process, keep these troubleshooting tips in mind: make sure you’re entering the code correctly, check your internet connection, and refresh the page if needed.

Remember, your account security is paramount. Create a strong password and don’t share your login details with anyone. If you encounter any issues, don’t hesitate to contact Mega Mixer’s support team for assistance.

Now, you’re all set to enjoy the features of Mega Mixer!

Also Read – How to Activate Simple TV on Roku

Post-Activation Steps

After successfully activating your Mega Mixer account, it’s crucial to take a few more steps to fully set up your profile and start utilizing the platform’s features. Begin by discovering additional features; these may include unique settings, customization options, or exclusive tools. Here’s a simple guide:

StepDescription
Step 1Customize your profile, add a profile picture and fill out all necessary details
Step 2Familiarize yourself with the platform, its tools and features
Step 3Begin using the platform’s features for your projects

Reaching Out to Mega Mixers Customer Support

While you’re setting up your profile and exploring the platform, you might encounter issues that require the assistance of Mega Mixers customer support. They’re readily available to help you with any problems you may face.

There are several contact methods you could use to reach them:

  1. Phone Support: Dial 844 2 Localista and get real-time assistance.
  2. Email Support: Send your queries to [emailprotected]. They’re quick to respond.
  3. Mail Support: Post your inquiries to Mega Mixer, C/O Localista Media, 2315 Lomita Blvd, Suite #203, Lomita, CA 90717.

Each method is effective, but choose what works best for you. Support troubleshooting is a part of their service, ensuring that you get the most out of your Mega Mixers account. Reach out whenever you need help.

Also Read – How to Activate Your SDCCU Card Online

Dealing With Activation Issues

Getting through activation issues on Mega Mixer can often be a challenge, but don’t worry, there’s plenty of support available to assist you through the process. If you’re stuck, here are some common problems and troubleshooting tips.

Common ProblemsTroubleshooting Tips
Can’t find activation codeCheck your email, including spam and junk folders
Activation page doesn’t loadRefresh the page, try a different browser or device
Code isn’t acceptedDouble-check for errors, try again later, contact support

Conclusion

Now you’re all set! You’ve successfully navigated to Mega Mixer’s website, signed up, logged in, obtained your activation code, and activated your account.

Any concerns? Don’t hesitate to reach out to Mega Mixer’s customer support. Remember, there’s no issue too big or small for them to handle.

Enjoy the fantastic journey ahead with Mega Mixer. Here’s to unlimited mixing and connecting experiences!