Home Blog Page 18

How to Access Tumblr on Roku: 2024

0

You can easily access Tumblr on your Roku device by using the screen mirroring function. First, make sure your Roku and mobile device are connected to the same Wi-Fi network.
How To Access Tumblr On Roku

Then, on your Android device, install the Tumblr app, go to ‘Settings’ and activate ‘Screen Mirroring.’ Oh, and if you’re an iOS user, get Tumblr and ‘Mirror for Roku‘ apps, open the ‘Mirror for Roku’ and select your Roku device. Now, kick back and enjoy your Tumblr feed on your TV. There are even more ways to improve your Tumblr experience waiting for you, so don’t stop exploring now!

Guide to Access Tumblr on Roku

While accessing Tumblr directly through Roku isn’t an option, you can easily mirror your Android or iOS device‘s screen on your Roku-connected TV to enjoy your favorite Tumblr content.

Roku compatibility isn’t limited to specific apps; the technology’s versatility allows you to mirror screens across different platforms. This is where screen mirroring techniques come into play. Screen mirroring is a key, effective method to display your device’s screen onto your TV, opening up a variety of content possibilities.

However, it’s important to make sure both your Roku device and your casting device are on the same Wi-Fi network. Also, remember to adjust your Roku’s screen mirroring mode to ‘Always Allow’ or ‘Prompt’. This way, you can harness the power of Roku’s flexibility to seamlessly enjoy your Tumblr feed on a bigger screen.

Also Read – How to Watch/Stream USTVNow on Roku

Steps to Mirror Screen Using Android

To mirror your Tumblr feed from an Android device onto your Roku, begin by installing the Tumblr app from the Google Play Store. This simple action allows you to enjoy the screen mirroring benefits like a larger viewing experience and convenience.

Here are the steps:

  • Open the ‘Settings’ app on your Android device
  • Navigate to ‘Display’ and then to ‘Cast Screen’
  • Activate the ‘Screen Mirroring’ option
  • Make certain your Roku device is on and connected to the same WiFi network
  • From the list of available devices, choose your Roku device

If you encounter any issues, use these troubleshooting tips: check your WiFi connection, confirm that your Roku device supports screen mirroring, and update your Android and Roku to the latest version.

Steps to Mirror Screen Using Ios

If you’re an iOS user, verifying your Tumblr feed on Roku involves a slightly different process.

First, confirm your iOS device and Roku share a Wi-Fi connection, an important step for Roku’s compatibility with iOS screen casting.

Next, navigate to the App Store on your iOS device and install the Tumblr app. In addition to Tumblr, you’ll need to install the ‘Mirror for Roku‘ app, which allows your iOS device to communicate with Roku.

Once installed, open the app and select your Roku device. You’re now ready to mirror your iOS screen to Roku.

Remember, screen mirroring reflects everything on your device, so open your Tumblr app to view it on your Roku-connected TV.

Follow these steps and enjoy your Tumblr content on a bigger screen.

Also Read – How to Watch/Stream Acorn on Roku

Accessing Tumblr on Roku

After setting up the screen mirroring function, you can now start exploring Tumblr on your Roku device. Understanding the Roku compatibility with Tumblr is essential for smooth usage.

Screen mirroring benefits include:

  • Viewing Tumblr feeds on a larger screen
  • Browsing through Tumblr blogs with ease
  • Enjoying multimedia content in better resolution
  • Sharing Tumblr content with others
  • Enhancing the overall Tumblr experience

To use Tumblr on Roku, open the Tumblr app on your screen mirroring-enabled device. If you’re logged in, your Tumblr feeds should now appear on your Roku-connected TV. Navigate the app as you normally would on your device. Now, you can enjoy the Tumblr experience on a larger screen, thanks to your Roku device.

Related Posts

In our related posts, you’ll find concise, well-researched guides covering a range of topics such as setting up an HP DeskJet All-in-One Printer, activating new Roku devices, streaming apps, and more.

We investigate essential aspects like Tumblr content moderation, guaranteeing the material you view aligns with community standards and personal preferences. Additionally, we’ll examine Roku streaming trends, enabling you to stay ahead with the most popular channels and services.

Our aim is to provide you with comprehensive, easy-to-follow information to improve your streaming experience. Whether you’re a seasoned Roku user or a newcomer, our related posts cater to your needs, offering timely and relevant insights to make sure you get the most out of your device.

Also Read – How to Activate Frndly TV on Roku

Access CNBC on CNBC.Com/Rokutv Page

Shifting focus to CNBC, let’s see how you can access this finance-focused channel on your Roku device through cnbc.com/rokutv page. With Roku TV integration, accessing CNBC is simple and efficient.

Here’s a step-by-step guide to assist you:

  • Open your web browser and visit cnbc.com/rokutv.
  • You’ll see a code on your Roku screen, make a note of it.
  • Input this code on the webpage.
  • Follow the prompts on the screen to log in or create an account.
  • Finally, select CNBC from the list of channels on your Roku device.

Stream USTVNow on Roku

If you’re looking to expand your streaming options, USTVNow offers a diverse selection of American television channels that you can easily stream on your Roku device. This service provides a wide range of entertainment choices, broadening your viewing horizons.

To start, install the USTVNow app on your Roku. Sign in if you already have an account or create a new one. Once logged in, you’ll have access to a variety of channels that cater to various tastes. From news to sports, drama to comedy, USTVNow has got you covered.

Also Read – How to Watch/Stream C-Span on Roku

About Author: Dan Smith

With over seven years of experience in the technology industry, Dan Smith is a respected figure who uses his comprehensive knowledge to write insightful articles on various tech topics. Leveraging his broad understanding of tech trends, he provides readers with valuable author insights that help demystify complex technical concepts.

Here’s a quick rundown of what makes Dan Smith standout:

  • A seasoned tech writer with a wealth of industry experience
  • Known for his clear, concise writing style that breaks down intricate tech trends
  • Provides insightful author insights that help readers understand different tech topics
  • Regularly writes about streaming devices, TV channels, and credit card activations
  • His articles are a trusted source of information for many tech enthusiasts

In essence, Dan’s deep understanding of technology and his ability to communicate effectively make his articles an essential read for anyone looking to keep abreast with the constantly changing tech world.

Conclusion

And there you have it! Now, sit back on your cozy couch, grab your remote, and immerse yourself in the vibrant world of Tumblr, all on your big Roku TV screen.

No more straining your eyes on tiny mobile screens. Enjoy scrolling through your favorite blogs and posts, in the comfort of your living room.

With these easy steps, your Roku device just became a gateway to the endless creativity that Tumblr offers. Happy browsing!
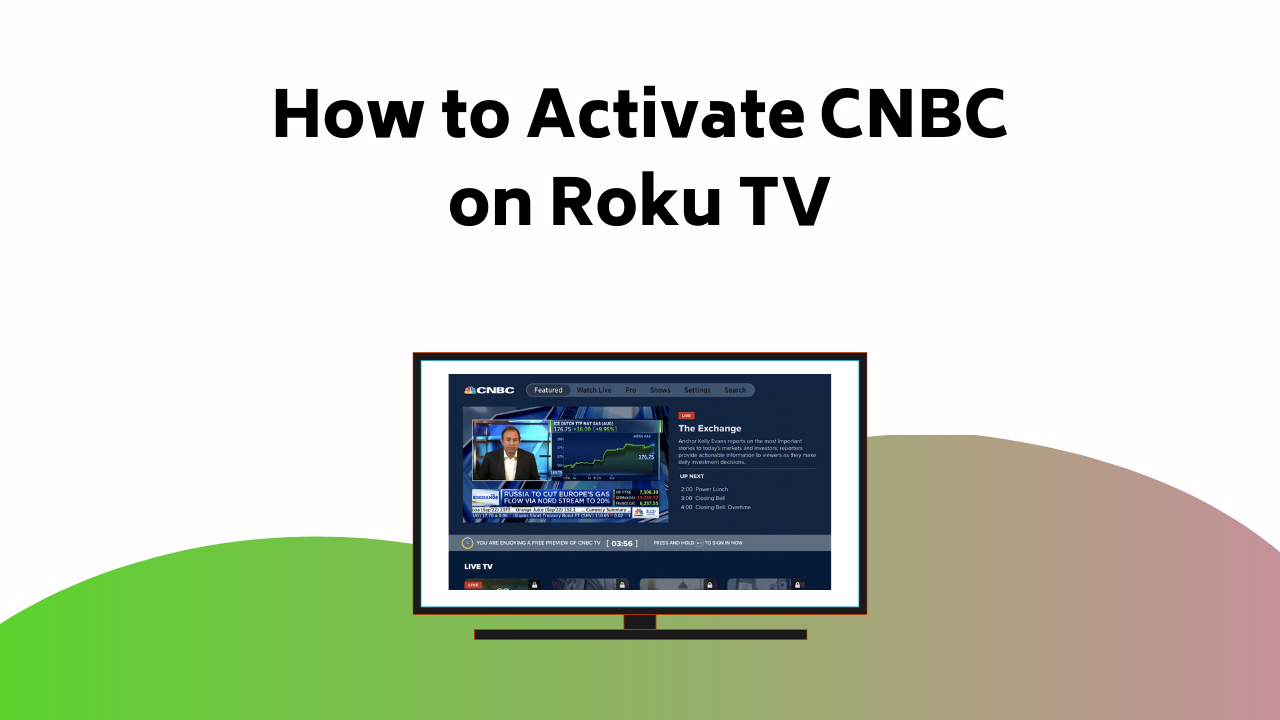
How to Activate CNBC on Roku TV: 2024

0

To access CNBC on your Roku device, start by powering on your Roku and ensuring a stable internet connection. Then, log into your Roku account, navigate to the Channel Store under Streaming Channels, locate the CNBC app and click ‘Add channel‘. If prompted, enter your PIN.

How To Activate Cnbc On Roku Tv

Once you’ve installed the CNBC channel, visit cnbc.com/rokutv and enter the activation code provided by the CNBC app. Follow the on-screen prompts to activate the CNBC channel. Ensuring seamless access might require some troubleshooting, like checking for device updates or rebooting your Roku. As you navigate the different content categories on CNBC, there’s a lot more for you to discover.

Activation Guide for CNBC on Roku

To activate CNBC on your Roku device, you initially need to power on your Roku and make sure it’s connected to both your TV and a stable wireless internet connection. After ensuring the connection, log into your Roku account on the device. Hit the Home button on your Roku remote to navigate to the home screen. From there, scroll down and select Channel Store under Streaming Channels.

Now, you’re ready to find the CNBC channel. You can do this either by browsing through the list or simply using the search option. If you encounter any activation issues during this process, don’t hesitate to do some troubleshooting. Remember, keeping your Roku device updated is one of the essential Roku channel tips for smooth operation.

Also Read – How to Access Tumblr on Roku

Installing CNBC Channel on Roku

Once you’ve located the CNBC channel in the Roku Channel Store, it’s time to install it on your device.

  1. Navigate to the CNBC app in the Channel Store.
  2. Click on ‘Add channel’ to start the installation process.
  3. If prompted, enter your PIN.

This sets up the CNBC channel on your Roku device.

Now, it’s crucial to anticipate and troubleshoot connectivity issues that might arise. Confirm your Roku device is connected to a stable and fast internet connection. If you encounter any problems, you may need to reboot your Roku device or router. Stay patient, as the process could take a few minutes.

Now, you’re all set to enjoy CNBC on your Roku device.

Activating CNBC Channel on Roku

After setting up the CNBC channel on your Roku device, the next step is activating it to start streaming content. To activate, visit cnbc.com/rokutv on a web browser and enter the activation code provided by the CNBC app on your Roku. Follow the on-screen prompts to finalize the activation process.

If you encounter any activation issues, there are troubleshooting steps you can take. Make sure your Roku device is updated to the latest version to avoid any compatibility issues. If problems persist, don’t hesitate to contact CNBC customer support for further assistance.

Once activated, you’ll be able to enjoy a wide range of CNBC content. Remember, keeping your Roku device updated is key to ensuring smooth streaming.

Also Read – How to Watch/Stream USTVNow on Roku

Accessing CNBC Post-Activation

After successfully activating your CNBC channel on Roku, you can now start discovering the wealth of content it offers. The process is simple post-activation, and you’ll be streaming CNBC content in no time.

Here are a few post-activation tips to enrich your viewing experience:

  1. Regularly check for device updates. Roku periodically releases updates to improve performance and add new features. Making sure your device is updated ensures smoother streaming.
  2. Expand your content. CNBC offers a variety of programs. Explore different categories to maximize your subscription.
  3. Get familiar with navigation. Understand how to access the guide, settings, and other features on the CNBC channel.

If you face any issues, consult the troubleshooting guide or reach out to customer support. Enjoy your CNBC streaming experience!

Troubleshooting CNBC Channel on Roku

If you come across issues while accessing the CNBC channel on your Roku device, there are several troubleshooting steps you can follow to resolve them.

First, verify your device’s compatibility. The CNBC channel requires Roku devices to be running on the latest software. So, check if there are any pending updates on your device and install them.

Secondly, address any connection issues. Confirm your Roku device has a strong and stable internet connection as this can significantly affect the channel’s loading time and streaming quality. If your connection is weak, try moving closer to your router or resetting it.

Lastly, if the problems persist, reaching out to Roku’s customer service could be beneficial. They can provide further assistance tailored to your specific situation.

Also Read – How to Watch/Stream Acorn on Roku

Checking CNBC Subscription Status

While addressing potential issues with your Roku device, another aspect to keep in mind is the status of your CNBC subscription. If you’re experiencing troubles accessing CNBC, it’s important to verify your subscription status.

Here’s how you can do it:

  1. Visit CNBC’s website and navigate to the subscription section. Here, you’ll be prompted for account authentication. Enter your credentials to gain access to your subscription details.
  2. Look for a section labeled ‘Subscription Status’ or similar. This is where you’ll find your current subscription status, indicating whether it’s active, expired, or due for renewal.
  3. If your subscription status isn’t active, you might need to renew it or address any payment issues that have arisen.

Updating Your Roku Device

To guarantee peak performance and access to the latest features, you should regularly update your Roku device. Roku’s system software, known as firmware, is consistently enhanced to provide seamless streaming and troubleshoot connectivity issues. So, how do you update it?

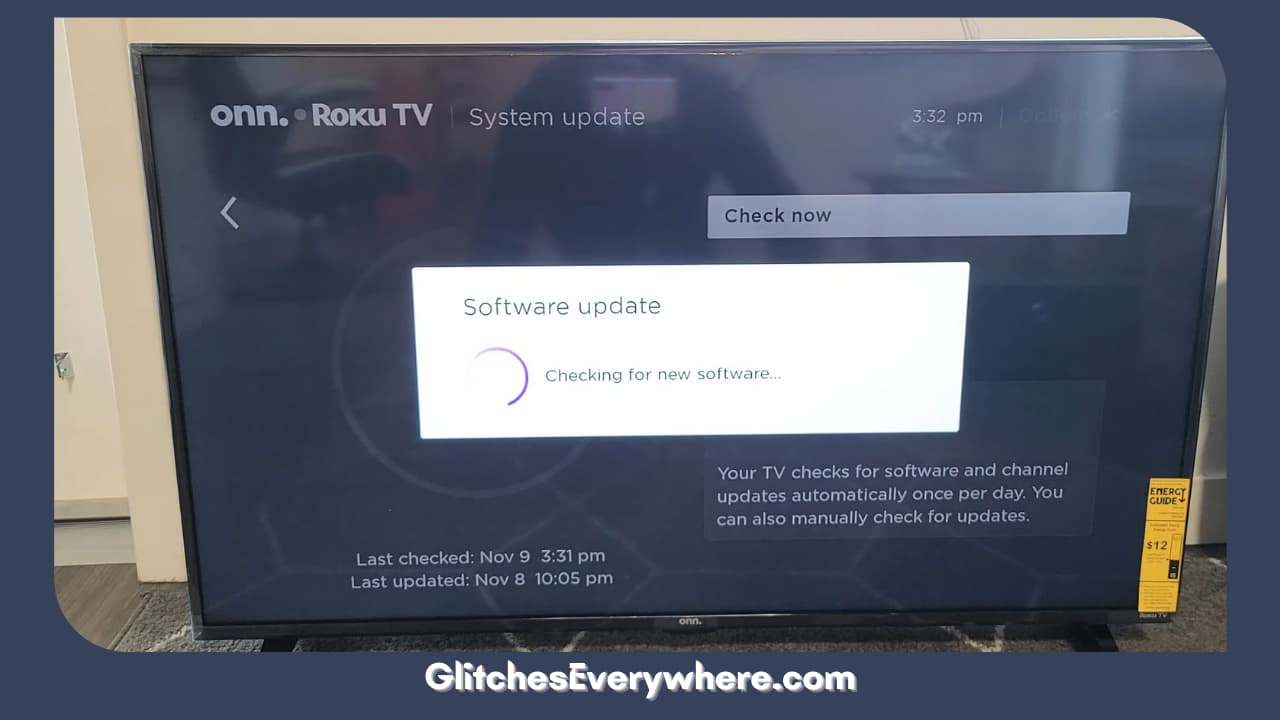
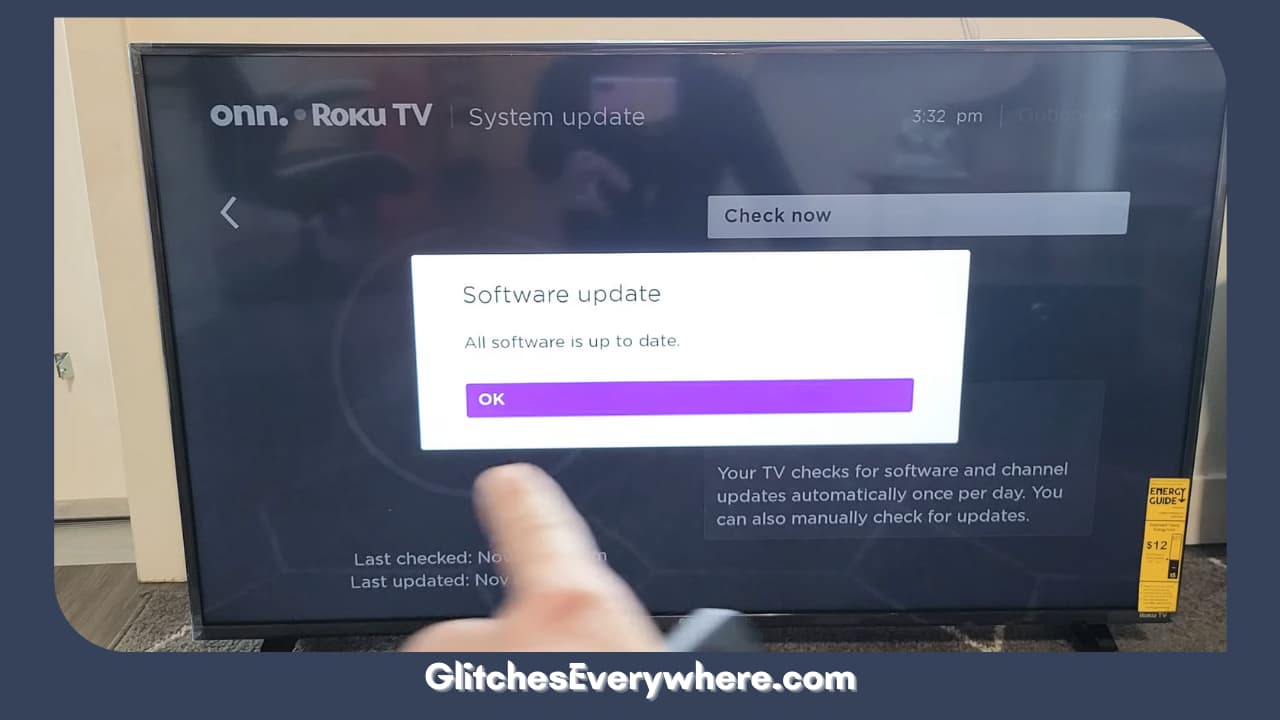
Firstly, click on ‘Settings’ from your Roku home menu. Then, select ‘System’, followed by ‘System update’. Here, you’ll see your current software version and the date it was updated. If there’s an available update, you’ll see ‘Update’ on this screen. Click on it and your Roku device will download the newest firmware. The device will restart once the update completes.

Also Read – How to Activate Frndly TV on Roku

Contacting CNBC Customer Support

In the event of any issues or queries while accessing CNBC on your Roku device, don’t hesitate to reach out to CNBC customer support. These trained professionals are on hand to provide technical assistance and help with account verification.

  1. Technical Assistance: If you’re facing issues such as streaming difficulties, app crashes, or any such technical issues, customer support is available to help troubleshoot and resolve these problems.
  2. Account Verification: In case you’re having trouble verifying your account, customer support can guide you through the process effectively and securely.
  3. Contacting Support: To get in touch with CNBC customer support, you can use the contact form on the CNBC website or call their hotline for immediate assistance. Remember, customer support is there to help you enjoy your CNBC viewing experience.

Conclusion

And there you have it! Just like an experienced stock trader maneuvering through the market’s ups and downs, you’ve successfully steered the process of accessing CNBC on your Roku device.

From installing the app to problem-solving, you’re now equipped with the right tools to stay informed in this fast-paced financial world. Remember, keeping your device updated is as essential as staying updated with the market trends.

Happy streaming!

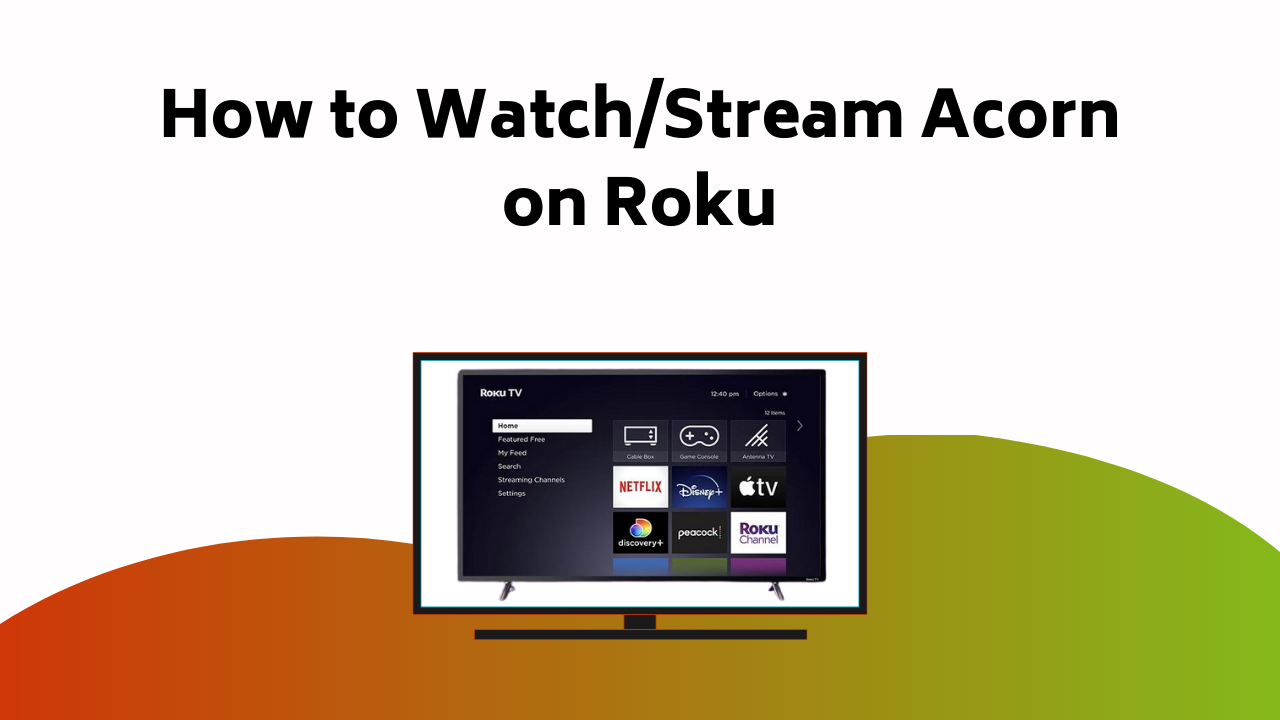
How to Watch/Stream Acorn on Roku: 2024

0

To access Acorn on your Roku, first turn on your Roku device and connect it to your WiFi. Then, go to the home screen and choose ‘Streaming Channels‘. Use the virtual keypad to type ‘Acorn TV‘ into the search field in the Roku Channel Store. Select Acorn TV and click on ‘install’.

How To Watchstream Acorn On Roku

Once installed, you’ll find the Acorn TV app on your home screen where you can open it and log in with your Acorn credentials. From there, the wealth of British and international shows is at your fingertips. Stick around, and we’ll fill you in on how to make full use of your Acorn TV account.

Accessing Acorn TV on Roku

Getting Acorn TV up and running on your Roku device is a straightforward process that begins with turning on your Roku device and ensuring it’s connected to your wireless internet network. Navigate to the home screen by pressing the home icon button on your remote. From here, scroll down and select ‘Streaming Channels.’ This will take you to the Roku Channel Store.

In the store, use the virtual keypad to type ‘Acorn TV.’ Once you’ve found Acorn TV, select it and hit ‘install.’ Now, you’ve successfully added the Acorn TV channel to your Roku.

Exploring features comes next. Acorn TV boasts a vast library of British and international shows. If you face any issues, don’t worry – there are plenty of troubleshooting tips available to get you back on track. Enjoy!

Also Read – How to Activate Frndly TV on Roku

Launching Acorn TV App

After successfully installing the Acorn TV channel on your Roku, you can launch the app directly from your home screen. Here’s how you can get started:

  1. On the home screen, scroll until you locate the Acorn TV app.
  2. Click on the app’s icon to open it.
  3. If required, enter your login credentials.
  4. Start exploring the features of Acorn TV.

While you enjoy the vast array of British and international shows on Acorn TV, you might face some issues. Don’t worry, troubleshooting issues is quite simple. Try restarting the app or your Roku device. If the problem persists, check your internet connection or try reinstalling the app. Enjoy your journey into the world of Acorn TV!

Creating an Acorn TV Account

Before you can enjoy all the features of Acorn TV on your Roku device, it’s essential to create an Acorn TV account. Start the account setup by visiting the Acorn TV website.

Look for the option ‘Start a Free Trial‘ and click on it. You’ll be asked to provide basic information like your email address and desired password. Make sure you confirm your age, agree to terms, and set your email preferences. After clicking ‘Create Account’, follow the on-screen instructions to finalize your registration.

This trial period allows you to discover Acorn TV’s offerings before committing further. Once you’ve established your account, you can use these credentials to log into Acorn TV on your Roku device, opening up a world of entertainment.

Also Read – How to Watch/Stream C-Span on Roku: 2024

Free Trial and Subscription Details

Now that you’ve established an Acorn TV account, let’s explore the details of the free trial and subsequent subscription. The free trial, lasting seven days, offers you a taste of Acorn’s rich and diverse content availability.

  1. First week: You won’t be charged during your free trial. It’s the perfect opportunity to dive into what Acorn has to offer.
  2. Subscription: After the trial, a subscription costs $5.99 per month. It’s a small price for a wealth of content!
  3. Billing options: Acorn offers flexible payment options for your convenience. You can choose the one that suits you best.
  4. Continued access: Keep your subscription active to ensure uninterrupted access to your favorite shows.

Redeeming Gift Codes

If you have an Acorn TV gift code, you can easily redeem it during the account creation process to enjoy additional benefits. These benefits can range from extended trial periods to discounts on your subscription.

Here’s the gift code redemption process: during signup, you’ll come across a field labeled ‘Gift Code’. Enter your code here. If it’s valid, you’ll see the gift code benefits applied immediately.

Remember, you can only use one code at a time. It’s worth noting that these codes can’t be redeemed for cash. They’re purely for enjoying more of the Acorn TV service.

Also Read – How to Activate Your Citizens Bank Debit Card: 2024

Renewing Acorn TV Subscription

When your Acorn TV free trial comes to an end, you’ll need to renew your subscription to keep enjoying the wealth of British TV shows and movies.

Here’s how to go about it:

  1. Log into your account on Acorn TV’s website. This is where all your account management happens.
  2. Navigate to the ‘My Account’ section. You’ll find your subscription details here.
  3. Review your payment options. Acorn TV accepts credit and debit cards, as well as PayPal.
  4. Click on ‘Renew Now’ to continue your subscription.

Related Posts and Resources

Beyond managing your Acorn TV subscription, there are numerous resources and guides available to help you activate different channels on your Roku device and understand the latest technology trends. As you’re exploring streaming options, you’ll find a wealth of knowledge in these resources that will allow you to compare subscription plans efficiently.

Here’s a quick table for reference:

ResourceBenefit
Roku User GuideUnderstand how to navigate your Roku device
Streaming Service ComparisonCompare the features and prices of various streaming options
Tech Blog PostsStay updated on the latest tech and streaming trends
Online Streaming ForumsEngage with community discussions, ask questions, and share your experiences
Roku Channel Activation GuidesLearn how to add new channels to your Roku

Activating Other Roku Channels

While Acorn TV offers a variety of unique content, there are also many other channels available to enhance your Roku experience. Exploring new channels can introduce you to diverse genres and programs from around the world.

  1. Exploration: Your Roku device is a goldmine of channels waiting to be explored. Delve into the unknown and uncover the hidden treasures in Roku’s vast library.
  2. Installation: Once you’ve made your choice, click on the channel icon to install it. It’s as easy as that.
  3. Troubleshooting Streaming Issues: Encountering problems? Don’t worry! Roku’s support center is always ready to help you with any streaming issues.
  4. Enjoy: Once everything’s set up, all that’s left is to sit back, relax, and enjoy your new channels. Happy streaming!
Conclusion

You’ve now covered all the bases to access Acorn on Roku. With a few taps on your remote, you can plunge into a world of mesmerizing British and international shows.

Whether you’re using a free trial or a paid subscription, Acorn TV is sure to keep you glued to your screen. Remember, this is just the tip of the iceberg; there are tons of other Roku channels waiting for you to discover.

Happy streaming!
Roku Keeps Restarting: Fix in Seconds 2024

0

Roku Keeps Restarting

You have reached the right destination if you have any queries regarding Roku Keeps Restarting. This detailed guide will equip you with all the information you need.

Roku tv keeps restarting? Stop whatever you are doing right now; we got the solutions you need. If your Roku shuts off after 30 minutes, flashes on and off or even just keeps restarting, read this article through to fix your issue today.

In order to fix it, begin by restarting or rebooting your device, checking for power, HDMI, and internet issues, check for pending updates before resorting to factory resetting your device. If the problem is specific to a channel or app, try updating it or reinstalling it.

Everything you need to know about why my Roku TV keep restarting headache is right here, sit back and read now to fix it! 
Why Does My Roku Keep Restarting

Why Does My Roku Keep Restarting

Let us begin our guide by understanding the reason behind your distress, why is it that your Roku TV keeps restarting?

This can be narrowed down to a few main causes, each of which has been discussed in the following list:

Power Issues

Your Roku device requires a sufficient amount of power in order to work properly. In case it is not and experiencing fluctuations in its supply, you can experience the roku tv keeps restarting problem and it can also lead to a green screen problem. In cases like these, try moving to another power outlet or adapter. It may fix this issue, if not then move on to the other possible causes.

Overheating

Roku has an amazing feature where it shuts down on its own if the device seems to be overheating. This is to protect the device and yourself. There are many possible reasons behind the same, which have been discussed in a later section. For starters, one should ensure that our Roku TV receives the airflow it needs and is not blocked. 

App Issue

Roku tv keeps restarting only when you try to access a particular app. It may be a glitch or issue with the app, not your whole Roku device. Check if the problem persists only with that particular Roku app or just with that one. In this case, you can restart your app or even remove it and download it again to see if the problem continues.

Software Update

It is common knowledge that Roku undergoes software updates every now and then. Wondering: why does my Roku TV keep restarting? It just might be because of this! If a Roku device is undergoing a software update, it very likely shuts down a couple of times and might take the sound out of sync. Wait for the update to finish completely, then check if the issue persists.

Hardware Trouble

Another common cause of the ‘why does my Roku TV keep restarting’ headache is hardware troubles. Have you connected external hardware to your device? Or is there something wrong with the device itself? Get it looked at by a professional as soon as possible, or get in touch with Roku Support for the same.

These are the most likely answers to your ‘Why does my Roku keep restarting’ questions. Once you have narrowed down the cause of your issue, you can move on to a more particular path of troubleshooting and making it go away!

Recommended Reading – How to Hide Channels on Roku: Easiest Guide

Roku Keeps Restarting: Solutions

Roku Keeps Restarting Solutions

Now let’s move on from causes to fixes. Here is a detailed guide to fixing your Roku Tv keeps restarting issue for good. If you have already narrowed down the cause of your issue, scroll through the list to find the solution that corresponds to your culprit. 

Or else, follow these steps and by the end, we are positive that you will be free of this ‘Why does my Roku keep restarting’ problem!

Without further ado, let’s get into it!

Restart/Reboot your Roku TV

Let’s begin this guide with the simplest solution, restart your device! You would have heard this simple fix so many times, but do you know why it is considered so helpful?

Whenever a device restarts, the running memory of the same gets cleared up, giving it a small cleanse and getting rid of minor glitches or problematic codes that might be causing it to malfunction.

When you are restarting your Roku TV without remote, simply unplug your main power cord from your TV. Continue to wait for at least half a minute before plugging it back in. Check if your problem still exists.

If it does, try this reboot method.  If you are looking to reboot your Roku, follow the given mini guide:

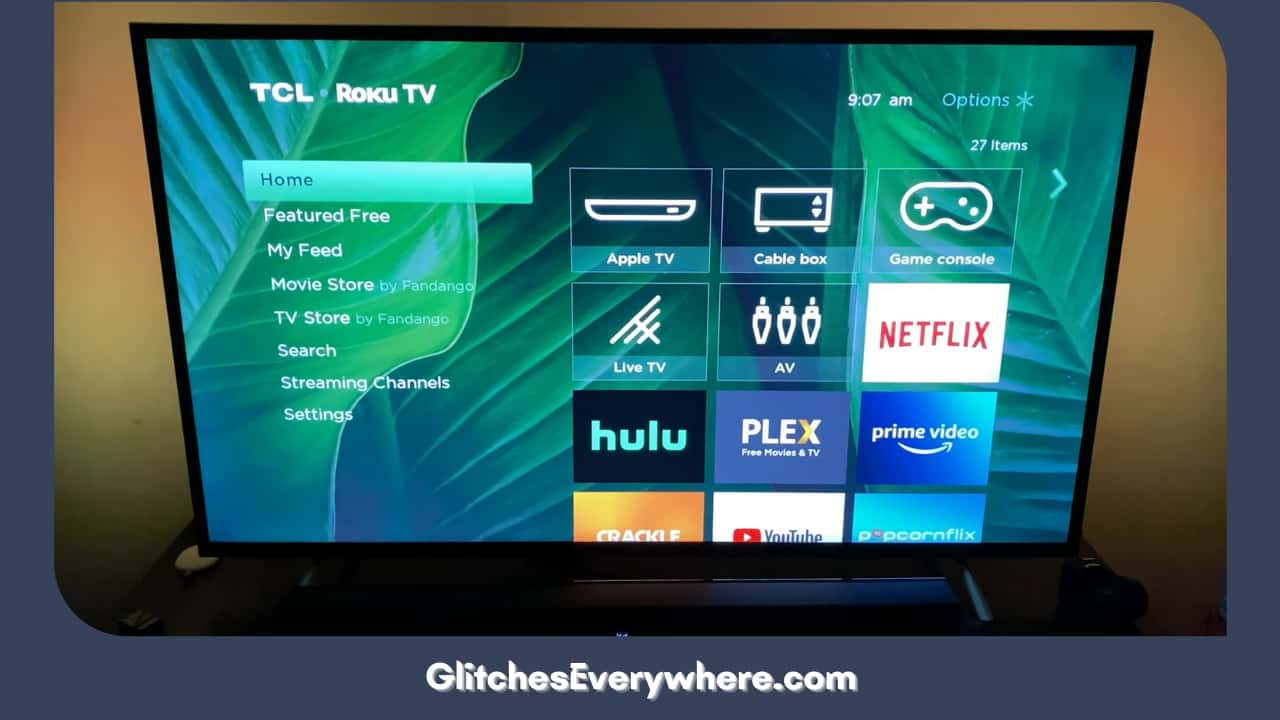
1. Take your Roku remote, locate the Home button and press it.

Take Your Roku Remote, Locate The Home Button And Press It

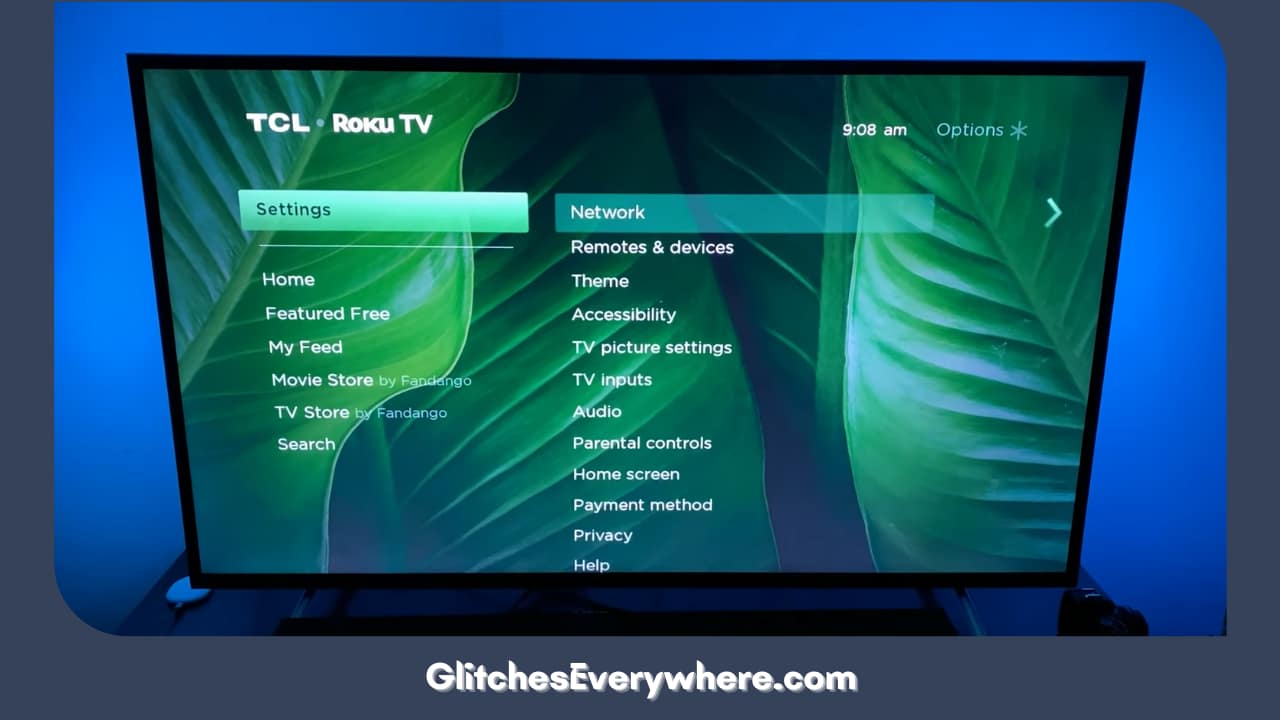
2. Using the remote, find the Settings menu.

Using The Remote, Find The Settings Menu

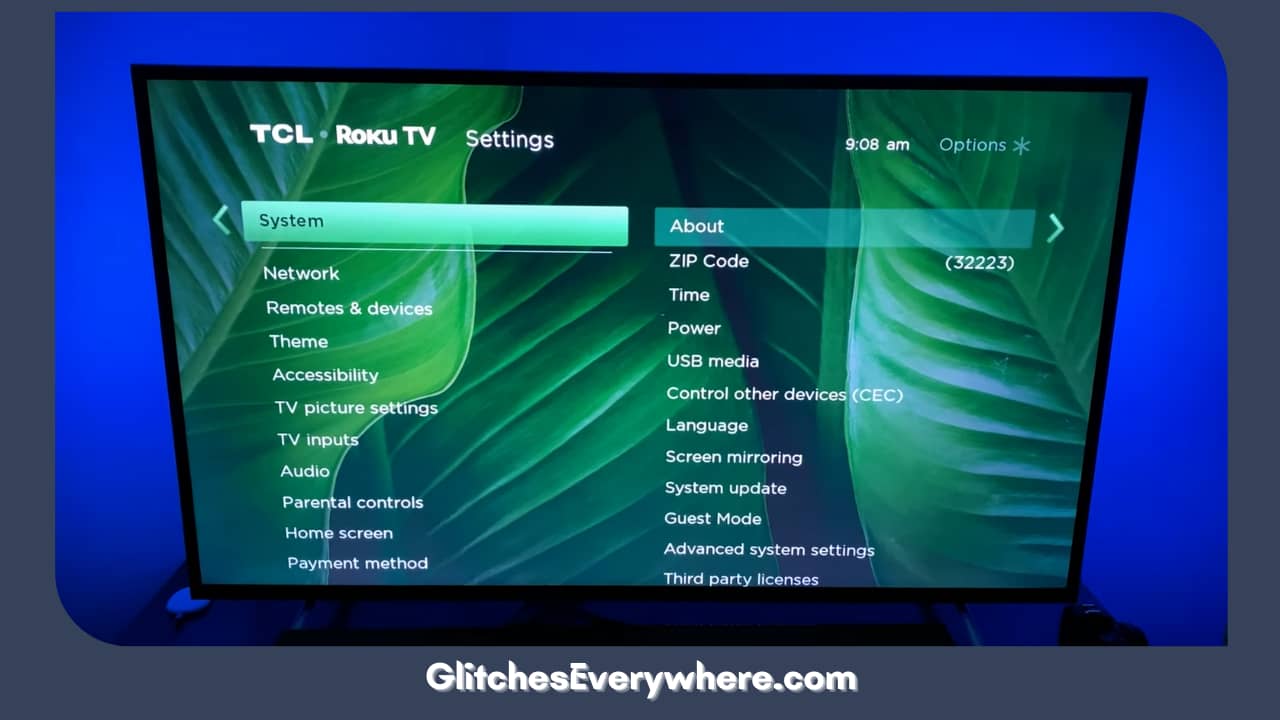
3. Select the System option.

Select The System Option

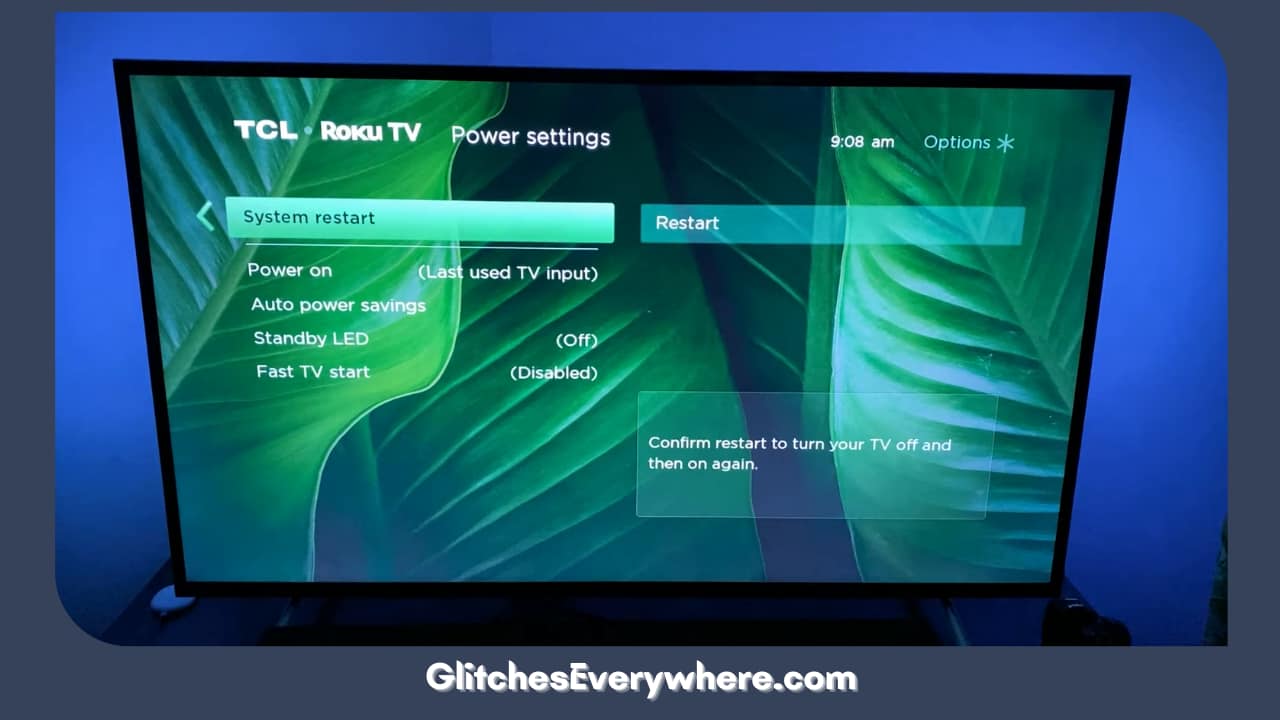
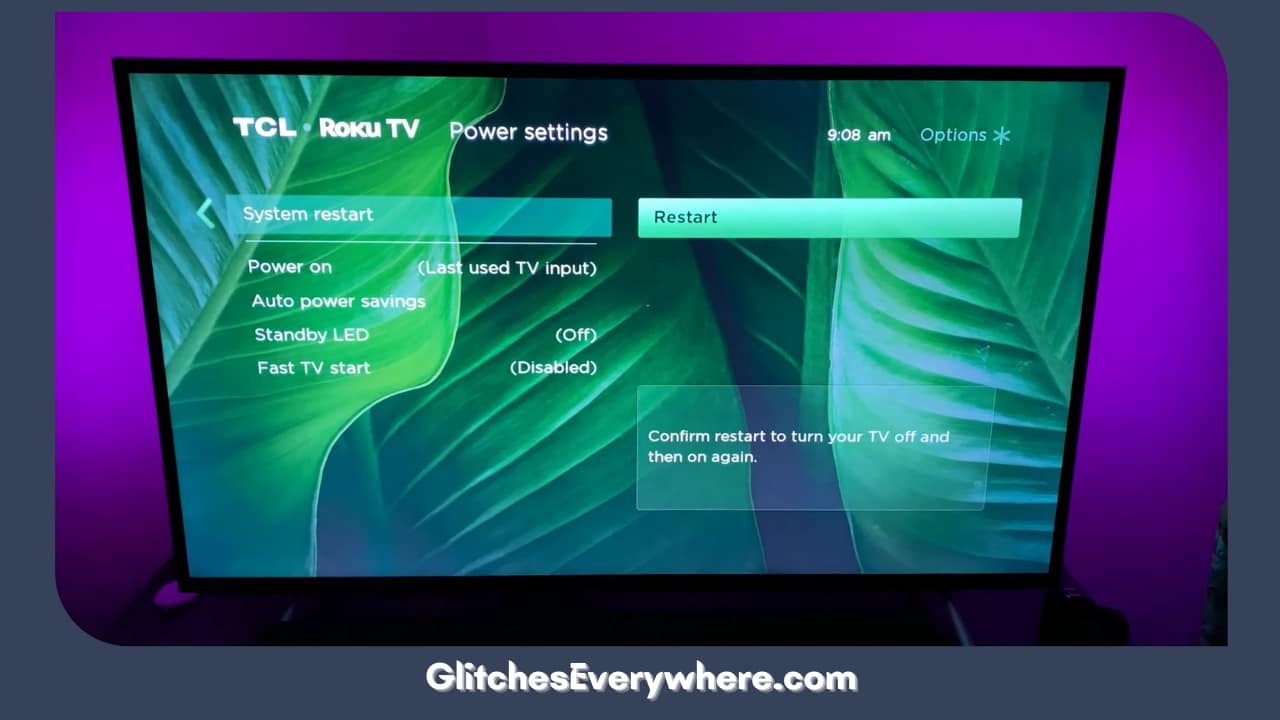
4. From here, press the System Restart option.

From Here, Press The System Restart Option

5. Locate the restart option and press it to reboot your Roku device.

Locate The Restart Option And Press It To Reboot Your Roku Device

Roku keeps restarting even now? Do not worry and continue reading, we are just getting started.

Check for Updates

As mentioned above, a common reason the Roku TV keeps restarting issue is software updates. It is always a good idea to be up to date with all updates. Here is how you can check for and perform said software updates on your Roku device:

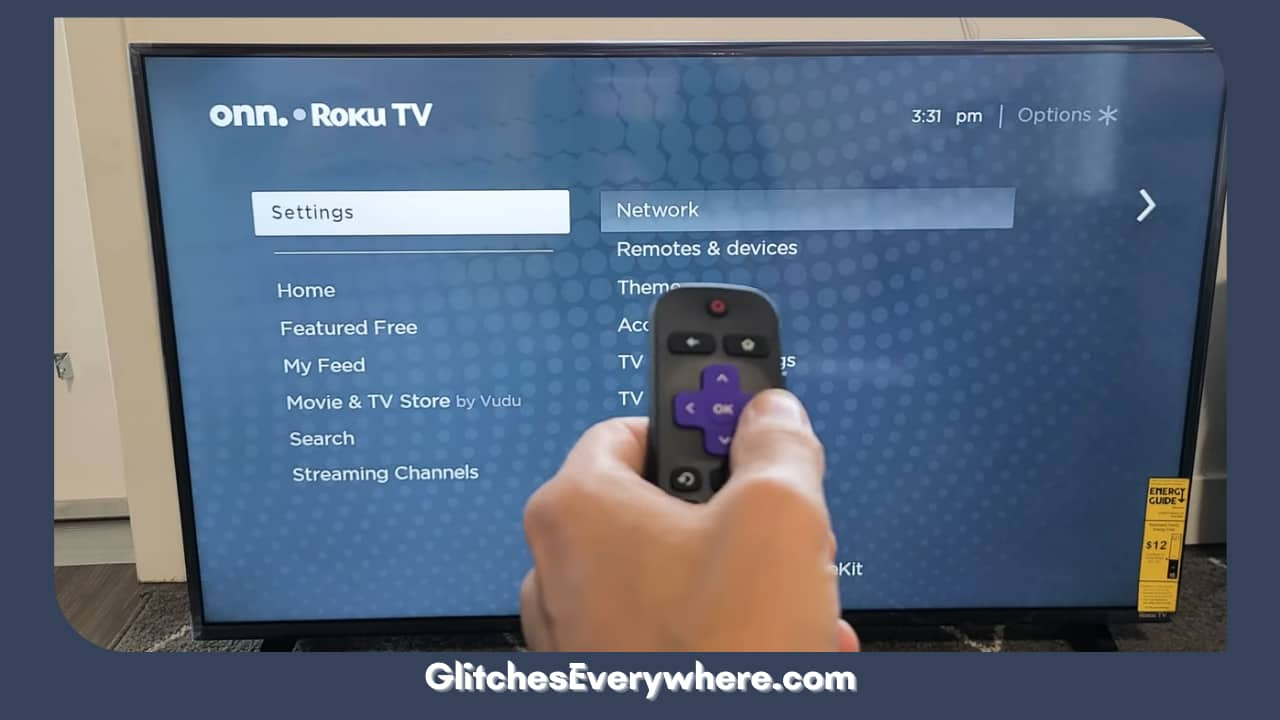
1. Using your Roku remote, go to the Roku TV settings menu.

Using Your Roku Remote, Go To The Roku Tv Settings Menu

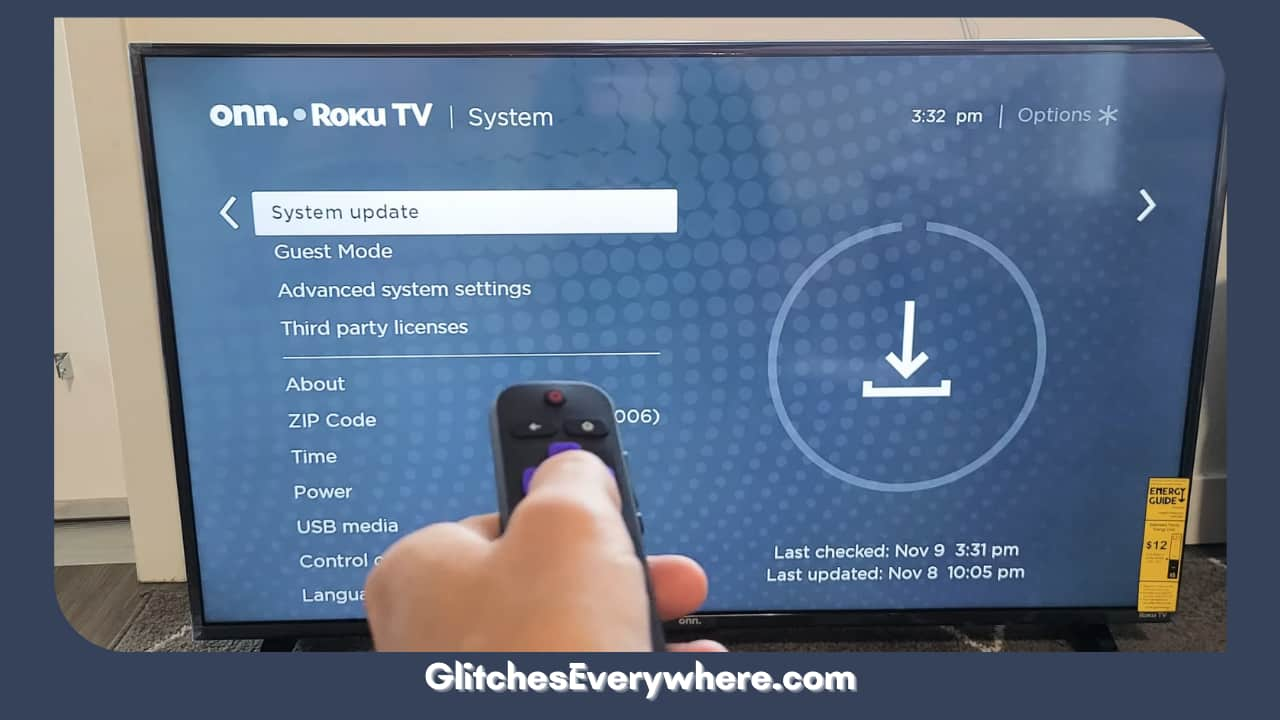
2. Move on to the System Update option.

Move On To The System Update Option

3. Here you will be able to see if there is any pending update for your device.

Move On To The System Update Option (1)

4. If there is, follow the simple prompts on your screen to install it.

If There Is, Follow The Simple Prompts On Your Screen To Install It

5. Restart your device once and check if your problem has been fixed or not.

Overheating Solutions

Overheating is a common issue in many Roku devices, which causes many performance issues with the device. 

Here are a couple of things you should watch if you suspect your device is overheating: It is physically hot. The sound keeps going out. There is an issue with the audio and video sync.

There is a lot of buffering. Slow and difficult navigation through the screen. The LED indicator is a solid red. You may even see an alert on your screen. It also causes the topic of this article, i.e., Roku keeps restarting. If your Airplay is not working 

Here is how you can fix this issue if overheating is the leading cause:

  1. Turn off your device immediately. Ensure that you unplug it frequently.
  2. Clean it with a soft cloth regularly to avoid any dust blockage.
  3. Place the device in a ventilated area so it gets lots of air.
  4. Move the streaming stick a little further from your Roku TV.

Wondering: Why does my Roku keep restarting despite trying these solutions? Continue reading. We have a lot more to go!

Channel or App-Specific Issue

While discussing the causes, we briefly talked about how there might be an issue with specific apps in your Roku rather than the whole device. This section deals with fixing that.

Before we jump into the what to do part, let’s see why it happens in the first place. Sometimes the data in a channel or app gets corrupted, due to which your Roku keeps restarting.

Now, coming to fixing this, you can either uninstall and reinstall it or update it. We have described both. Using the following methods you can also hide channels on Roku

For the first, this is what you need to do:

  1. Use your remote and highlight the channel causing you trouble from your Home screen.
  2. Find the * button and press it.
  3. You’ll find the Remove channel option. Press it.
  4. Then move on to finally click on Remove.

Just wait for the channel to be removed now. Now, comes the reinstalling part.

  1. Go back to your Home screen.
  2. From here, select Streaming channels.
  3. Find the channel you want to reinstall.
  4. Follow the screen prompts to get it back just as easily.

Another thing you can do if your Roku keeps restarting due to a channel issue is to update it. Here is how you can go about it:

  1. Using your remote, again highlight the troublesome channel.
  2. Again, press the * button.
  3. You’ll find a Check for updates option, click on it.
  4. If there is one, follow the instructions on your screen to complete the update.
  5. Restart the channel and check if your Roku keeps restarting even now.

Hardware Issues

If you are wondering: Why does my Roku keep restarting? My question to you now is if you use headphones with your device.

A common issue that many users have reported is that their Roku tends to freeze and reboot if they have their headphones connected to their remotes. The fix for the same is pretty simple. Disconnect the headphones and try to use Roku on its own, and check if the problem is still bothering you.

Another common hardware issue is the Nintendo Switch wifi issue. Try disconnecting it to see if it helps.

Check Power Connection

Roku tv keeps restarting? It may very well be a result of poor power supply. Check the main power outlet and if the connection is strong and the outlet is not faulty. Try connecting your device to another adapter to check the same.

Check Internet Connection

Wondering: why does my Roku TV keep restarting? It’s time to check your connectivity. It is common knowledge that your Roku requires a stable internet connection in order to stream seamlessly.

If you are facing performance issues, for instance, your Roku TV keeps restarting, check your network strength. If it’s low, talk to your service provider or connect to a stronger network to check if it helps.

HDMI Cables

Why does my Roku TV keep restarting? Maybe the HDMI cables are at fault. Double-check all your HDMI cables and ensure that the wires are in proper shape and not eroded. Proceed to clean any dust that might have accumulated over there.

Factory Reset 

Let’s look at one of our last resorts. Roku TV keeps restarting even now. Finally, try factory resetting your device. It is going to change the settings back to their default ones. You’ll have to set it up all over again. 

Here is a step-by-step guide on how to factory reset your device:

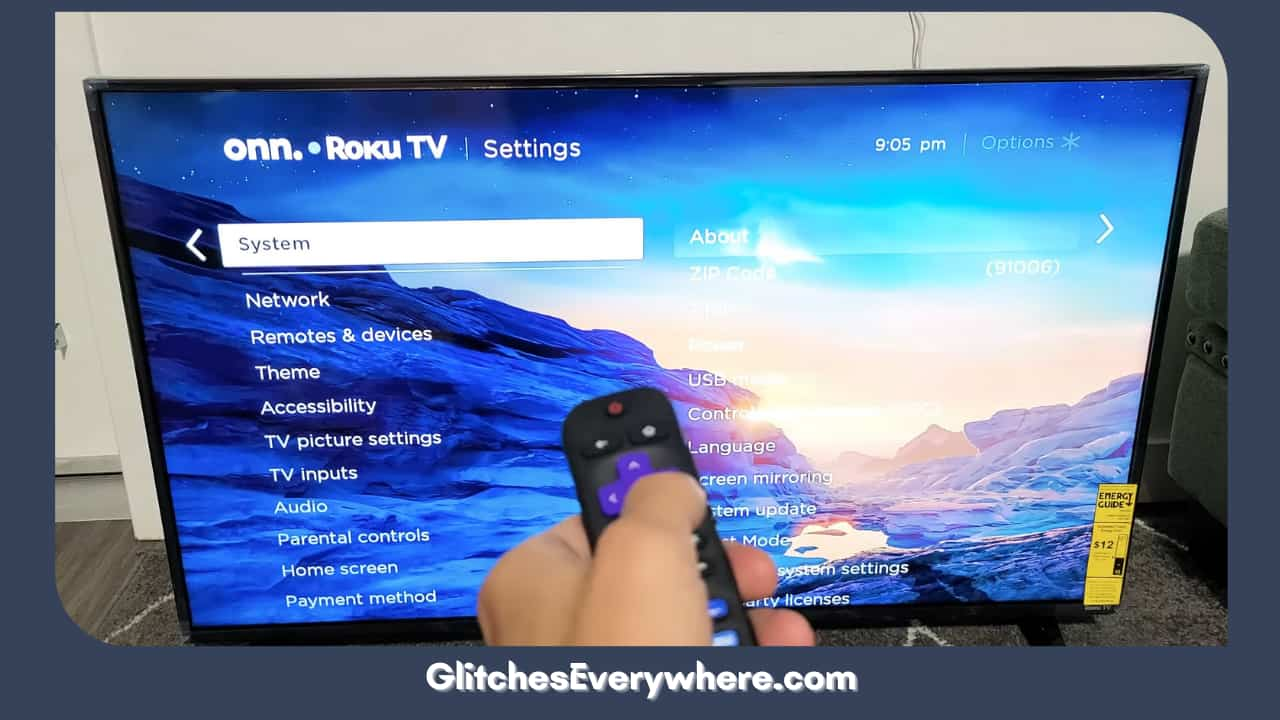
1. Use your Roku remote to press the Home button.

Use Your Roku Remote To Press The Home Button

2. Then use the up-down buttons in order to go to Settings.

Then Use The Up Down Buttons In Order To Go To Settings

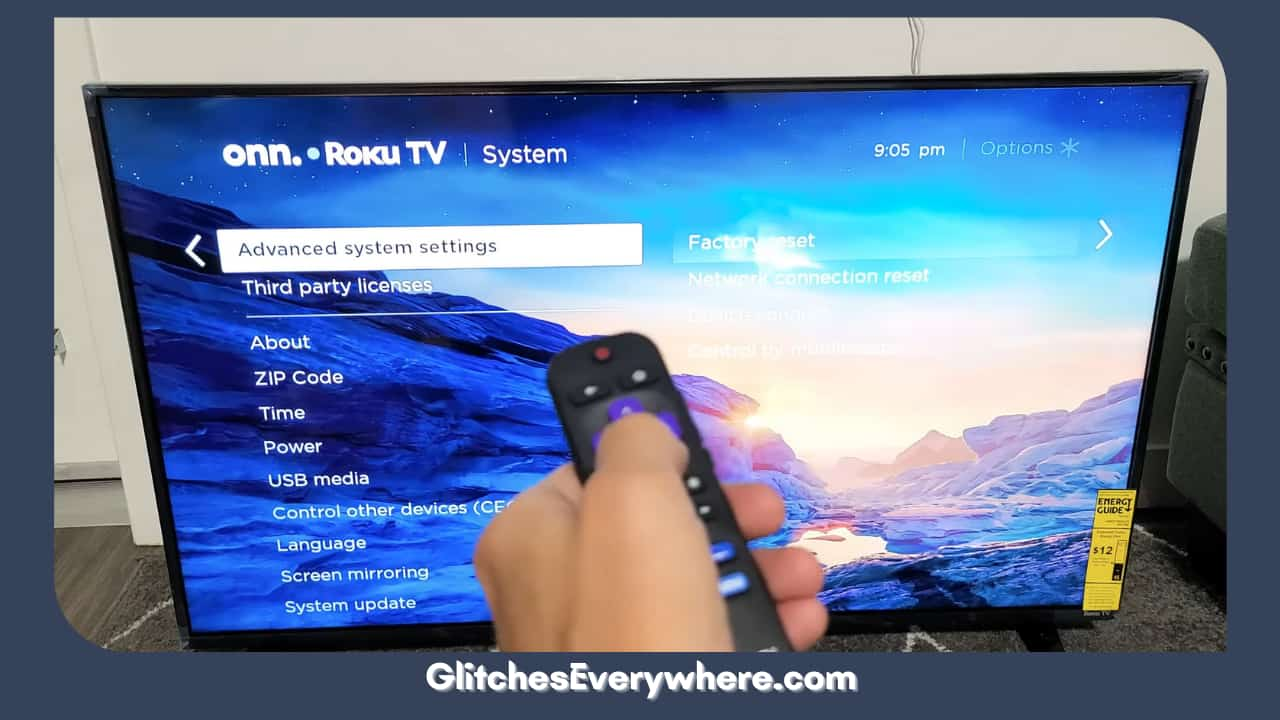
3. Move on to the System option.

Move On To The System Option

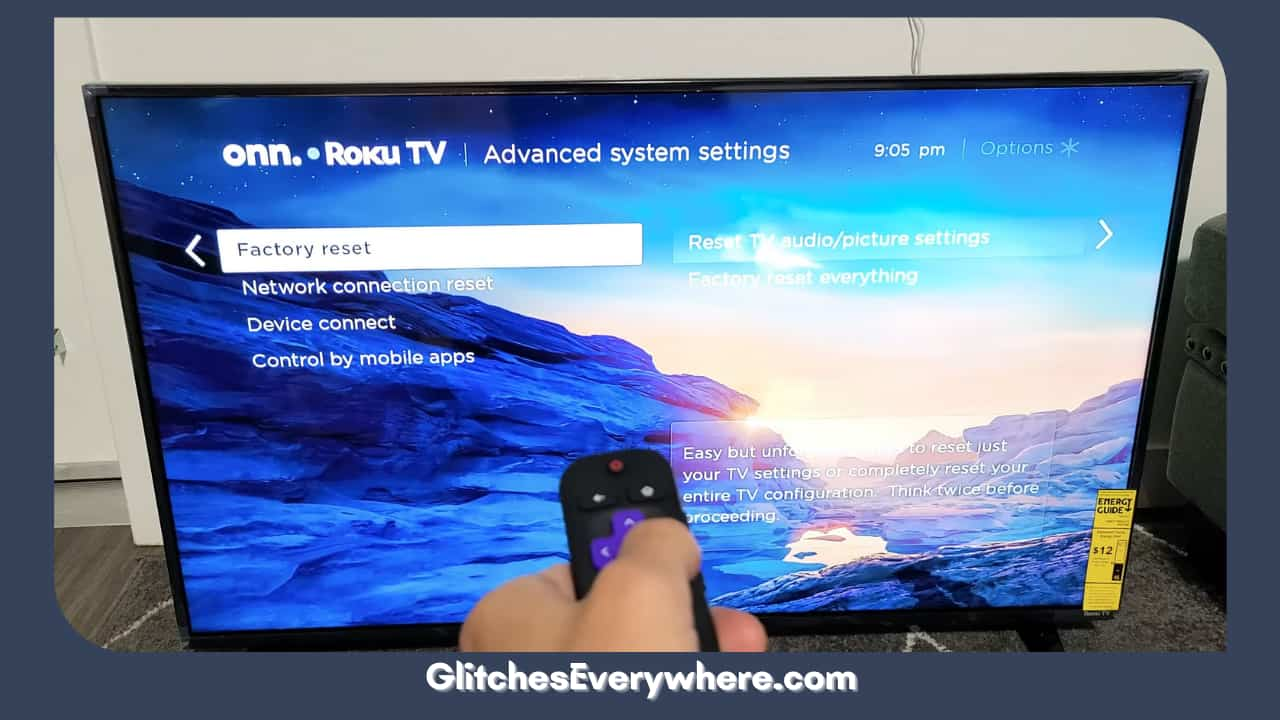
4. Go to Advanced System Settings from there.

Go To Advanced System Settings From There

5. Finally, select the Factory Reset option.

Finally, Select The Factory Reset Option

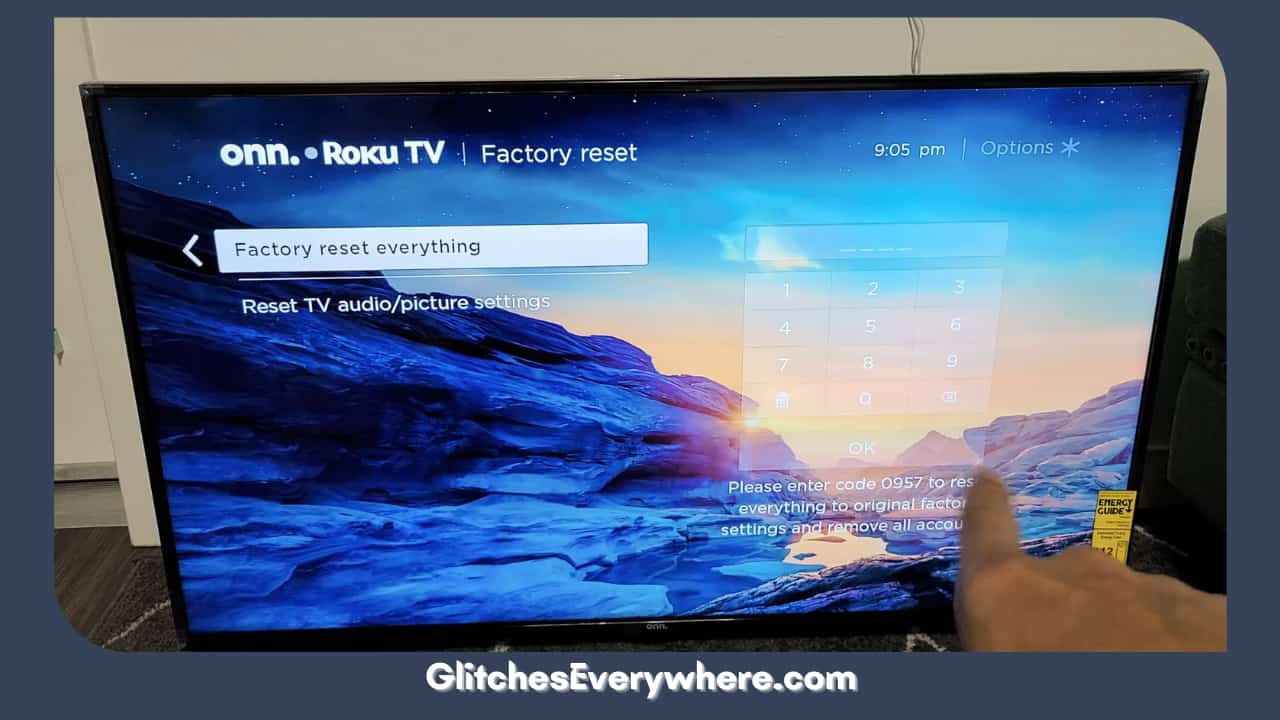
6. You’ll be required to enter a code on your screen and then confirm.

Finally, Select The Factory Reset Option (1)

Contact Roku Support

The last and final resort is getting in touch with the Roku Support Center. Detail them your problem along with the model of your device. Inform them of the steps of recovery you’ve already tried and ask them for assistance. If your warranty still applies, you might even get a replacement!

Recommended Reading – Where Is the Factory Reset Button on Emerson TV: Easy Guide

Roku TV Keeps Restarting: Flashing on and off

Roku Tv Keeps Restarting Flashing On And Off

Let’s look at a more particular form of the ‘why does my Roku TV keep restarting’ issue. If your device is flashing on and off, it can be a result of a few factors, each of which has been described below with potential solutions, let’s take a quick look:

  1. As we know, insufficient power is a key contributor, due to which your Roku keeps restarting. If you’re currently using a low-power USB port, try using a higher one to see if it affects your problem.
  2. The next thing is to check your HDMI cable. A loose connection can cause the flashing on-and-off effect. Try unplugging the cables carefully and connecting them back again.

Try some tricks from our guide above in this case as well. These include resetting your device or power cycling it. This gives your device a quick revamp. Or else, contact Roku support as we have described in the above sections.

Recommended Reading – How to Tell if iPad Is Charging or Not: Quick and Easy

Roku Shuts off After 30 Minutes

In this specific case of why your Roku TV keeps restarting, we are discussing why your Roku shuts off after 30 minutes. Here is why:

  1. Your Settings are the major reason why you might find yourself in this conundrum. Go to your settings and change your power off after 30 minutes of the inactivity feature and check if the problem still exists. This ‘auto-off’ feature is meant to save power use but can cause this issue.
  2. Does your Roku device have a low battery? That may be why your Roku keeps restarting!
  3. Overheating is also a common cause of this issue. We have described how to deal with this issue in detail in the above section, refer to it if you want to learn how to deal with it.
  4. Make sure that your power cord is connected correctly to ensure an abundant supply of power to your device to avoid this issue.

Roku Keeps Restarting as I set up 

Roku tv keeps restarting as you desperately try to set it up. That can be a frustrating situation. We have broken down a few causes of this problem and how to deal with it. Follow the given points to deal with the same:

  1. Again, the most relevant reason for this headache is the lack of supply of the required power. Plugging into a higher-quality HDMI cable might help.
  2. The other common culprit of the same is a poor internet connection. Check it or connect to a stronger connection to see if the problem still exists.

Recommended Reading – How To Use iPad as HDMI Monitor: With This Simple Hack

Wrapping Up

Still wondering: Why does my Roku TV keep restarting? Why? You got everything you need right here. Refer to this article as your guide and fix your problem yourself today! Continue to enjoy Roku’e excellent streaming experience!

How to Watch/Stream C-Span on Roku: 2024

0

You can access C-Span on your Roku by subscribing to AT&T TV Now or through your device’s screen mirroring feature. First, confirm that your Roku’s operating system is version 7.7 or higher. If it’s not, go to ‘System Update‘ in the settings to upgrade. Once updated, activate screen mirroring.

How To Watchstream C Span On Roku

Alternatively, you can use AT&T TV Now to watch C-Span. All you need is a stable internet connection for a smooth streaming experience. If you’re still facing issues, or want to explore other streaming options, there are additional solutions and troubleshooting steps available.

Accessing C-Span via AT&T TV Now

To access C-Span on your Roku device, you can subscribe to AT&T TV Now, a streaming service known for providing over 60 channels, including C-Span. This choice improves the C Span channel availability on your Roku platform, giving you a wider variety of content.

Subscribing to AT&T TV Now costs approximately $65/month, but it’s worth the investment if you’re a dedicated viewer of C-Span. The service also offers 20 hours of DVR recording for 30 days, thereby expanding your Roku streaming options.

Once you’ve subscribed, accessing C-Span is simple. It’s a practical solution that allows you to enjoy a wide range of channels, including C-Span, directly on your Roku device. So, broaden your Roku streaming options and stay informed with C-Span.

Also Read – How to Activate Your Citizens Bank Debit Card

Requirements for C-Span Access

While subscribing to AT&T TV Now offers a straightforward method of accessing C-Span on Roku, you also have the option to use screen mirroring from a Windows system, provided you meet certain criteria. To begin with, you need to subscribe to AT&T TV Now, a streaming service offering the C Span channel among its 60+ channels.

Next, if you’re using a Windows system for screen mirroring, make sure your Roku device‘s operating system is 7.7 or above. You can activate screen mirroring from the System section in your Roku settings. Once these conditions are satisfied, you can enjoy the C-Span channel via AT&T TV Now or screen mirroring, effectively turning your Roku device into a conduit for this popular public affairs network.

Updating Your Roku Device

Before you can begin streaming C-Span on your Roku device, it’s important to make sure that your device is updated to the latest operating system. This is a vital step in troubleshooting updates. An outdated system can cause compatibility issues, thereby preventing you from accessing C-Span.

Follow these steps to update your Roku:

  1. Press the Home button on your remote to access the Home Screen.
  2. Scroll and select ‘Settings’, then choose ‘System’.
  3. Navigate to ‘System Update’ to check for updates.

If an update is available, your Roku device will download and install it automatically. This ensures Roku compatibility with the latest apps and features. So, before you start streaming C-Span, make sure your Roku device is up-to-date.

Also Read – How to Access RFD TV on Roku

Enabling Screen Mirroring on Roku

After making sure your Roku device is updated, you’ll need to activate the screen mirroring feature to stream C-Span from your Windows system. Go to ‘Settings’ from the main screen and choose ‘Screen mirroring’. Here, you can select among ‘Prompt’, ‘Always allow’, or ‘Never allow’. If you’re troubleshooting screen mirroring, check these settings first.

However, if you encounter issues with screen mirroring, there are alternative casting methods available. For instance, use casting apps that support C-Span. Remember, each method may require specific compatibility and prerequisites, so make sure your devices meet these before proceeding.

In essence, enabling screen mirroring is vital for accessing C-Span on Roku through a Windows system. It offers a seamless experience, connecting your PC and TV for a comprehensive view.

Using Windows for C-Span Access

Now that you’ve enabled screen mirroring on your Roku, let’s focus on how you can use your Windows system to access C-Span content. Windows compatibility is important in this process. Here are some screen casting tips:

  1. Open your preferred web browser on your Windows system and navigate to the C-Span website.
  2. Play the video you’d like to cast.
  3. Right-click on the video and select ‘Cast’ from the dropdown menu.

Ensure your Windows system detects your Roku device. If successful, the C-Span content playing on your Windows browser will appear on your Roku-connected TV. This Windows to Roku method is useful when the C-Span channel isn’t readily available on your Roku device. Remember, a stable internet connection is essential for smooth screen casting.

Also Read – How to Activate OTC Network Credit Card

Screen Mirroring Procedure on Roku

To effectively mirror your screen from a Windows system to your Roku device, you’ll first need to make sure that the screen mirroring feature on your Roku is activated. Verify your device’s Roku compatibility by checking it runs on an operating system version 7.7 or above. This is important for the screen sharing requirements.

Here’s a quick guide:

StepsInstructions
1.Go to ‘Settings’ on your Roku.
2.Choose ‘System’ then ‘Screen Mirroring’.
3.Set ‘Screen Mirroring Mode‘ to ‘Prompt’.
4.Confirm your changes.

Now, your Roku is ready for screen mirroring. Always remember to validate your screen sharing requirements for a seamless viewing experience. Continue with these steps each time you want to mirror your Windows screen to Roku.

C-Span Streaming From Windows

Having established your Roku for screen mirroring from the last segment, you’re ready to stream C-Span content from your Windows PC. This process utilizes the windows compatibility of your Roku device.

Here’s a step-by-step guide:

  1. Open your preferred web browser on your Windows PC and navigate to the C-Span website.
  2. Choose the content you wish to stream and start playing it.
  3. Right-click on the video and select ‘Cast’ from the dropdown menu.

This initiates the streaming process, sending the C-Span content directly from your PC to your Roku device. It’s a seamless way to enjoy C-Span on a bigger screen. Remember to make sure your PC and Roku are connected to the same network for successful streaming.

Also Read – How to Activate Crave TV on Roku

Casting C-Span to Roku

Once you’ve established screen mirroring on your Roku, casting C-Span content from your Windows PC is a straightforward process. Begin by selecting the C-Span video you want to watch on your computer. Right-click on the screen to bring up the options and select ‘Cast’.

If you’re encountering issues, here are some troubleshooting tips. First, make sure your Roku is updated to the latest version. Second, check if your PC and Roku are connected to the same WiFi network.

Here’s a quick table on the mirroring setup:

StepsDescription
Step 1Open C-Span on PC
Step 2Right-click, select ‘Cast’
Step 3Choose your Roku device

Conclusion

Now you know how to stream C-Span on your Roku device, either via AT&T TV Now or by screen mirroring from a Windows system.

You might think it sounds a bit complex, but once you’ve done it, it’ll be second nature. Don’t let technology intimidate you!

Remember, staying updated with U.S. politics is now at your fingertips, all thanks to your Roku device.

Happy streaming!

How to Activate Frndly TV on Roku: 2024

0

To activate Frndly TV on your Roku device, start by selecting the home icon and navigate to ‘Streaming Channels’, then on to the ‘Channel Store’. Locate and add the Frndly TV channel. Once added, launch Frndly TV and log in using your credentials. An activation code will appear on your screen – note it down.

How To Activate Frndly Tv On Roku

Using a web browser, visit the Frndly TV activation site, input your code, and follow the prompts to complete the activation. Now, you’re all set to enjoy Frndly TV on your Roku! For any issues, don’t hesitate to seek help from Frndly TV’s customer support, which has plenty of resources to guide you further.

Activation Steps for Frndly TV

To activate Frndly TV on your Roku device, follow these steps:

  1. Power up your device and select the Home icon.
  2. Scroll down to ‘Streaming Channels’ and select the ‘Channel Store’.
  3. Locate Frndly TV in the store; if not found, use the search option.
  4. Click on ‘Add Channel’.

For troubleshooting tips:

  • Ensure you have a stable internet connection.
  • Make sure your Roku device is updated to the latest software.
  • If facing glitches, try restarting your device.

Feedback from users indicates that following these steps should lead to a seamless activation process. However, if issues persist, reach out to Frndly TV’s support center for assistance.

Also Read – How to Watch/Stream C-Span on Roku:

Logging In and Activation Process

Once you’ve successfully added Frndly TV to your Roku channels, the next important step is to log in and activate the service. Start by launching the Frndly TV channel. You’ll likely be prompted to log in with your Frndly TV credentials. Don’t worry if you forget your password, there are troubleshooting tips available to help you reset it.

After logging in, you’ll receive an activation code displayed on the screen. Record this code, open a web browser on your smartphone or computer and visit the Frndly TV activation site. Enter the code and complete the activation process. This is also an excellent time to manage your user account settings.

Congratulations! You’ve successfully activated and logged into Frndly TV on your Roku device.

Also Read – How to Activate Your Citizens Bank Debit Card

Seeking and Getting Customer Support

If you’re finding difficulties with activating Frndly TV on your Roku device, don’t fret – Frndly TV’s customer support is readily available to assist you. Whether it’s troubleshooting tips you need or help with account management, their team is well-equipped to handle all your queries.

Head to Frndly TV’s website and scroll down to the Help Center. Enter your question in the search field, or browse through the popular articles. Odds are, you’ll find an answer to your problem.

If you’re still stuck, don’t hesitate to reach out. Just click on the relevant help topic and follow the prompts for instant assistance. Remember, you’re not alone in this. Frndly TV’s customer support is always ready and willing to lend a helping hand.

Conclusion

That’s it! You’ve successfully navigated the process of activating Frndly TV on your Roku device.

With an impressive lineup of over 15 family-friendly channels, it’s no surprise that Frndly TV has gained popularity among Roku users.

And remember, if you ever run into any issues, their customer support is always ready to help.

So, kick back, grab the popcorn, and enjoy your favorite shows with a click of a button.

How to Watch Peacock on VIZIO Smart TV (Try THIS Fix First!)

0

How To Watch Peacock On Vizio Smart Tv

Watching your favorite show after a long day is the best way to relieve yourself, and that too, without disturbing anyone’s personal space. The culture has come more into use since the COVID-19 lockdown.

However, since this culture has become popular enough, the OTT platforms have started involving money in this business, and it has all become monetary now. This brings us to the Peacock platform that you can stream on your Vizio Smart TVs, which charges almost negligible and is practically free of cost!

To stream Peacock on a Vizio TV, you can use various methods depending on your TV’s capabilities and preferences. If your Vizio TV has a built-in SmartCast feature, you can navigate to the SmartCast Home screen and locate the Peacock app among the available apps. If the app is not pre-installed, you can access the app store on your Vizio Smart TV and download the Peacock app.

If this is not preferable to you, you do not need to worry; there are alternatives, which will be explained further. These are easy steps, and this guide does not demand you to be very proficient at technology. 

Read the article till the end for better knowledge!

If you try every single one of these methods in chronological order, I am pretty sure, one of them will work for you.

Recommended Reading – Vizio TV Factory Reset: (Just Do This ONE THING)

How to Stream Peacock on your Vizio Smart TV – Easy Methods

Easy Methods

Both free and premium subscription options are available on the Peacock application. The free tier has a limited selection of content with advertisements. In contrast, the premium tier (Peacock Premium) offers a more extensive library of content, including exclusive originals, with the option for an ad-supported or ad-free experience.

You also need to note that Peacock is a geo-blocked service, which means it can only be used under a specified area. Hence, you can access its content in the US or while traveling. 

As mentioned, you do not need to worry if one instance is impossible for your device; there are other alternatives. This article has tried and tested two methods that can be useful to you. 

First is the simple way I mentioned before, and second is the casting method, which will help you stream content via these apps. This streaming content is also possible via the Ruku or Apple Firestick. Let us discuss them in detail further. 

Watch Peacock on Vizio Smart TV 

To get Peacock on your Vizio Smart TV, there are specific steps you need to carry out. Look for them in detail further. 

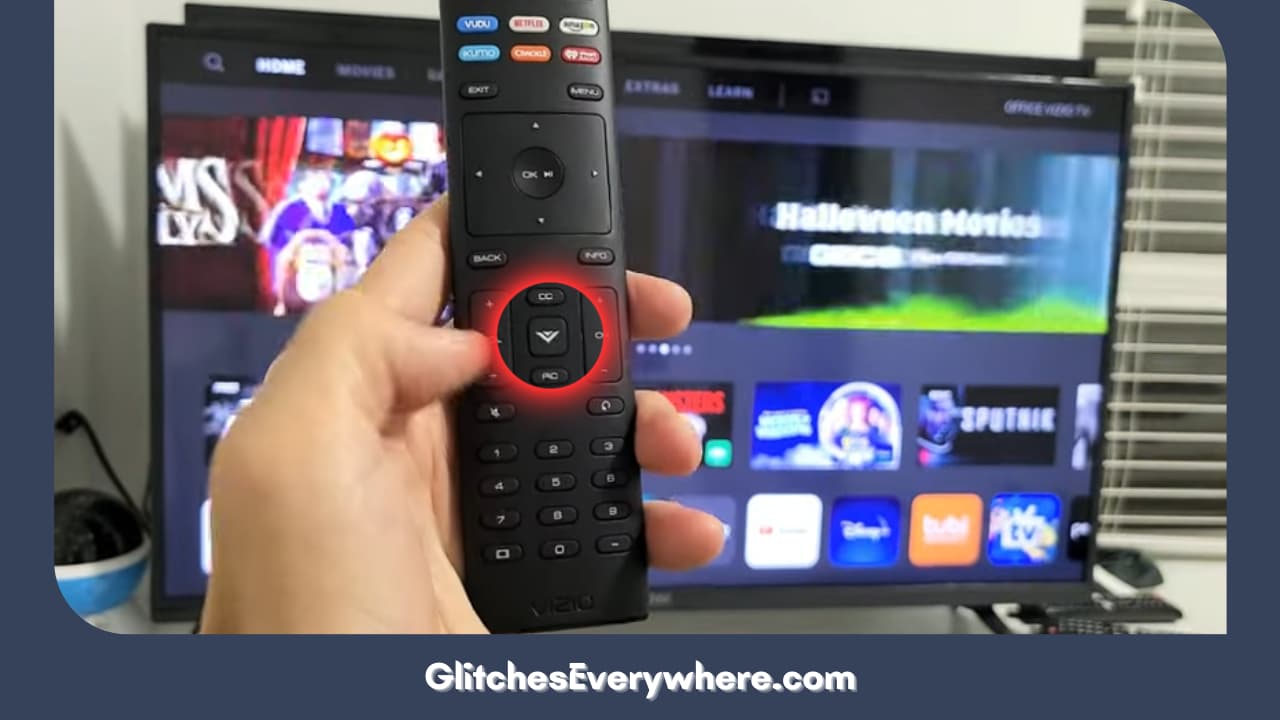
1. First, go to the Home screen of the Vizio Smart TV and use the V button on your remote to go to System and then Check for Updates (if an update is available, confirm that you want to install it).

Click The V Or Home Buttons On Your Vizio Tv Remote

2. Wait until this process ends, then use the V button again to search for Peacock.

Wait Until This Process Ends, Then Use The V Button Again To Search For Peacock

3. Open Peacock and log in to your account using your credentials (only when first launching it).

4. Select and play the desired content, and you can now watch Peacock on your Vizio Smart TV!

Vizio Smart TVs do not have any App Store like the other devices, so all the available apps come with every new update on your System.

However, if, in any case, this method has yet to prove to apply to your device, here is the other technique.

Watch Peacock on Vizio Smart TV via Smart Casting

Watch Peacock On Vizio Smart Tv Via Smart Casting 

Streaming Peacock on a Vizio TV involves a few steps, depending on the model and features of your TV. If your Vizio TV comes with the SmartCast feature, here’s a step-by-step guide:

Connect to Wi-Fi

Make sure your Vizio TV is connected to the internet via Wi-Fi.

Access SmartCast Home

Press the “V” button on your Vizio remote to open the SmartCast Home screen.

Navigate to the App Row

Use the arrow keys given on your remote control to navigate to the “App Row” at the top of the SmartCast screen.

Find the Peacock App

Look for the Peacock app among the available apps. If you don’t see it, you can access the “WatchFree+” app store on SmartCast to search for and download the Peacock app.

Install the Peacock App

Once you locate the Peacock app, select it and follow the on-screen prompts to download and install it on your Vizio TV.

Launch Peacock

After installation, go back to the SmartCast Home screen and select the Peacock app to launch it.

Sign In or Sign Up

If you have a Peacock account, sign in. You may need to sign up and create an account if you still need to.

Start Streaming

Once signed in, you can browse and select content from the Peacock library to start streaming on your Vizio TV.

If you ever faced problems following this method, please move forward to look at the last and third. This is helpful even if you cannot access smart casting on your device. 

Watching Peacock On Vizio Smart TV via Mobile or External Streaming

If you do not have access to smart casting on your device, you can always go back to this method of external casting. It is explained in detail further.

Casting from Mobile Device

If your Vizio TV supports casting, open the Peacock app on your mobile device, tap the casting icon, and select your Vizio TV from the list.

External Streaming Device

If you have a streaming device (Roku, Amazon Fire Stick, Apple TV), connect it to your Vizio TV, download the Peacock app on the streaming device, and access Peacock content.

Please note that the steps and features can vary as per the specific model and software version of your Vizio TV, so it’s always a good idea to refer to the user manual or the Vizio support website for model-specific instructions.

Recommended Reading – TCL Roku TV Black Screen (Don’t Panic, Easy Fix!)

Helpful Answers

Helpful Answers

Is Peacock a helpful application for streaming content online?

Yes, Peacock is a streaming service that offers a variety of content, making it useful for streaming entertainment. It provides a range of TV shows, movies, news, sports, and original programming. Peacock’s content library includes a mix of classic plays, current seasons of the NBC series, and a selection of movies. It also offers exclusive original content you can’t find on other platforms.

Peacock has a free tier, which includes a limited content selection with advertisements, and a premium tier (Peacock Premium), which offers a more extensive library, including additional shows, movies, and exclusive originals.

Why is Smart Casting not working for my Vizio Smart TV model? What could be the possible solutions for the same?

The ability to cast or mirror content from a mobile device to a TV depends on both the TV and the mobile device’s capabilities. If casting is not possible for watching Peacock on some Vizio TV devices, there could be several reasons for this:

  • Compatibility Issues: Some Vizio TVs may not support casting or may have limited compatibility with certain apps. If the TV model is older or does not have the necessary hardware and software specifications, casting might not be available.
  • App Restrictions: The Peacock app itself may have restrictions on casting. Content providers sometimes implement rules on specific devices to protect their content or due to licensing agreements. Check the Peacock app settings or support documentation for information on casting capabilities.=

Suppose you are experiencing difficulties with casting Peacock on your Vizio TV. In that case, it’s recommended to check your TV’s user manual, visit the Vizio support website, and review the Peacock app’s support resources. Additionally, contacting customer support for both Vizio and Peacock can provide specific guidance tailored to your situation.

How do I install the Peacock application on my Vizio Smart TV to stream content online?

The steps for the same may change according to the varying TV models. However, there is a basic set of rules you need. These steps are mentioned below. 

  • Make sure your Vizio TV is connected to the internet. You can do this through the TV’s settings menu.
  • Using your Vizio remote, press the “V” button to open the SmartCast Home screen.
  • Use the arrow keys on your remote control to navigate to the “App Row” at the top of the SmartCast screen.
  • Scroll through the available apps to find the Peacock app. You might need to access the app store on your Vizio TV if it still needs to be pre-installed.
  • From the App Row, you might find an option like “WatchFree+,” which is Vizio’s app store. Enter the app store and look for the Peacock app.
  • Once you locate the Peacock app, please select it and now follow the on-screen instructions visible on the screen to download and install it.
  • After installation, return to the SmartCast Home screen and find the Peacock app. Select it to launch the app.
  • If you have a Peacock account, sign in. You may need to sign up and create an account if you still need to.
  • Once signed in, you can browse and select content from the Peacock library to start streaming on your Vizio TV.

Where do I refer to if I want to solve any Peacock application regarding a query?

If you’re experiencing issues with the Peacock application and need assistance, there are a few resources you can refer to for support:

  • The official Peacock Help Center on the Peacock website is a good starting point for troubleshooting and finding answers to common questions. You can visit the Peacock Help Center at help.peacocktv.com.
  • Check the Vizio support resources if the issue concerns the Peacock app on your Vizio TV. Visit the official Vizio support website, and you can find FAQs, user manuals, and contact information for customer support.
  • Some streaming services have community forums where users discuss issues and solutions. You can check if Peacock has an official community forum where you might find information or get help from other users.

Recommended Reading – How to Get Twitter on Roku TV (Just Do This ONE THING)

Wrapping Up

OTT platforms crashing or any other issue may make your day irritating. But it is these small challenges and how we react to them that define our very fighting spirit.

This guide is for the same purpose: to help you resolve the issue of OTT platforms via the introduction of Peacock. The article has several easy-peasy solutions that do not require you to be an expert.

It has all the steps to do so from the beginning to the end, and you will benefit immensely!

I hope this article was of help! Thank you for reading it till the end!

How to Activate Crave TV on Roku: 2024

0

To activate Crave TV on your Roku device, visit crave.ca/roku to obtain a unique activation code. Make sure you have your account details ready and remember, it’s always possible to refresh your activation code or restart your device if you encounter hitches.

How To Activate Crave Tv On Roku

Next, you’ll need to locate Crave in Roku’s Channel Store, you can scroll through or utilize the search function to find it. Highlight Crave and press ‘OK’, then select ‘Add Channel‘ to install. After installation, Crave should appear on your home screen. If issues persist, you know you can always rely on the dedicated support from both Crave and Roku.

Stick with me, there are insightful details just around the corner to enable this process go even smoother.

Also Read – How to Access Prism TV on Roku

Understanding Crave Streaming Service

Often promoted as Canada’s response to Netflix, Crave is a subscription-based streaming service that offers a vast selection of high-quality TV shows and movies, including popular series like Star Trek: Picard and the Handmaid’s Tale.

As you investigate the content, you’ll observe that the platform is structured to cater to a wide variety of tastes and preferences. But what if you encounter issues while streaming? Don’t worry, troubleshooting on Crave is relatively straightforward. User-friendly features and a robust support system guarantee a smooth viewing experience.

From common playback issues to account-related problems, the platform provides comprehensive assistance. In contrast to other streaming services, Crave’s customer-centric approach is refreshing, making it an appealing choice for viewers seeking a reliable streaming service.

Activating Crave on Roku Device

To activate Crave on your Roku device, you’ll first need to obtain a unique activation code from the Crave website. This can be found at crave.ca/roku. Once you get this code, you can enter it into the appropriate field on your Roku device.

While you’re exploring Crave’s content offerings, you might come across some troubleshooting activation issues. Don’t worry, most issues can be solved by refreshing your activation code or restarting your Roku device. Here are some common questions and solutions:

IssuesSolutionsTips
Can’t find activation codeRefresh Crave websiteCheck internet connection
Code not workingRestart Roku deviceBe patient, it may take time
Can’t access Crave contentCheck subscriptionEnjoy free trial first
App not launchingUpdate Roku deviceKeep device updated
Activation unsuccessfulContact Crave supportKeep your account details ready

Also Read – How to Access Golf Channel on Roku

Locating Crave in Rokus Channel Store

Once you’ve obtained your activation code, you’ll need to locate Crave in the Roku’s Channel Store to proceed with the activation process. Now, let’s discuss investigating features and troubleshooting playback errors.

Investigating Features

Start by launching your Roku device. Use the remote to navigate to the Channel Store. It’s a wealth of entertainment, filled with a variety of channels and features to investigate.

Locating Crave

Scroll through the list or use the search function to find Crave. Take a moment to appreciate the simplicity of Roku’s user-friendly interface.

Troubleshooting Playback Errors

Sometimes, you may encounter playback errors. Don’t panic! A simple system restart or checking your internet connection usually solves it.

Further Assistance

If issues persist, Roku’s support site offers comprehensive guides for problem-solving.

Adding Crave Channel on Roku

Having located Crave in the Channel Store of your Roku device, you’re now ready to add this exciting channel to your lineup. Your Roku setup will influence your streaming options, but adding Crave is a straightforward process.

From the Channel Store, highlight Crave and press ‘OK’ on your Roku remote. Select ‘Add Channel‘ and Crave will be installed on your Roku device. After the installation, Crave will appear on your home screen.

Also Read – How to Watch Big Bang Theory on Roku

Crave Subscription Methods

If you’re eager to discover the world of Crave, there are several subscription methods available at your disposal. The crave account setup is user-friendly, and in case you encounter any hiccups, there are plenty of troubleshooting tips to help you out.

  1. Direct Subscription: You can subscribe directly on the Crave website. This is a straightforward method, ideal for those who want a quick setup.
  2. TV Provider Subscription: If you’re subscribed to a participating TV provider, you can add Crave to your package.
  3. Roku Device Subscription: By downloading the Crave app on your Roku device, you can subscribe directly from there.
  4. Other Platforms: Crave is also available on other platforms like Apple TV, Amazon Fire TV, and more.

Choose the method that suits your preferences the best.

Initiating Free Trial on Crave

Starting a free trial on Crave is a breeze and a golden opportunity to test the waters before diving into a full subscription. You’ll appreciate the free trial benefits, which include unrestricted access to the wide range of Crave TV features.

You can binge-watch popular series, enjoy exclusive content, and even stream live events. You’re not just getting a sneak peek, but a full-blown experience of Crave’s offerings.

This trial period isn’t just about enjoyment, it’s also a strategic move. It allows you to assess the platform’s value based on your viewing habits. You’ll be able to gauge whether the service is worth the investment or if it’s time to check out other options.

Also Read – How to Access LES MILLS On Demand on Roku

Subscribing to Crave via TV Provider

While enjoying your free trial on Crave, you might find that this streaming service fits your viewing habits perfectly, and you’re ready to upgrade to a full subscription. Subscribing through a TV provider can offer notable benefits.

  1. Ease of Payment: Your Crave subscription gets bundled with your regular TV bill, making payments hassle-free.
  2. Access to Additional Content: Certain TV providers offer additional Crave TV features as part of their package.
  3. Uninterrupted Streaming: With a stable subscription via your TV provider, experience uninterrupted streaming of your favorite shows.
  4. Potential Discounts: Some TV providers might offer Crave at a discounted rate as part of their bundle.

Activating Crave Through Roku Device

Once you’ve confirmed your Crave subscription, you can easily activate the service on your Roku device, expanding your streaming possibilities.

The first step is to verify Roku compatibility. Most recent Roku models will support the Crave app. Navigate to the Roku Channel Store and search for ‘Crave’. After locating the app, add it to your channel list and open it. You’ll be presented with an activation code.

Head over to crave.ca/roku on a web browser, log in to your account, and enter the code. If you encounter any issues during this process, some general troubleshooting tips include checking your internet connection, ensuring your Roku software is up-to-date, and restarting your device.

Enjoy the expanded content Crave brings to your Roku experience!

Conclusion

Crave’s engaging content is now conveniently accessible on your Roku device. This comprehensive guide has illuminated the steps from subscription to activation, making the process practically painless.

Whether you’re a streaming novice or a seasoned viewer, Crave on Roku provides an unparalleled entertainment experience. So, sit back, subscribe, and start streaming some of the best shows on Crave.

Enjoy your exciting exploration into Crave’s extensive entertainment ecosystem!

How to Access RFD TV on Roku: 2024

0

To access RFD TV on your Roku, start by going to the Roku Channel Store. You can navigate there directly from your Roku-Connected TV or via the web or mobile app on Android or iOS devices. Search for ‘RFD TV’, and click ‘Addf Channel‘. Make sure your Roku device has the latest software version for a smooth process. Channel activation should occur automatically upon app launch. If you’re facing glitches, try troubleshooting by reinstalling the app or checking your internet connection. Stay tuned for more tips on getting the most from your Roku experience.

How To Access Rfd Tv On Roku

Guide to Access RFD TV on Roku

Starting the process to access RFD TV on your Roku device is simple and doesn’t require any activation code. You just need to install the app from the Roku Channel Store and launch it on your TV.

If you encounter any issues, don’t worry. There are troubleshooting tips you can follow to resolve most common problems. In case the app isn’t working properly, try uninstalling and reinstalling it. This usually solves most glitches.

The key step is the channel activation, which happens automatically once you launch the app. For the smooth functioning of the app, make sure your Roku device is updated to the latest software version.

Also Read – How to Activate Crave TV on Roku

Adding RFD TV on Roku-Connected TV

Once you’ve verified you have a stable internet connection and your Roku device is updated, you’re ready to add the RFD TV channel to your Roku-connected TV. Navigate to the Roku home screen and select ‘Streaming Channels’ to open the Channel Store.

Now, enter ‘RFD TV’ in the search bar. Once located, click ‘Add Channel‘ to install. It’s that simple! However, if you face issues, here are some troubleshooting tips. Check your streaming quality and internet speed. Poor quality can be due to slow internet. Also, make sure your Roku software is up-to-date. Rebooting your Roku device can also resolve minor glitches.

Now, enjoy unlimited access to the RFD TV channel on your Roku device.

Installing RFD TV App From the Web

If you’re frequently on the move, you can also install the RFD TV app on your Roku device using the web. The web installation process is straightforward and convenient. Begin by signing into your Roku account on their website. Navigate to the Channel Store and input ‘RFD TV’ in the search bar. Once you’ve located the RFD TV app, click on ‘Add Channel’ to initiate the download.

After the installation process, it may take up to 24 hours for the app to appear on your Roku device. So, don’t fret if you don’t see it immediately. If you’re still not seeing the app after this period, follow troubleshooting tips such as checking your internet connection or restarting your Roku device.

Also Read – How to Access Prism TV on Roku

Roku Account Sign-In Procedure

Before you can add the RFD TV app via the web, you’ll need to successfully log in to your Roku account. Getting through this process may seem challenging, but don’t worry; we’ve got you covered.

Here’s your step-by-step guide:

  • Go to the Roku website and click on ‘Sign In’.
  • Enter your email address and password linked to your Roku account.
  • If you experience any difficulties, keep in mind, troubleshooting Roku activation is readily available.
  • Once logged in, you’re ready to check out the RFD TV programming schedule.

Adding RFD TV App Via Mobile

To add the RFD TV app to your Roku devices using a mobile, you’ll first need to download and launch the Roku mobile app on your Android or iOS device. After successfully launching the app, navigate to the Channel Store. Here, you can either browse through the available channels or use the search function to find the RFD TV app.

Once you’ve located it, tap on the app icon and select ‘Add’. The mobile app installation will take a few moments to complete. If you encounter any issues during this process, there are troubleshooting tips available within the app to assist you.

After installation, the RFD TV app will be accessible on all Roku devices linked to your account.

Also Read – How to Access Golf Channel on Roku

Using Roku Mobile App for Installation

Using the Roku mobile app for installation, you’re able to quickly and conveniently add the RFD TV app to all your linked Roku devices. This process is simple and requires just a few steps.

Here are some points to guide you:

  • Download the Roku app on your mobile device and log in to your account.
  • Tap on ‘Channel Store’ and use the search bar to find ‘RFD TV’.
  • Click ‘Add Channel’ to install the app on all your devices.
  • Wait for the installation process to complete before you can start streaming.

Related Post Suggestions

For further guidance on Roku or related services, you might find the following posts helpful. These posts offer a wealth of information, from Roku troubleshooting tips to the RFD TV programming schedule.

If you’re facing issues with your Roku device, a post on ‘Roku Troubleshooting Tips’ could be your savior. It provides solutions for common problems like buffering, remote issues, and more.

Alternatively, if you’re interested in what’s airing on RFD TV, you’ll appreciate a post detailing the ‘RFD TV Programming Schedule’. This post offers a comprehensive guide to the shows and events to look forward to.

Also Read – How to Watch Big Bang Theory on Roku

Comment Section Guidelines

While we’re on the topic of utilizing Roku and RFD TV to their full potential, let’s also consider the guidelines for participating in the comment section of this platform.

To guarantee a positive user engagement experience, there’s a system of comment moderation in place. Here are some key points to keep in mind:

  • Always show respect to other participants. Avoid hate speech, offensive language, or personal attacks.
  • Stay on-point. Make sure your comments are relevant to the content discussed.
  • Don’t flood. Repeated, irrelevant messages can lead to your account being blocked.
  • Be mindful that all comments are subject to moderation before being posted.

Conclusion

There you have it, folks! You’re now equipped with the know-how to access RFD TV on your Roku, opening up a world of rural and agricultural entertainment at your fingertips.

Isn’t it wonderful how technology brings us closer to our interests? So, go ahead, seize the opportunity, and immerse yourself in the diverse world of RFD TV.

Happy viewing, and remember, every new channel is a new adventure waiting to unfold.

How to Activate OTC Network Credit Card: 2024

0

To activate your OTC Network Card, you’ll need to have your card with you for precise verification. Make sure you have a stable internet connection and access the card activation page using a supported browser. Input your card number, expiration date, and security code accurately.

How To Activate Otc Network Credit Card

Double-check the information to avoid any activation issues. Once that’s done, you can install the OTC Network app on your Android or iOS device to manage your card and track your spending. It’s all pretty straightforward if you’re careful. No doubt, further exploration of this topic will reveal additional insights.

Getting Your OTC Network Card Ready

Before you can activate your OTC Network Card, make sure you have the card in hand for accurate verification. This initial step is critical to avoid card activation troubleshooting later on.

The OTC Network card benefits are vast, offering you a flexible and convenient way to make eligible purchases. It’s essential to understand that precise verification of the card details improves the efficiency of the activation process.

This attention to detail not only expedites the procedure but also minimizes the chances of errors occurring, which can lead to unnecessary delays. If you encounter any issues during the activation, don’t hesitate to reach out to customer service.

Also Read – How to Activate Crave TV on Roku

Accessing the Card Activation Page

Heading to the card activation page is your next step in unlocking the potential of your OTC Network Card. This process is quite straightforward. However, be vigilant as activation issues might occur. Here are some pointers to guide you:

  • Make sure you’re connected to a stable internet connection.
  • Use a supported browser for the best experience.
  • Clear cache or cookies if the page fails to load.
  • Try refreshing the page or restarting your device if issues persist.

If you’re activating multiple OTC Network cards, the process remains the same. Just repeat the steps for each card. Remember, troubleshooting activation issues promptly helps you get the most out of your OTC Network Cards without any hassle.

Entering Card Details for Activation

Once you’ve successfully accessed the activation page, it’s time to input the details of your OTC Network card for activation. You’ll need to key in your card number, expiration date, and the three-digit security code located on the back. It’s crucial to enter these details accurately to prevent troubleshooting activation issues.

If you’re activating multiple OTC Network cards, repeat the process for each card. Make sure you’re entering the correct details for the specific card you’re working on to avoid confusion. In case of any errors or issues, double-check the information you’ve entered. Incorrect card details are a common cause of activation issues.

Also Read – How to Access Prism TV on Roku

Adding OTC Network App on Android

To add the OTC Network app on your Android device, you first need to access the Google Play Store. Once there, search for ‘OTC Network’ in the search bar. The app should appear in the search results. Before proceeding to install the app, it’s important to understand some of its features and how to troubleshoot, if necessary.

  • App Features:

The app allows you to manage your OTC Network card, view balance, and track spending.

  • App Troubleshooting:

If you encounter issues, try:

  • Clearing the app’s cache.
  • Reinstalling the app.
  • Check for app updates.
  • Restart your device.
  • Contact customer support.

Installing OTC Network App on Ios

If you’re using an iOS device, installing the OTC Network app is a straightforward process that begins with visiting the App Store. Locate the app by entering ‘OTC Network’ into the search bar. Once found, tap ‘Get’ to initiate the download. In case of any issues, troubleshooting app installation can address common problems. After successful installation, log in using your credentials.

The app’s features and benefits are plentiful. It allows easy management of your OTC Network card, offers real-time balance information, and enables swift transactions. Additionally, the app’s user-friendly interface guarantees a seamless experience. It’s worth noting that the app requires iOS 9.0 or later, so ensure your device’s operating system is up to date.

Also Read – How to Access Golf Channel on Roku

Exploring Other Activation Guides

While mastering the use of the OTC Network app on your devices is a key step, it’s also beneficial to familiarize yourself with activation procedures for other platforms and services.

  • App Troubleshooting: Whether it’s an issue with the OTC Network app or another service, understanding how to troubleshoot will save you time and frustration. Look for guides that explain common issues and their solutions.
  • Card Replacement: If your OTC Network card is lost or stolen, knowing how to replace it quickly and securely is essential.
  • Discover Credit Card Activation: Discover offers a straightforward activation process that’s worth studying.
  • Activating NBC Sports Channel: Learn how to enable this channel on various devices.
  • DisneyNow.com Activation: This guide will walk you through activating DisneyNow on Roku, iOS, or Android.

Registering Walmart MoneyCard

Registering your Walmart MoneyCard is a simple process that allows you to start enjoying the benefits and conveniences of this prepaid debit card. This card is a practical tool for managing funds, offering you the ability to monitor your expenses, and control your budget effectively.

The registration process is straightforward. You’ll need to provide some basic information such as your name, address, and social security number. Once registered, you can use the card for purchases anywhere Visa or Mastercard is accepted.

One of the significant benefits of the Walmart MoneyCard is the opportunity to earn cashback rewards. You get rewarded for shopping at Walmart, both online and in-store. These rewards can really add up, providing an excellent incentive for regular use of the card.

Also Read – How to Watch Big Bang Theory on Roku

Engaging Through Comments

Ever wondered how to make your voice heard on our platform? Engaging through comments is an essential way to share your thoughts and experiences. Comment interaction is a crucial part of our community, and we encourage you to participate.

Here are a few engagement strategies to keep in mind:

  • Be respectful and considerate of others’ opinions.
  • Stay on topic to maintain the discussion’s relevance.
  • Provide constructive feedback to enrich the conversation.
  • Ask questions to clarify any confusion about the topic.
  • Respond to other comments to foster a sense of community.

Conclusion

And there you have it! You’ve successfully navigated the maze of card activation, emerging victorious.

With your OTC Network Card ready, and the app at your fingertips, you’re now a seasoned adventurer in the vast world of financial convenience.

Don’t forget to dive into our other guides, and share your journey in the comments. The path to financial ease isn’t a solitary one, we’re with you every step of the way.

Happy spending!