Home Blog Page 2

Roku TV Won’t Turn On (60 Second Fix): March 2024

0

Roku Tv Won't Turn On

Wondering: Why won’t my Roku TV turn on? Look no further, you’ve found the right page. This article details everything you need to know about this and more. Read through the end-to-end your problem by yourself today!

Nothing is worse than sitting down on a Sunday with a fresh bowl of popcorn to watch the movie you’ve flagged for a whole week and then your TV not starting at all! This is exactly what happened to me a while ago and let me tell you, it frustrated me beyond words! 

The good thing is I researched and tried out almost all methods of fixing this issue available online. This is why I can help you out with this comprehensive guide so you don’t suffer as much as I did!

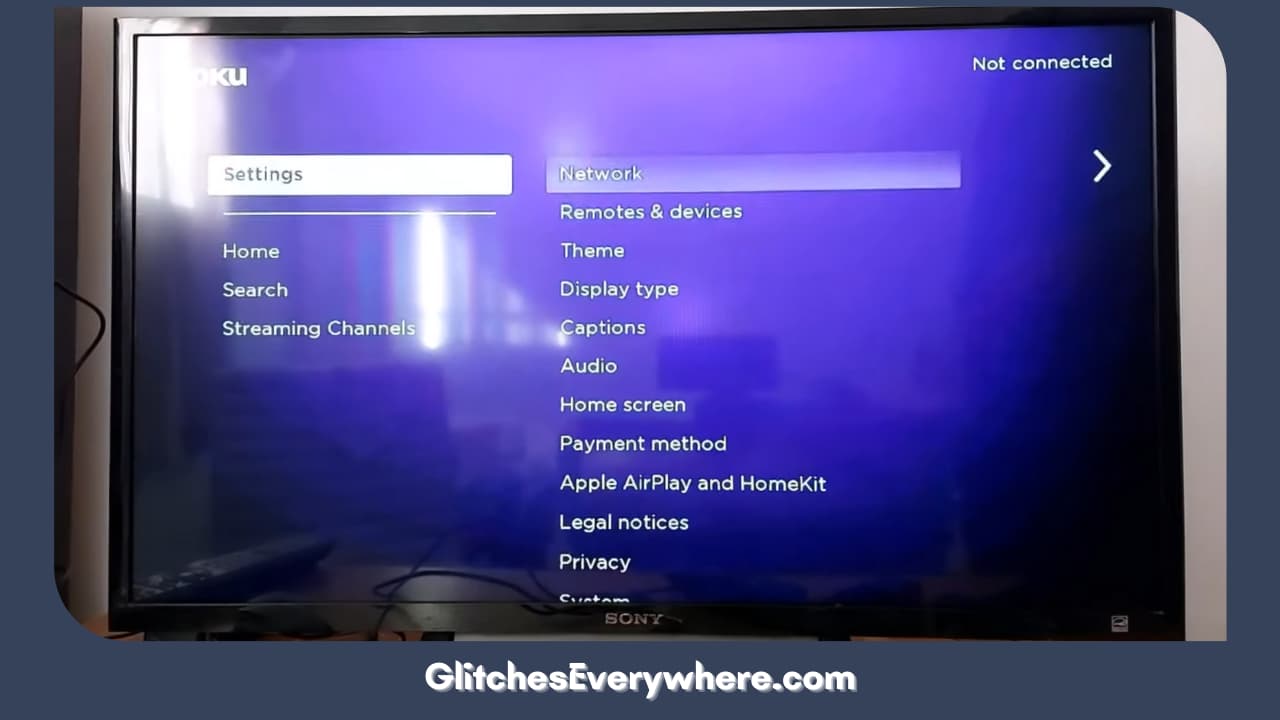
Begin by first checking if all the cables and wires are in good condition and properly connected on both ends. Then try power-cycling your device. Reset your Roku remote and then change the batteries if needed. Check for internal hardware damage. If nothing helps, try factory resetting your device before contacting Roku Support if nothing helps.

Now, how do you power cycle your device? What does resetting your remote mean? How do I factory reset my device? So many questions! But lucky for you, we’ve got all the answers. If your Roku TV won’t turn on, sit back and read this article to guide you through fixing it by yourself!

If you try every single one of these methods in a chronological order, I am pretty sure, one of them will work for you.

Recommended Reading – Do Vizio TVs Have Bluetooth? (+ Hack to Connect Wirelessly)

Why Won’t my Roku TV Turn On

Why Won't My Roku Tv Turn On

Before we can get into the entire list of solutions and fixes for the issue of the day, let us begin by addressing the most important question; my Roku TV won’t turn on, why?

This problem can be a result of various causes. This is extremely important as the troubleshooting method that you’ll want to employ will depend on this cause. Here are common factors due to which your Roku TV won’t turn on:

  • Power Issue: Your Roku TV needs to be properly connected to its power source. Lose connections and worn-out wires can lead to this situation, it is one of the common culprits of the same. 
  • Remote Control Problems: If your Roku TV won’t turn on, maybe it’s the fault of your remote and not your TV. It could be because of weak or dead batteries or disconnected pairing.
  • A Power Surge or Electrical Issue: Sometimes an overflow of electricity can burn the connections or even the insides of your device. You can face permanent and sometimes irreversible damage in this case.
  • Software or Firmware Issues: Not being updated with the latest Roku software can also cause this situation.
  • Hardware Malfunctions: Physical damage to your Roku TV or a part of it can be responsible for the TV not starting.
  • Overheating Issues: If the device is heating up too much, it can be the reason why your TV isn’t turning on. There is a safety setting in most Roku devices that does so for obvious reasons.

Now that we have discussed why your Roku TV won’t turn on, we can move on to what we can do to fix it.

Recommended Reading – Netflix Not Working on Roku? (Here’s How To Fix It)

Roku TV Won’t Turn On: Solutions

Solutions

This section of the article holds tried, tested and true solutions for your ‘my Roku TV won’t turn on’ problem. These solutions range widely in complexity and frequency of their occurrence. 

If you have already been able to figure out the reason why your Roku TV won’t turn on, you can skip directly to the solutions that correspond to the same. If not, do not worry. Follow these steps as described and by the end, I am positive that you will have gotten rid of your Why won’t my Roku TV turn on headache for good!

So, without any delays, the following is a detailed solution guide with step-by-step instructions on various ways to troubleshoot when your Roku TV won’t turn on:

Verify Power Source
Power Cycle Your Tv

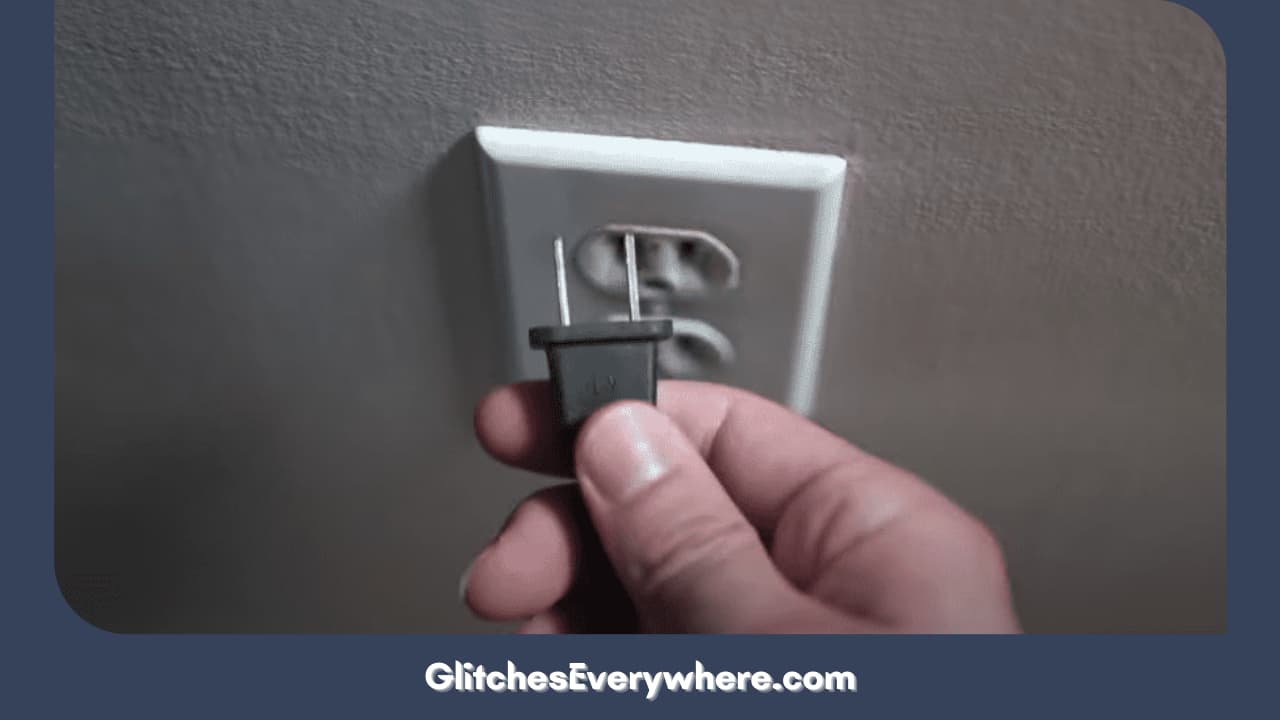
Roku won’t turn on? Let us begin with the simplest ones first. Your Roku TV, like any other appliance, needs power to run. So, our first step is to check if your device is properly connected and getting the required power. 

Check and verify if the power cord is properly connected to the outlet. Next, make sure that it is securely connected to the TV as well. While you are at it, check if the power cord is in proper condition, meaning it is not corroded or bit. 

In case, you use an extension cord or something similar for your device, remove that connection and try connecting the TV directly to the wall.

Double-check all Cable Connections
Double Check All Cable Connections

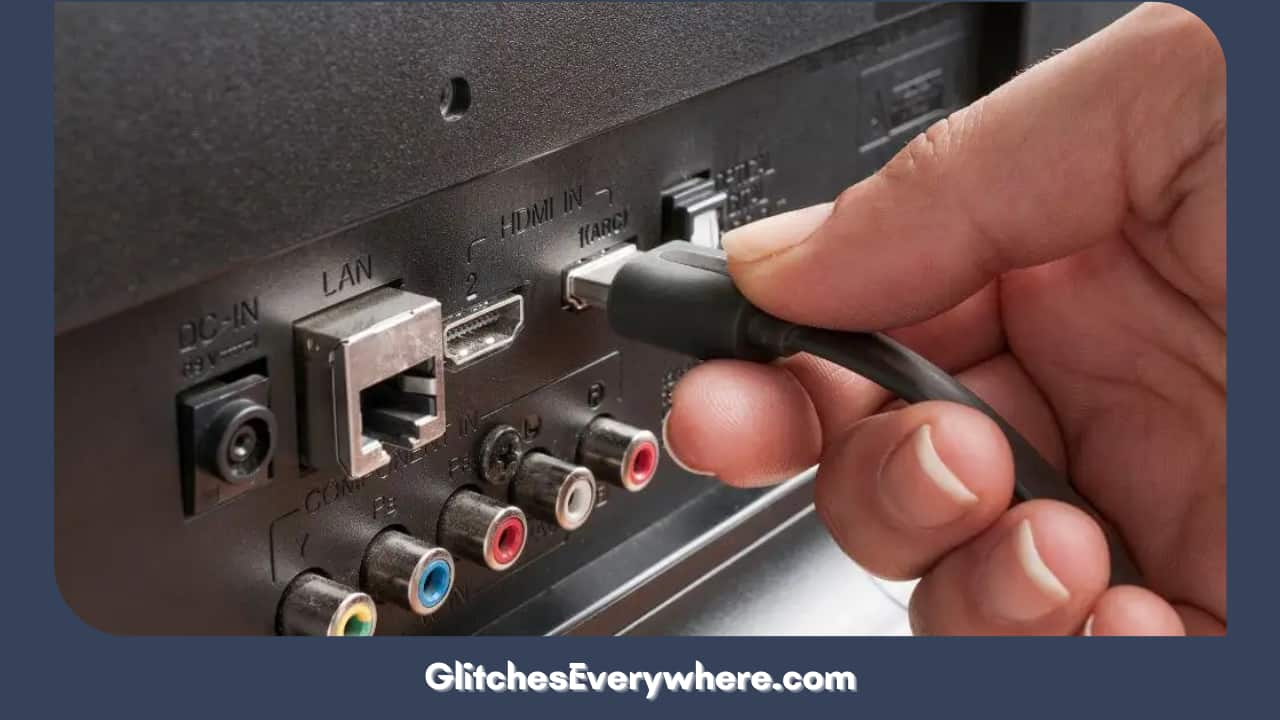
Let us take the previous solution one step forward. Your TV has a lot of cables connected to it. What you need to do now is carefully check if these wires are properly connected from all ends.

There can be multiple wires which is why people find it daunting to handle them. But in this case, you do not need to know the exact functions of these cables, just make sure that they are in good condition and properly plugged in.

This also holds true in the case of a Roku stick, so ensure that it is secured in place in the HDMI port of your television set.

Take this time to also clean up any dirt or dust that might have accumulated there. Over time, this can build up to a lot and then interfere with the power supply. That being said, be extremely careful while you touch these wires and cables with your bare hands.

Power-Cycle Your Device

Power Cycle Your Tv

Roku TV not turning on? Try power cycling it! Do not get scared by this technical term. It simply refers to the process of shutting off your device, unplugging it for a bit and then restarting it. I know it seems like a stretch and fruitless but there is a reason why this is encouraged during any technical issues that you might be facing. Can’t figure out why won’t my Roku TV turn on? It doesn’t matter in this step as it works in all cases!

Power-cycling your device gives it a quick internal cleanse without permanent loss of any important data. This fixes any small glitches or bugs and helps with many issues with one’s TV. Roku won’t turn on? Try this too!

Shut down Roku through the menu settings or your remote. Then proceed to unplug it completely from the power outlet. Wait for at least five minutes before plugging the power back in and restarting your device.

Roku won’t turn on even now? Don’t worry, we are just getting started! Continue reading.

Check Your Remote
Check Your Remote

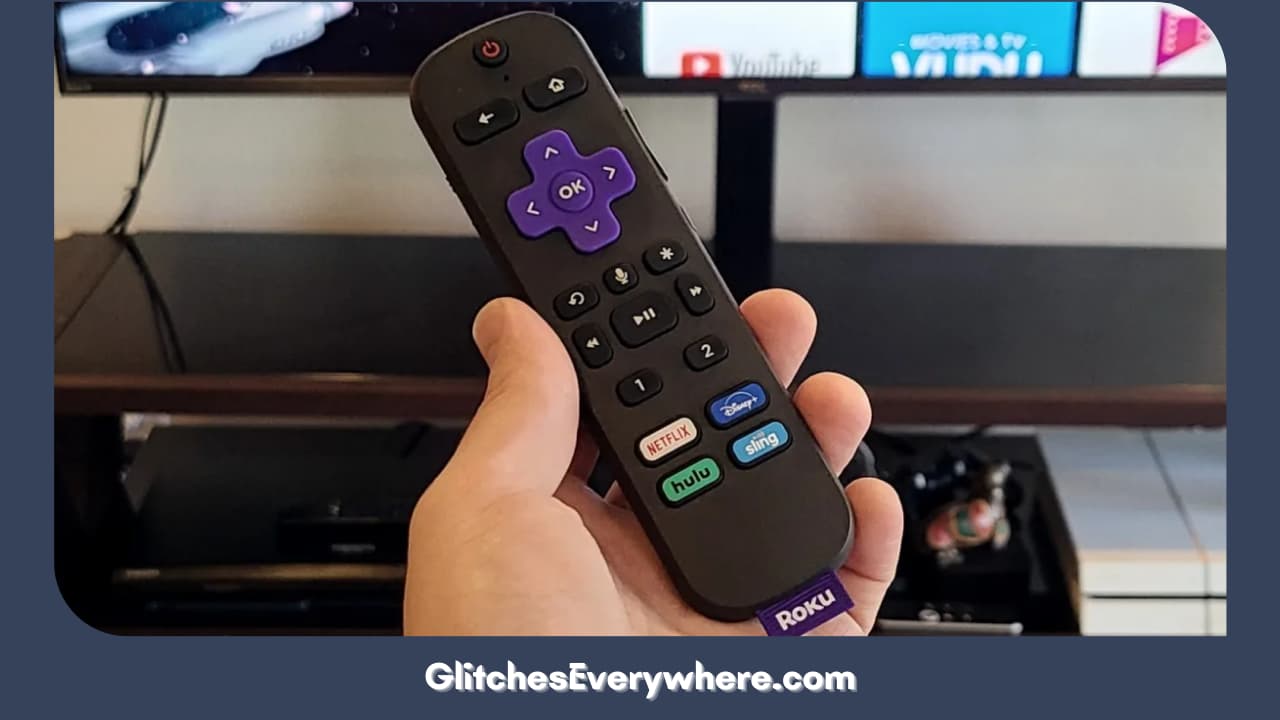
This solution takes us to the next category of solutions for your why won’t my Roku TV turn on problem, i.e. the remote fixes. First, let us confirm that you are using the right type of the remote. This is a common mishap that happens with users who use multiple Roku devices.

This will not apply to you if you have a universal remote that works on multiple devices. I personally recommend that you buy one if you are one of these people.

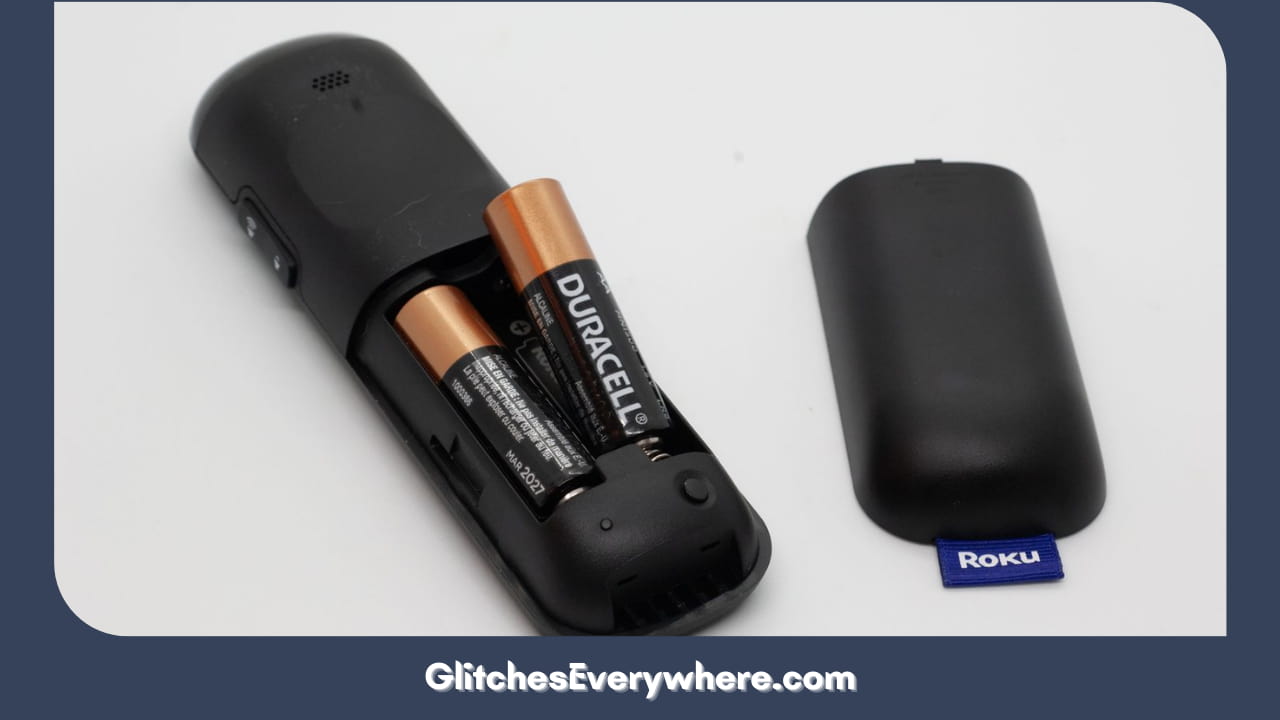
Check Batteries
Check Batteries

If you are using the right kind of remote, then let us move on to the next solution. My Roku TV won’t turn on or respond to my remote, what should I do?

The reason why your Roku TV won’t turn on might be a faulty remote and the most common issue with the remote is the battery. Check your remote’s batteries and if they are low or finished, replace them with fresh ones of the right kind and check if that is the answer to your Why won’t my Roku TV turn on dilemma. 

Here is a small sidenote, Ensure the polarity or the order of the inserted batteries is correct as it does make a difference.

Check the Remote Particulars
Check The Remote Particulars

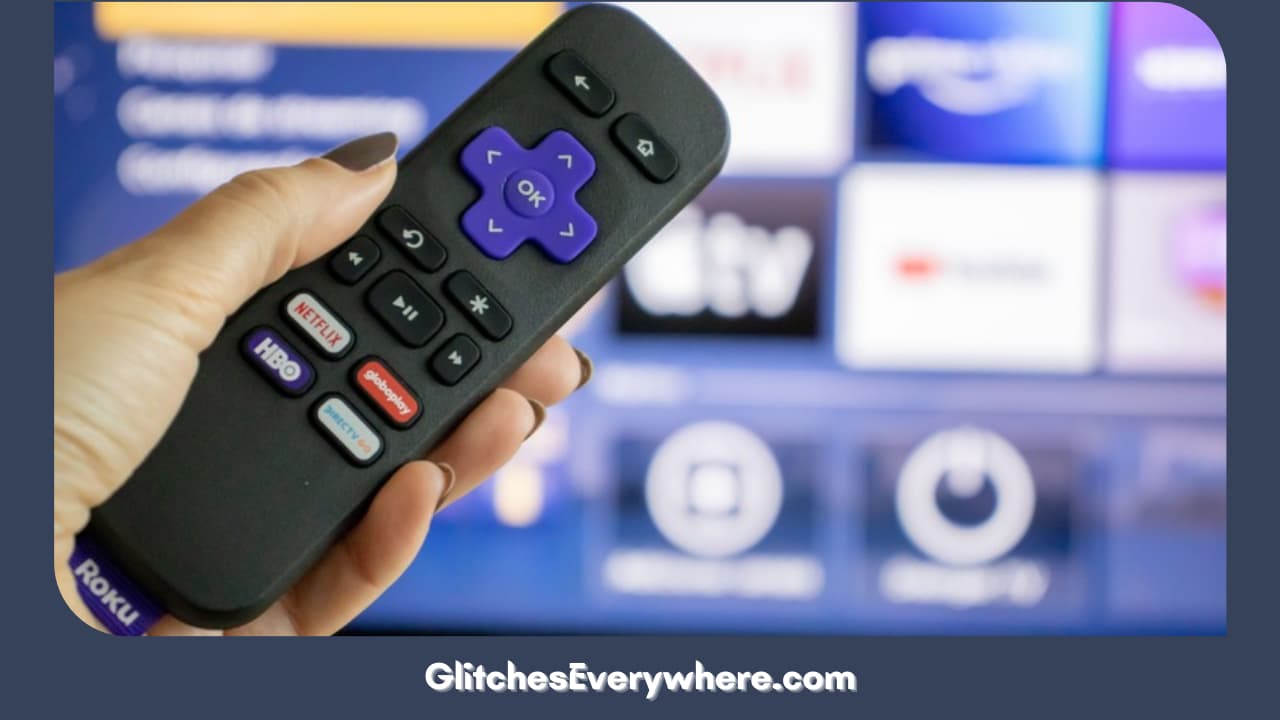
Wondering why won’t my Roku TV turn on? It could still be your remote. Other than batteries, there are still a lot of things that can mess with your remote and cause this issue.

The first one we are discussing is a line of sight between your remote and TV. Ensure that there are no hindrances or obstacles between them and that the remote is being directly pointed towards the TV. This will not apply to you if you use a Wi-fi controlled remote.

There is a chance that the power button alone is broken, so try using the physical button on the TV itself to check if it helps. Additionally, if you are using an IR or infrared connection remote, other such devices or the sunlight can also cause trouble.

Reset Your Remote
Reset Your Remote

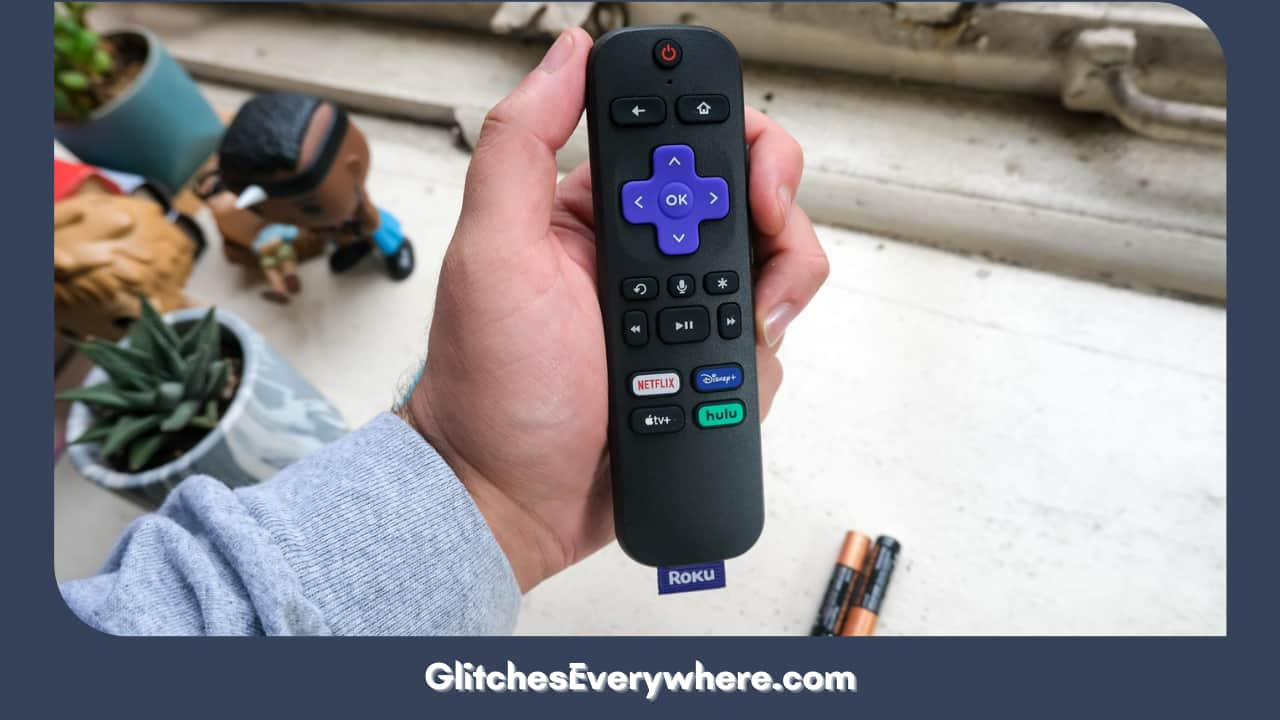
A couple of solutions before, we talked about how resetting your device could be a way to get rid of your Roku TV won’t turn on nightmare. Let us apply the same to your remote as well. Roku TV won’t turn on? Try this:

First of all, unplug your TV completely. Then take off the battery cover from the back of your remote and take out the batteries. Wait for about ten seconds and then put them back in the correct order. Put the cover back in and check if the TV is responding to the remote now.

Try the Roku Mobile App
Try The Roku Mobile App

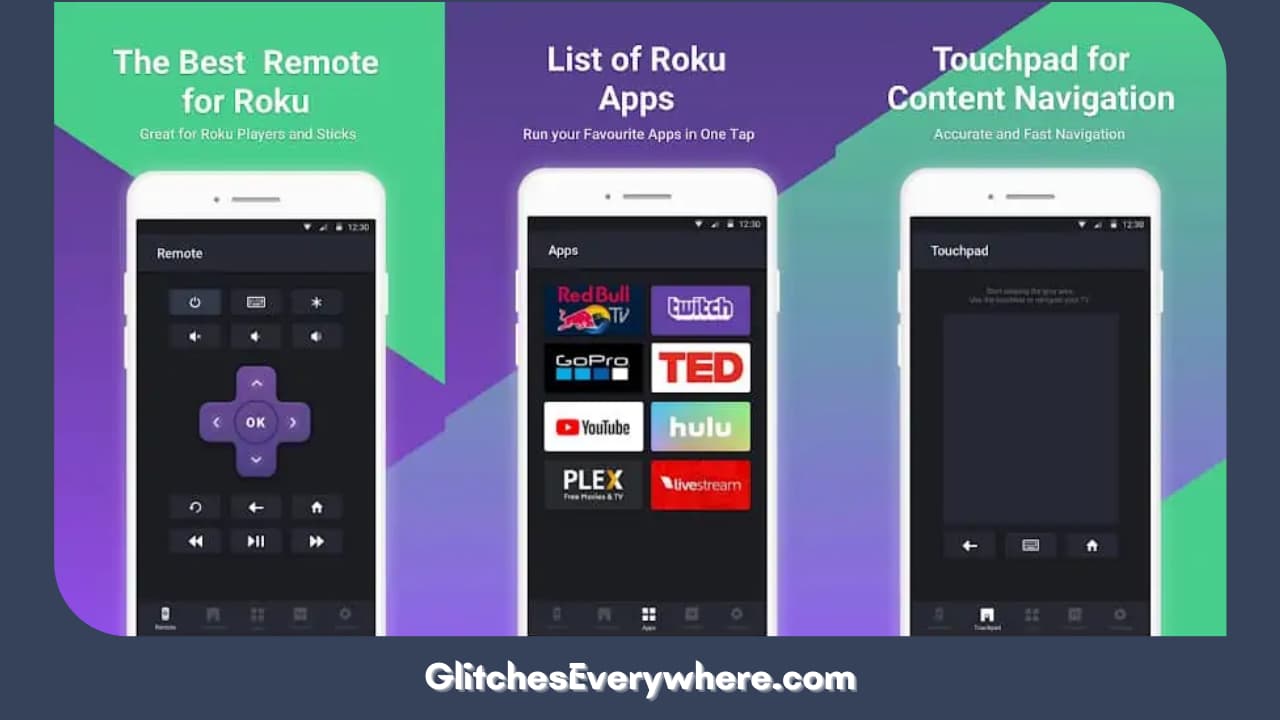
This step is for those who have already realized that their remote is the cause of their Roku TV not turning on. Now, you know your remote is the issue but you do not know how to fix it immediately and replacement always takes some time. So, what can one do?

Roku has an official mobile app that lets you turn your smartphone or tablet into a remote! You can download it easily through the Play Store or Apple Store. You’ll have to create or log into your Roku account.

Make sure that your Roku TV and device are connected to the same Wi-Fi connection and the app will detect your TV. Once paired, you can operate your TV through the remote option on the app!

Factory Reset Roku
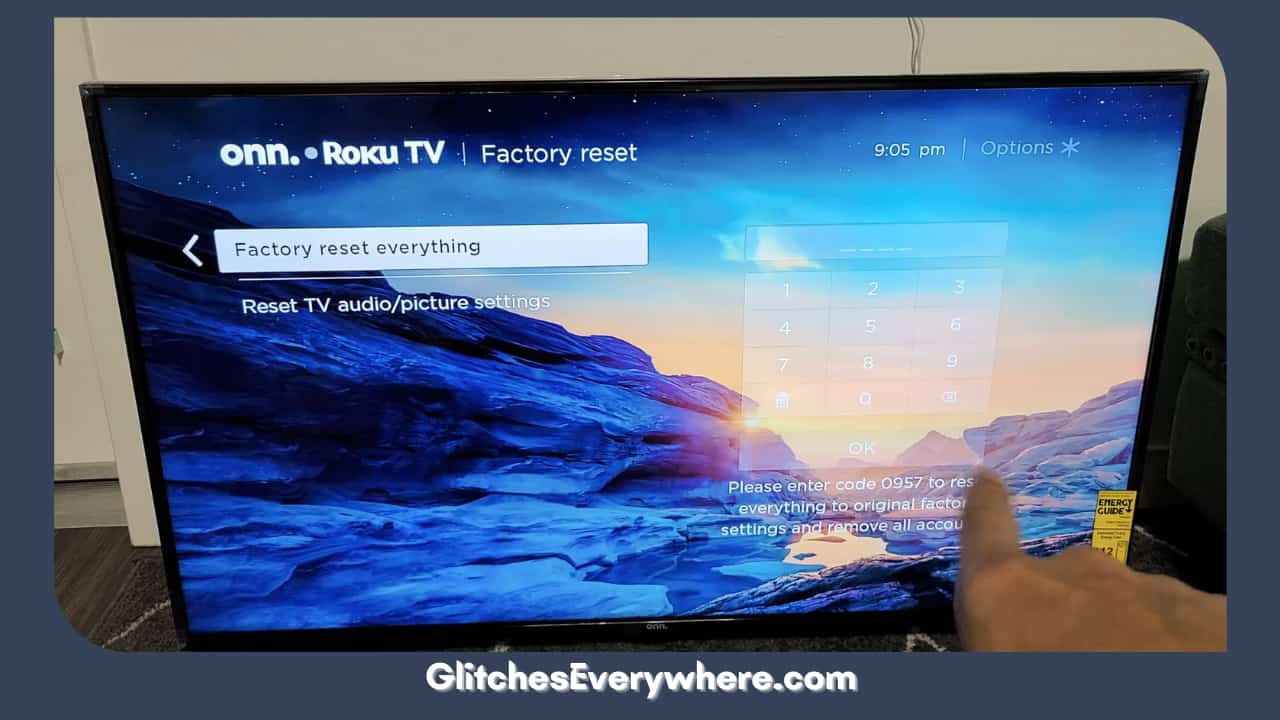
Finally, Select The Factory Reset Option (1)

Why won’t my Roku TV turn on despite all these steps? I know it can be frustrating but we are moving on to the more technical solutions, so do not lose heart and just read ahead.

Before we even go any further, I would like to state that you should keep the factory reset option as your last resort and nothing less. Allow me to expand on that.

Once you factory reset your device, all the data will be lost and the device will be swept clean. In other words, the device will go back to its factory or original settings. Now, you will lose all stored data on that particular device. You will also have to set up the device from the beginning as you did when you got it in the first place. This is why you need to make sure that this is your last option. 

There are many different ways that you can go about performing a factory reset on your device. Here is the most common one:

1. Go to the Home Screen of your Roku device.
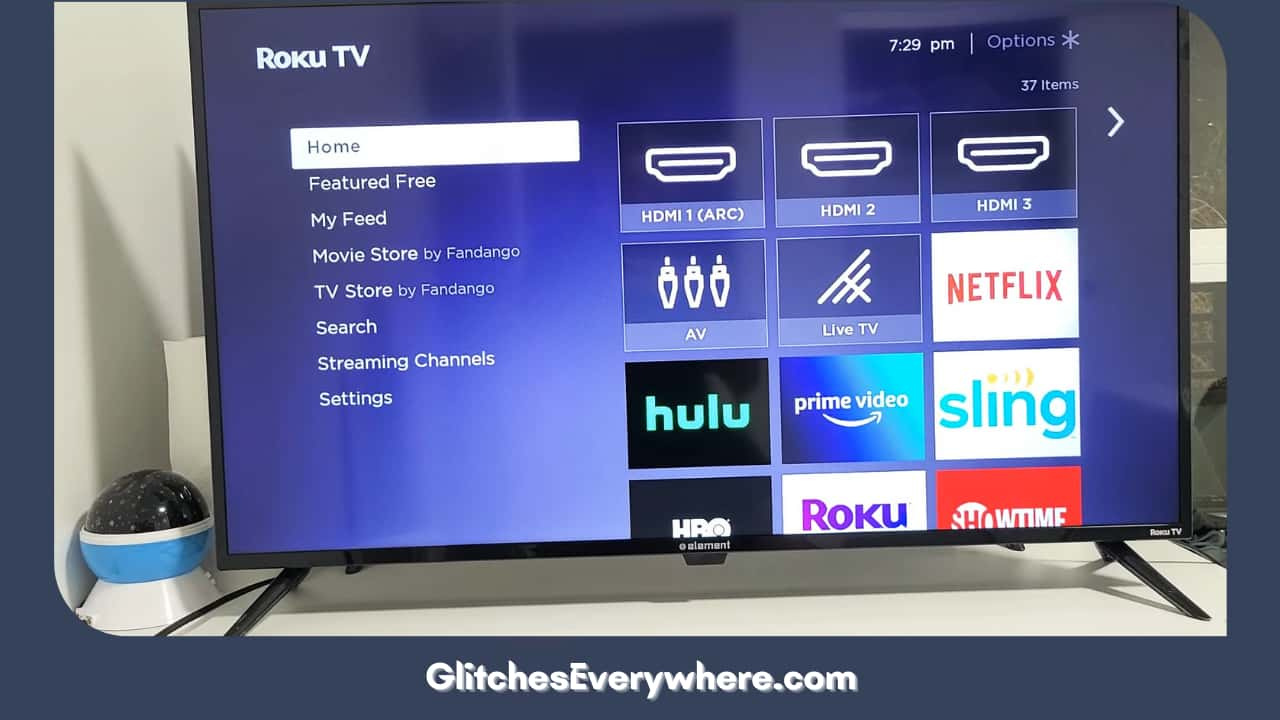
Press Home On Your Roku Remote

2. Next, go to the Settings menu.

Choose And Enter Your Settings Menu

3. Navigate the screen to find the System option and select it.
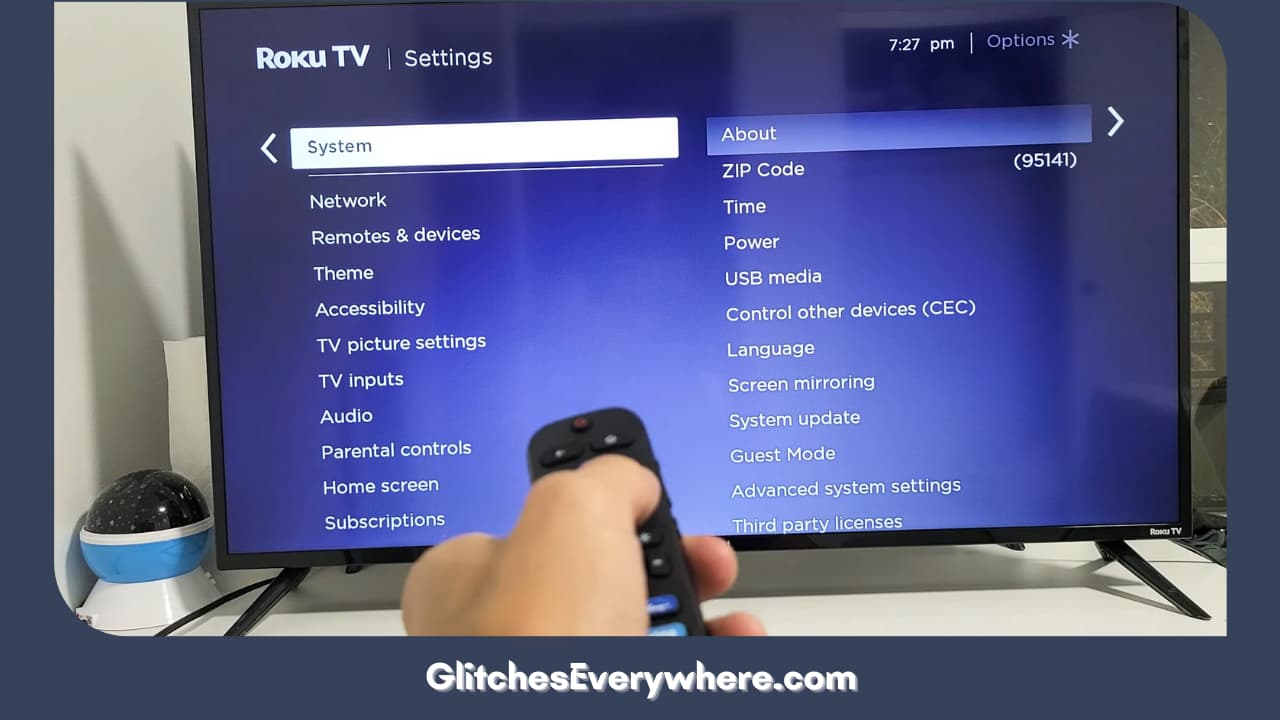
Find The System Option And Click On It

4. Now, move on to Advanced System Settings.
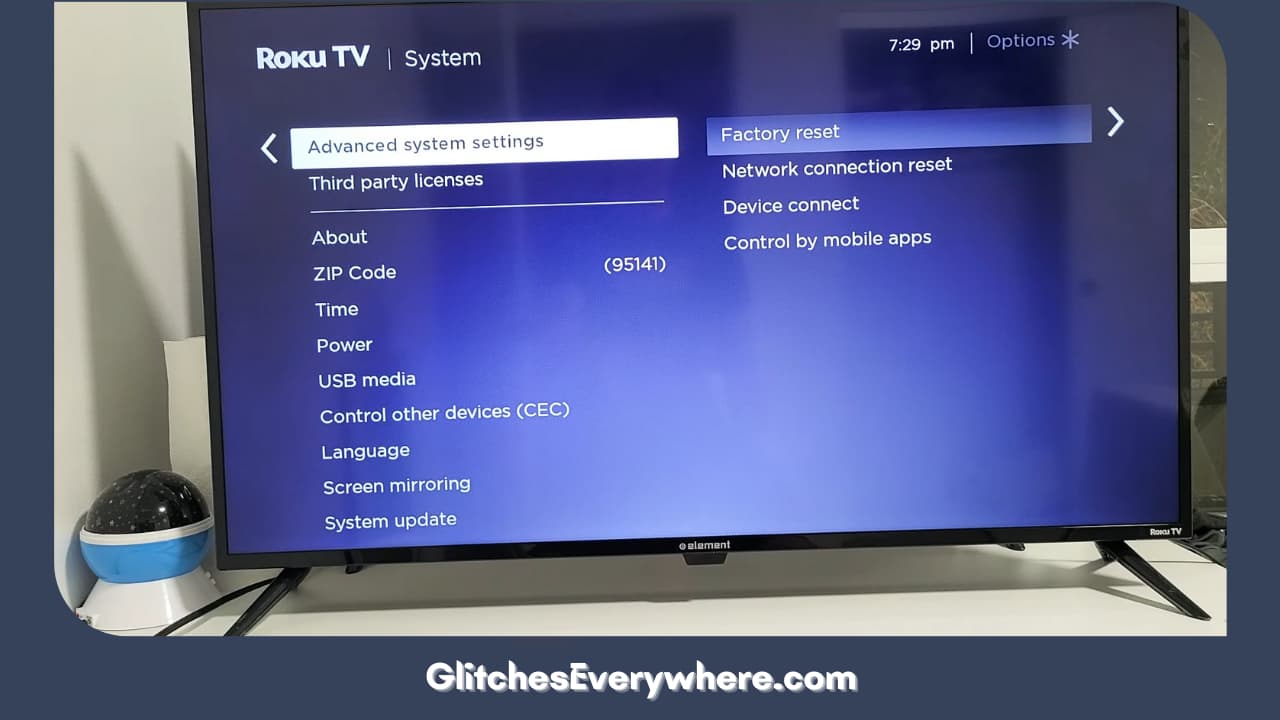
Move On To Advanced System Settings

5. Now, find the option of Factory Reset from there.
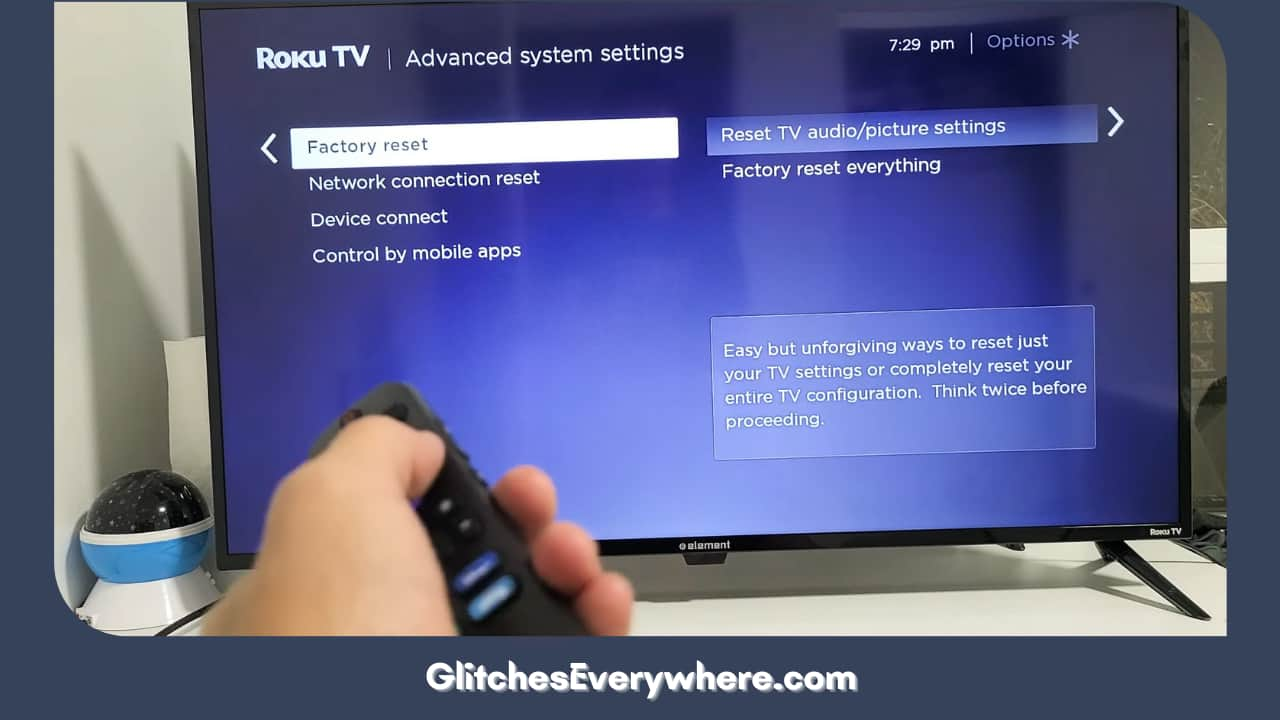
Find The Factory Reset Option And Click On It

6. Once you select it, it’ll ask you for a confirmation and pin, enter both accordingly.

Once you give in your confirmation, it’ll take a few minutes for the factory reset to happen and the device should restart!

If your Roku model has a restart button, locate it. It can be behind, at the front bottom or the side. It’s mostly embedded. So, use a paper clip or something to press and hold it down for about fifteen seconds. This will prompt the TV to reset on its own.

In case your model does not have a reset button, you can try out this easy remote button combo as an alternative. Press and hold down the mute and power buttons of your remote together. While they are held down, plug out the main cable from the socket and then plug it back in. Keep holding the buttons throughout the restarting process. When it restarts, it should have a factory reset, just like that! Check if your Roku TV won’t turn on or not now.

Broken TV Backlight

This is a very particular case but we are still covering it. My Roku TV won’t turn on even though the device is. Let me explain:

So you feel that your TV is turning on but there is just nothing being displayed on the screen? This might be it.

You should check if your device’s backlight is broken or not. This is an easy way to figure out if it is broken or not. Turn on your TV and shine your phone’s flashlight on it. If there is a faint picture visible, your backlight might be broken.

In this case, you’ll need to resolve the broken backlight or its power board

Check for Broken Internal Hardware

This is the issue least likely identifiable. It also happens to be the most complicated answer to your Why won’t my Roku TV turn on question. There can be a lot of cases of malfunctioning or broken inside of your TV. Wondering: Why won’t my Roku TV turn on? Could be a broken power board, main board or even T-con board 

In order to check for yourself, you’ll need to open up your Roku TV. This is a delicate procedure and thus should be done with utmost care and precision. If you don’t have a confident or experienced hand, I would strongly suggest that you get a professional to do it. But if you are, begin by inspecting these boards. You are looking for signs of damage like burnt or broken parts.  

Contact support

Contact Support

None of the above solutions have helped you. It’s time to go to the source itself! Roku Support Center provides extensive help in technical matters like these. Use the given steps to get the help you need easily:

  1. Go to their website and enter their Support center. 
  2. You’ll have to choose the category of your problem from the many options on your screen.
  3. Once you choose your pick, you will be given a bunch of supporting articles.
  4. If that does not help you either, you can get in contact with an executive through call, email or chat. 

My advice would be to be as thorough with your situation as you can and I’m sure they’ll be able to help you tackle your ‘Roku TV not turning on’ issue with ease!

Recommended Reading – Fix Apple TV No Signal: In Seconds (Black Screen)

Wrapping Up

This brings me to the end of my extensive ‘My Roku TV won’t turn on’ guide. Don’t let a small technical issue like this come in between you and your favourite shows or movies.

Take this as a reminder to know the devices you use regularly. This will save you a lot of time. Additionally, make it a point to take good care of your Roku TV, clean the cables and replace the existing batteries with new ones periodically. Be well-informed and continue streaming without any trouble!
How to Activate SelectTV on Roku: 2024

0

With SelectTV on your Roku device, you’re getting the epitome of entertainment convenienceeverything in one place. It curates and organizes a vast array of TV shows, movies, live streams, and even radio stations from varied providers, promising you a range of viewing options. From major networks like History, CBS, NBC, ABC, and A&E to over 100,000 films, your options are pretty much boundless. To kickstart your viewing experience, all you do is navigate to ‘Streaming Channels’ on the Roku home screen, and add SelectTV from the Roku Channel Store.

How To Activate Selecttv On Roku

Its user-friendly interface and customization make it super easy to navigate and set your content preferences. Buckle up because there’s a lot more to discover about the seamless activation and endless entertainment possibilities with SelectTV.

Activating SelectTV on Roku

Before diving into the endless entertainment provided by SelectTV, you’ll need to activate it on your Roku device. The process is straightforward, but you might run into activation issues. Don’t worry, troubleshooting them is as simple as ensuring you have a suitable plan and a stable internet connection.

Once you’ve navigated to ‘Streaming Channels’ on your Roku’s home screen, you can add SelectTV from the Roku Channel Store. Afterward, you’ll receive a unique activation code. Entering this on the activation page completes the process, and you’re ready to start exploring content recommendations. Remember, the key to a seamless activation is following each step meticulously.

Now, you’re all set to enjoy an expansive world of TV shows, movies, live streams, and more with SelectTV on your Roku.

Also Read – How to Watch YouTube Kids on Roku

Understanding How SelectTV Works

To fully appreciate the benefits of SelectTV, it’s important to understand how this comprehensive entertainment platform functions. Serving as content curator, SelectTV organizes numerous movies and TV shows from various streaming providers. It’s like having a personal assistant exploring features for you, making millions of hours of entertainment accessible with a few clicks.

Here’s a snapshot of how SelectTV operates:

FunctionalityDescription
Content CurationGathers and organizes content from different providers
Search FeatureFacilitates easy discovery of content
Extensive EntertainmentProvides access to numerous TV shows, movies, live streams
User-FriendlySimple interface for seamless navigation
CustomizationAllows content preferences setting

SelectTV simplifies your entertainment experience by putting everything in one place.

Popular SelectTV Programs on Roku

Delving into the vast array of entertainment that SelectTV provides on Roku, you’ll discover a multitude of popular programs from major networks and thousands of movies to choose from. This Roku streaming service brings your favorite shows from giants like History, CBS, NBC, ABC, and A&E right to your fingertips. SelectTV features not only cater to TV show enthusiasts, but movie buffs too, offering access to over 100,000 free and pay-per-view movies.

Additionally, news junkies, sports fans, and general entertainment seekers can benefit from hundreds of 24/7 live channels. Also, music lovers aren’t left behind with over 30,000 streaming radio stations available.

Also Read – How to Watch FETV on Roku via Satellite Provider

Activating SelectTV on Other Devices

While Roku is a popular choice for streaming SelectTV, it’s also possible to activate this comprehensive entertainment service on a variety of other devices. Let’s investigate compatibility and delve into troubleshooting activation issues:

  1. Smart TVs and Gaming Consoles: SelectTV can be activated on smart TVs from Samsung, LG, and other major brands. Gaming consoles like PlayStation 4 and Xbox One also support the service.
  2. Mobile Devices: For Android and iOS devices, simply download the SelectTV app from the respective app store and log in.
  3. Computers: Access SelectTV through any web browser on your Mac or PC.
  4. Streaming Sticks and Boxes: Devices like Apple TV, Amazon Fire Stick, and others also support SelectTV.

Additional Information About Selecttv

Beyond just being a hub for endless entertainment, SelectTV offers numerous features that enrich your viewing experience significantly. It’s more than just a platform for streaming content; it’s a comprehensive entertainment solution. You have access to live channels, movies, TV shows, and even radio stations.

One of the key SelectTV features is its user-friendly interface that allows customization based on your preferences. It’s designed to make navigation easy, even for first-time users.

As for SelectTV availability, it’s accessible to millions of U.S. residents. This means you can enjoy a seamless entertainment experience no matter where you’re located in the country.

SelectTV FeaturesSelectTV Availability
User-friendly interfaceAvailable to millions of U.S. residents
Customizable preferencesSeamless entertainment experience
Access to extensive contentNationwide accessibility

Also Read – How to Activate Your Virtual Reward Center Card

Navigating SelectTVs User Interface

Often, you’ll find the user interface of SelectTV remarkably easy to navigate, providing a seamless transition from one entertainment option to the next. The UI makes exploring features a breeze.

  1. Home Screen: This is the starting point of your SelectTV journey. It’s neatly organized with a bright, clear layout that makes browsing effortless.
  2. Guide: Here, you’ll find TV shows, Movies, and Channels grouped for easy access. This is your go-to spot for improving search functionality.
  3. On-demand: This section houses all your favorite movies, ready to watch whenever you are.
  4. Search Bar: A powerful tool that brings the entire SelectTV library to your fingertips.

In essence, SelectTV’s UI design is intuitive, efficient, and user-centered, ensuring a premium entertainment experience right at home.

Customizing Your SelectTV Experience

After familiarizing yourself with the user-friendly interface of SelectTV, you can now personalize your viewing preferences and entertainment experience to match your tastes.

SelectTV allows you to set customized recommendations based on your viewing habits, ensuring you never miss out on content you love. From action-packed blockbusters to heartwarming dramas, the platform learns from your choices to suggest similar programming.

Additionally, SelectTV provides content filtering, further refining your selections. This means you can opt to see less of what you don’t enjoy and more of what you do.

Also Read – How to Activate Bravo TV on Your Streaming Devices

SelectTV: A Comprehensive Entertainment Solution

With its vast collection of movies, TV shows, live channels, and radio stations, SelectTV truly serves as a comprehensive entertainment solution for your viewing pleasure. This service excels in entertainment aggregation, pulling content from various providers into one easy-to-navigate platform.

Here’s what you can expect:

  1. A vast media library: With countless movies and TV shows, you’re never short of entertainment options.
  2. Live streaming: Not just on-demand content, SelectTV offers numerous live channels for real-time viewing.
  3. Radio stations: An added bonus, you can tune into thousands of radio stations.
  4. Streaming convenience: With its user-friendly interface, finding and streaming your favorite content is a breeze.

Conclusion

Simply put, SelectTV on Roku is your all-in-one solution for an engaging entertainment experience.

It’s about time to dispel the misconception that multiple streaming services are required for diverse content. With SelectTV’s wide range of programs and user-friendly interface, your entertainment needs are satisfied in one place.

So, why hesitate? Activate SelectTV on your Roku device and unlock the gateway to boundless viewing pleasure.

How to Activate NASCAR on Roku: 2024

0

To activate NASCAR on Roku, first, power up your Roku device and connect it to your TV. Start by adding the NBC and FOX Sports channels to your Roku device. Once added, sign in to the NBC Sports app using your credentials, and in the case of Fox, use your cable or satellite provider credentials. With this setup, you’ll have the opportunity to enjoy live NASCAR races, updates, and exclusive content. Remember to have a stable internet connection for uninterrupted streaming. However, don’t stop here, moving forward, there’s plenty more to discover and benefit from.

How To Activate Nascar On Roku

Why Subscribe to NASCAR?

Considering the benefits, subscribing to NASCAR allows you to check pricing options, including monthly plans and seasonal purchases, offering you the freedom to stream NASCAR events without commercial interruptions with a premium subscription. You’ll be able to access exclusive content that includes NASCAR series like the Gander RV & Outdoors Trucks Series, Cup Series, and Xfinity Series. Additionally, you’ll get the latest news and updates about the races, drivers, and teams.

The pricing options are flexible, giving you the advantage to choose based on your budget and viewing preferences. With a NASCAR subscription, you’ll experience the thrill of the race from the comfort of your own home. So, weigh the benefits and select the right plan for an uninterrupted, ad-free NASCAR viewing experience.

Also Read – How to Activate Your Capital One Credit Card

Activating NASCAR on Roku

Once you’ve chosen the right NASCAR subscription plan for you, getting it activated on your Roku is a straightforward process. Start by powering up your Roku device and connecting it to your TV. Then, navigate to the ‘Streaming Channels’ option in the Roku Channel Store and search for the NBC channel, which hosts NASCAR streaming.

After finding NBC, add the channel to your Roku device by downloading it. The next step in your Roku activation involves signing into the NBC app using your login credentials. Finally, within the NBC app, select the NASCAR channel. Now you’re all set to enjoy live NASCAR races, updates, and more on your Roku. Remember, a premium subscription gets you ad-free enjoyment of your favorite NASCAR series.

Procedure for NBC NASCAR Streaming

Want to watch NASCAR races on NBC and NBC Sports Network? You’ll need a NASCAR subscription from a participating satellite or cable provider. Here’s the detailed process to access NBC NASCAR streaming:

  1. Log in to your NBC Sports account using your satellite or cable provider’s credentials.
  2. Navigate to the NASCAR section. Here, you’ll find a plethora of NASCAR highlights and thrilling moments from past races.
  3. Don’t miss out on the NASCAR documentaries. They offer an in-depth exploration into the sport’s history and its biggest stars.
  4. Finally, select the race you’d like to watch and enjoy your streaming experience.

It’s that simple! Now, you’re all set to catch all the action, from high-speed chases to photo finishes, right from your couch.

Also Read – How to Activate Best Buy Account Online Credit Card

Accessing NBC Sports Channel

To access your favorite NASCAR races, you’ll need to first navigate to the NBC Sports channel on your service provider’s platform. This can be done by searching for the network in your channel guide or by using the voice command feature, if your provider supports it.

Once you’ve found NBC Sports, you should sign in with your NBC Sports subscription credentials. This will allow you to access a wide range of sports content, including NASCAR races. If you encounter any issues during this process, you might need to perform some Roku troubleshooting. This could involve checking your internet connection, restarting your device, or re-entering your login details.

Watching NASCAR on FOX

Shifting focus, let’s see how you can enjoy NASCAR races on FOX and FS1 using your subscription from a participating satellite or cable provider.

Here’s a step-by-step guide:

  1. To start, verify that your provider supports FOX Sports. You’ll need this for the NASCAR broadcast.
  2. Next, visit the FOX Sports website or app. You’ll find options for Live TV, Shows, Scores, and more.
  3. Click on ‘Live TV’. This will redirect you to the live streaming page for FOX Sports.
  4. Finally, log in using your provider details. Once authenticated, you can choose the NASCAR race you want to watch.

Also Read – How to Watch Big Brother Canada on Roku

Streaming on FS1 and FOX

Now that you’re familiar with watching NASCAR on FOX, let’s get you all set up for streaming on FS1 and FOX.

Start by making sure your Roku device is connected to the internet, then navigate to the channel store. Search for ‘FOX Sports’ and add the channel to your list.

Once added, open the channel and find the sign-in option. Here, you’ll be asked to enter your cable or satellite provider credentials. After successfully signing in, you’ll have access to live NASCAR races, NASCAR highlights, and exclusive interviews.

For trouble-free streaming, make sure your internet connection is stable and strong. Enjoy your favorite NASCAR events on FS1 and FOX, right from your Roku device.

Related Posts on Streaming

Diving deeper into the world of streaming, you’ll find a variety of articles related to setup and activation processes for various devices and applications. These include, but aren’t limited to, streaming tips for Activating Roku, as well as other popular platforms.

  1. HP DeskJet All-in-One Printer Setup: Learn how to set up your printer for the first time or troubleshoot problems.
  2. Activating Roku: Get a detailed step-by-step guide on how to activate your new Roku device using roku.com/link.
  3. Activating NBC Sports Channel: Find out how to activate your NBC Sports Channel via nbc.com/activate for endless sports content.
  4. Activating Spectrum TV App: Discover how to activate the Spectrum TV app on your streaming device for a wide variety of programs.

Also Read – How to Activate/Watch Hotstar on Roku

Other Activation Guides

In addition to NASCAR, there are several other streaming platforms and channels you might need help activating on your Roku or other devices. Understanding your Roku setup is important to maximizing your entertainment experience. With the right setup, you can take advantage of the NASCAR benefits, among others, and enjoy an array of programming at your fingertips.

For instance, to activate a channel like NBC Sports, you’ll need to navigate to the Roku Channel Store and add the NBC app. Likewise, to stream FOX Sports Go, you’ll need a subscription from a participating provider. Remember to sign in with your login credentials for each channel to start streaming. The setup process for other platforms like DisneyNow or Spectrum TV follows a similar pattern.

Conclusion

Congratulations! You’re now set to experience the thrill of NASCAR right on your Roku device.

But hold on, the ride isn’t over yet. As you navigate the fast-paced world of NASCAR streaming, remember there’s always more to discover.

What’s next? Will it be NBC, FOX, FS1? The choice is yours.

Keep tuning in for more detailed guides on enhancing your streaming experience.

Until then, buckle up and enjoy the race!

How to Watch FETV on Roku via Satellite Provider: 2024

0

To watch FETV on Roku through your satellite provider, you’ll first need to make sure you’re subscribed to a service like Sling TV, which includes FETV in its package. Once subscribed, navigate to the Roku Channel Store on your device, find the Sling TV app, and add it. Sign into your Sling TV account, and choose a package that includes FETV, like Sling Orange or Blue. Now, you’re all set to stream FETV via your Roku device. If you’d like to find even more details, along with tips and tricks for a smooth viewing experience, feel free to delve deeper.

How To Watch Fetv On Roku Via Satellite Provider

Understanding FETV Availability

Wondering where to find FETV on Roku? Well, it’s not as complicated as you might think. FETV, or Family Entertainment Television, is a network that’s available through various satellite coverage providers such as DISH Network, DIRECTV, and more.

Unfortunately, there isn’t a stand-alone FETV app on Roku’s platform. But don’t worry, you’ve got other streaming options. Sling TV, for example, is a service you can access directly on your Roku device which offers packages that include FETV.

Also Read – How to Activate Your Virtual Reward Center Card

Accessing FETV on Roku

Now that you’re aware of FETV’s availability via different platforms, let’s walk you through the process of accessing FETV on your Roku device through Sling TV.

Firstly, assess your Roku compatibility. Is your Roku device up-to-date with the latest software? If not, perform a system update.

Next, navigate to the Roku Channel Store and search for Sling TV. Add it to your channel list and sign up or log in to your existing account.

Remember, FETV isn’t directly available on Roku, but through packages offered by Sling TV. So, subscribe to a package that includes FETV.

If you encounter any issues, follow these troubleshooting tips:

  • Restart your Roku device
  • Check your internet connection
  • Update your Sling TV app

Procedure: Watching FETV via Sling TV

To start watching FETV on your Roku device via Sling TV, you’ll first need to make sure Sling TV is installed and activated on your Roku. To do this, navigate to the Roku Channel Store and look for Sling TV. Once found, add it to your channel list and sign in with your Sling TV credentials.

Now, let’s set your preferences. To find FETV, browse through the channels available in your Sling TV package. Once you’ve located it, add it to your favorites for easy access in the future.

Here’s a table to guide you:

TaskProcedureTips
Installing Sling TVNavigate to the Roku Channel Store, find Sling TV, add it to your channel listRemember your Sling TV credentials
Setting PreferencesFind FETV among channels, add to favoritesThis eases future access
TroubleshootingIf problems arise, refer to Sling TV troubleshooting tipsContact Sling TV support if needed

Enjoy watching FETV via Sling TV on your Roku device!
Also Read – How to Activate Bravo TV on Your Streaming Devices

Steps to Setup Sling TV on Roku

Setting up Sling TV on your Roku device involves a few straightforward steps that will have you streaming FETV in no time.

First, turn on your Roku device and from the home screen, navigate to the Roku Channel Store. Here, you’ll search for Sling TV. Once found, add Sling TV to your channel list.

To get set up, you’ll need to:

  • Create an account or sign in if you already have one
  • Activate Sling TV using a unique code provided
  • Subscribe to a package that includes FETV access

Subscription Packages for FETV Access

Diving into the different subscription packages, it’s important to note that FETV access on Sling TV comes with specific plans. You’ve two main choices: Sling Orange and Sling Blue. Both offer unique subscription benefits and channel selection. If FETV is your main priority, you’d be glad to know it’s included in both packages.

Sling Orange, priced at $35 per month, provides access to more than 30 channels. On the other hand, Sling Blue, also priced at $35 per month, offers over 40 channels. If you desire a broader channel selection, consider the combined package, Sling Orange + Blue, at $50 per month.

Also Read – How to Connect an Xbox Account to My Microsoft Account

Dealing With Technical Difficulties

Even with the best services, you might encounter technical difficulties while streaming FETV on Roku through Sling TV. These issues can range from buffering problems, app crashes, or even an inability to access FETV content. But don’t worry, here are some troubleshooting tips to help you resolve these problems:

  • Reboot your Roku device: Sometimes, a simple restart can fix many streaming issues.
  • Check your internet connection: A vital and high-speed internet connection is essential for streaming without interruptions.
  • Update Sling TV app: Make sure you’re using the latest version of the app as outdated versions might cause issues.

If these tips don’t help, it’s best to contact your satellite provider’s customer support. They’ve specialized tools and knowledge to help you resolve the issue.

Contacting Support for Assistance

Despite your best efforts, there might be times when you can’t resolve technical difficulties on your own, and contacting support for assistance becomes necessary. Don’t hesitate to reach out to the customer service team. They’re equipped with troubleshooting tips to help you get back to watching FETV on your Roku via your satellite provider in no time.

Contact MethodDetails
PhoneCall the customer service hotline provided by your satellite provider.
EmailSend a detailed email outlining the issues you’re experiencing.
Live ChatUse the live chat feature on your provider’s website for immediate assistance.

Also Read – How to Activate Your Capital One Platinum Credit Card

Engaging With FETV Community

Consistently engaging with the FETV community can greatly enrich your viewing experience, as you’re able to share thoughts, ask questions, and interact with other FETV viewers. Elevate community interactions and fan engagement through social media platforms and community events.

  • Participate in FETV’s active social media presence. They’re on platforms like Facebook, Instagram, and Twitter, where you can interact with posts and join discussions.
  • Sign up for FETV community events for a chance to meet other fans and even personalities from your favorite shows.
  • Don’t forget the FETV website, where you can leave comments, join forums, and stay updated with the latest news.

Conclusion

So, are you ready to immerse yourself in the world of FETV on your Roku device? Just keep in mind these simple steps and you’ll be watching your preferred shows in no time.

Don’t let technical difficulties discourage you, assistance is always available.

Isn’t it thrilling to have all your preferred entertainment at your fingertips? Now, go ahead and join the FETV community, share your experience, and enjoy the smooth streaming.

Happy watching!

How To Fix Hulu Black Screen Issue: Fix in Seconds 2024

How To Fix Hulu Black Screen Issue

You have reached the right destination if you have any queries regarding How To Fix Hulu Black Screen Issue. This detailed guide will equip you with all the information you need.

Introduction

Introduction

Is it that your Hulu keeps blacking out? Do not worry, it is a common problem observed across various OTT problems. The question of the hour is how to fix Hulu black screen?

How To Fix Hulu Black Screen Issue

The analysis of the problem can be narrowed down to 1. Updates  2. Internet and VPN connections 3. Cache, Cookies and data overload 4. Extensions 5. Customer care and Community

Let us begin by taking a deep dive into the problem. Hulu has become one of the most famous streaming platforms in the platform today. Nothing is more worrisome than a dead black screen while watching your favorite movies and shows. There are a wide array of reasons why you might be facing this issue.

Is it the server? Is it the internet? Is it your device? What can be done about it? Do not worry; you are at the right place; we got you! We have decoded the perfect guide for you to fix Hulu black screen issue!

Read through the end to go over multiple possible solutions and fix your Hulu stuck on black screen today!

What is Hulu

What is Hulu

Before we can give into the how to fix Hulu black screen discussion, let us acquaint ourselves with the platform itself. Hulu is an American streaming service. Walt Disney owns most of the platform alongside NBCUniversal as the other shareholder. It was launched in 2007 and has grown exceptionally over time.

It displays a diverse range of movies and TV shows from various production companies and Hulu original programming. Hulu currently has over forty-seven million subscribers! 

There is no doubt that Hulu is an extremely popular OTT video streaming platform. Many viewers have experienced a common problem while using it, the Hulu screen goes black, or the screen goes dead. Do not worry; this is extremely common and is generally nothing serious, and can be easily fixed.

The next section discusses this problem in detail and dives into the solution to how to fix Hulu black screen problem.

Fix Hulu Black Screen Issue

Fix Hulu Black Screen Issue

Does your Hulu keep blacking out? This can happen in a couple of ways. You may be able to hear the audio but your Hulu keeps blacking out. You may also experience your entire screen dying anytime you open Hulu and a lot more.

The nature of your problem will determine how you fix Hulu black screen issue that you may be facing. Does it feel a little daunting? Do not worry, it is much easier than it looks, especially once you figure out what is causing the problem. Following is a detailed guide to answer your how do I fix the black screen on Hulu dilemma.

The Hulu Servers

The Hulu Servers

Does Hulu keep blacking out? Maybe you or your device are not even to blame! One of the most common causes of this Hulu screen going black issue is Hulu itself! It can be caused due to the Hulu servers. As an OTT platform, it is bound to have server-driven problems from time to time. Your Hulu screen goes black?

Your first suspect should malfunction in the servers that are responsible for delivering vast content and features to millions of subscribers across the globe. How do you know that it is the servers responsible for your ‘Hulu stuck on black screen’ issue? To check the same, you can use a third-party site like Downdetector, which will tell you if any app is facing any issues.

How to fix Hulu black screen caused by the server? Well, there is absolutely nothing that you can do to fix these malfunctions yourself. All you can do is wait till their team resolves the issue. 

All you can do is reach out to Hulu, which has been explained in detail in a later section.

Cache and Cookies

Cache And Cookies

Another common cause of the Hulu screen black issue is the browser cache and cookies. What does that even mean? Any browser stores some temporary data called cache and cookies on your system. Why does it do that, you wonder?

The browser utilizes this data to increase the overall performance and better your experience. A common side effect of this feature is that caches and cookies accumulate over time and can then get corrupted and cause many problems, including the Hulu screen black issue.

How to fix Hulu black screen caused due to this? You can do that by clearing up the browsing data regularly. Following is a small guide that explains how you can do it.

  • Open your browser that you use and go to the settings.
  • You will find a Privacy and Settings tab; click on it.
  • Click on the clear browsing data option.
  • You will find a time range tab that will ask you the time span you want the cache and cookies to be deleted from.
  • Select All Time from the Time Range tab using the drop-down arrow.
  • Include caches and cookies using the provided option.
  • Click on the clear data button.
  • You are done! Go back to the browser and notice the difference.

Hulu App Data

Hulu App Data

Hulu app also stores data by default as you use it; after a certain amount of time, it can accumulate and cause problems. It can corrupt files and then lead to Hulu stuck-on black screen problem.

This is why it is advisable to clear Hulu’s app data regularly. Go to the settings section of your device and access apps. Select Hulu and go to storage, where you will find the option to clear data.

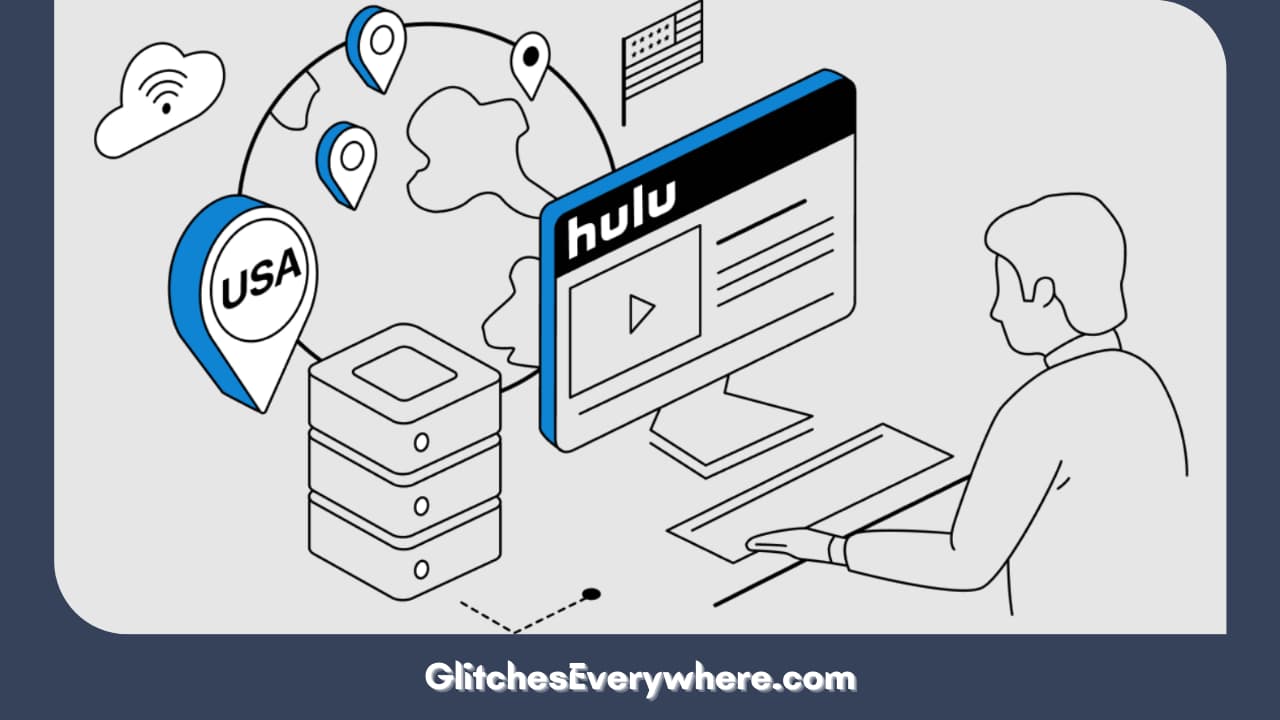
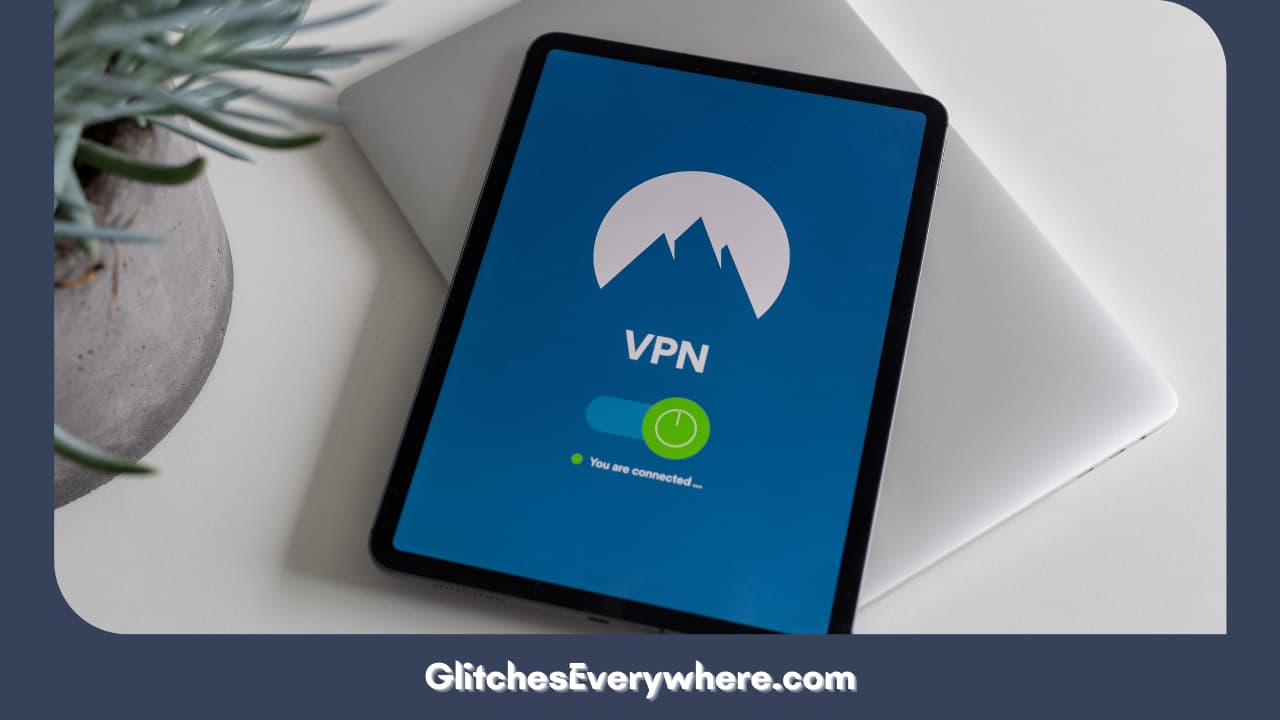
A VPN Connection

A Vpn Connection

Yes, a VPN connection is also a common cause for the ‘Hulu screen goes black’ matter. Before we get into that, what is VPN? VPN stands for Virtual Private Networks and is a common aid to protect networks from breaching private information and attacks against hackers. How do they work?

They change the default IP addresses and filter the data from the device. There are endless VPN connectors out there, making it crucial for you to choose the correct one. Some VPNs are inefficient and cause more inconvenience than anything. It can make the device’s connection unstable. ESPN TV is another network where VPN issues are apparent. 

In these cases, your device will fail to have the network strength required for a smooth Hulu experience. 

How do I fix the black screen on Hulu caused by VPN issues? Hulu is a safe platform; you can turn off your VPN before opening it. 

It should be noted that this is a common problem where users use VPN connections to use Hulu outside the US. Use a good-quality VPN like NordVPN to avoid any issues.

Your Internet Connection

Your Internet Connection

Is Hulu stuck on the black screen? One of the most obvious causes for Hulu not working that comes to mind is some issue with internet connectivity. For this, you need to check and might have to reset your network connection. So, first things first, what does Hulu require to run smoothly?

It requires an internet speed of at least 3 Mbps to watch movies from the library and 8 Mbps for live streams that it offers. You can check your internet connection to ensure that the network is the culprit behind the ‘Hulu keeps blacking out’ problem.

You can check the bandwidth of your network connection by using online tests. Fast.com is one of the reliable ones.

Browser Extensions

Browser Extensions

Another common cause of the Hulu stuck on black screen problem is extensions. First of all, what are extensions? They can be best understood as small software modules that are used to customize a web browser.

Certain websites are incompatible with browser extensions, and Hulu is one of them. The good news is that you can easily disable your extensions while you are accessing Hulu and just as easily enable them afterwards. Following is a step-by-step guide to help you disable your extensions:

  • Open the browser you use and go to the settings tab.
  • Go to the extensions tab. You will find it in the side drawer. It helps you manage your browser extensions.
  • Disable all your browser extensions from there.
  • Restart your browser.
  • Open Hulu to check your fix Hulu black screen issue.

Similar steps can be followed if your Disney Plus is not Working on Samsung TV.

Run Malwarebytes

Run Malwarebytes

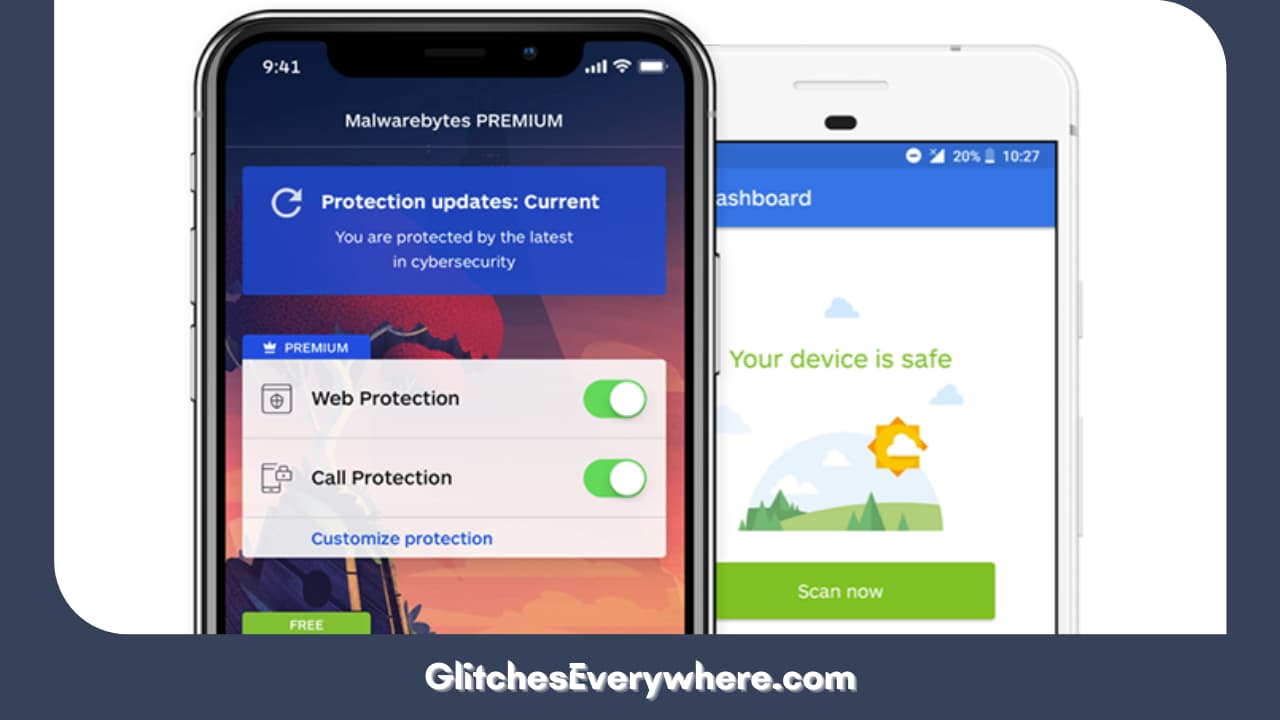
One of the most obvious reasons for your technical difficulties is infection by malware. If your device gets infected by a virus, it does consume your bandwidth which can cause the ‘Hulu screen goes black’ issue.

But the main question is, how do I fix the black screen on Hulu? Use Malwarebytes or other similar applications on your device.

Run the full system scan feature to check your entire device storage for files that have been infected, and then remove them from your system. 

‘No Ads’ Plan

‘no Ads’ Plan

Hulu provides an option for the viewer to have a commercial-free experience through a no-ads plan that costs about 14.99 dollars a month after the expiration of your free trial. Sounds amazing, right? 

Indeed but it is this no-ads plan that sometimes causes the ‘Hulu screen goes black’ problem.’ In place of the ads that would usually play, an account under the no ads plan will switch the screen to all-black for several seconds.

This can be a pain and an inconvenience which can be especially annoying as the user is paying extra money for a better experience. You can do nothing to fix this issue yourself, but you can reach out to Hulu again and request they look into this problem. Read through the end to see how you can contact their team.

Watch Another show

Watch Another Show

There is a chance that it is not Hulu as a whole but the movie or TV show that you have chosen to watch. There is a slight chance of a temporary issue with Hulu’s display of a particular title.

If you face this issue, select any other film or show. If it usually plays, it is just the one facing an issue. How do I fix the black screen on Hulu caused by this? Bring it to the notice of the Hulu team, and rest assured that it will be fixed soon.

Update Hulu

Update Hulu

 Something to avoid the ‘Hulu screen goes black’ issue is to ensure that you keep the application updated. Below is a detailed guide to updating your Hulu app on your device. There are two different sets of instructions for an Android or iOs device.

Android

Android

For Android devices, follow the given step-by-step instructions to update Hulu to avoid the dead screen:

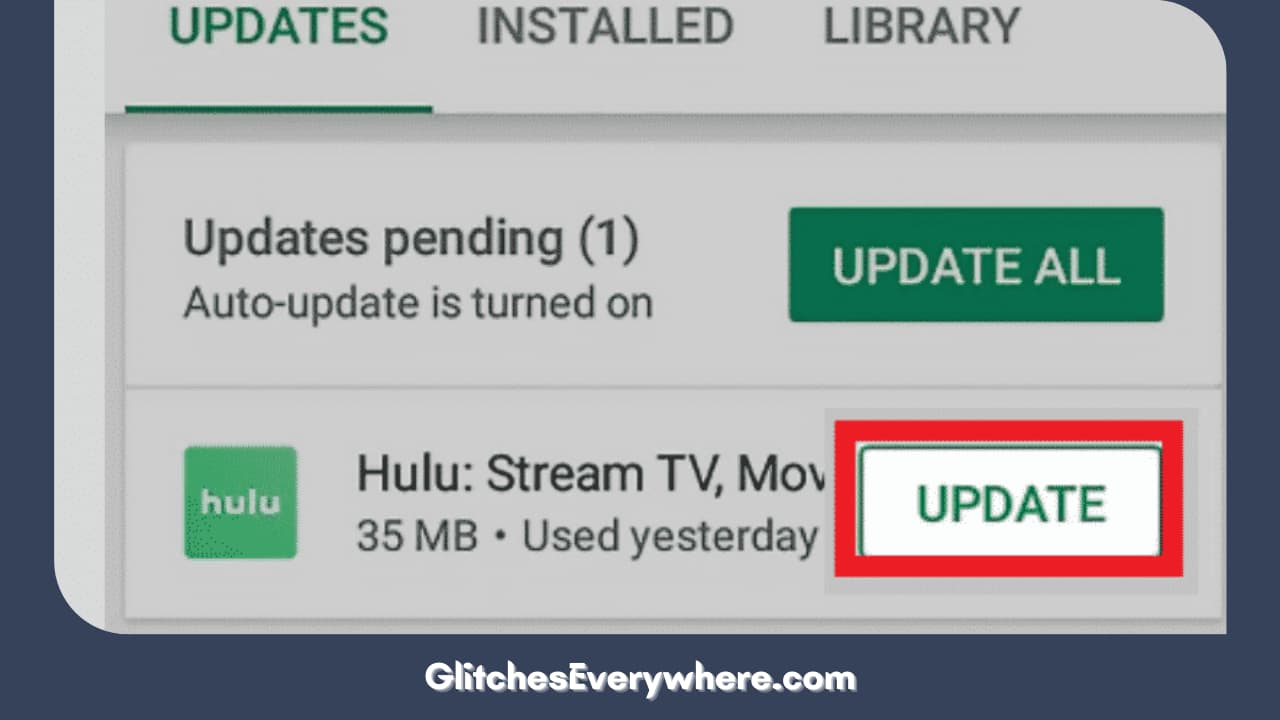
  • Open the Google play store on your device.
  • Open the side menu by clicking on the Menu button, which you will find on the search bar.
  • You will find the My Apps & Games option. Click on it. You will see the applications which have pending updates.
  • Find Hulu on the list and click on the update button.

That’s it!

iOS

iOS

If you are an iOs user, do not worry about it, we got you! Use the following guide to update Hulu:

  • Go to your home screen and go to the App store.
  • Click on your profile.
  • You will see the list of apps that have pending updates.
  • Locate Hulu on this list and click on Update.

This may not fix your ‘Hulu stuck on black screen’ every time, but it does prevent it and should be done to ensure the best experience.

Log Into Your Hulu Account Again

Hulu Account Again

Sometimes, the simplest answer is the right one. Trying logging out and logging in again. As an online platform, your account may have just run into unexpected bugs and crashed or glitched, which led to a ‘Hulu stuck on black screen’ issue.

All you have to do here is log out of your session after clicking on your account, wait for a few minutes, and then log in again.

How to report to Hulu

How to report to Hulu

How do I fix the black screen on Hulu? There are certain times that you can not independently fix it. This includes server issues and many more. There may be some problems specific to your account that need special attention.

If you want to contact Hulu, visit the Hulu Help Center and then use their customer support. Be specific with your problem and describe it in detail. Provide screenshots wherever necessary. Following is the link to their Help Center: https://help.hulu.com/s/article/how-to-contact-Hulu

Hulu also has a community where people post their problems on the site, and others who have experienced it help you by describing how they dealt with it. Following is the link to their Hulu Community: https://community.hulu.com/s/?utm_medium=help-center.

Wrapping up

Are you still wondering: how do I fix the black screen on Hulu? Are you still wondering? Get on to it. Use the detailed guide provided here to eliminate your ‘Hulu stuck on black screen’ problem.

Hulu is an incredible streaming platform that you can use to keep yourself entertained through the plethora of content that you will find there.

You are bound to run into your fair share of technical issues and might run into problems like the ‘Hulu keeps blacking out’ issue that we have discussed in depth here. The good thing is that most of these issues can be easily solved.

Keep in mind that you should know about the application you use, and it is best to be updated about all their features. 

How to Jailbreak Vizio Smart TV: (Effortlessly in Seconds!)

0

How To Jailbreak Vizio Smart Tv

Vizio TVs are among one of the most popular brands and are also very affordable at the same time. However, certain aspects contribute to it being a challenging one. While there might not be actual solutions, there are roundabout ways.

Yes, I am referring to the Jailbreaking process. The public may not access this process, so this article should only be treated as a hypothetical option. The Jailbreaking process is when we explore the full potential of a device by removing all the boundaries put beforehand by the company managers. How do you do this? Read further to know more!

To jailbreak means to bring down all restrictions on the app or the website and channel access for users. Moreover, these restrictions are present in all Smart TVs, and Vizio TV is no exception. The steps involve updating the Vizio Smart TV, downloading the code converter, looking for the hidden code, and converting a secret code. 

Did that look tricky? Everyone does initially, but this article will help clear up all your confusion. These are easy steps and do not require you to be tech-savvy. 

Read the article till the end to know more. 

Recommended Reading – Get YouTube Music on Roku (Effortlessly in Seconds!)

Why Jailbreaking Vizio Smart TV

Jailbreaking a Vizio Smart TV, or any smart TV for that matter, is not recommended and is generally not a legal or supported activity. 

If there are specific features or apps you are looking for on your Vizio Smart TV, you should explore the official app store or contact Vizio support for assistance.

However, jailbreaking is preferred widely as it has several benefits. This will allow you to download and quickly access apps and websites you could not before. Though it is considered risky, the surplus benefits are beyond comparison. Therefore, you should go for it!

Whether you need to download an Android app or want to access every channel that is unavailable for you, jailbreaking helps you get through these difficulties.

To perform this efficiently, as it is considered a little risky, you must follow the instructions in this article carefully. 

Let us get started!

Recommended Reading – How to Watch Peacock on VIZIO Smart TV (Try THIS Fix First!)

How to Jailbreak Vizio Smart TV – Easy Methods

Easy Methods

This consists of four main steps mentioned above in the introduction. Follow each one of them carefully to get the results at their best!

Update Vizio Smart TV Firmware

This is one of the most essential and foremost steps in the jailbreaking process. The process may require a particular ARM version, and therefore, it becomes necessary to do the same. 

This is the foremost step, and to be more precise, you may cross-check the firmware version you last updated if you need to know which version you have updated; no worries, as long as you have recently performed an update.

Here are the basic steps to follow for the same. 

1. Make sure you know the model number of your Vizio TV. You can usually find this information on a label on the back of the TV or in the TV’s settings menu.

2. Ensure that your Vizio TV is connected to the internet. You can do this via both – a wired Ethernet connection or even a wireless Wi-Fi connection whichever is handy for you.

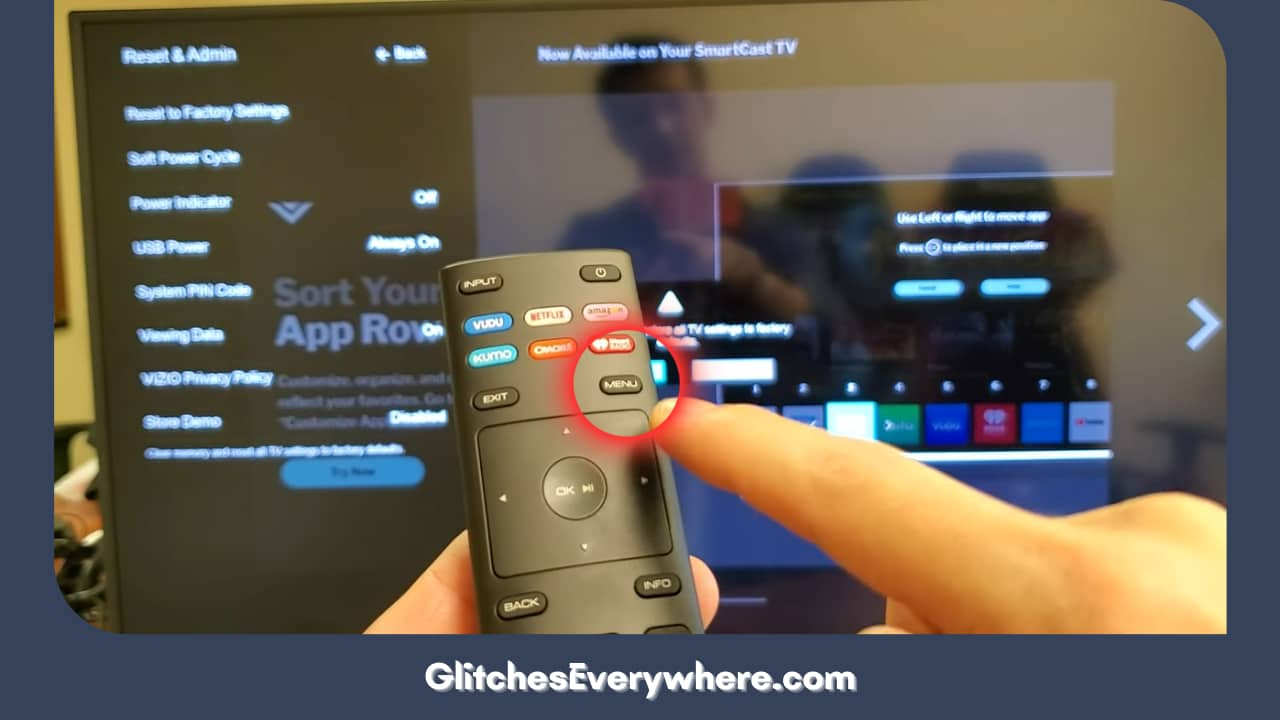
3. Using your TV remote, press the “Menu” button to access the main settings menu.

First, To Open The Menu List, Click On The 'menu' Button

4. Look for a category related to system settings or support in the menu. The naming might vary depending on your TV model.

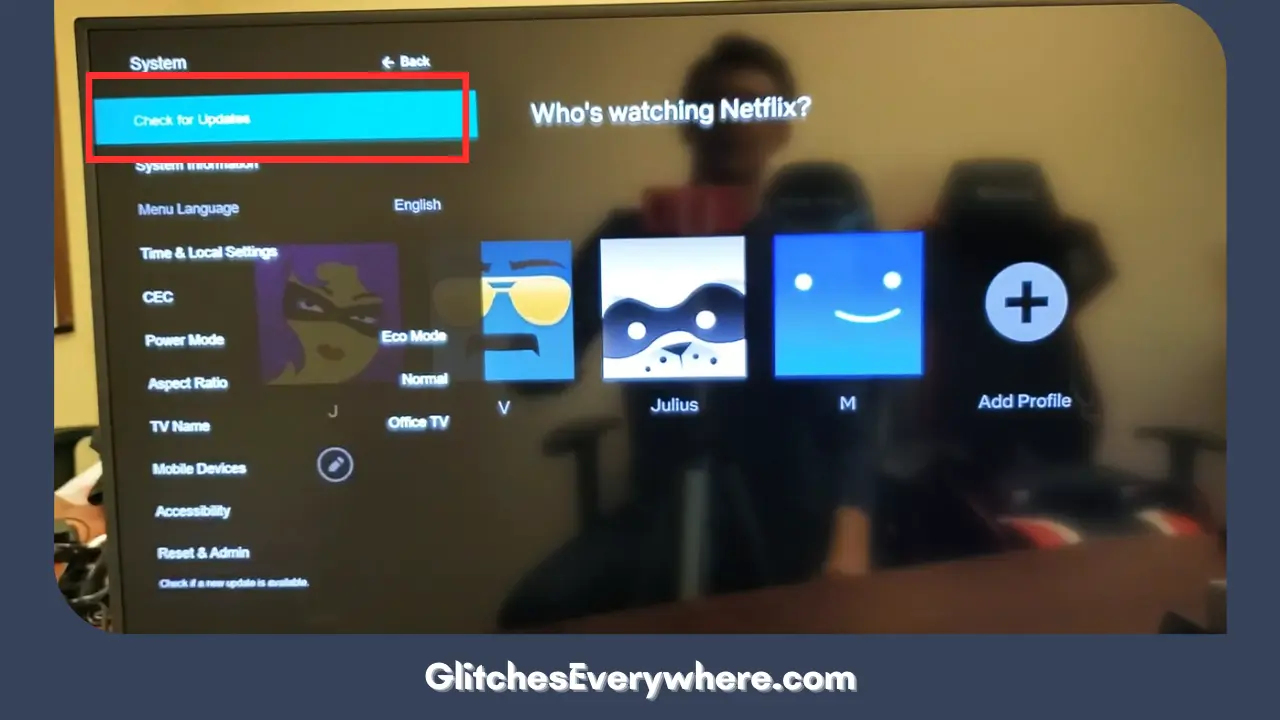
5. Navigate to “System Information” or a similar option that provides information about your TV. Some models might have a “Check for Updates” or “Software Updates” option directly in the settings menu.

Roku Youtube Music Through Screen Mirroring 

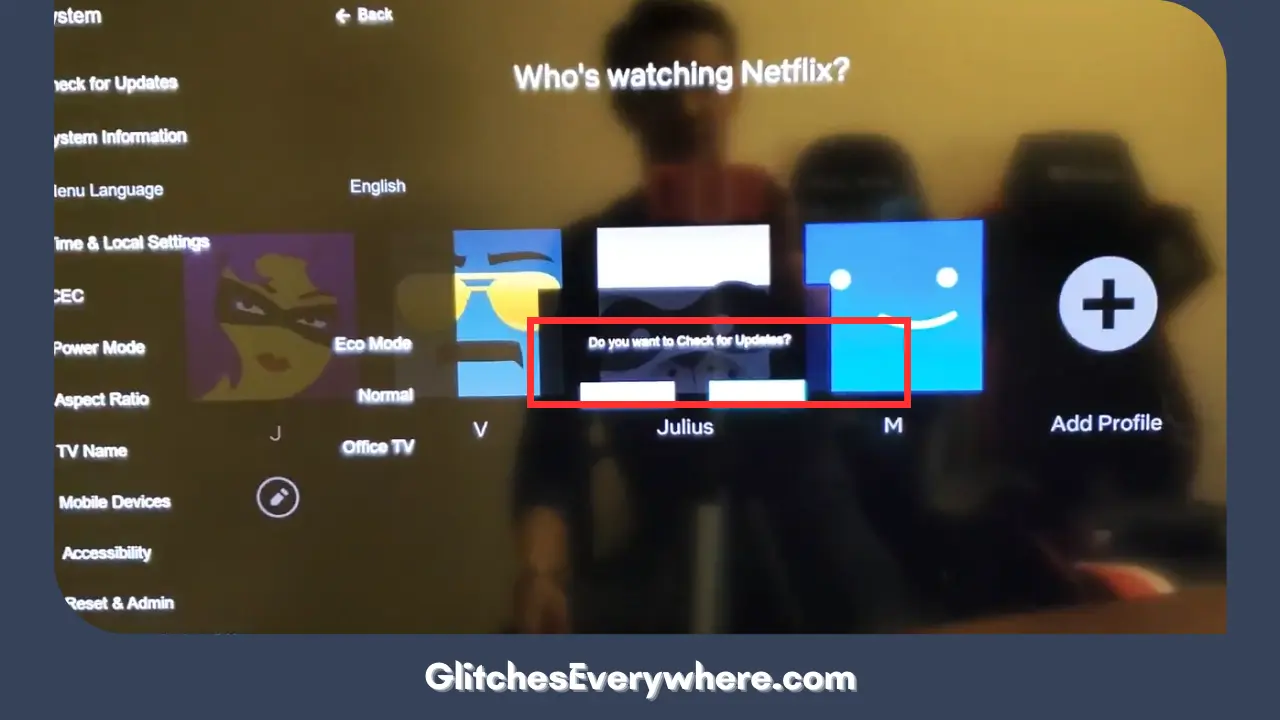
6. Once you are in the relevant section, look for the option to check if there are any firmware updates available. Select “Check for Updates” and follow the on-screen instructions further if available.

Select Check For Updates

7. If a firmware update is available, the TV will prompt you to download and install it. Follow the on-screen prompts to initiate the update process. This may take some time, so be patient.

8. After the firmware update, your TV may prompt you to restart. If not, renewing your TV is a good practice to ensure the changes take effect manually.

9. Once your TV has restarted, you can return to the “System Information” or similar section in the settings menu to verify that the firmware has been updated to the latest version.

Let us now move on to the next step.

Download the Code Converter

Download The Code Converter

Code converter is helpful for Samsung smart device users. It converts the open code source into a form that helps make your device more compatible. 

Several generic code converter programs should be compatible with a Vizio Smart TV. You can install the software using a download file saved on an external hard drive.

So, all that is left to do is give the correct code and let it get converted into the required form.

Let us now move to the next step. 

Search for the Code

Search For The Code 

After following the above step, you must use your remote control and activate the Vizio Smart TV’s smartcast’s smart hub by pressing the V button. 

Press and search ‘CODE’ on your remote control and click Enter.

You will now find the code converter icon on the screen.

The last thing to do is change the generic code the TV recognizes. 

Convert Secret Code

Convert Secret Code

The app is designed so that once you open it, you will see the ‘press enter to continue’ displayed on the Vizio Smart TV Screen. 

Follow these instructions further. Press Enter, and you will now see two sets of options. 

  1. Enter 1-8-9-1 above the “Convert from” tab.
  2. Check “Hexadecimal” under the “Convert From” tab.
  3. Go to the “Convert to” tab and select “Binary.”
  4. Choose “Convert.”
  5. When done, your Vizio Smart TV software will be deregulated, and you can download third-party apps and streaming channels.

Here, we have converted a simple code into binary form. Now, over 1700 channels initially included in your Vizio Smart TV will be available. 

Recommended Reading – Vizio TV Factory Reset: (Just Do This ONE THING)

Helpful Answers

Helpful Answers

Why is the Jailbreaking procedure called illegal?

Jailbreaking refers to the procedure of removing software restrictions imposed by the manufacturer or operating system on a device, such as a smartphone or tablet. While jailbreaking is not inherently illegal, it often involves bypassing specific security measures, which can raise legal concerns.

The legality of jailbreaking varies from country to country and depends on the device and the specific circumstances. For instance, the Digital Millennium Copyright Act (DMCA) is what makes it illegal to circumvent digital rights management (DRM) or other technical protection measures in the United States. Jailbreaking may fall under this provision, as it involves bypassing the built-in security mechanisms of a device.

Individuals must be well aware of the legal implications in their specific jurisdiction and carefully consider the potential risks before engaging in jailbreaking activities.

What are the potential advantages of Jailbreaking?

Jailbreaking a device can provide users with several potential benefits, but it’s important to note that these advantages may come with certain risks and drawbacks. Here are some potential benefits of jailbreaking:

  • Customization: Jailbreaking gives room for customers’ choices of their device’s interface, including themes, icons, and other visual elements. This level of customization is often not possible on non-jailbroken devices.
  • Access to Third-Party Apps: Users can install unavailable apps and software through the official app stores, expanding the range of applications they can use on their devices.
  • Tweaks and Modifications: Jailbreaking enables users to install tweaks and modifications that enhance or add new features to the operating system. This can include changes to system settings, improved multitasking, or other enhancements that are impossible on non-jailbroken devices.
  • File System Access: With a jailbroken device, users can access the device’s file system, allowing more control over files and data. This can be very helpful for advanced users and developers.
  • Unlocking Carrier Restrictions: Jailbreaking may allow users to open a device from a specific carrier, allowing them to use their device with different airlines or SIM cards.

What are the potential risks of Jailbreaking?

Jailbreaking a device can introduce several risks and potential drawbacks. Here are some of the common risks associated with jailbreaking:

  • Security Vulnerabilities: Jailbreaking typically involves bypassing specific security measures the device manufacturer or operating system puts in place. This can make the device susceptible to malware, viruses, and other security threats.
  • Voided Warranty: Jailbreaking often voids the device’s warranty. If something goes wrong with the device after jailbreaking, the manufacturer may refuse to provide support or service.
  • Instability and Performance Issues: Jailbreaking can lead to software instability and performance issues. Modified or unauthorized software may not interact well with the device’s operating system, leading to crashes, freezes, or other problems.
  • Update and Compatibility Issues: Jailbreaking may prevent the device from receiving official software updates. This can leave the machine running outdated software and missing essential security patches and new features.
  • Legal Consequences: In some jurisdictions, jailbreaking may be considered a violation of copyright laws or terms of service agreements. This could lead to legal consequences, including fines or other penalties.

Recommended Reading – TCL Roku TV Black Screen (Don’t Panic, Easy Fix!)

Wrapping Up

Every coin comes with two sides, and so does this Jailbreaking procedure. The article will help you station out the two sides. But do not let this trouble you anymore. Though the risks, go for a change!

However, it has immense benefits to consider as well. Hence, it is worth taking the risk! 

For any further doubts or queries, you can always contact the Vizio Technical Team, as they will help you to the best of your knowledge. 

Thank you for reading the article till the end!

How to Activate Your Venmo Credit Card: 2024

0

To activate your Venmo card, you’ll need to use the Venmo app on your mobile device. First, tap the menu icon, navigate to ‘Settings‘, and then select ‘Venmo Card’. After that, tap on ‘Activate Card‘ and follow the outlined steps. You’ll also need to set a PIN for added security. After you’ve done this, your card should be activated and ready for use, allowing you to take advantage of the benefits Venmo cards offer. However, if you encounter any issues during activation or want further insights into getting the most out of your card, there’s a wealth of information waiting just a bit further on.

How To Activate Your Venmo Credit Card

Understanding Venmo Credit Card

The Venmo Credit Card, a product of Venmo’s collaboration with Synchrony Bank, provides a unique and flexible method of making both online and person-to-person payments. One of the primary Venmo card benefits is the ability to earn cash back on your purchases, which automatically goes into your Venmo account for seamless use. There’s also the convenience of splitting bills and making quick payments right from the Venmo app, further enhancing your financial flexibility.

In terms of Venmo card security, you’re covered by Visa’s Zero Liability policy. This means you’re not responsible for unauthorized charges. Plus, there’s the added security of real-time alerts for every card activity. In case of a lost or stolen card, you can disable it directly from the Venmo app, ensuring your financial security remains intact.

Also Read – How to Activate Your Sears MasterCard

Adding and Using Venmo Card

Once you’ve understood the Venmo card benefits and Venmo card security features of your new Venmo credit card, it’s time to add it to your account and start using it for your transactions. Here’s how:

  1. Open the Venmo app on your mobile device.
  2. Go to ‘Settings’ and click on ‘Venmo Card’.
  3. Tap on ‘Get Venmo Card’ and follow the instructions to add your card.
  4. Once added, your Venmo card is ready for use!

You can now use your Venmo card to make payments at millions of retailers, online and in stores, wherever Mastercard® is accepted. Remember, your card also comes with cashback benefits on eligible purchases, making your transactions more rewarding. Enjoy the convenience and security of your Venmo card!

Venmo Credit Card Fees

Understanding the fees associated with your Venmo Credit Card can help you make the most of your card while avoiding unnecessary charges. One of the Venmo card benefits is cashback. You’ll earn varying percentages of cashback on different categories of purchases, enhancing your spending power.

However, should you decide to withdraw cash at an ATM, a $2.50 fee applies. For foreign transactions, you’re looking at a 3% fee.

But it’s not all about fees. Venmo card security is another significant feature. The card offers real-time alerts for each transaction, helping you keep track of your spending. It also includes fraud detection, providing an additional layer of safety against unauthorized transactions.

Also Read – How to Activate Your Kohl’s Credit Card

Activating Your Venmo Card

Now that you’re familiar with the fees and security features of your Venmo Credit Card, let’s discuss how you can enable it to start enjoying these benefits.

  1. First, open your Venmo app and tap the menu icon.
  2. Navigate to ‘Settings’ and select ‘Venmo Card.’
  3. Tap ‘Activate Card’ and follow the guided steps.
  4. You’ll need to set a PIN for your card for added Venmo card security.

Once done, your card is active and ready to use. Remember, activating your card is important to access the full Venmo card benefits. This includes making purchases, sending money, and earning cash back. Ensuring your card’s security is also a vital part of the activation process. So, take control and activate your card today.

Troubleshooting Venmo Card Activation

If you’re experiencing difficulties in activating your Venmo card, don’t fret; there are several troubleshooting steps you can take to resolve the issue. The activation process can sometimes encounter hitches, but the solutions often lie in addressing the common activation issues.

Here is a table summarizing some of these issues and their remedies:

Common Activation Issue Troubleshooting Step Outcome
Card not recognized Check card details Correct entry
Error message Retry activation Successful activation
App freezing Restart app Smooth operation
No internet Check connection Activation proceeds

Also Read – How to Activate Netflix on Your Streaming Devices

Reaching Out to Venmo Support

In case you’re experiencing difficulties with your Venmo credit card activation, don’t hesitate to reach out to Venmo’s customer support for assistance. They’re there to help you understand all the Venmo card benefits and make sure your Venmo card security isn’t compromised.

To get in touch with them, simply navigate to the ‘Help & Contact’ section in your Venmo app or on their website.

Choose the ‘Contact Us’ option.

Select the most appropriate category for your issue – in this instance, ‘Venmo Card.’

Lastly, follow the prompts to send your query or request.

Tips for Venmo Card Users

To maximize the potential of your Venmo card, there are several tips and strategies you should keep in mind. One critical aspect is card security. Always make sure your card details are concealed and never share your PIN with anyone. Regularly monitor your account activity for any suspicious transactions.

The Venmo card also offers virtual card benefits. It allows you to make online purchases safely without revealing your actual card number. You also have the flexibility to regenerate your virtual card number through the app, providing an additional layer of security.

Also Read – Roku TV: Access Secret Menu – Unlocking Hidden Secrets

Other Helpful Activation Guides

Just as you’ve learned to activate your Venmo card, there are many other cards and services that require similar steps for activation. Here are four other helpful guides you might find useful:

  1. Activating Your PayPal Card: Like Venmo, PayPal also offers virtual card benefits. After receiving your card in the mail, you can activate it via the PayPal app or website.
  2. Setting Up Your Google Wallet: Google Wallet is another service offering card security features. You can set it up by linking your bank account or credit card.
  3. Activating Your Amazon Gift Card: To activate your Amazon gift card, scratch off the code on the back and enter it in the designated section on the Amazon website.
  4. Using Apple Pay: Apple Pay allows you to add various cards to your digital wallet. The activation process is done through the Wallet app on your iPhone.

Conclusion

So, ironically, activating your Venmo card isn’t brain surgery, is it?

Just a few taps, maybe a phone call, and voila! You’re all set to start spending.

But remember, this is just the start. There’s much more to discover and comprehend about your new card.

So, don’t hesitate to delve into our other guides or reach out to Venmo support.

After all, knowledge is power, particularly when managing your finances!

How to Activate Your Citizens Bank Debit Card: 2024

0

Activating your Citizens Bank Debit Card is straightforward. You’ve got four ways to do it: via the mobile app, using a PIN purchase, at a Citizens ATM, or by calling customer service. With the mobile app, you’ll log in, navigate to the ‘Services’ tab, and choose ‘Card Activation.’ If you prefer using your PIN, simply make a purchase and enter your PIN when prompted. An alternative is to visit a Citizens Bank ATM, insert your card, input your PIN, and select ‘Card Activation.’ You can also call customer service and follow their instructions to activate. Be sure to stick around, there’s plenty more to learn about maximizing your card’s benefits.

How To Activate Your Citizens Bank Debit Card

Applying for Citizens Bank Debit Card

If you’re considering getting a Citizens Bank Debit Card, you can apply by visiting the official Citizens Bank website, calling their customer service number at 1-800-922-9999, or stopping by your local branch to open an account and request your card. Through the online application process, you’ll be required to provide necessary personal and financial information.

Once approval is granted, your card will be processed and mailed to you. The card delivery process typically takes 7-10 business days. You’ll also receive a separate mailer with your Personal Identification Number (PIN). It’s important that you store this information securely. Remember, Citizens Bank will never ask for this information via phone, email, or text, so be cautious of scams.

Keep track of your card’s arrival so you can proceed to the next step: activation.

Also Read – How to Activate OTC Network Credit Card

Activation Process Overview

Once you’ve received your Citizens Bank Debit Card in the mail, it’s essential to activate it before you can start enjoying its many benefits. This activation process is straightforward and convenient, designed with you in mind. This overview provides a glimpse into the steps you’ll undertake.

Here is a quick table for reference:

Steps for ActivationDescription
Step 1Use the Citizens Bank Debit Card number to initiate the process.
Step 2Validate your identity as the cardholder.
Step 3Set up a secure PIN for your new card.

Activating via Mobile App

Activating your Citizens Bank Debit Card through the mobile app is a convenient and secure method you can use right from your smartphone. This method provides a host of benefits, including the ability to activate your card anytime, anywhere, and the ease of following intuitive steps on the app.

Here’s a step-by-step guide:

  1. Download the Citizens Bank mobile app from your smartphone’s app store.
  2. Log in to your account using your credentials.
  3. Go to the ‘Services’ section and select ‘Card Activation’.

Also Read – How to Activate Crave TV on Roku

Activating With PIN Purchase

You can also activate your Citizens Bank Debit Card by making a purchase and entering your correct PIN at the point of sale. This method not only activates your card but also validates your pin security. It’s an easy, straightforward process that lets you activate your card while making your daily purchases.

While using this method, you’ll also enable transaction tracking, further enhancing your banking security. Keep in mind though, to always guarantee you’re using secure, encrypted point of sale terminals to safeguard your card and pin details.

Here is a quick summary of this activation method:

StepDescription
1Make a purchase
2Enter the correct PIN
3Confirm transaction
4Card is activated

Activation at Citizens ATM

Stepping up to a Citizens Bank ATM offers another convenient method to activate your debit card. This process, known as Citizens ATM activation, isn’t only easy but also secure, thanks to the card’s security features.

To begin your card activation, follow these steps:

  1. Insert your card into the Citizens Bank ATM.
  2. Enter your Personal Identification Number (PIN).
  3. Select the ‘Card Activation’ option.

Also Read – How to Access Prism TV on Roku

Activation via Customer Service

If the need arises to get your Citizens Bank Debit Card activated, reaching out to customer service offers a tried-and-true method. You’ll need to provide some information for customer verification as part of the security measures in place to protect your account.

StepsAction RequiredInformation Needed
1Call Customer ServiceCitizens Bank Debit Card Number
2Verify IdentitySocial Security Number, Date of Birth
3Confirm Card DetailsCard Expiration Date, CVV
4Complete ActivationFollow Instructions Given
5Confirm ActivationCheck Activation Status

Benefits of Citizens Bank Card

Providing a host of benefits, a Citizens Bank Debit Card guarantees secure transactions, 24/7 account monitoring, and the convenience of viewing statements and balances online. Here are the three main advantages of using a Citizens Bank Debit Card:

  1. Enhanced Security: The card uses advanced encryption technology to safeguard your transactions, minimizing the risk of fraudulent activities. Plus, real-time alerts keep you informed of any suspicious activity.
  2. Convenient Payments: The card is accepted globally, making it ideal for shopping online or at millions of stores worldwide. The tap-to-pay feature ensures quick checkouts.
  3. Online Accessibility: You can easily monitor your account, view transactions, and freeze or unfreeze your card online, giving you total control over your finances.

Also Read – How to Access RFD TV on Roku

Contacting Citizens Bank Support

When you need assistance with your Citizens Bank Debit Card, you can reach out to their dedicated customer support team who are available round the clock to help with your banking queries. They can provide you with troubleshooting tips, account security advice, and information on debit card rewards and cashback offers.

Support AreaContact DetailsAvailability
Troubleshooting Tips1-800-922-999924/7
Account Security1-800-922-999924/7
Debit Card Rewards1-800-922-999924/7
Cashback Offers1-800-922-999924/7
General Inquiries1-800-922-999924/7

Conclusion

You’ve now navigated the winding road to activating your Citizens Bank debit card. Like a seasoned traveler, you’ve learned the ins and outs, from mobile app activation to PIN purchases.

Remember, this card is your key to financial exploration, unleashing benefits like no-fee transactions and 24/7 account monitoring. So, treasure this guide as your map, and should you ever lose your way, Citizens Bank’s supportive crew is just a call away.

Adventure on, savvy spender!

How to Activate AT&T MicroCell on Your Router: 2024

0

To activate your AT&T Microcell, go to att.com/microcell-activate and click ‘Activate.’ Choose your account type, log in, input your device details, review the setup, and finally submit it for activation. Keep in mind proper set up, connect the device to your router, use a power outlet for AC power adapter and place it in an area with a clear line of sight to maximize its capabilities. If you run into activation errors, don’t fret, troubleshooting is also part of the journey. As you navigate further, you’ll become an expert on your device, including dealing with common network problems and connectivity solutions.

How To Activate Att Microcell On Your Router

Understanding AT&T MicroCell

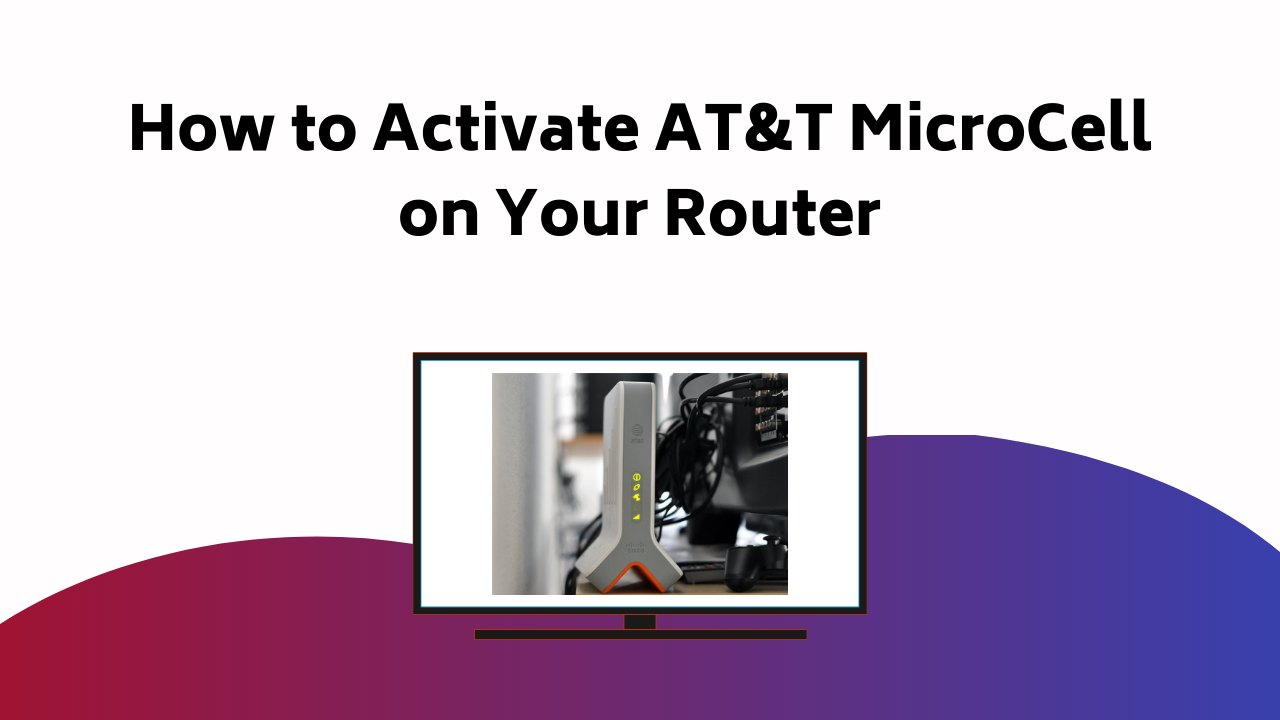
The AT&T MicroCell, designed to enhance your in-home connectivity, is a device that enhances your cell phone signal by utilizing your home’s internet connection. It acts as a link between your cell phone and the broader AT&T network, boosting your signal strength and enhancing your call quality.

When optimizing placement, keep in mind that your MicroCell needs to be near a window, ideally positioned high and with a clear line of sight to the sky. This helps it pick up GPS signals, essential for its operation. Avoid basements or enclosed spaces which could impede signal improvement.

The MicroCell also requires a solid internet connection. Make sure it’s connected to a reliable, high-speed source. Proper placement and connection can help maximize your device’s capability, enhancing signal and improving your overall experience.

Also Read – How to Activate Your Epic Games Account

Installation Steps

To start your AT&T MicroCell setup, make sure you have a stable internet connection and find a window spot that’s approximately 3 feet away from your Wi-Fi router. This placement is important for best signal strength.

Now, follow these simple steps:

  1. Connect your MicroCell to your router using the yellow Ethernet cable provided.
  2. Plug the AC power adapter into your MicroCell and a power outlet.
  3. Wait for the signal strength light to turn green, indicating a strong connection.

Keep in mind these placement tips: avoid enclosed spaces like closets and basements since they can affect the signal strength. Also, keep your MicroCell away from other electronic devices to prevent signal interference. With the right setup, your MicroCell will improve your network coverage significantly.

Activation Process

Having configured your MicroCell correctly, you’re all set to activate it on the AT&T network. Go to att.com/microcell-activate. Click ‘Activate’, choose ‘Personal’ or ‘Business’ account, sign in with your myAT&T credentials. Enter your device’s serial number and location data, review the setup details, and submit for activation.

Here’s a straightforward guide:

Step Action
1 Visit att.com/microcell-activate
2 Click ‘Activate’, choose account type
3 Log in and input device details

If you encounter difficulties, don’t worry. Troubleshooting activation errors is part of the process. For signal strength optimization, place the device close to a window, away from other routers. Remember, patience and following these instructions will guarantee a successful activation of your MicroCell on the AT&T network.

Also Read – How to Activate Bally Sports on Your Streaming Devices

Troubleshooting Technical Issues

Should you encounter technical issues with your AT&T MicroCell, there are several strategies you can employ to troubleshoot and resolve these problems. Signal interference is a common issue, which can be caused by obstacles like walls or other electronic devices.

  1. Consider device relocation. Move your MicroCell to a higher location, away from other devices that may cause interference.
  2. Regularly check for software updates. Updated firmware often fixes known issues and improves performance.
  3. Reset your MicroCell. If all else fails, a reset can often resolve lingering technical issues.

Addressing Network Problems

While troubleshooting technical issues often resolves many problems, you might still experience network and connectivity issues with your AT&T MicroCell, necessitating further measures. These could be due to signal interference or the need for network optimization.

Problem Cause Solution
Weak signal Signal interference from other devices Distance MicroCell from other electronics
Connection drops Inadequate network optimization Evaluate network settings
Slow speed Congested network Turn off unused connected devices
No signal Location of MicroCell Position near a window for better reception

Connectivity Problem Solutions

To solve connectivity problems with your AT&T MicroCell, it’s important to take a systematic approach to troubleshooting, beginning with a restart of your device. However, if that doesn’t work, don’t worry. There are still a number of ways to improve your MicroCell connectivity.

  1. Relocate Your MicroCell: Try moving your device to a different location, ideally near a window. This can be vital in improving signal strength and enhancing coverage.
  2. Check Your Internet Connection: Your MicroCell relies heavily on a strong, stable internet connection. Make sure your Wi-Fi network is functioning properly.
  3. Update Your Device Software: Keeping your MicroCell’s software up-to-date can resolve a variety of connectivity issues.

Also Read – How to Unlock Hallmark TV: (Hallmark TV Activation)

Contacting AT&T Customer Care

If you’re facing persistent issues with your AT&T MicroCell, it’s essential to reach out to AT&T Customer Care for expert assistance. Their customer support team is well-versed in providing service assistance for a variety of concerns.

To connect, you can dial 1-800-331-0500 from any phone, follow the voice prompts, and be prepared to provide them with your account details. You can also access the AT&T support center online where you’ll find a range of troubleshooting guides and FAQs to help you.

Alternatively, you can use the AT&T mobile app to chat live with a representative. Remember to explain the problem in detail to help them understand and solve your issue effectively and efficiently.

Additional Activation Guides

Beyond setting up your AT&T MicroCell, you may also need guidance on activating other devices such as printers, streaming devices, and apps. Here’s a quick guide to help you:

  1. Printer activation: Visit the printer manufacturer’s website, such as 123.hp.com/setup for HP printers. Follow the on-screen instructions to complete the activation.
  2. Streaming services: Likewise, for streaming devices like Roku, go to roku.com/link and enter the code displayed on your TV screen. For activating apps like HBO Go, follow the instructions on the app.
  3. Apps: Most apps can be activated by logging into your account within the app and following the provided instructions. Make sure you have your account credentials handy for a smooth setup. Remember, the key to successful activation is following the instructions carefully.

Conclusion

Now that you’ve gotten the lowdown on your new AT&T MicroCell, you’re ready to take on its activation with confidence.

Just remember, it’s like putting together a puzzle – connect it to your Wi-Fi, find the sweet spot for placement, and activate at att.com/microcell-activate.

If you hit a snag, don’t fret, troubleshooting and customer care are at your disposal.

Welcome to a world of stronger, more reliable mobile signal. Enjoy the journey!

How to Activate Best Buy Account Online Credit Card: 2024

0
How To Activate Best Buy Account Online Credit Card

To activate your Best Buy online credit card, you need to visit the Best Buy homepage and look for the ‘Activate Credit Card‘ option. You’ll securely input your card details and then navigate through on-screen prompts related to payment methods. If you encounter any challenges, don’t hesitate to reach out to Best Buy’s customer service for assistance.

Once your card is activated, you’re all set to make purchases in-store and online, plus access the rewards program to accumulate points for discounts. There’s more to discover, so stick with us for further insights into using your Best Buy online credit card.

Also Read – How to Activate Your Capital One Credit Card

Activation Steps for Best Buy Online Credit Card

Getting through the activation process of your Best Buy Online Credit Card is a simple task, and it starts with opening a web browser and visiting the Best Buy homepage. From there, look for the ‘Activate Credit Card‘ option.

This is where online security comes in. You’ll need to enter your card details, so make sure you’re on a secure, private network. The site uses strong encryption for your safety. Follow the on-screen prompts, which includes setting up your payment methods.

You can link your bank account for direct debit or set up a credit card for payments. If you hit any snags, Best Buy’s customer service is there to help. And voila! You’re ready to start shopping with your newly activated card.

Using Activated Best Buy Credit Card

Once your Best Buy Online Credit Card is activated, you’re all set to make purchases both in-store and online with ease and convenience. This opens up a world of possibilities for you.

  • You can use it to shop for the latest electronics, appliances, and much more. Your online purchases become a breeze with this activated card, making shopping a smooth and enjoyable experience.
  • The card also grants you access to Best Buy’s rewards program. You’ll accumulate points with every purchase, which you can later redeem for discounts, making every shopping trip even more rewarding.
  • Plus, it boosts your buying power, allowing you to make bigger purchases and pay them off over time.

Activating Best Buy Gift Card Online

If you’ve recently received a Best Buy gift card, activating it online is a straightforward process that you can complete in just a few steps. Start by accessing the Best Buy website, then navigate to the gift card activation page. You’ll need to enter your 16-digit gift card number and provide your email address.

Once activated, the card is ready for online purchases, turning it into a tool of convenience for buying anything from electronics to appliances. This process simplifies digital payments, making your shopping experience smoother and more efficient.

Also Read – How to Watch Big Brother Canada on Roku

Verification Process for Gift Card Activation

To ensure the security of your Best Buy gift card, a verification process is established that you’ll need to successfully navigate before the card is fully activated. This process is essential for ensuring your online account security, and is as trouble-free as possible.

  • You’ll start by entering the 16-digit gift card number found on the back of your card.
  • Next, you’ll need to input your email address.
  • You’ll then be asked to complete a captcha or security question for gift card verification.

Contacting Best Buy Customer Service

Whether you’re dealing with issues related to card activation or have any other queries, reaching out to Best Buy’s Customer Service can be an important step towards resolution. They’re readily available to help you with account troubleshooting and can guide you through any problems you’re experiencing.

Best Buy offers several avenues to contact their customer service, including a dedicated hotline and an online chat support. You can access these services through their website or mobile app. Their team is trained to help you resolve your issues quickly and efficiently, ensuring you can get back to using your online credit card account smoothly.

Also Read – How to Activate/Watch Hotstar on Roku

Preparing for Customer Service Interaction

Before you reach out to Best Buy’s Customer Service, it’s crucial to gather all pertinent information about your online credit card account. This can greatly expedite the troubleshooting process and lead to a more efficient interaction. In preparing for this interaction, you’ll want to focus on:

  • Preparing documentation: Collect all necessary account and personal details. This includes your credit card number, account number, and any correspondence you’ve received from Best Buy regarding your account.
  • Communication strategies: Have a concise and clear explanation of your problem ready. This will help the customer service representative understand your issue more quickly and provide a solution.
  • Patience and respect: Keep in mind that the representative is there to assist you. Being patient and respectful can make the process smoother and more pleasant for both parties.

This preparation can significantly enhance your customer service experience.

Related Posts on Device and Card Activation

Getting through the activation process can sometimes be challenging, so let’s examine related posts that offer detailed instructions on setting up different devices and cards.

For instance, HP printers require specific steps for software installation and network setup. Activating a new Sprint SIM or device can be done by visiting their online portal. Roku devices can be activated using roku.com/link, while the Spectrum TV App can be set up on your streaming device with just a few clicks.

Bank of America offers a simple online process for activating credit, debit, and EDD cards. Not only do these activations make your life easier, but they also enable you to earn Best Buy rewards and keep pace with online shopping trends.

Stay tuned for more helpful guides.

Also Read – How to Activate Your Sears MasterCard

Commenting and Engagement Guidelines

To enhance your online experience and promote a healthy discussion, it’s crucial to comprehend the guidelines for commenting and engagement on our platform. We value your thoughts and encourage you to share them with us.

Here are some engagement strategies to follow:

  • Be Respectful: Treat others with respect. Avoid abusive or offensive language.
  • Stay On Topic: Keep your comments relevant to the topic at hand.
  • No Spam: Don’t use the comment section to advertise your products or services.

Our comment moderation team works diligently to maintain a respectful, engaging and informative conversation. Should your comment not appear immediately, it may have been flagged for review. Don’t be discouraged; this is part of our effort to ensure a high-quality interaction for all users.

Conclusion

That’s it! You’ve successfully navigated the Best Buy credit card activation process. Now you’re all set to start reaping the rewards.

Remember, activating your Best Buy card is like opening a treasure chest of opportunities. Don’t hesitate to reach out to customer service if you ever encounter a hurdle. They’re always ready to assist.

So, go ahead, immerse yourself in the convenience of your Best Buy online credit card and enjoy your shopping!