Home Blog Page 4

Vizio Smartcast Not Working: (Don’t Panic, Easy Fix in 2024!)

0

Vizio Smartcast Not Working

You have reached the right destination if you have any queries regarding Vizio Smartcast Not Working. This detailed guide will equip you with all the information you need.

Vizio Smart TVs are among the best in the market today, with affordable prices and the latest technological advancements. However, some issues show up after a certain point. 

One of the very common of these is the smartcast not working. This has been seen over a while and has multiple causes and answer keys. Have you reached here looking for solutions for it? If yes, then worry not – we have the fix!

Vizio SmartCast not working has the most simple solution – updating it while the message appears on the TV screen. However, there are several other possible reasons, and their fixes range from simple device glitches to complex ones. This article will list all of them!

All these are convenient and quick fixes that do not require you to be tech-savvy or an expert at technological advancements. 

Read the article till the end to get the best solution for your issue!

If you try every single one of these methods in chronological order, I am pretty sure one of them will work for you.

Recommended Reading – Vizio Airplay Not Working: (Try THIS Fix First!)

Vizio SmartCast Not Working – Causes

Causes

Determining and understanding the matter of trouble is necessary before jumping straight into the solutions to the issue. Hence, we will first examine the various reasons behind the problem. 

This will also assist in determining what will suit the best to your device! Here are some of the possible reasons behind this.

Simple Glitch

Yes, even a simple glitch due to power load or storage overload will also result in this smartcast crashing or Vizio TV turning on by itself.

Internet Connection

Any issue in internet connectivity will result in this form and might be the reason behind many more problems like Vizio TV freezing randomly

Un-updated Software

Outdated software will not support the well-functioning Vizio TV and may contribute to the Vizio TV smartcast losing connection. 

App Issue

It might not always be your TV at fault; the app might also be faulty. You should download the app again and deal with the settings again.

Faulty Settings

Default settings in the Vizio Smart TV will also result in such an issue. Hence, you might need to discard them and make arrangements according to your preferences and convenience.

Recommended Reading – Activate the Soap2day on Roku (Effortlessly in Seconds)

Vizio SmartCast Not Working – Solutions

Solutions

Since you now might have figured out where the problem lies, it will become easy to determine which solution will work best for your device. There is no need to try every solution now. 

Here are the answer keys to your issues.

Power Cycle/Reboot Your Vizio TV
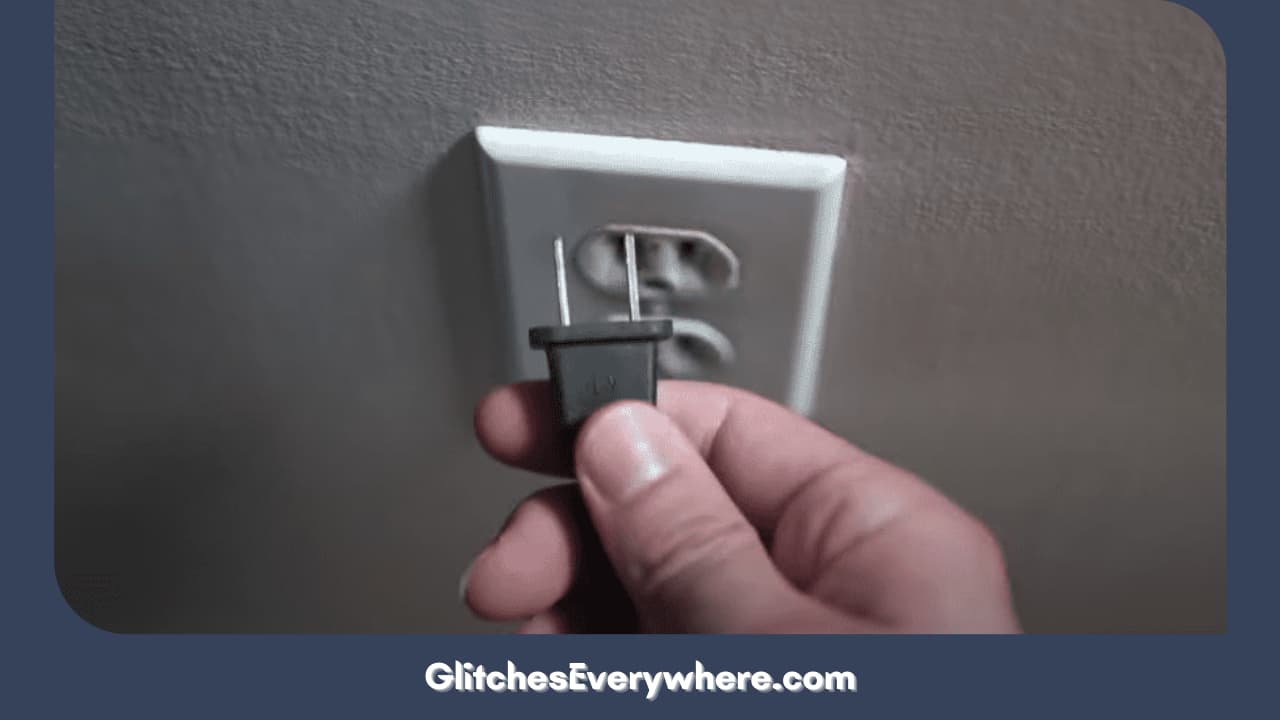
Power Cycle Your Tv

One of the foremost steps when facing any Vizio Smart TV issue is power cycling or rebooting. This clears up all the bugs and gives your Vizio TV a smooth start that will support the overall working of the Vizio TV, enabling faster downloading of apps

A power cycle test is one of the simplest ways to troubleshoot performance issues on your Vizio Smart TV. When the screen stays black, turns off at random times, or doesn’t come on, it can be the job of a power cycle test.

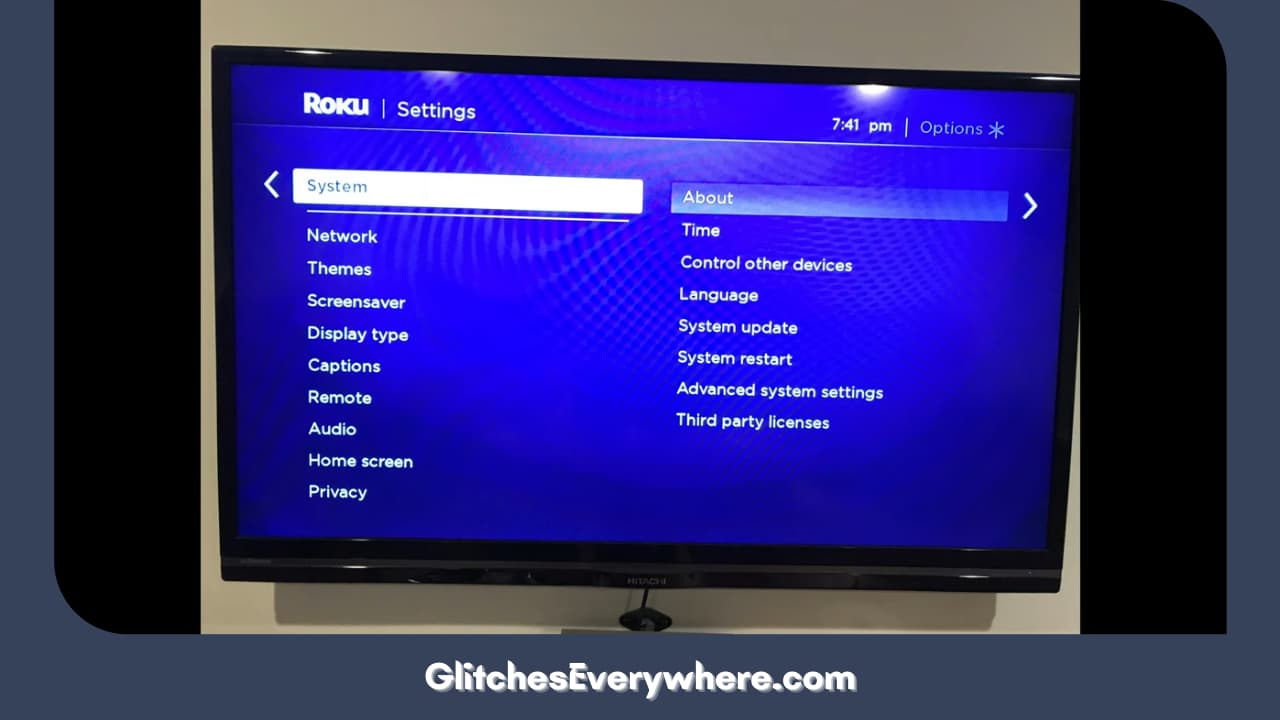
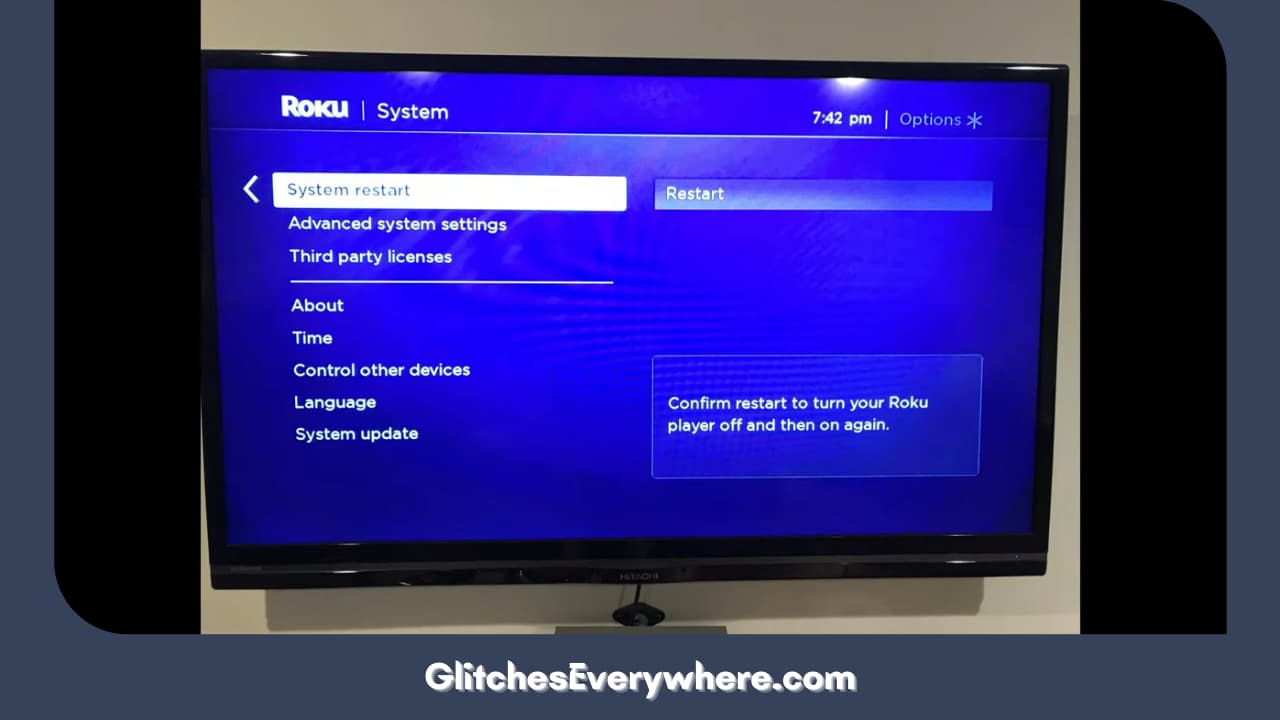
Here is a step-wise guide if you want to reboot/power cycle your Vizio TV.

  • First, turn Off your Vizio Smart TV and unplug it from the socket.
  • Leave your Vizio TV in this state for about 2-3 minutes.
  • Then, press and hold the power button for about a minute.
  • Repeat this step a couple of times. 
  • Plug back the Power cable and power on the Vizio TV.

Our testing found that this simple procedure helped apparent bugs and solved problems from faulty software to bad syncing. Thus, precautions are always better than cure!

However, if it has yet to help, look for the next solution.

Update the Vizio Smart TV Firmware
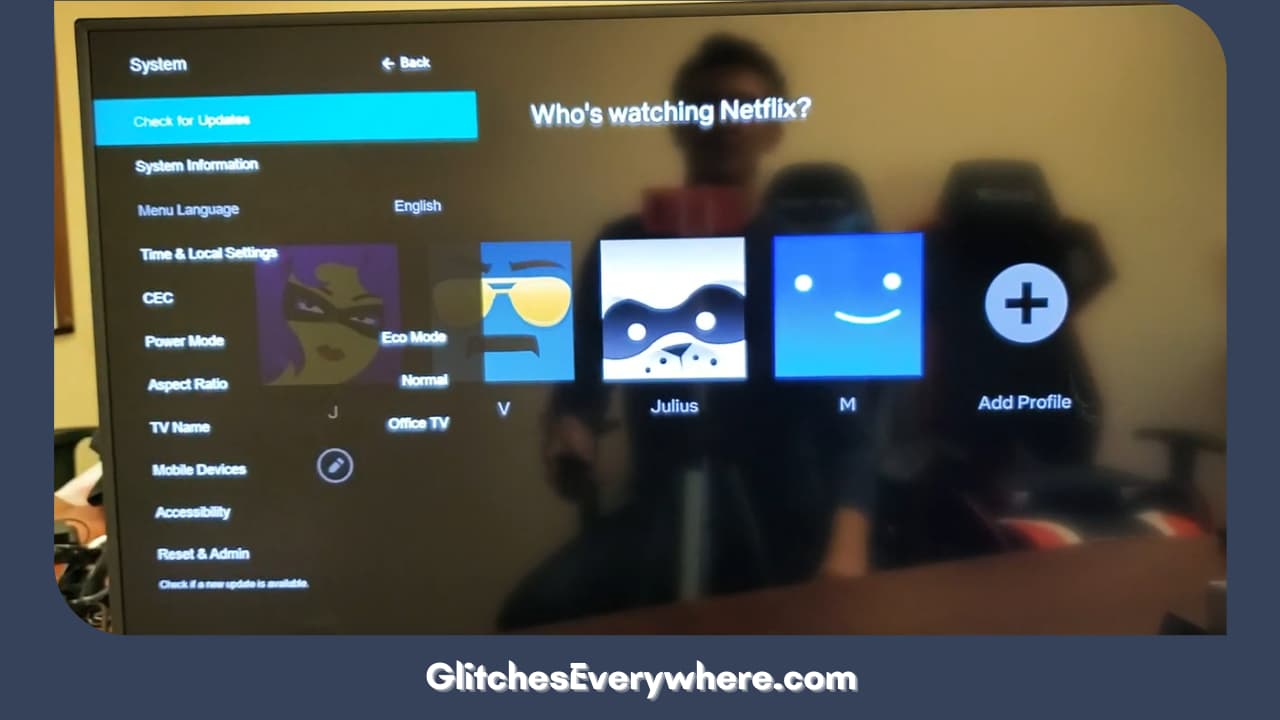
Select Check For Updates

Running on an un-updated software version also allows it to work at a reasonable speed. Your Vizio TV might be operating on an older software version and, hence, not working and crashing the smartcast network. 

Even if you consider the benefits small, updating has many more advantages. We can achieve general stability, fix bugs, address security issues, and add many other interesting new features along with the fixation of our case. 

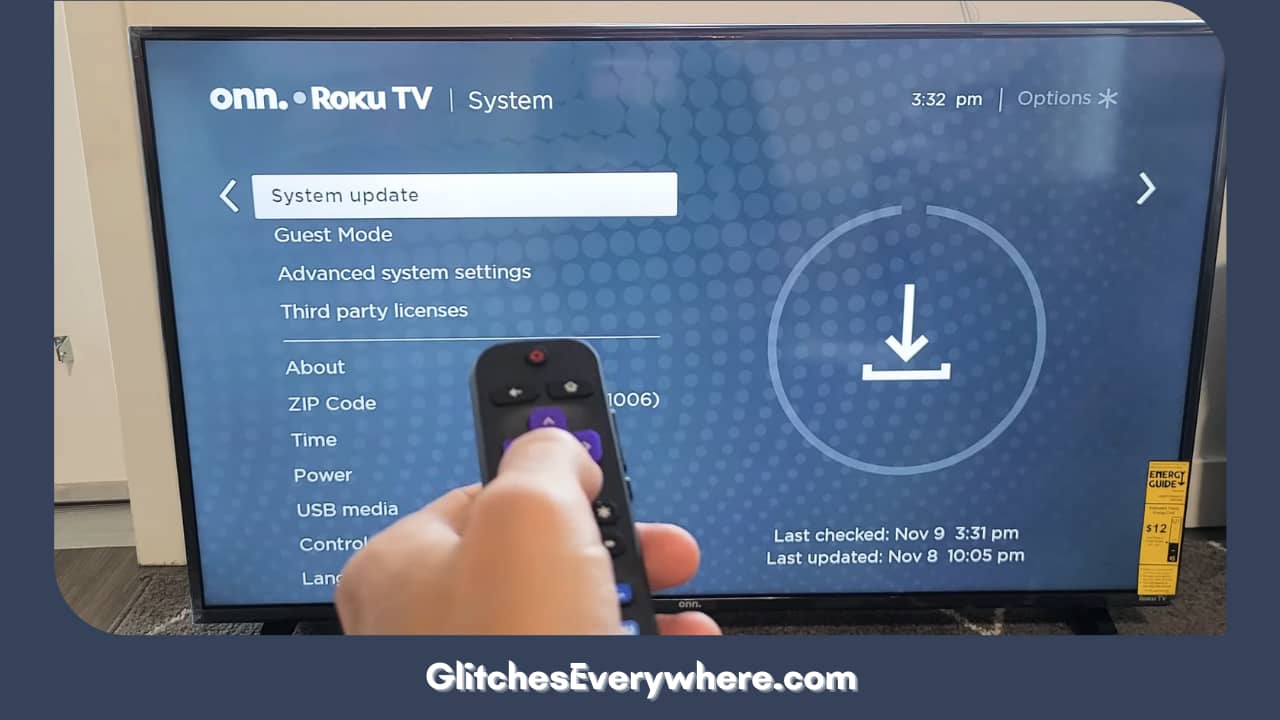
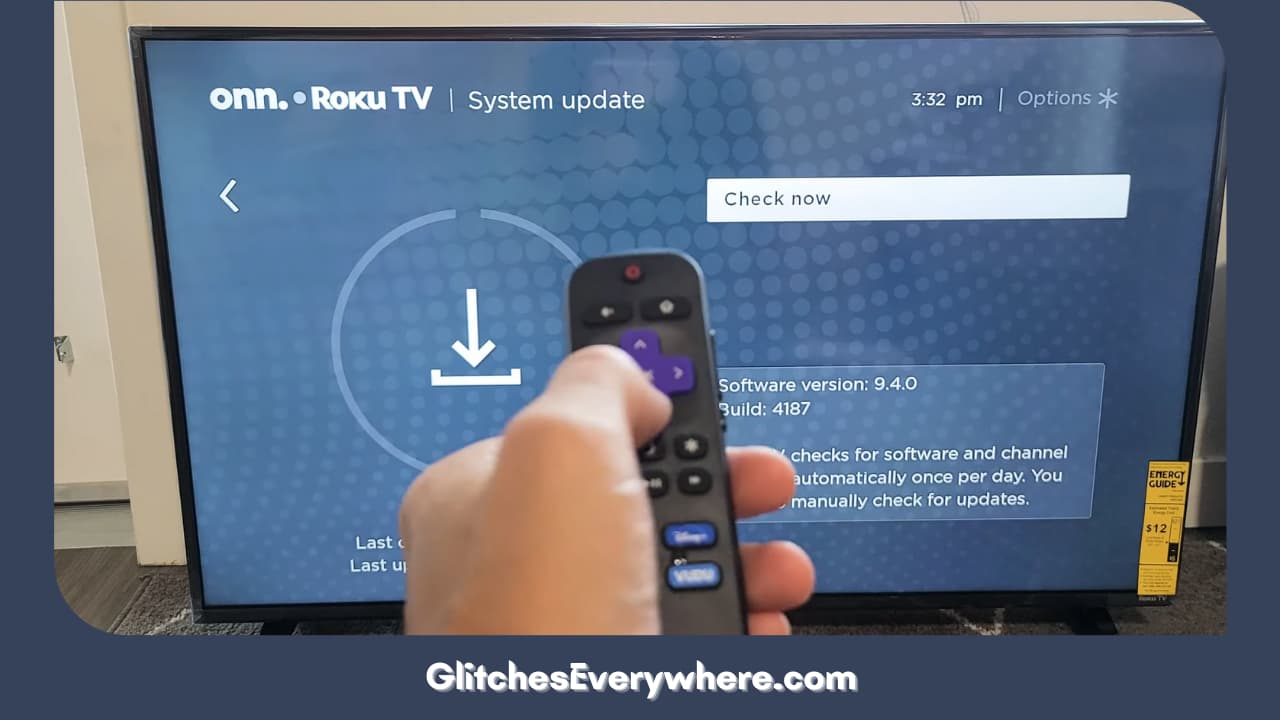
To update your Vizio Smart TV, follow the steps mentioned.

  • On the Menu tab, open System.
  • Select Check for Updates.
  • Hit ‘update now’ and follow the on-screen prompts if any updates are available. Wait for the updation process, and now see if the TV usually works.

This process will solve many other minor problems as well. But if it has not worked well for your TV, consider moving to the next solution mentioned.

Check/Unplug the Vizio Smart TV’s Power Cord
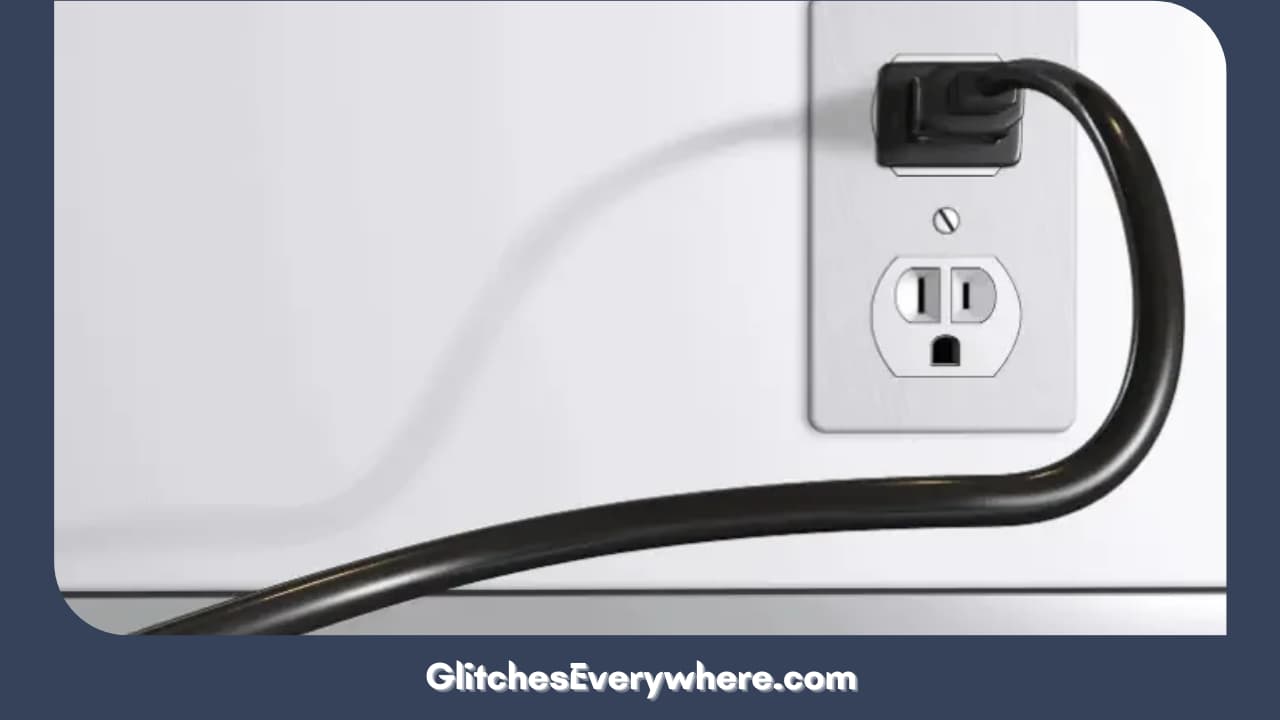
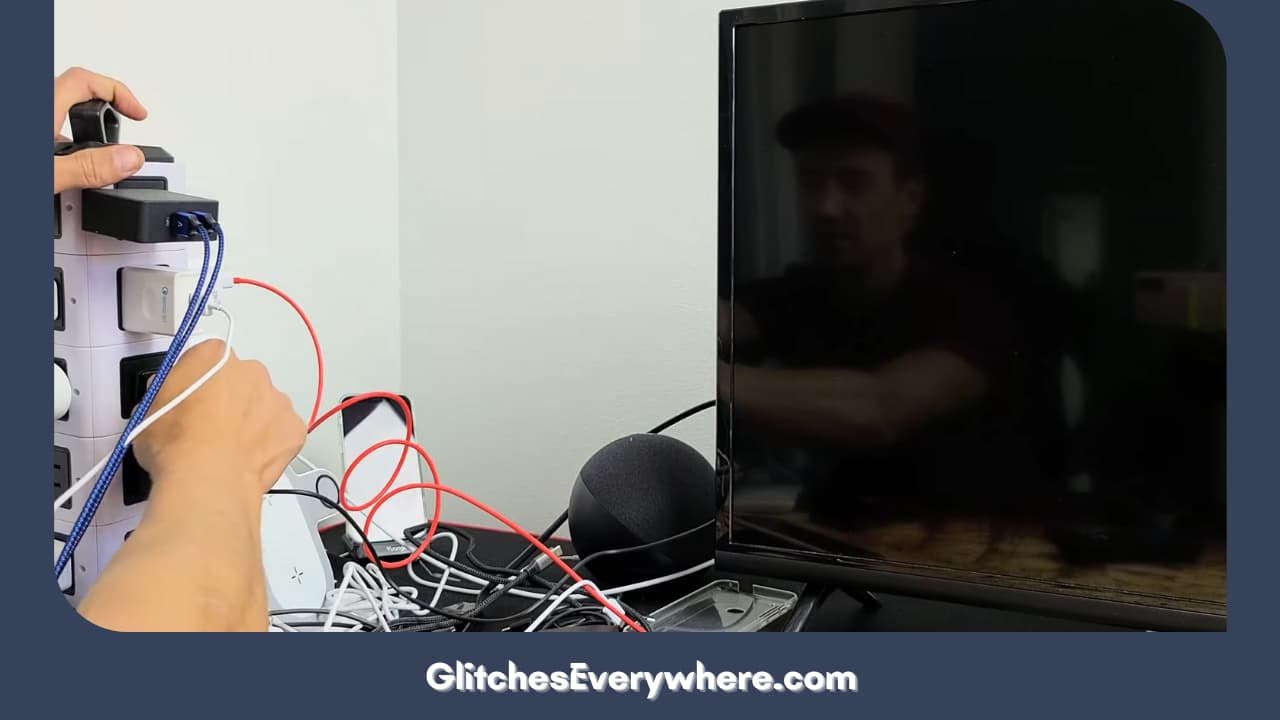
Check Power Cord

Unplugging the Vizio TV’s power cord from the wall socket is one of the easiest and most common ways to solve the Vizio Smart TV smartcast crashing issue.

Wait for at least one minute after unplugging the power cord. Press the power button on your Vizio Smart TV and hold it for 30 seconds. It will allow the Vizio TV to reset itself as it drains the remaining residual power. The next step is to plug the power cord back in and check if the issue is resolved. If it’s not, move on to the next hack.

Are you still waiting? Do not worry, for there are a few more solutions.

Clear Cache on Vizio Smart TV
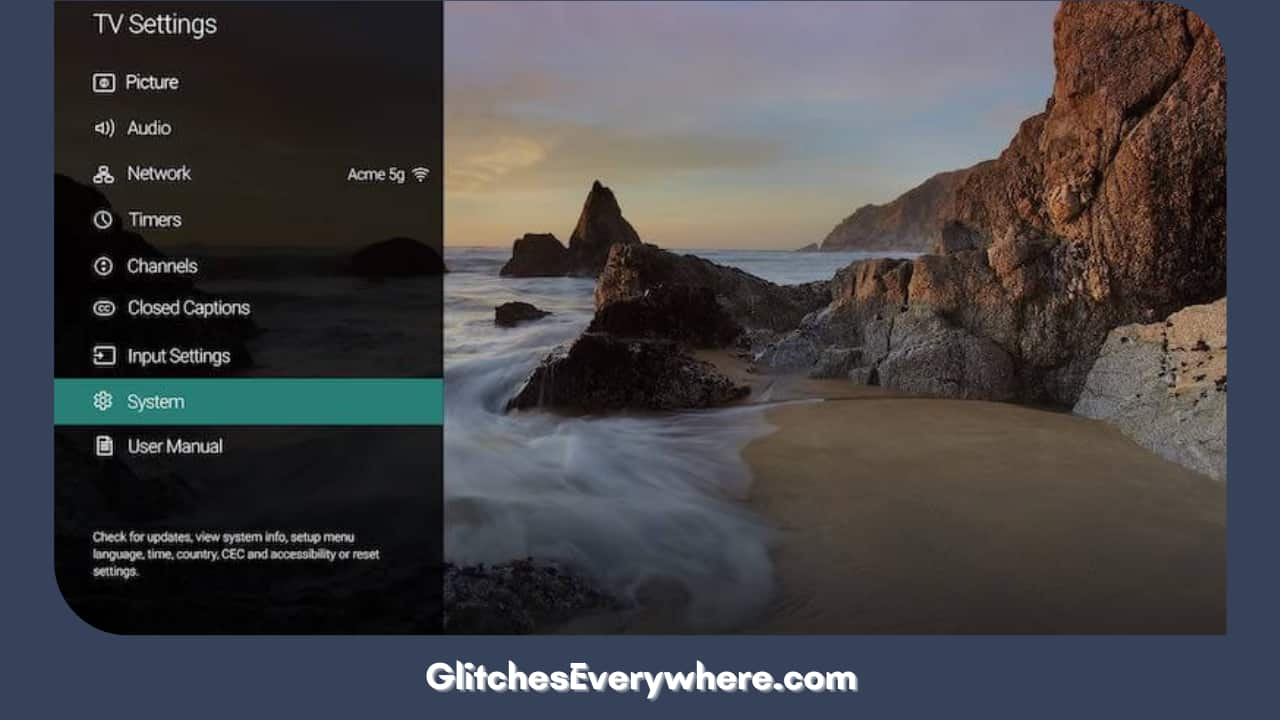
Clear Cache On Vizio Smart Tv

Cache files burden a device’s storage; hence, the device may face problems functioning smoothly. 

This can also contribute to the airplay option not appearing on your Vizio smart TV device. Clearing these cache files might solve the problem. 

To clear your Vizio TV’s cache files, follow the steps mentioned.

  • Go to the VIZIO SmartCast homepage.
  • Navigate to VIZIO TV Settings and select the Apps option.
  • Head to System Apps and select the AirPlay option.
  • Click Clear Cache and click OK to clear all cache files.

Now, look if the AirPlay appears on your Vizio SmartCast home screen. If you still can’t fix the issue, change the Firewall Settings on your Mac.

It’s sad if this has not worked as well. However, there is one last resort you can always look forward to, which is mentioned next. 

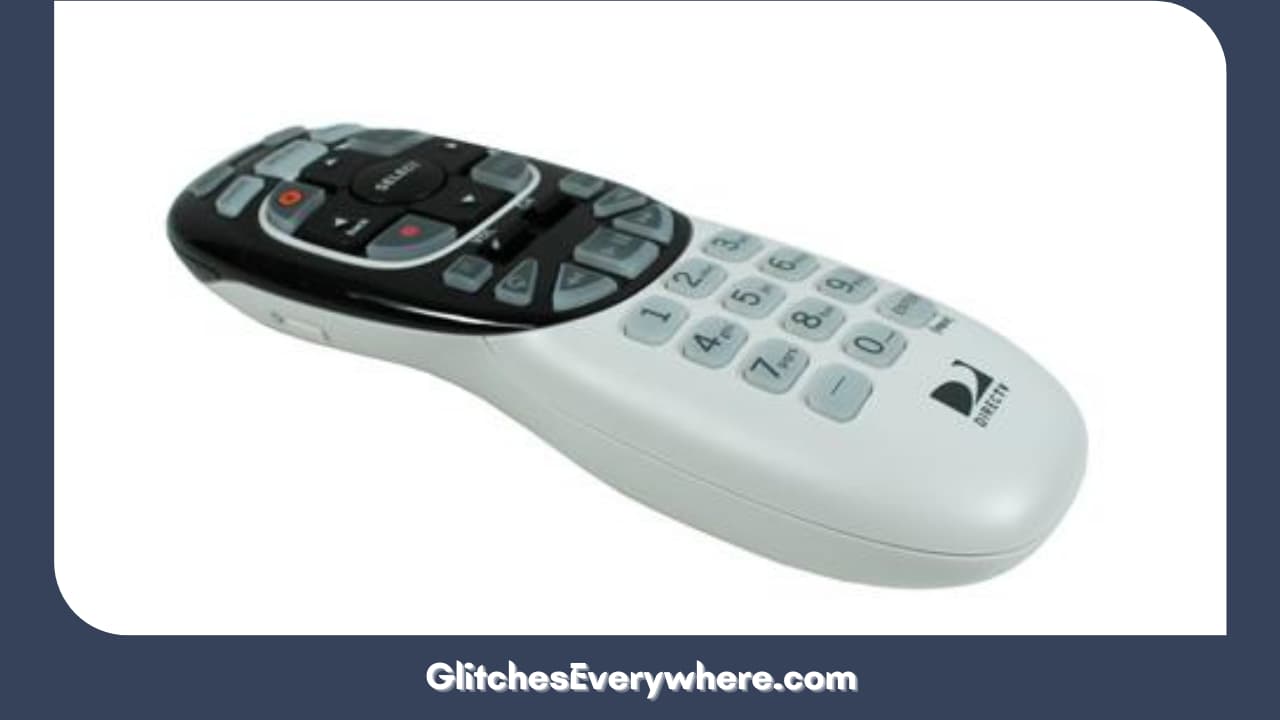
Replacing the Remote Control’s Batteries
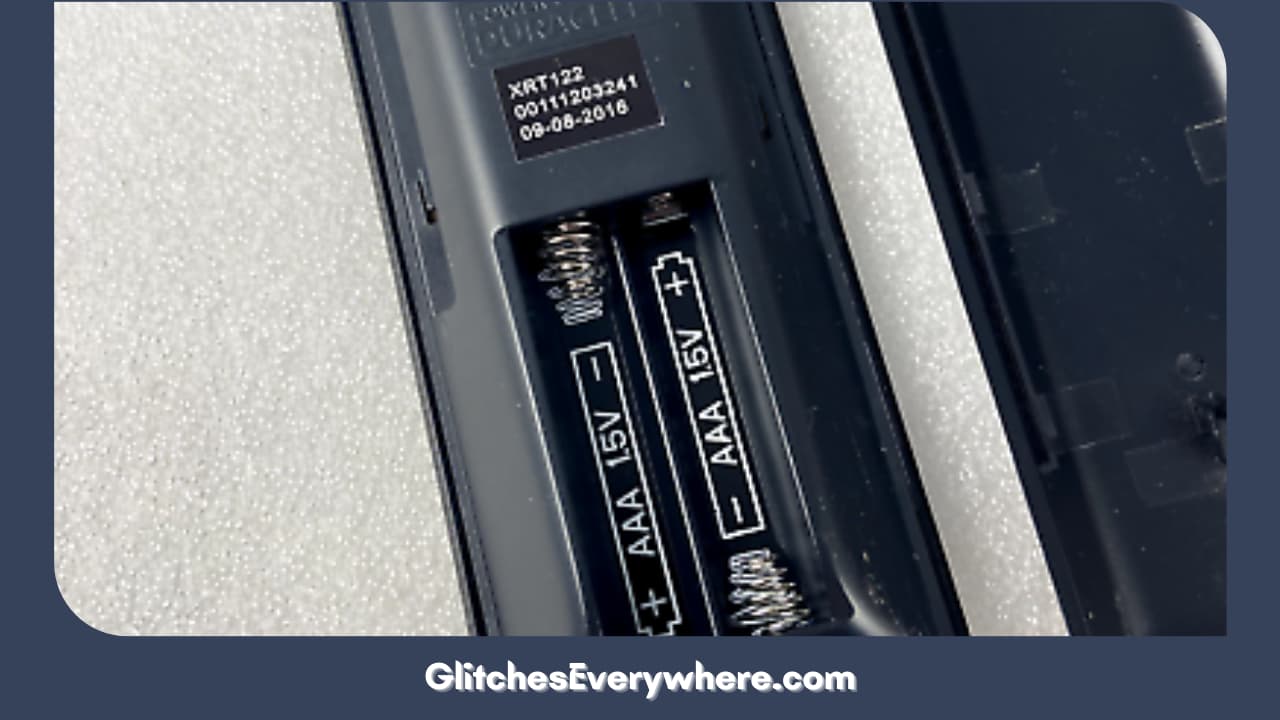
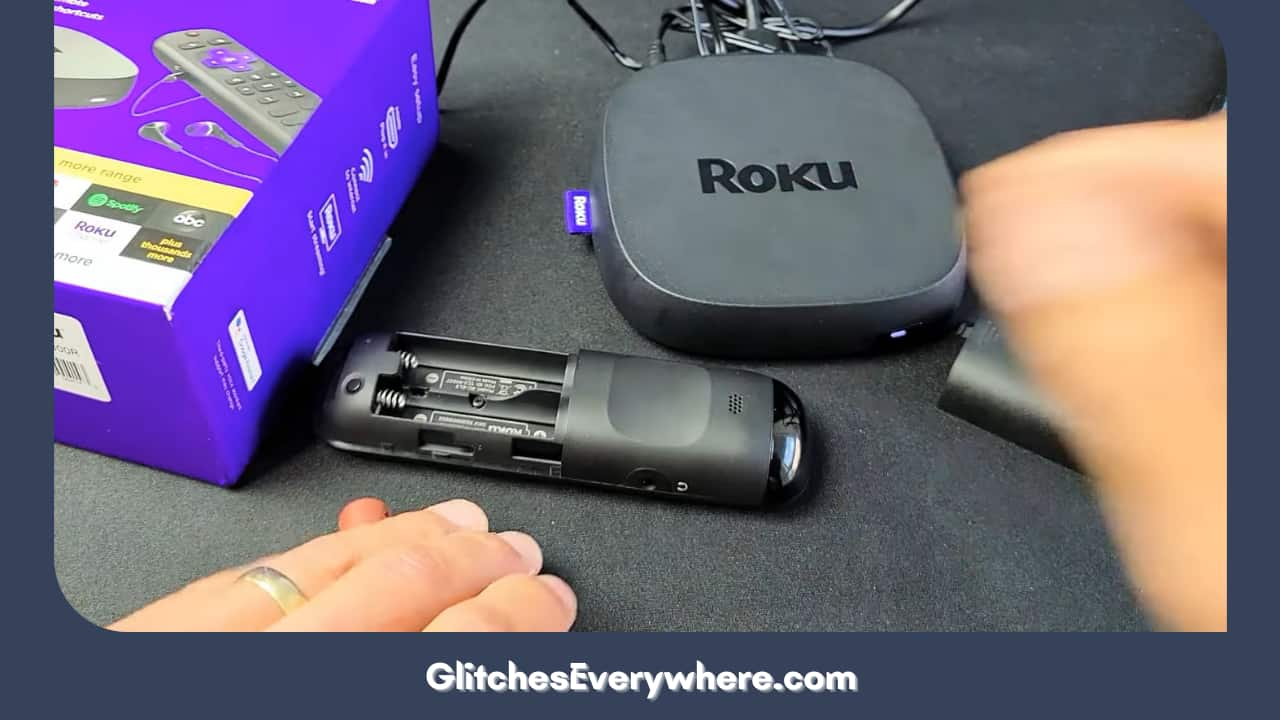
Remove Batteries From Your Vizio Tv Remote Control

Replacing the batteries is a fundamental and straightforward solution for a Vizio TV remote not working or responding with a delay. Any remote requires power to work, and lack of which is sure to show problems. 

To do this, you can remove the back panel where the batteries are and insert new cells or batteries, keeping in mind the positive and negative terminals. Choosing the battery of the same company or brand is also recommended. 

However, if it does not work, your remote might need a factory reset. 

Reinstalling the App

Reinstalling The App

At times, the problem might not be with your device or any others but due to an issue with the website/app that you are using. Hence, it is recommended to reinstall the app/website you are using to sort out any such error. 

This will be an excellent idea if you are okay with downloading and re-logging into your apps. This procedure ensures that the apps with faults are removed from your Vizio TV and, instead, new ones with updations are installed. 

Here are the steps for the same.

  • On your Vizio TV remote control, press the Home button.
  • Press the center button after selecting the affected app from the Apps menu.  
  • From the pop-up menu that you see, select Delete or Uninstall.
  • On your Vizio Smart TV, go to the App section, search for the app, and install it.
  • Wait till the app fully downloads and installs on your Vizio Smart TV, then connect with your login credentials.
  • Try and see if the freezing is still there. 

This has worked for your Vizio smart TV as well! However, if you still need to, here are the last two solutions you can look forward to. 

Wait for Some Time

This might sound not very reassuring, but it is the most basic advice to deal with any Apple product. This gives space to the device to function and load things. 

If the issue continues for a long, move to the next. 

Check the Warranty of your Vizio TV/Contact Vizio Technical Team

Contact Support

If you need help with the options/solutions mentioned above, consider checking if the warranty covers the loss. Contact the Vizio Technical Support Team for their opinions on your Vizio TV’s condition. If it is, they will replace or repair your TV without extra expenditure.

They also service your home if the damage is covered under warranty, so it is worth a try. If not even that, contact the Vizio Technical Support Team.

They will help you with the best possible solution for your issue.

Helpful Answers

Helpful Answers

Is SmartCast similar to Chromcast?

SmartCast and Chromecast are similar in casting apps for smart TVs like Vizio.

To put it in context, SmartCast is a level higher than Chromecast. The main advantage is that SmartCast lets apps update automatically instead of a series of rolls out to update one app on the TV.

Let’s look closely at this table for comparing SmartCast and Chromecast. It uses Chromecast.

How to set up SmartCast on the Vizio Smart TV without using the TV’s remote control?

To set up SmartCast on the Vizio TV without the remote, download the Vizio TV remote app. You can use the app to control all the TV’s functions, including setting up SmartCast.

When installing the Vizio TV remote app, install the SmartCast app on your TV or mobile device to start casting or streaming.

How do I SmartCast to my Vizio Smart TV?

For smart casting to your Vizio Smart TV, here are some steps/things you can consider doing.

  • The Wi-Fi of your Android TV and the Vizio Smart TV should be the same. 
  • Now, look for the app you want to cast for its content. 
  • Look for the casting option in this app and click on it once you find it out.
  • The list will now appear on your device. From this, choose your TV’s name. 
  • When Cast. If it changes colour, you’re successfully connected.

How to fix SmartCast loading?

Here are two significant ways for the same.

  • Refresh SmartCast Home. Menu or > System > Menu Language > Select Spanish or French. Note: Do not close the menu. Wait for SmartCast Home to load. 
  • If SmartCast Home still isn’t loading. You will need to reset your television. Menu or. > Admin & Privacy >Reset to Factory Settings > OK.
  1. Why must I repeatedly reboot or power cycle my Vizio Smart TV for minor issues?

HDMI or Input Problems: If you experience issues with HDMI input or other connected devices, a reboot can help reset the connections and resolve any compatibility or handshake issues. 6. Power Surges or Fluctuations: Power surges or fluctuations can disrupt the normal functioning of your Vizio Smart TV.

Recommended Reading – Vizio TV Not Connecting to WiFi: (Don’t Panic, Easy Fix!)

Wrapping Up

SmartCast crashing or any other issue may make your day irritating. But it is these small challenges and how we react to them that define our very fighting spirit.

This guide is for the same purpose: to help you resolve the issue of Vizio TV randomly freezing up. The article has several easy-peasy solutions that do not require you to be an expert.

A check on all the possible software and hardware issues is good. If none of the answer keys were helpful, your Vizio Smart TV might have a damaged PCB/motherboard. If that is the case, contact the customer services of Vizio for further assistance.

I hope this article was of help! Thank you for reading it till the end!
Why is Roku Remote Not Working: Fix in Seconds 2024

0

Why Is Roku Remote Not Working

You have reached the right destination if you have any queries regarding Why is Roku Remote Not Working. This detailed guide will equip you with all the information you need.

Wondering why isn’t my Roku remote working. Do not worry since you are already at the right place. Read through the end of this article in order to re pair Roku remote on your own today!

Begin with cleaning your remote and replacing its batteries. Then check the remote’s settings and re-pair your remote. Check for infrared disturbances or instances in the remote’s line of sight. Try resetting your device too. In the meantime, you can download the Roku mobile app to access your Roku account.

Now, how to re-pair Roku remote? How to reset it? How can I use the Roku app to my advantage? All these questions and more have been answered in detail in our comprehensive how to fix Roku remote guide!

Recommended Reading – Why is Vizio Remote Is Not Working: Fix in Seconds

Roku Remote not Working: Analyzing the Problem

Analyzing the Problem

If you’re looking up how to fix a Roku remote, you should begin with what is exactly wrong with your remote. This problem can show itself in different ways which is why you should be keen while observing and analyzing what is exactly wrong with your device. 

Your remote can stop responding at all, meaning none of the buttons work for no channels. Alternatively, only a few buttons may not be working or the remote is unresponsive only in the cases of a few apps.

In the last case, the issue may not be with the remote at all but with the app. Here, you should try removing and then reinstalling the app on the device. 

For the other two cases, the question that arises is: how to fix Roku remote now? In the later sections, I have described a detailed guide of why won’t my Roku remote work solutions are tried and tested to work. Though not all solutions may work for you, if you go through all of them one by one, you are bound to find one that works for you.

Recommended Reading – Why is YouTube Not Working on Roku: Fix in Seconds

How to Fix Roku Remote

How To Fix Roku Remote

Now that we have all the background knowledge that we need for the ‘why is my Roku remote not working debacle’, we can get into the solutions. Follow these steps in order or not and by the end, I am positive you would have fixed your problem.

Check for Infrared Inference

Check For Infrared Inference

Wondering: why won’t my Roku remote work? In some cases, there might be obstacles between your Roku remote and the device in the form of other infrared devices. Their mere presence in your Roku set’s proximity is enough for it to be considered a hindrance. Keep in mind this also includes sunlight! Now, why is that?

They can intervene with the passing signals between your remote and the device, thus causing connectivity issues and making the remote unresponsive.

Roku Re-Pair Remote

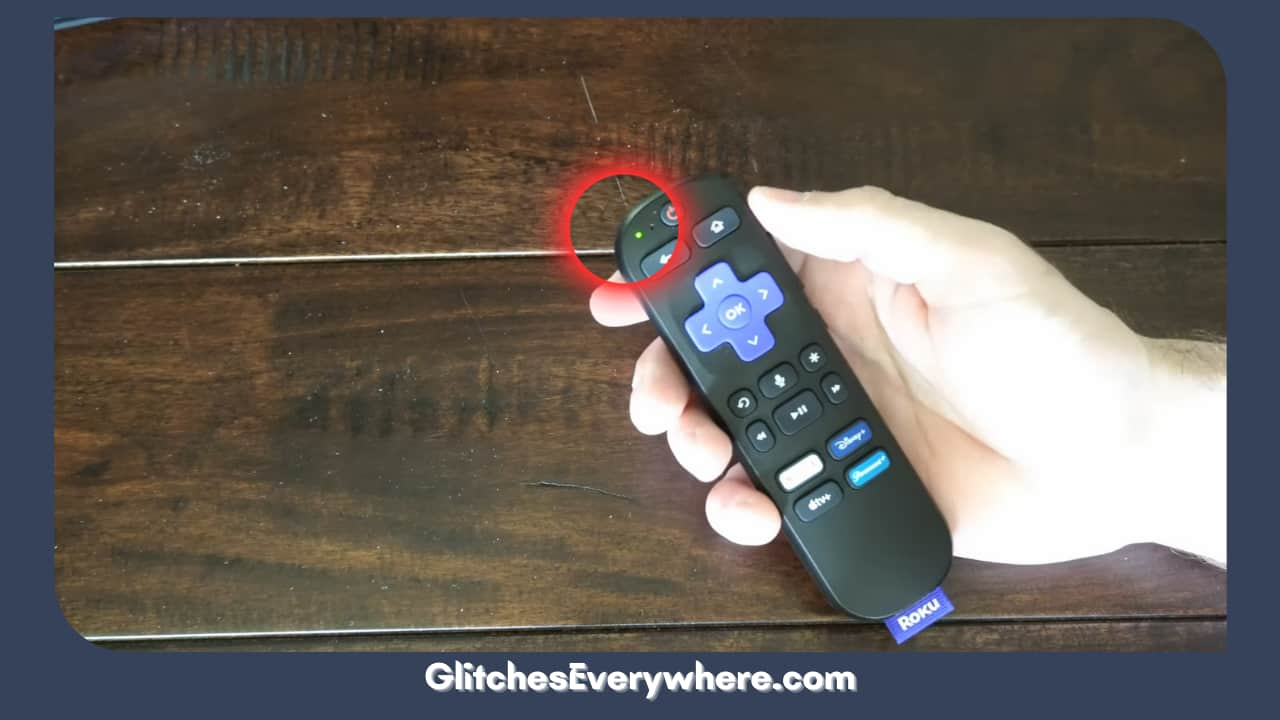
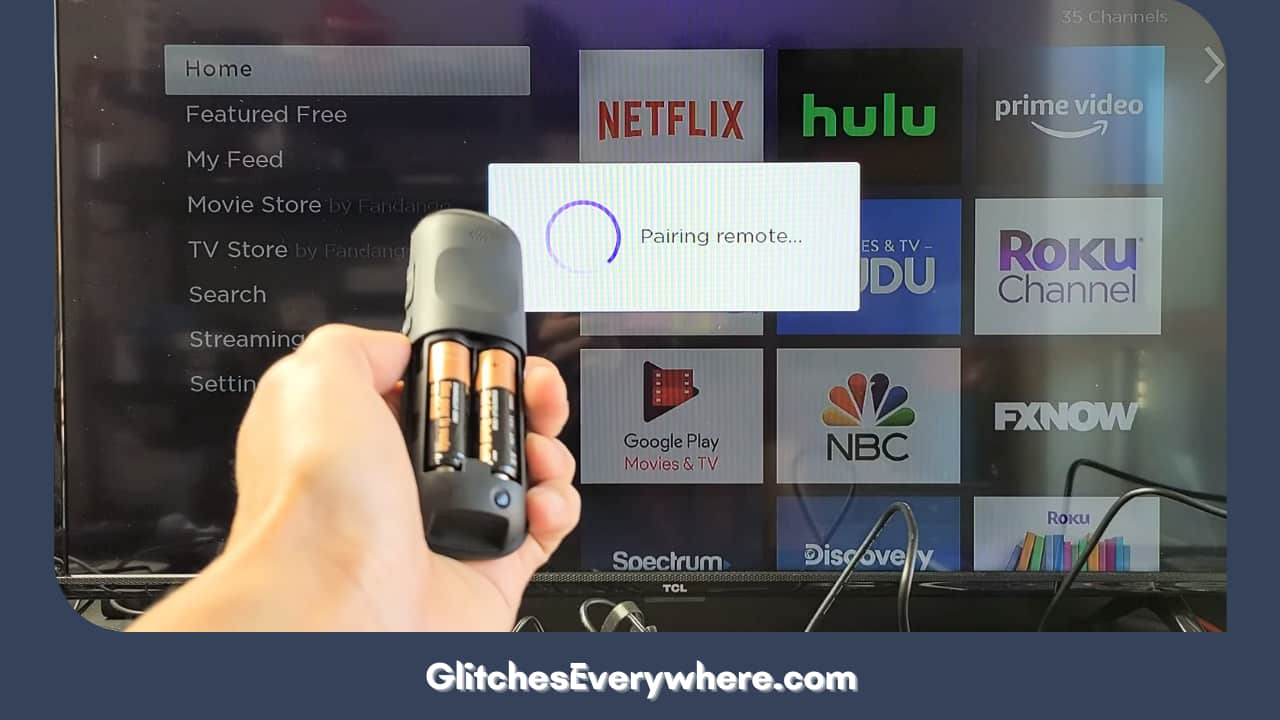
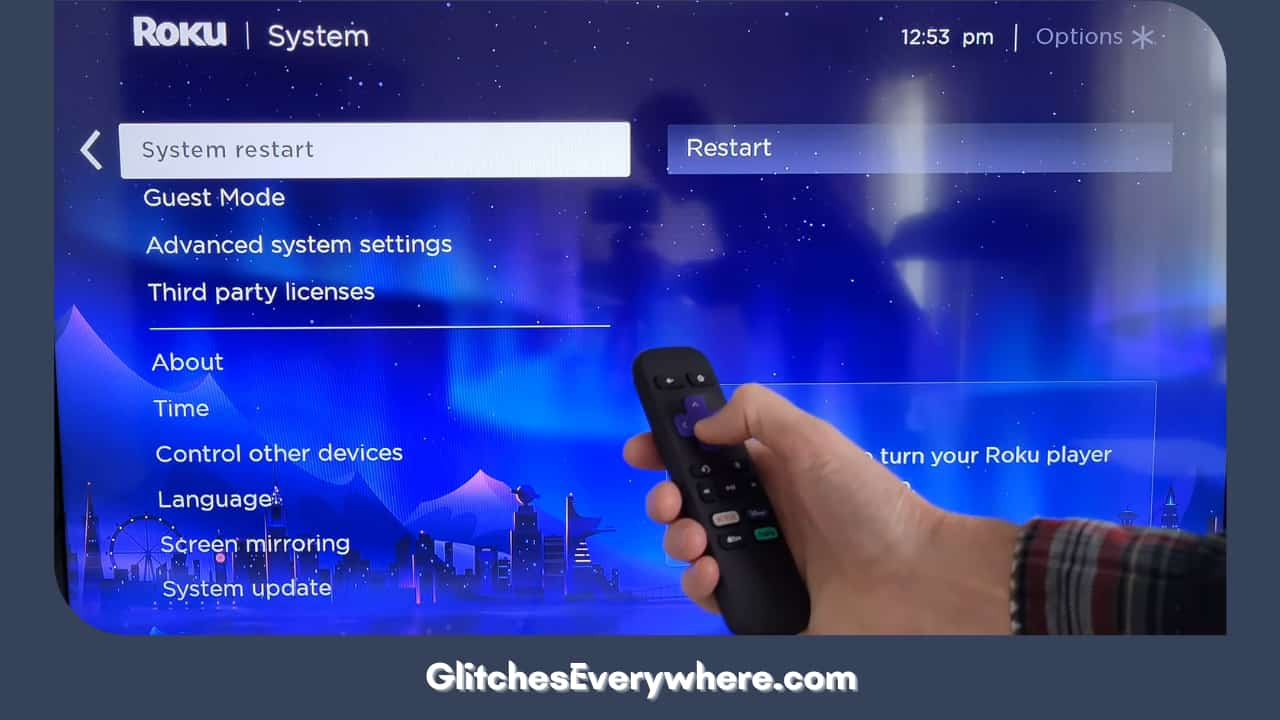
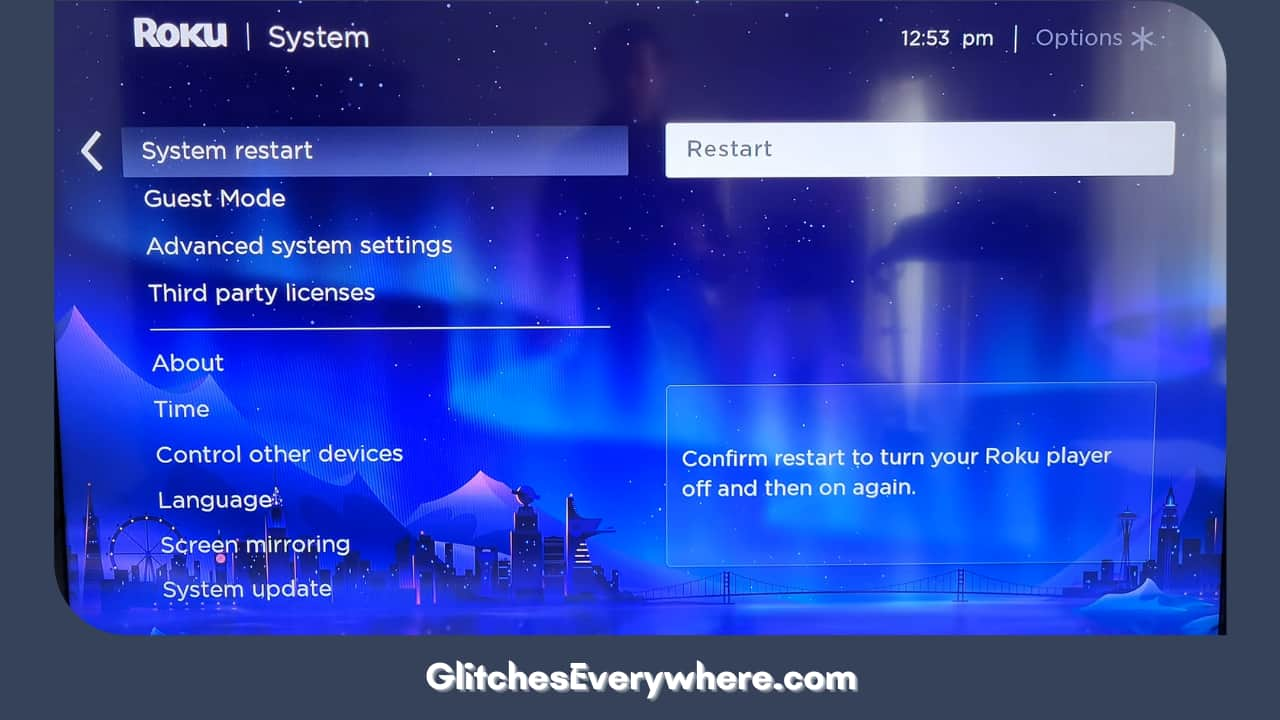
At This Point, You Will Be Able To See A Status Light On Your Roku Remote. This Light Is An Indication That The Roku Remote Is Now In Pairing Mode.

This is a reminder that your Roku remote needs to be paired with your device at all times in order to work well. In many cases, the remote loses this crucial pairing and thus does not respond to any command given to it. In these cases, you need to pair them up again.

How to re-pair Roku remote? Here it is, follow these steps to do the same in less than a couple of minutes:

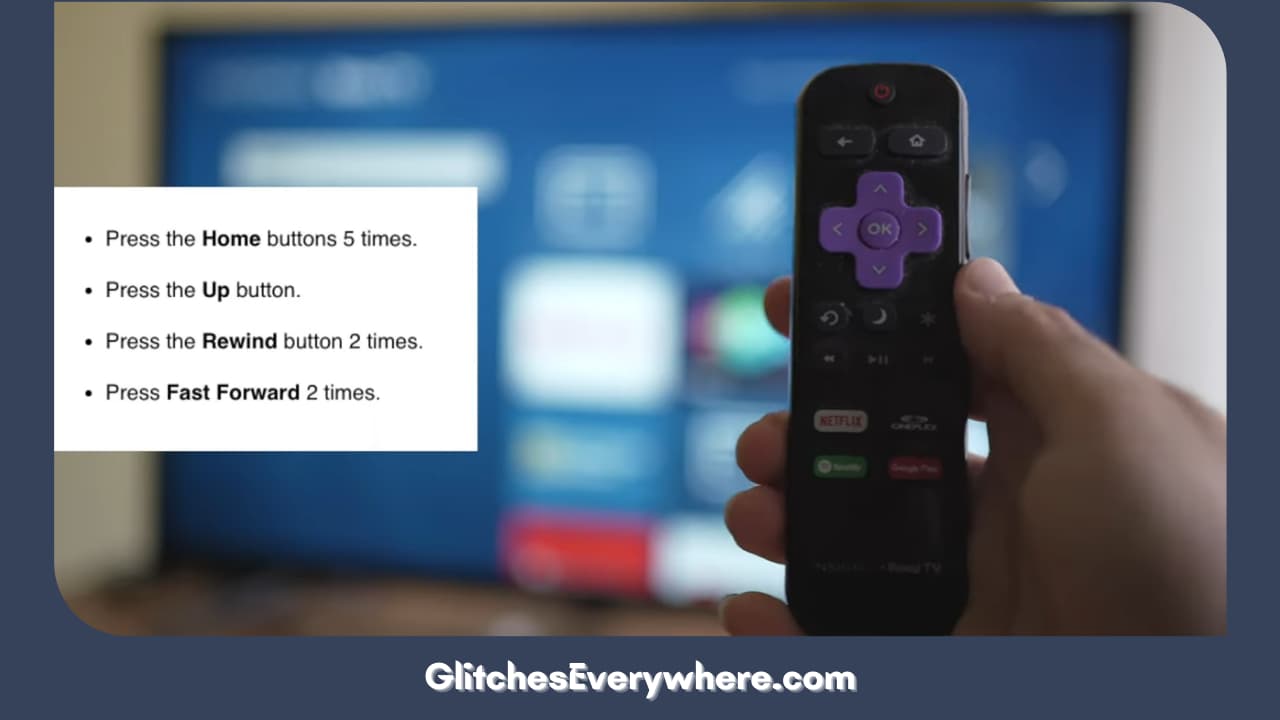
  1. Press and hold down the pairing button on your remote. You’ll find it at different places with respect to your model. Hold down the button until the LED light on it starts flashing. This is an indication that it is in pairing mode.
  2. Now, wait for your Roku device to discover and recognise the remote. Only then, do you release the button.
  3. Once the pairing is done, you’ll know if the light stops flashing.

And that’s it! After this, the remote should start working well. Also, note that all remotes do not need to be paired like this. The rule only holds true to enhanced remotes. These include voice remotes that make use of RF radio waves. 

On the other hand, infrared Remotes do pair on their own. If you still insist on trying to ‘Roku re-pair remote’ them, simply open their battery compartment, take out the batteries and put them back.

Wondering why won’t my Roku remote works despite this. There are many more reasons and solutions to go, we are just getting started!
Check for Other Established Connections

Let Your Devices Connect Again On Their Own

You might have to use the above how to re pair Roku remote guide in another case, i.e. if the remote has been paired to another device by mistake. In this case you’ll have to end that connection and make it to your Roku device of choice.

How do you find out if there is another such connection already established? You do that through the remote settings on your Roku device’s menu and settings. Browse through the remote details and double-check if the configuration of settings is the way you want it and not connected to something else, set on some mode or completely disabled.

Why isn’t my Roku remote working now? Maybe it’s completely broken? Continue reading to find out.

Check for Physical Damage

One of the most common answers to the Why isn’t my Roku remote working question is physical damage to the remote. In simpler terms, your remote might be broken. 

Think, did your Roku remote take a fall recently? Did your dog chew on it? There are so many possibilities! If the remote is fully unresponsive, there is a high chance of this case. Here, the only option you have is replacement here.
Clean Your Remote

Clean Your Remote

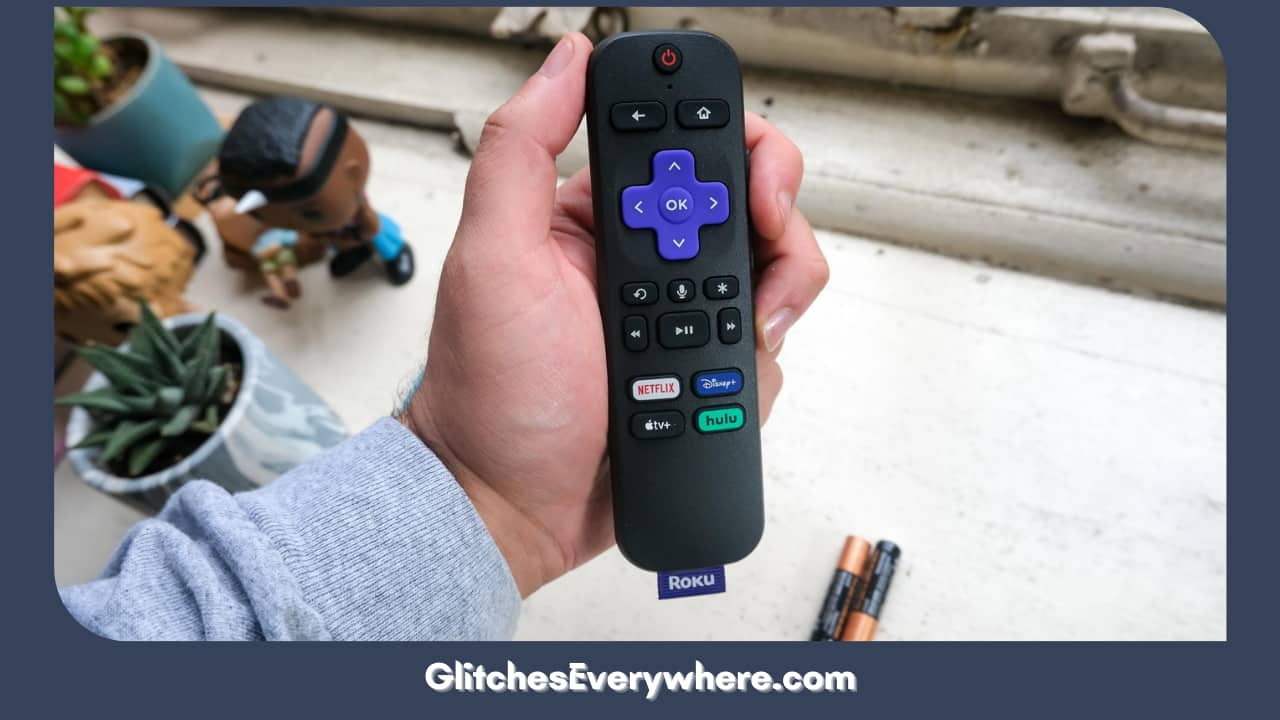
Why isn’t my Roku remote working? The answer could be as simple as poor maintenance. How to fix a Roku remote? Try cleaning it!

If your remote is working partially and even if it is not, this is your sign to clean it. Take a damp but not wet cloth and run it over the crevices of the remote to get out any dirt that might have accumulated there over time. Take this time to also ensure that no buttons are pushed and stuck in. Make sure to do this frequently to avoid any problems like this in the future.

How to repair Roku remote when none of the above circumstances has applied to you? Do not worry, we are beginning with the possibilities of higher probability now.

Check the Remote’s Batteries

Check The Remote's Batteries

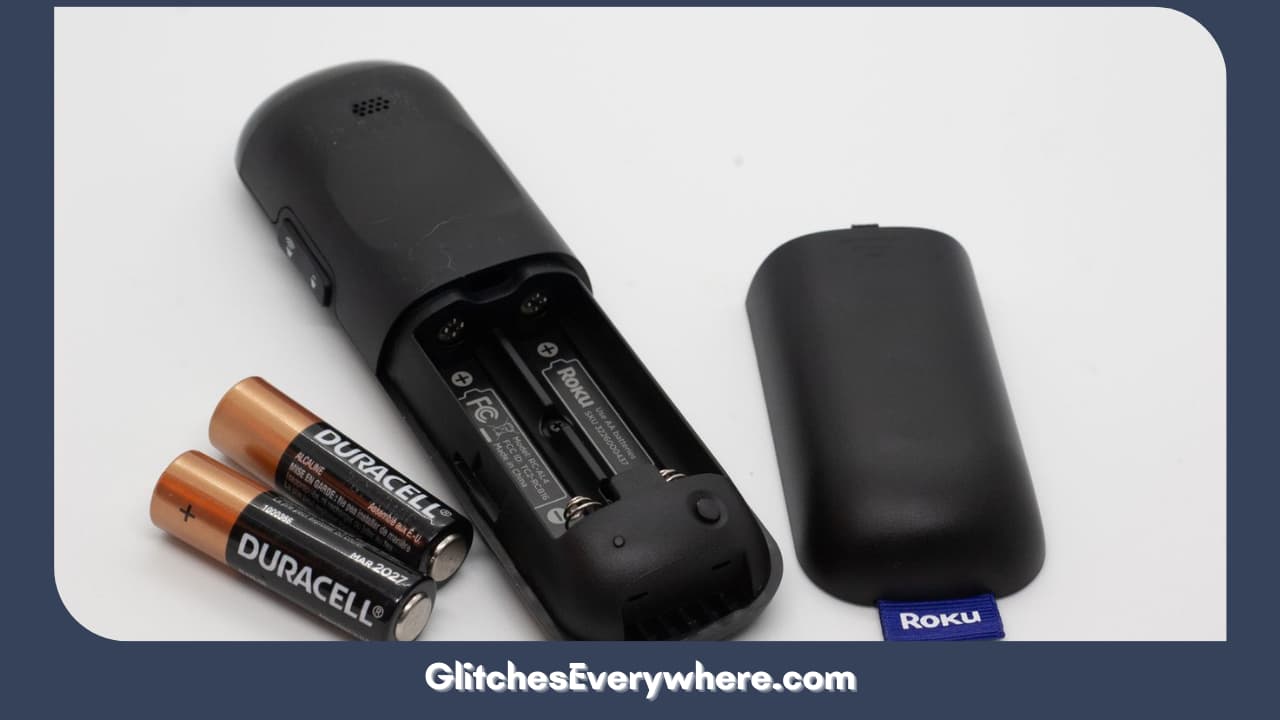
The most common answer to ‘Why is my Roku remote not working’ is something or the other with batteries. It could be faulty or drained batteries that might be causing you trouble.

Open the battery compartment and check if they are placed in the correct order. Then, replace them with the right kind of batteries and ensure the alignment with the new ones again. Alignment in the sense of the polarity markings as they do make a difference.

In the case of a Roku voice remote pro or models where the remote does not have removable batteries, take some time off and plug it in to charge. For this, you will require a micro-USB cable that the remote came in with and then, just plug it into a power source for the charging process to begin.

Once recharged and revamped, check if the Roku remote not working problem still exists.

Ensure a Clear Line of Sight

The most basic model of the Roku remote used the IR blaster for transmitting the commands on the pressed buttons. In other cases, Wi-Fi connections are used. In the former case, a clear line of sight between the remote and the device is required, meaning that there should be no obstacles in between or the connection may be lost. 

Something as simple as this could be the answer to your Why won’t my Roku remote work dilemma.

Try Resetting the Roku Device and Remote

Wondering why won’t my Roku remote works despite these steps again. Don’t lose heart just yet, we have a few more promising fixes left.

If re-pairing and battery checks didn’t work, try resetting your device and remote to check if it helps. There are two types of reset: power cycling or soft reset or a factory reset. This point focuses on the former. 

When you reset your Roku device, it’s like giving a brief cleanse to your Roku’s inside, the cache is cleared and any temporary software bugs are removed. In this process, no data is permanently lost. This is wildly different from a factory reset which has been discussed in a later point.

This is how you can reset your device easily:

1. The first step is to power off your device.

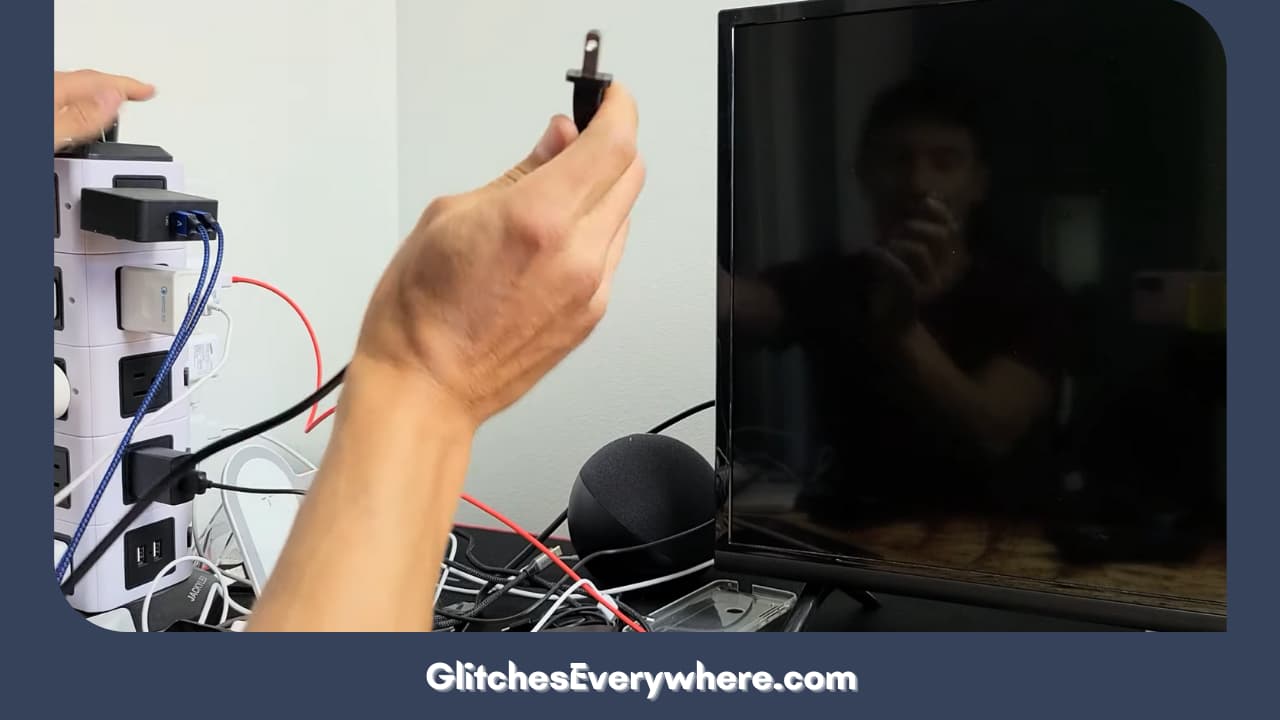
2. Next is to cut its main power supply. You can do so by unplugging the power cable.

First, Unplug Your Roku Player

3. Now, the remote’s batteries should be removed.

Take Your Remote And Remove All Its Batteries

4. Wait for at least ten seconds before assembling all of it back together.

5. Reconnect the power supply.

Plug In Your Roku Player Again

6. Wait for the Roku logo on your screen and then insert the batteries back in the remote.

Wait For The System To Factory Reset Now As The Screen Comes Back To Life In A Minute Or Two.

7. Let the remote reconnect with your Roku device.

That’s it! This will reset your Roku pair. Now check if the ‘why is my Roku remote not working’ issue still persists. 

Use an HDMI Extender

This step will only apply to you if you use a Roku stick that is plugged into your TV’s HDMI port. There is a possibility that HDMI interference is causing issues with your remote’s connection to your device.

You can try using an HDMI extender for your stick. It will help you place your Roku stick away from the HDMI port and may fix your ‘Roku remote not working’ problem.

Factory Reset your device

If you’re thinking about how to fix Roku remote or any other technical issue for that matter, this step is bound to show up.

A factory reset should be considered a last resort. It fully clears your device and gets it back to the way you got it. You do lose data permanently. So, before we can go to the guide that teaches you how to factory reset your Roku device, let us quickly talk about the changes your device will undergo. Here they are:

  1. It’ll get rid of your personal preferences.
  2. Unlink your accounts and devices.
  3. Also, reset all your settings.

Once the factory reset is done, be prepared to set your Roku device all over again. Now that you know, this is how you can factory reset your device completely as the answer to your how to fix a Roku remote question:

1. Using your Roku remote, press the Home button.

Press Home On Your Roku Remote

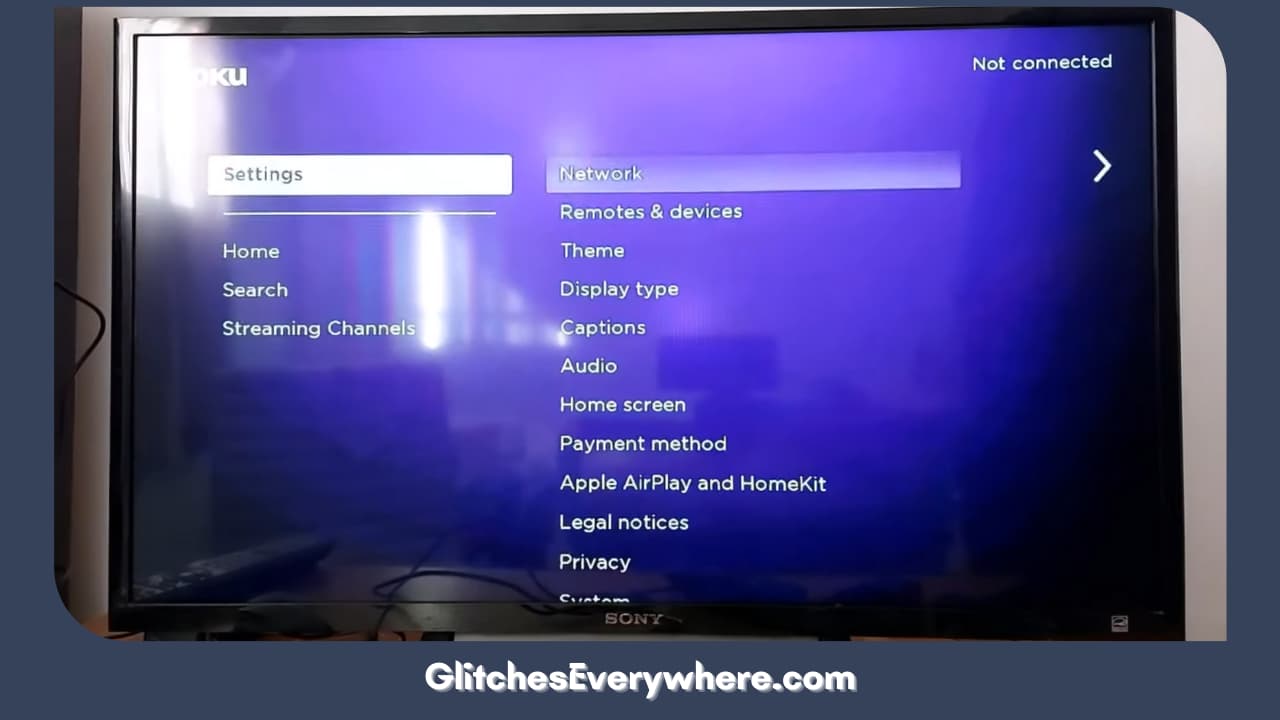
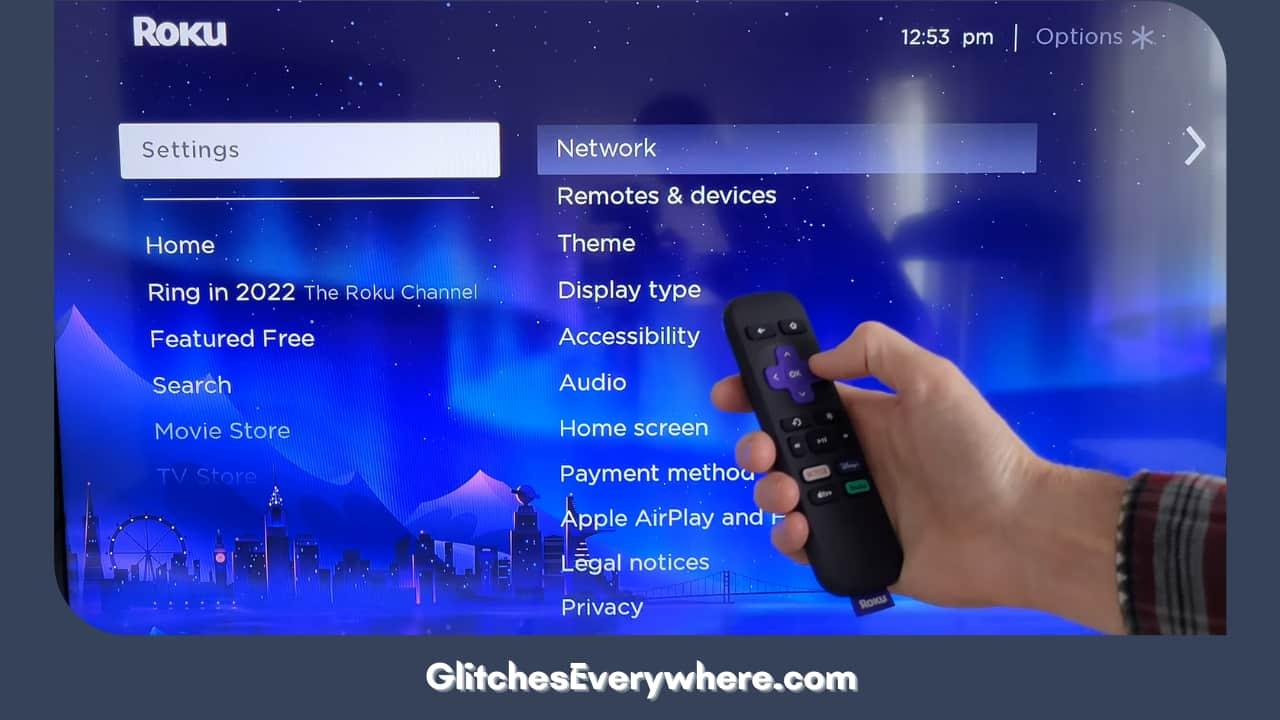
2. Scroll and then choose Settings.

Choose And Enter Your Settings Menu

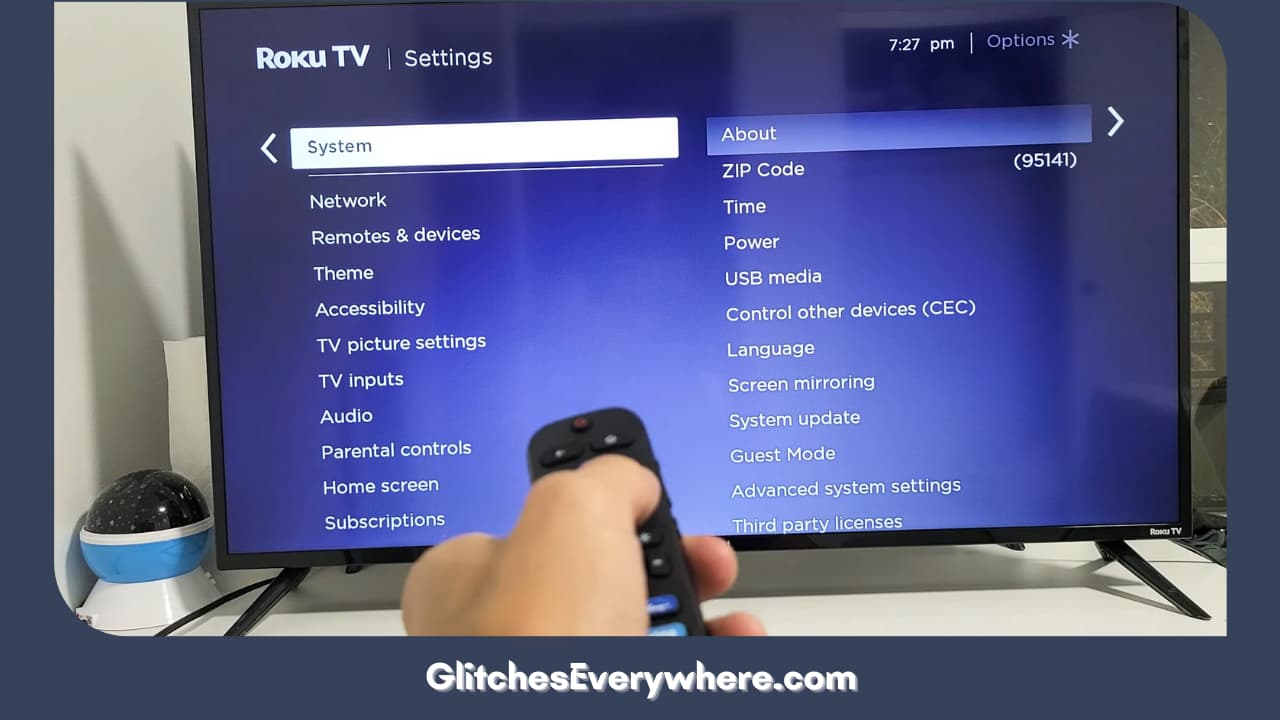
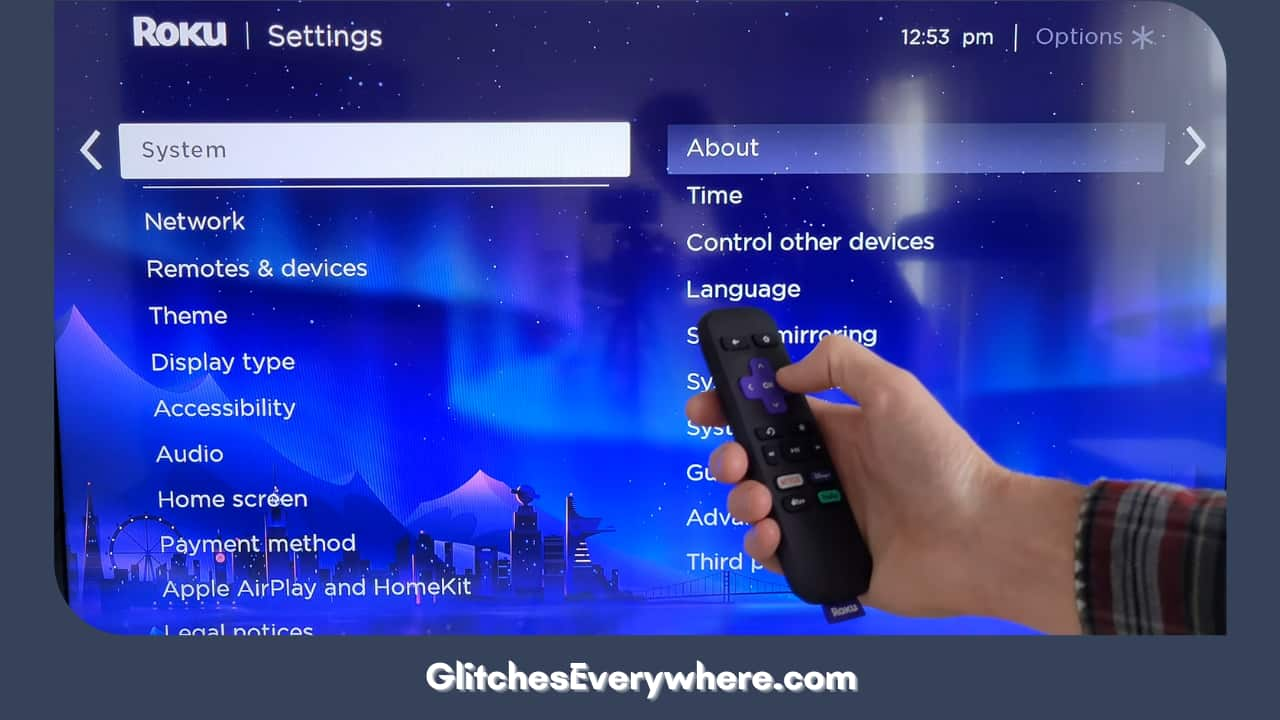
3. Now, select System.

Find The System Option And Click On It

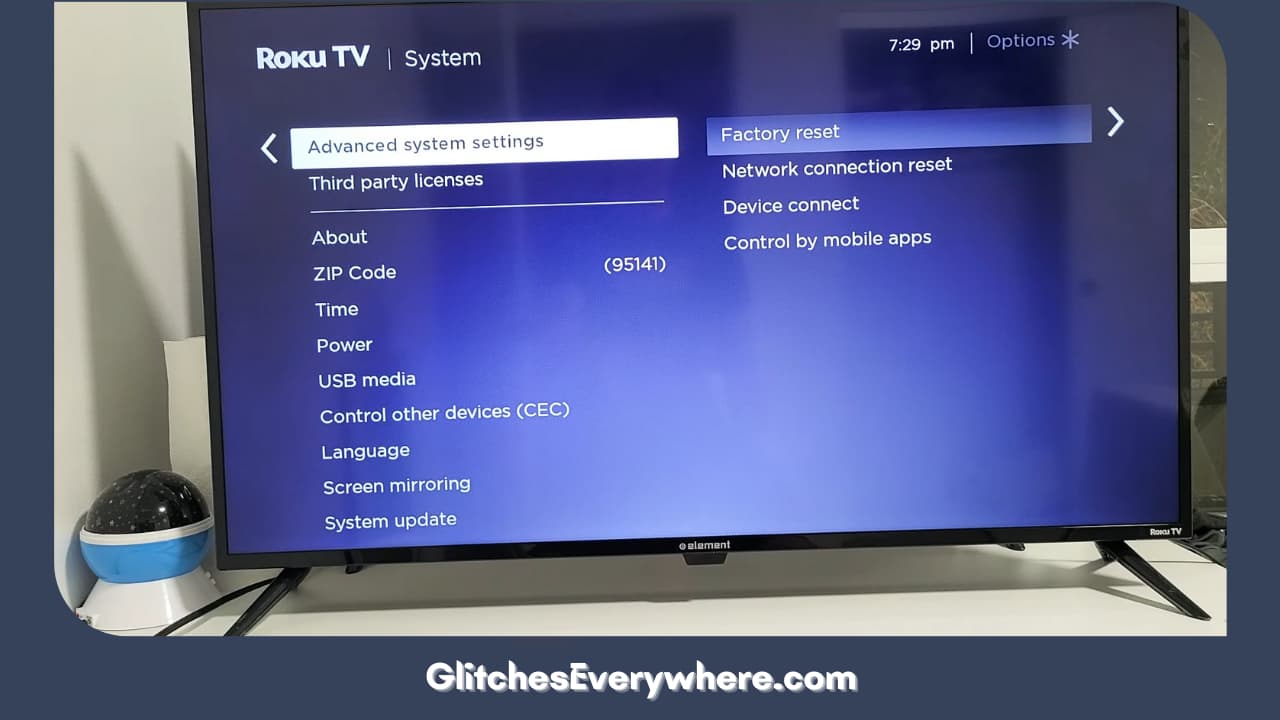
4. Further, select Advanced System Settings.

Move On To Advanced System Settings

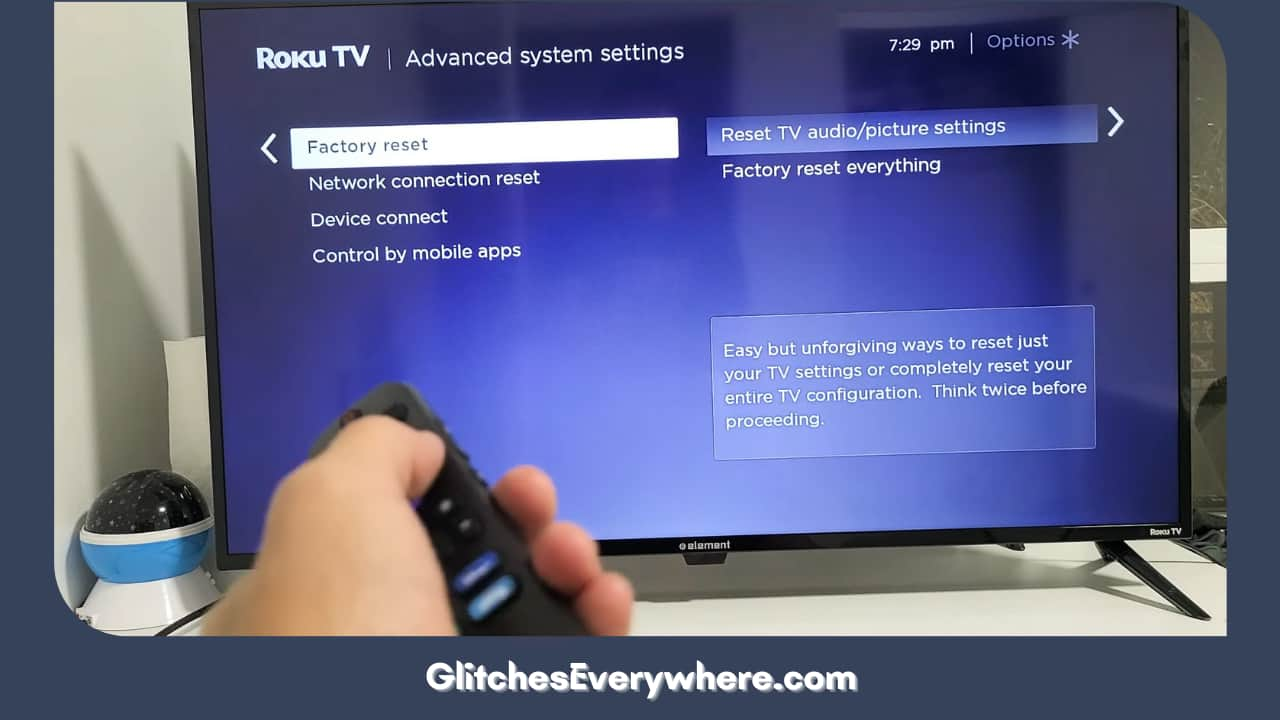
5. Now, select Factory Reset.

Find The Factory Reset Option And Click On It

6. Follow the on-screen instructions to finish the simple process.

Alternatively, you can also use the reset button on your device as well. It will either be a tactile or a pinhole button. Using a paperclip, press and hold down this button for about fifteen seconds. 

Why is my Roku remote not working even now? Now, that is a fix my friend. Until you can contact Roku support and get it fixed, we have listed an alternate so you can still access your Roku account and media, let’s get into it.

Roku Mobile app

This isn’t a direct answer to the how to fix a Roku remote discussion but it does help a lot. Roku does have a mobile app that has a remote feature in it. This converts your smartphone into a remote for you! First of all, make sure that your smartphone or iPad is compatible with the app before moving forward with this point.

Follow these steps:

  1. Go to the App Store or Play Store and search for the Roku app.
  2. Download the official one.
  3. Once the download is done, launch the app. Make sure that you are connected to a strong Wi-Fi connection which is the same one that’s connected to your Roku device as well, this is important.
  4. You will be required to sign in to your Roku account. If you don’t have one, create one.
  5. Once logged in, the app will automatically discover the Roku devices around it that are connected to the same network. Once your device is detected, pair with it.
  6. A code will appear on screen and you’ll need to follow the on-screen prompts to finish pairing up your phone to your device.

That should be it. You can now use your phone as the remote to your Roku device! Keep in mind that this should be a temporary ‘Roku remote not working’ scenario until you are able to fix or replace your malfunctioning remote.

Try Keeping a Universal Remote

Do you own multiple Roku devices? You might want to invest in a universal Roku remote. Such a remote works on several devices at once and is a great backup to have on hand. You can find affordable ones on Amazon. Just make sure to verify its compatibility with your devices before making the purchase.

Contact Roku Support

Nothing has worked? Why isn’t my Roku remote working yet? Ask the creators! It’s time to contact Roku. Go to their official website and then further navigate to Support. You’ll have to select the topic of your inconvenience and then meet with a bunch of troubleshooting articles to help you out.

If even that does not help you, there is an option to get in touch with a customer service provider. You can do so through call, text or mail. Make sure to detail your problem and even throw in things you’ve already tried out to save time and effort. Your problem should be solved in no time!

Recommended Reading – Why Does Apple TV App Keep Freezing: Fix in Seconds

Wrapping Up

This brings me to the end of my comprehensive ‘Why won’t my Roku remote work and how to fix it’ guide. Your remote is the way to navigate your Roku device and if it stops functioning, you can find yourself in a tough spot. This is why we have discussed a temporary solution in addition to many possible fixes.

Read the article well and follow the instructions to get rid of your ‘Roku remote not working’ problem today itself.  Don’t let something as small as your remote come in the middle of you and your favourite shows and movies.

Vizio HDMI Not Working (Here’s Why & How to STOP It!)

0

Vizio Hdmi Not Working

If you have any queries regarding Vizio HDMI Not Working, you have reached the right destination. This detailed guide will equip you with all the information you need.

Vizio Smart TVs are one of the best available at affordable rates, but they also have drawbacks. One of these drawbacks is the HDMI Signal issue. Are you wondering how to solve this issue, too? Are you tired of fixing the HDMI port innumerable times as well? Worry not, for you have come to the very right place!

There is nothing to be concerned about because there is more than one solution to this problem. Try unplugging the HDMI cable from the Vizio Smart TV and the device, then securely plug it in. If that does not work, try a different HDMI cable to see if the issue is with the cable itself.

It’s also possible that there is an issue with the TV’s firmware. Check if any firmware updates are available and install them if necessary.

Regardless of your case, in this article, we will find out what is wrong with your Vizio Smart TV and teach you how to fix it. These solutions are convenient and do not require you to be tech-savvy.

Before we jump to the solutions, let us look at the several possible reasons for the HDMI connection issues. This will also help determine the best solution for your Vizio TV no-signal case.

If you try every single one of these methods in chronological order, I am pretty sure one of them will work for you.

Vizio TV HDMI No Signal – Causes

Causes

Temporary Glitch

Any temporary glitch, possibly due to various reasons, may cause no signal on your Vizio TV. 

Faulty HDMI Cable

A fault in your HDMI Cable will also be responsible for a no signal on your Vizio TV.

Misconfigured Settings

At times, an issue with your device’s settings is what turns out to be the reason for a non-signal available Vizio TV and Vizio TV flickering.

Outdated Software

Of course, outdated software can be the reason behind a reason.

Issues with External Devices

Many times, an external case, i.e., a problem with the external devices, can also be responsible for a no-signal available TV.

Faulty HDMI Port

A wrong HDMI port might also be responsible for a Vizio Smart TV with no signal. 

Vizio TV HDMI No Signal – Solutions

Solutions

Update the TV Firmware/Software

If there is a bug that is preventing your HDMI ports from functioning correctly, there must be an update available that will have the bug fixed to solve the issue.

As with any product, you should ensure that you have updated your Vizio Smart TV’s firmware to the latest version, even though it is fresh and new.

Most Vizio Smart TVs support auto-updating of firmware, but you can only assume that this is turned on for you if you use a Vizio Smart TV, where auto-updates are always on.

If your TV’s firmware is outdated, use the steps below to update it.

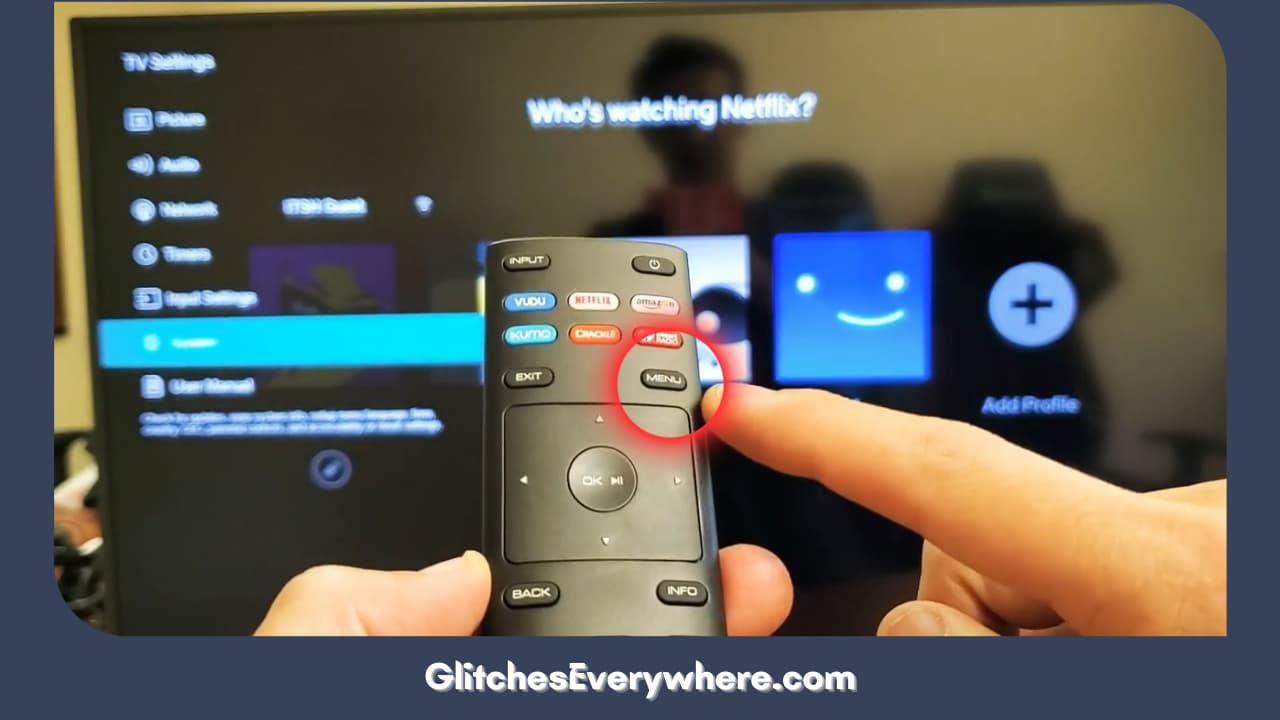
1. On your remote, press the ‘Menu’ button.

Press 'menu' On The Vizio Remote And Then Go To 'system'


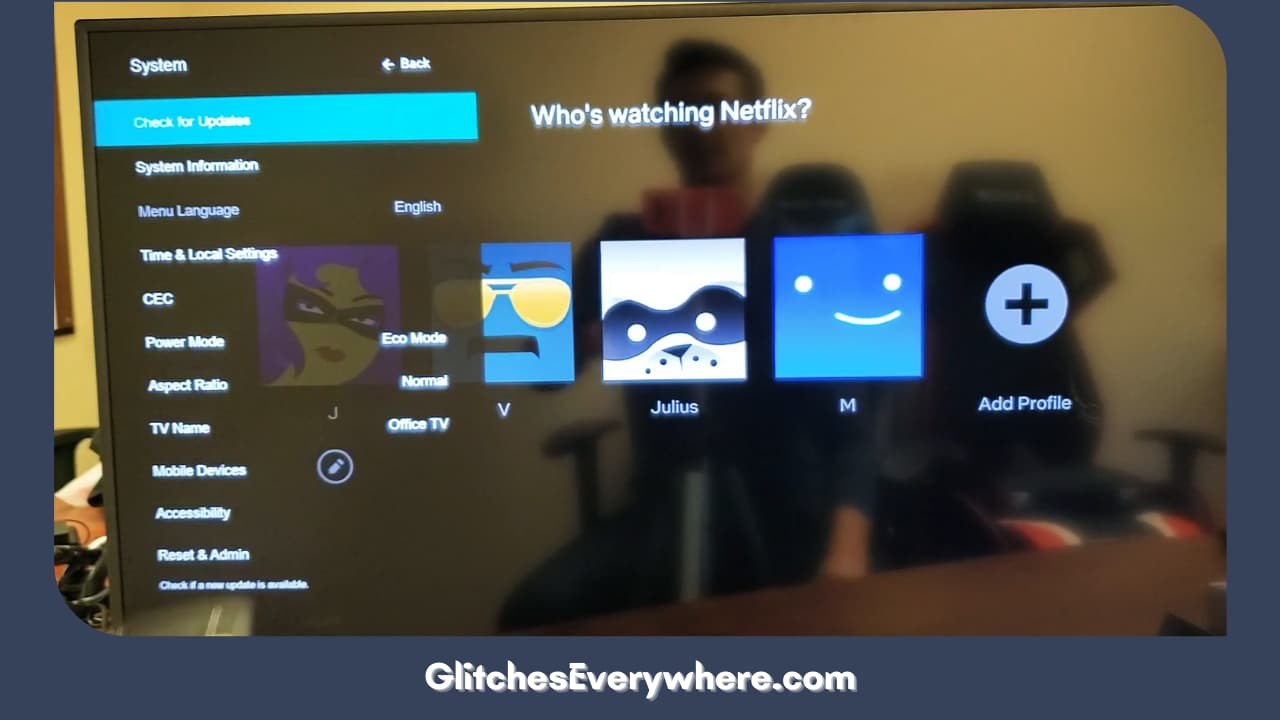
2. Select System > Check for Updates.

Select 'check For Updates.'

3. Click ‘Confirm’ to begin the installation if an update is available.

4. Wait for the update to finish.

If you use a Vizio Smart TV, there is no option to update firmware manually – this is automatically done as long as your TV has an Internet connection.

If you need help solving your issue, look for the next possible solution.

Restart/Hard Reset your Vizio Smart TV

Restarthard Reset Your Vizio Smart Tv

Most people have found that restarting the TV using the process below fixes the issue of the Vizio Smart TV being unable to detect an HDMI input. This is known as a hard restart.

Follow the below-given steps to reset your Vizio TV hard:

  • Turn off your device and then your Vizio TV.
  • Unplug all HDMI cables from the TV.
  • Unplug your TV’s power from the wall outlet.
  • Press and hold the power button on the Vizio TV for 30 seconds. This is located on the back of almost all Vizio TVs, but you may also find it on the side of the TV.
  • Plug your HDMI cables back into the Vizio TV.
  • Plug the TV back into the wall power and turn it on.

This should solve the issue. Flowwing the steps above will also solve Vizio TV no sound problem. However, you can look for the next possible solution if it does not do so. 

Reset your Vizio Smart TV to Factory Settings

Factory Reset Your Vizio Smart Tv

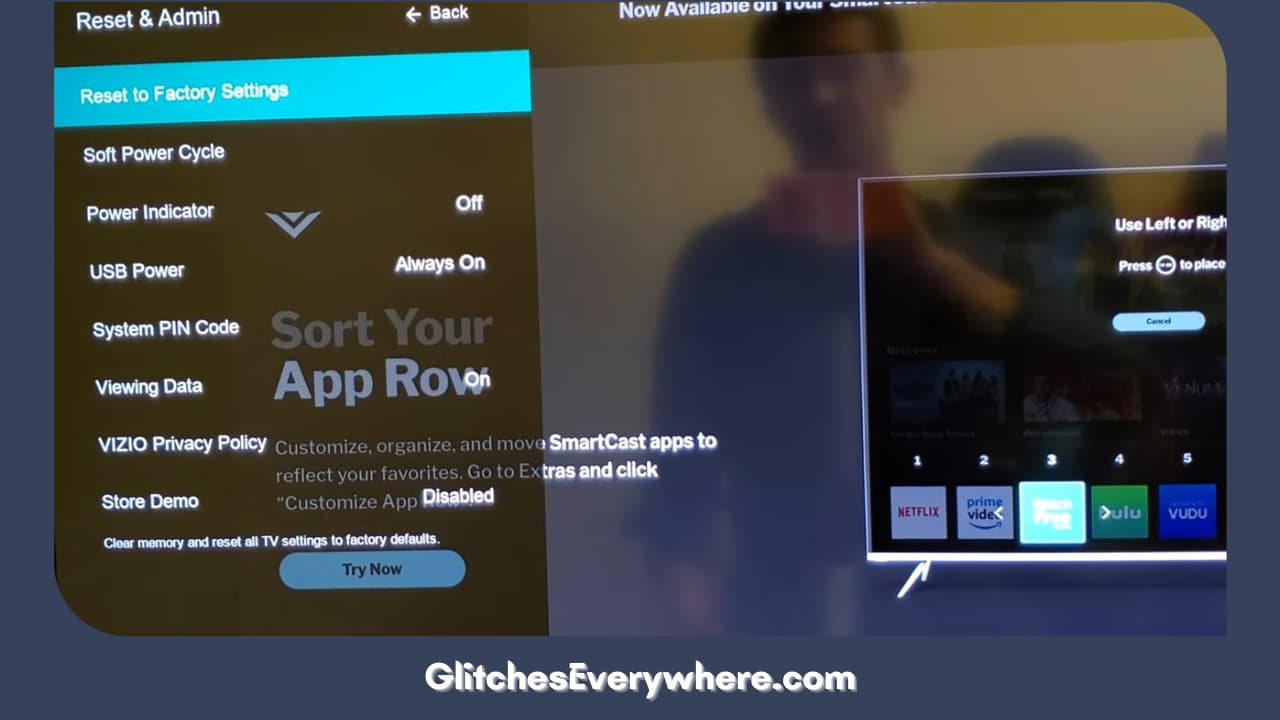
If any settings have been changed that are causing your HDMI ports to stop responding, resetting the TV to its factory settings might assist. It will also help if your Vizio SmartTV’s latest firmware contains any firmware bugs.

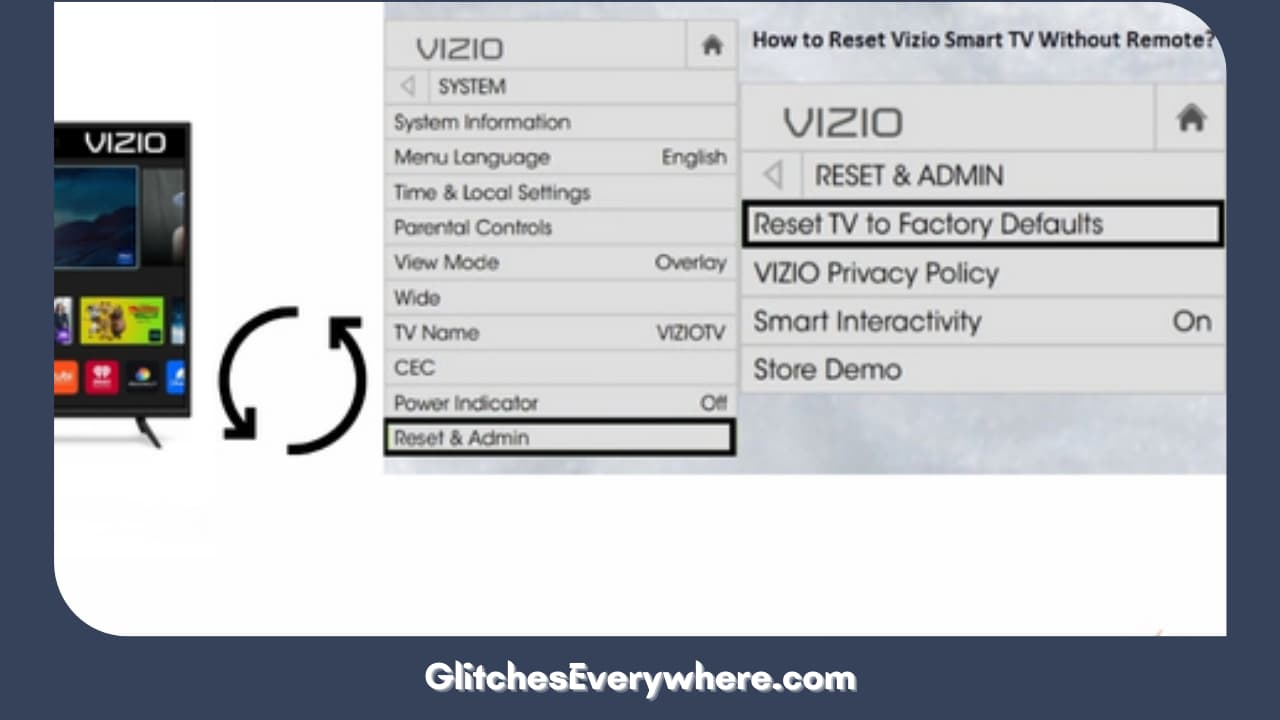
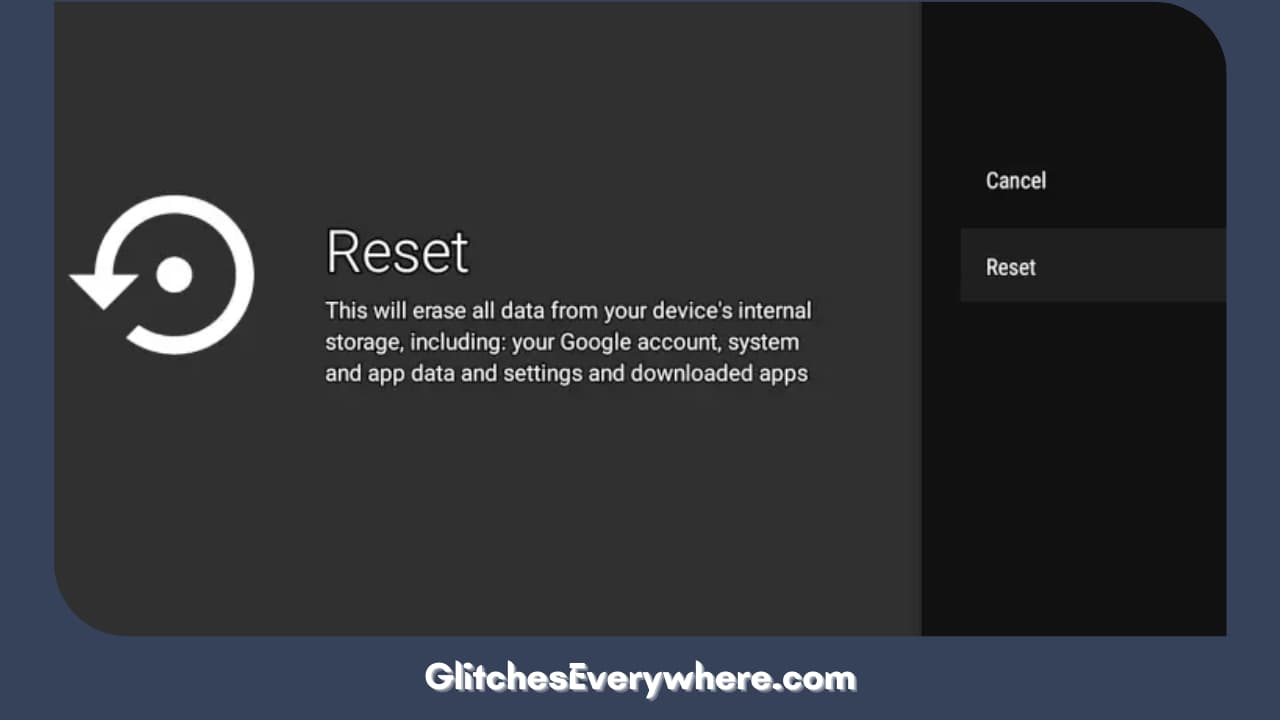
Resetting the Vizio TV to factory settings returns it to its original firmware. But it will also delete all your saved preferences and other downloaded apps, so only do this if you can start from scratch with your TV. However, downloading apps on Vizio TV again is an effortless task that you will finish in no time 

Before updating your TV, ensure that the HDMI ports are operational. Here are the steps to do so:

  • On the remote control, click the ‘Menu’ button.
  • Go to System > Reset & Admin.
  • Enter your passcode or the default code ‘0000’.
  • Select ‘Reset’ and press the ‘OK’ button on the remote control.
  • Please wait for the TV to turn off, then turn it back on.
  • Go through the TV setup procedure.

Move to the next step if you need help solving your issue.

HDMI Cable Inspection

HDMI Cable Inspection

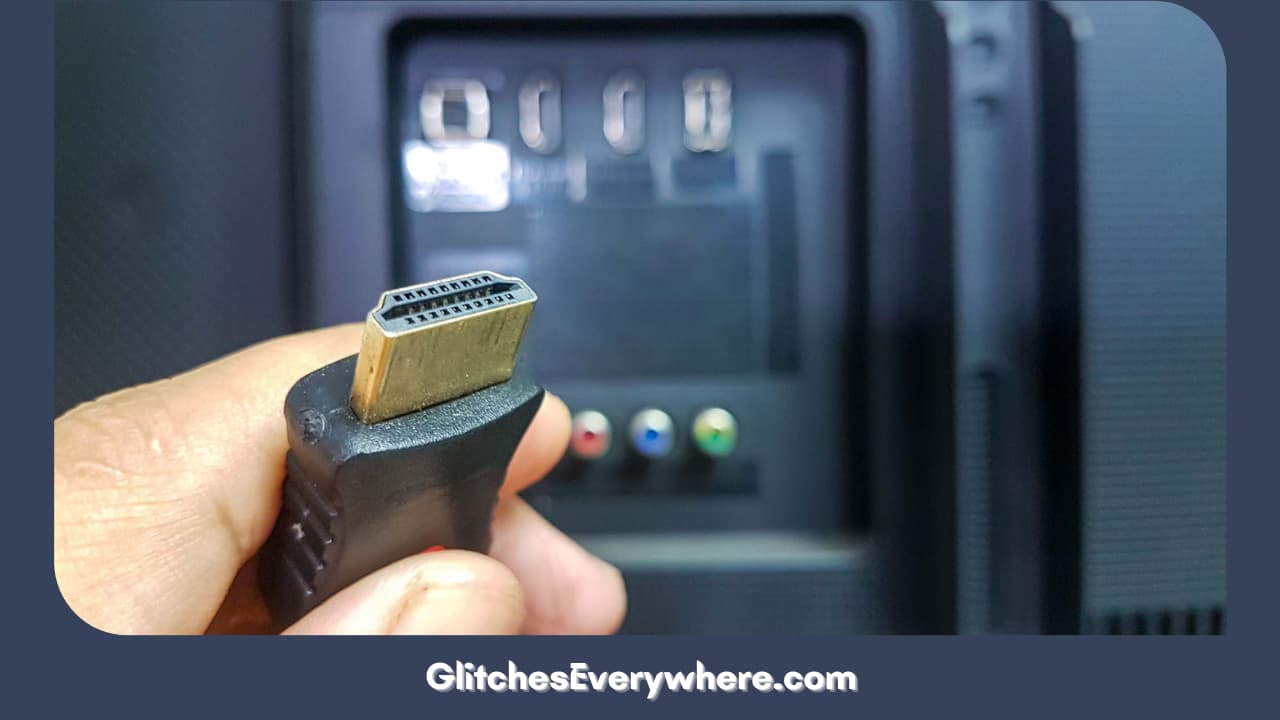
As mentioned earlier, this means ensuring that the hardware is not the reason for any problems. 

For this, follow these steps and verify where the problem is.

  • Switch your Vizio Smart TV off.
  • Remove HDMI or any other such physical cables connected to the back of your Vizio Smart TV.
  • Clean the contacts of the cable and the connector on the TV if you have any compressed air. If you do not have compressed air, then blow with your mouth on them gently.
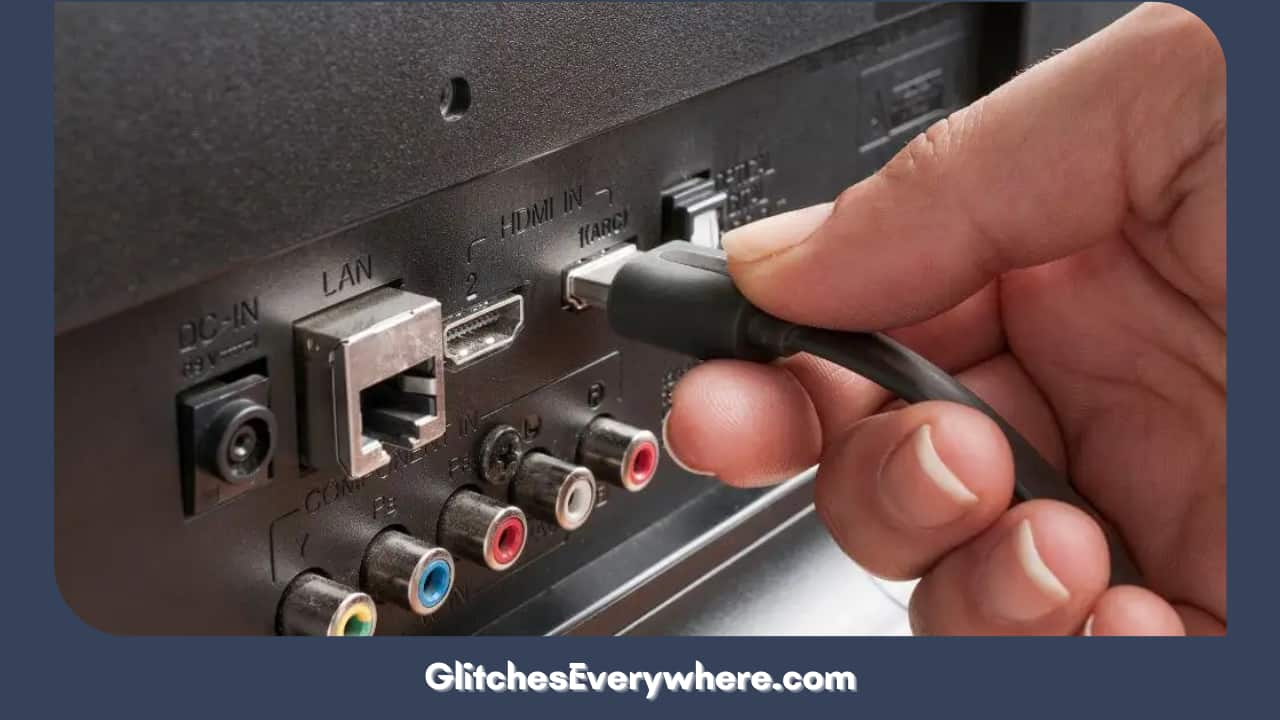
  • Firmly put all the cables back into their slots on the TV.
  • Switch your TV back on again.

If the issue is with the cable or the port, get it renewed or repaired. However, if the problem is not with the hardware device, continue scrolling for other possible solutions. 

These might be the problems you will come across during this procedure:

  • Faulty HDMI cable with a breakage in it.
  • Damaged HDMI port with broken pins.
  • Poor HDMI connection, that is, where the cable and connector are not entirely making contact

Conclude based on this and move forward if there is none of it.

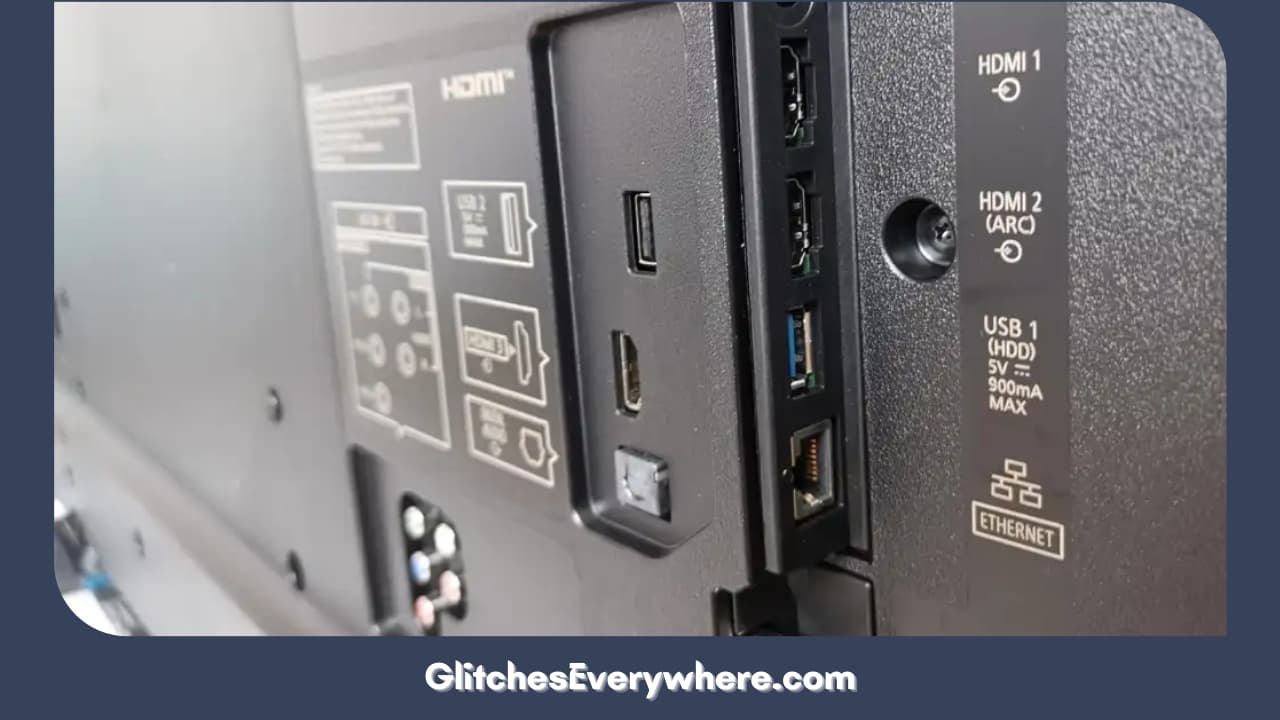
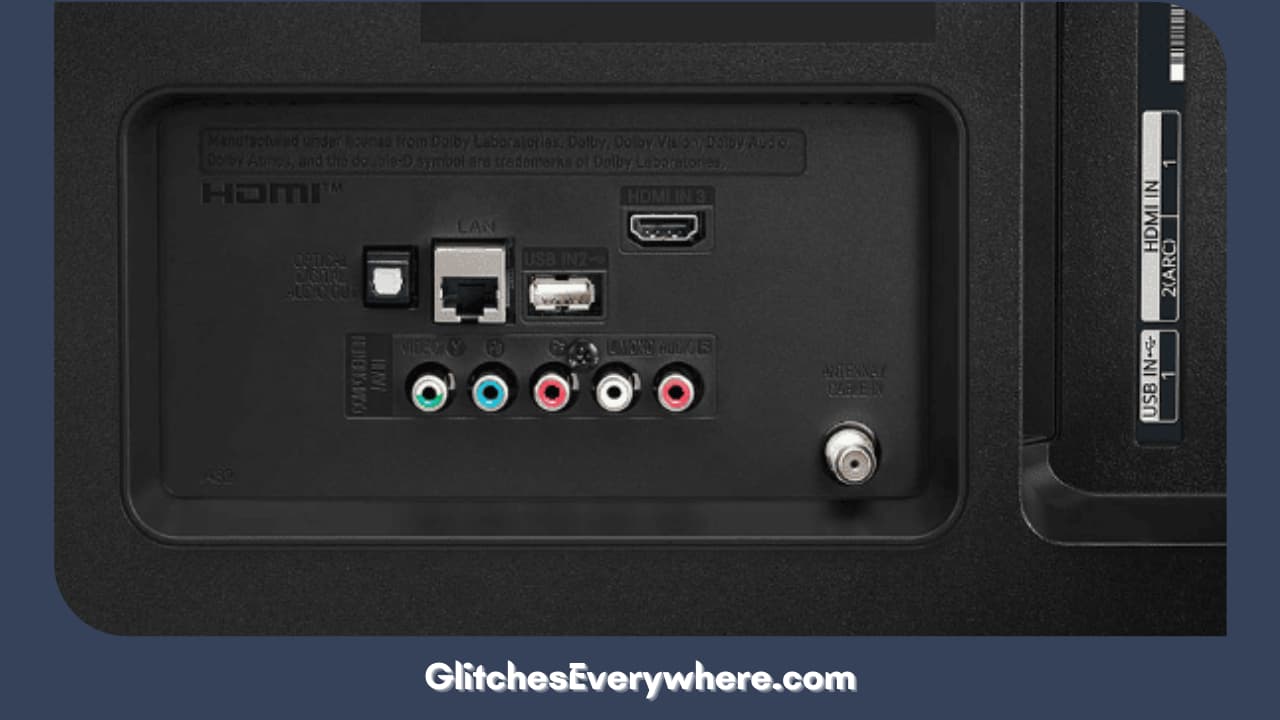
Check the HDMI Ports

Check the HDMI Ports

After ensuring that the issue is not with the HDMI cable, move to ensure that it is not the ports. At times, the Vizio TV might not receive input from a source due to an issue in the HDMI port, which also leads to Vizio TV turning off abruptly. 

After confirming no problems with your HDMI cord, try moving it to a different HDMI port on your TV. For example, if you’re using the HDMI 1 port, push the cord to the HDMI 2 port.

If this doesn’t solve the problem, try every HDMI port on your Vizio TV. If you can’t find a port that works, you may need to replace the TV motherboard.

You’ll have to contact Vizio support, particularly if you’re still under warranty.

You can always reset your Vizio HDMI port by factory resetting your Vizio TV. 

Turning your TV’s settings to factory settings is a more extreme step, for it will delete any personalized features or connected devices. Still, it’s always worth a shot when other methods haven’t worked.

To factory reset a Vizio Smart TV, refer to the steps mentioned where we talk about factory resetting a Vizio TV for better working.

  1. Figure Out the Display Settings

If your laptop or desktop PC is connected to your Vizio TV, check its display settings by following the steps mentioned below according to your device:

  • On a Windows 10 desktop PC, go to the Start menu > Settings > System > Display
  • On an older Windows computer, go to the Start menu > Control Panel > Display
  • On Apple devices, go to the Apple Menu > System Preferences > Display

By default, computers only display images and videos on their monitors. You must extend or mirror your laptop or PC’s display onto the TV to show the correct HDMI output.

Also, check that your source device’s resolution is compatible with your Vizio TV. You can find these in the instruction manuals of your devices.

If this does not help, look forward to the next possible solution given.

Check your Device’s HDMI Specifications

Check Your Device's Hdmi Specifications

If you are operating a fresh Vizio TV, and it is the first time you are plugging in a device, the issue is due to differing HDMI specifications.

The recent Vizio TVs support HDMI 2.1, which is backward compatible with the older versions of HDMI specifications and uses a new cable design for 4K 120Hz viewing.

Check your TV’s current HDMI specifications, the device you are plugging the cable, and the line connecting them.

If you attempt to plug an HDMI 2.1 device into a Vizio TV with an older HDMI port, the device will likely send a signal the Vizio TV cannot interpret.

This can, however, be fixed via the settings of your device.

Move to the next solution if this does not work out as well.

Update Graphics Driver

If your external device is a personal computer, the problem might be needing a video driver.

Get information that devices like Xbox and PlayStation do not require a manual driver installation and that the solution applies to only desktop or laptop devices.

Download a suitable driver and visit the website depending on your graphics card (GPU) model.

If a driver is already installed, check for updates and ensure to apply any updates found.

Are you still waiting? Next are the last few solutions possible for this problem.

Check Input Source

Check Input Source

The next thing to check would be the input source on your TV. It may seem simple, but this can be the solution for many stuck with this problem.

When you inserted the HDMI cable, you would have noticed the port was labeled ‘1’ or ‘2’. Click the Input button on your TV’s remote control, and ensure you selected the correct input source. You can cycle through each to check if they need to be labeled differently.

If you need help with those mentioned above solutions, you always have the last resort of referring the problem to the Vizio Support Team. 

  1. Contact the Vizio Support Team

This is the last resort you can look forward to. The Vizio technical support team is always available for you, no matter what.

It will be able to detect more complex problems with your device or others, if any, and provide the best solution. 

Recommended Reading – Roku TV Won’t Turn On (60 Second Fix)

Helpful Answers

Helpful Answers

How do I get my Vizio TV to recognize HDMI?

Sometimes, your Vizio TV doesn’t receive input from a source device because of an issue with the HDMI port. After confirming no problems with your HDMI cord, try moving it to a different HDMI port on your TV. For example, if you’re using the HDMI 1 port, push the cord to the HDMI 2 port.

How do I change the input source on my Vizio Smart TV?

To change the input source on your Vizio Smart TV, follow the steps mentioned below:

  • Press the Power button on your Vizio to switch it On.
  • On top of the remote, you will find an Input button; press it once.
  • Now, use the arrow keys to change the Input source. 
  • Press the OK button to set the desired input on the TV.

Why does my Vizio Smart TV say there is no signal even when HDMI is plugged in?

First of all, do not worry at all! For this, disconnect the HDMI cable from your source device and the Vizio Smart TV and reconnect, ensuring the connection is secure.

If the issue persists, use a different or a new HDMI cable. Connect your source device to a different HDMI port on your Vizio Smart TV, and then change the Vizio TV’s input to match the port used.

What causes the HDMI Port to fail?

The issue of your HDMI port not working on your laptop can be simply a hardware failure. Damaged or corrupted hardware can easily cause an error in your HDMI experience.

Thus, before we move on to other solutions to fix the HDMI that’s not working on your Windows, you should check your hardware. If hardware is not an issue in your case, look for the other several solutions mentioned in the article.

How do I enable an HDMI connection on my Vizio Smart TV?

Simple steps that you can follow for enabling HDMI connection on Vizio Smart TV are mentioned below:

  • Locate where the HDMI port is on your Vizio Smart TV.
  • Now look for a cable that will fit both ports on both devices.
  • Connect the cable now from one’s HDMI port to the other.
  • To switch the port, use the Input or the Source buttons on the TV.
  • Arrange and figure out the video and audio on the device if necessary. 

Recommended Reading – Do Vizio TVs Have Bluetooth? (+ Hack to Connect Wirelessly)

Wrapping Up

Vizio Smart TV not catching up with the HDMI signal is common and can be figured out by simple steps. If the issue persists, however, you can always contact the Vizio Technical Support Team, and they will be ready to serve.

The article mentioned several possible ways of solving the issue of Vizio TVs not catching HDMI signals, and I hope one of them worked for you.

Thank you for making it to the end; happy binge-watching!

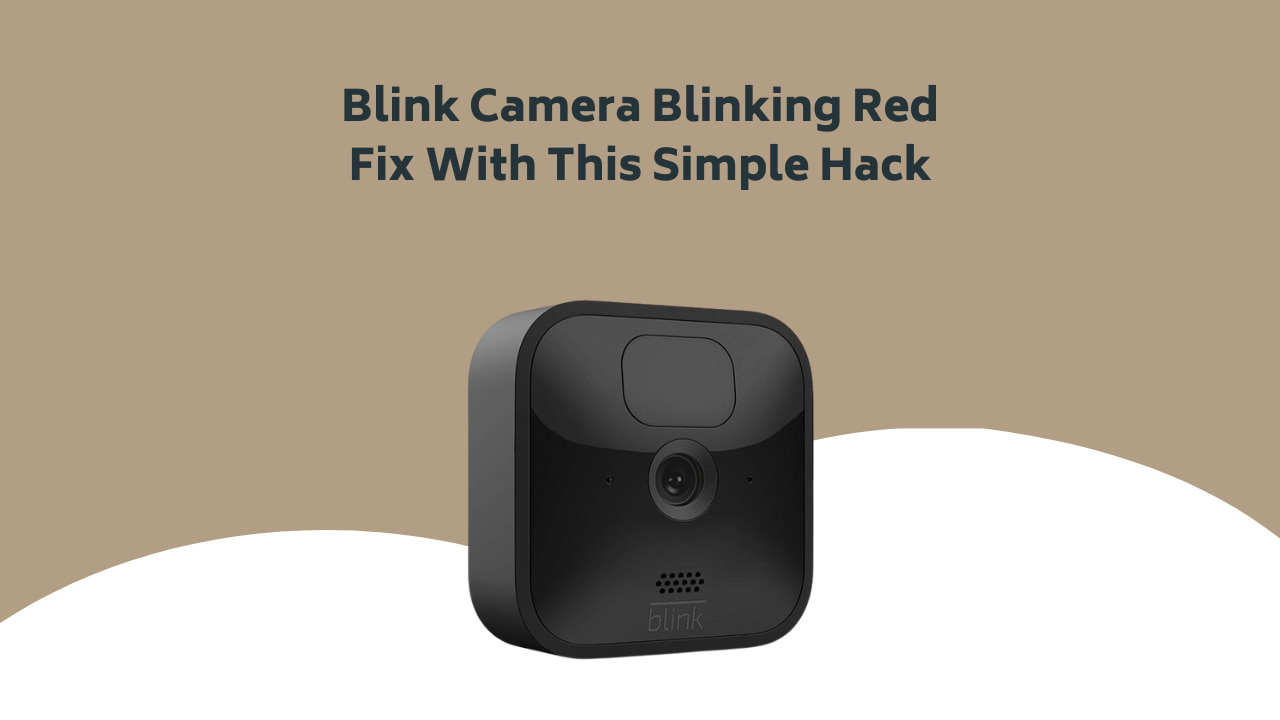
Blink Camera Blinking Red: Fix With This Simple Hack 2024

0

Blink Camera Blinking Red Fix With This Simple Hack

You have reached the right destination if you have any queries regarding Blink Camera Blinking Red. This detailed guide will equip you with all the information you need.

Wondering what to do when your blink camera flashes red? First of all, you need to calm down.

A blinking red light on any electronic device seems to cause panic, but this should not be the case at all! Your blink camera flashing red problem is a very common issue and can be treated easily without breaking a sweat, I promise!

When I faced this same blink red light problem a few months ago, I took a deep dive into the possible causes of the same, and here is how I was able to narrow down the possible cause of the issue to be.

Begin by verifying the initial setup procedure before moving on to ensure that your camera has proper internet access and is well connected to your Wifi source. Check your batteries and replace them if necessary. Before moving on to the last resort solution of hard resetting your camera, check if the blink red light is a sign that the camera has detected some motion.

That being said, this blink camera flashing red guide contains all you need to know about this issue and how you need to tackle it. Read through the end and I am positive that you will get rid of your problem today itself. Without further ado, let us dive into it!

Blink Red Light Causes 

Blink Red Light Causes 

Let us begin our what to do when the blink camera flashes red guide with the various causes of the same. This is crucial as the cause of the problem will determine what course of troubleshooting action you should opt for.

Narrowing down the reason behind your blink camera flashing red headache is half the battle. In my personal experience, I had to go through multiple possibilities before I was able to catch the real culprit.

For the very same reason and for your convenience, I have listed down all common causes of the blink red light.

Wondering: why is my blink camera flashing red? Refer to the following list to find out!

Weak or Faulty Wifi Connection 

Your blink camera functions on the internet. In cases of improper internet access or a bad connection to your wifi or network source, you may face the blink camera flashing red problem.

That being said, you also need a strong and stable internet connection to access the Blink mobile app that gives you insight into your camera and all its amazing features.

It should be noted that this problem can itself stem from two causes: an improper connection between your Wifi router and the blink camera or faulty or unsteady service altogether. which, honestly, is a problem with Vizio TV as well. Do not worry; we have covered these problems and their solutions later in this guide.

Failing Batteries

A blink camera functions on batteries. Its usage and life are subject to variation concerning its surroundings and usage. It is worth noting that Blink does provide additional options for power sources via power adaptors and solar panels.

One of the leading causes of the blink red light is failing batteries that are about to die. In these cases, the LED light blinks as an indicator or reminder that you need to replace your batteries with fresh ones.

Verify with the details of your model the type of batteries you need to buy and replace them to see if the blink red light still persists. 

Initial Setup Process

This particular cause did not work for me or cross my mind as my blink camera had been installed for a while now. But, I did come across it as a valid explanation for the infamous blink camera flashes red problem.

If your blink outdoor camera is flashing its red light, there is a chance that it is telling you that its setup procedure is still going on, and it should stop on its own once the same is finished.

Detected Motion

Another common cause for the blink camera blinking red issue is a response to its purpose. If your blink camera detects some motion, it might be showcasing it’s flashing red light as an indication towards the same. Similarly, Hisense TV also has a feature detecting motion and blinking red. 

This brings us to the end of our blink camera blinking red causes. If you could narrow down your cause, that would be great! Even if you could not do the same, do not worry. In the following section, we have laid a detailed guide on ‘how to turn off red light on blink camera’. Let us get into it!

Blink Camera Blinking Red: Solutions

Blink Camera Blinking Red Solutions

An interesting thing that I noticed while looking up the various solutions for the blink red light was that there are specific solutions that correspond to particular causes like connectivity issues or battery life issues.

On the other hand, there are also general solutions that can help you get rid of your blink red light. They may not work every time but are worth a shot.

That being said, let us get into it!

Restart Your Camera

Let us begin our how-to turn off red light on blink camera solutions with the most basic solution. Every time any electronic of mine seems not to work the way it is supposed to, I restart it, and a reasonable number of times, the problem does resolve itself. Here is how you can restart your blink camera:

  1. You are going to use your Blink app for this process. Open the app on your tablet or smartphone.
  2. Proceed to select the system your camera is connected to.
  3. Choose the camera you wish to restart.
  4. To access the camera settings, choose the gear-shaped icon on your screen.
  5. You will find a toggle switch next to the option to Enable the camera.
  6. Switch its position to turn it off.
  7. Wait for a few seconds, and then turn it on again.

It should be noted that while doing so, your camera will turn off entirely and get disconnected from your Wifi, and no recording will be done at the time. So, make sure to do this on your own time. 

Blink camera flashing red even right now? Do not worry, we are just getting started; continue reading to find more solutions.

Battery Check and Replacement 

As mentioned in the Why is my blink camera flashing red section of the article, the battery is a common reason behind the blinking red light.

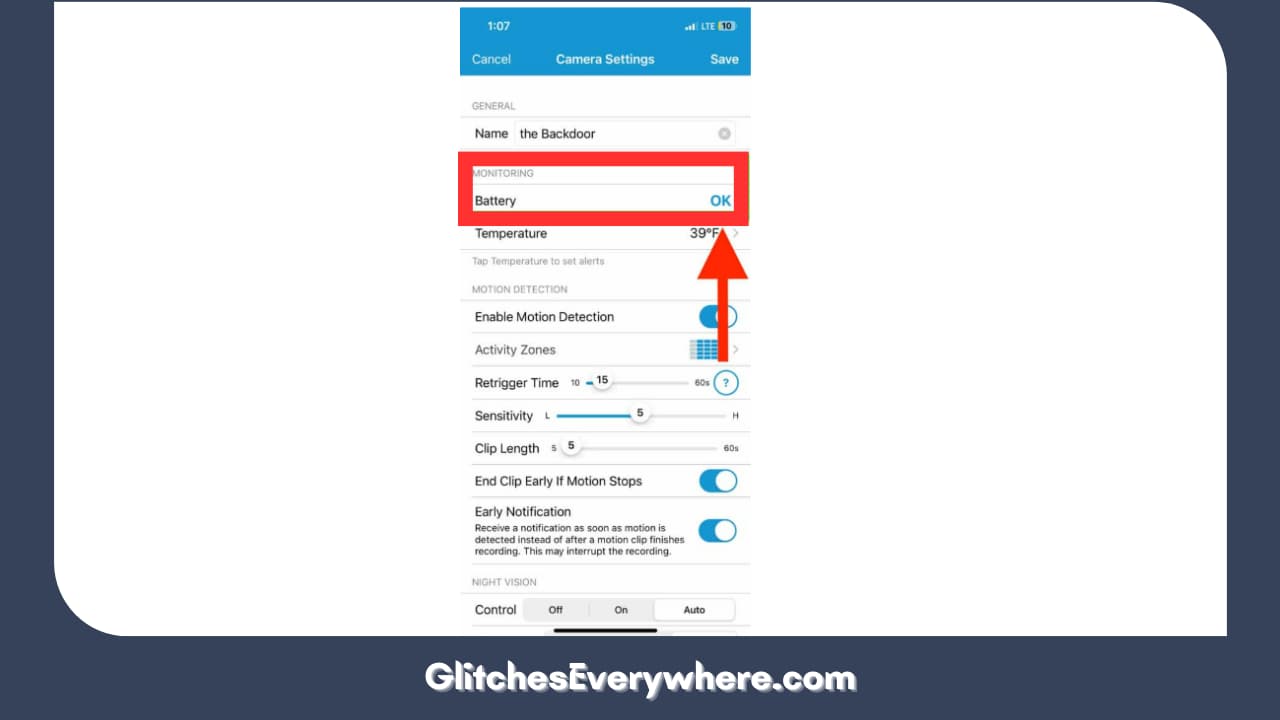
To check or verify the battery information for your Blink camera, the mobile app that we used in the previous step comes in handy again, you will need your Blink app for the same. It lets you check the battery life of your camera. Here is how you can do it for yourself:\

  1. Open the Blink app on your smartphone or tablet,
  2. Navigate to the camera settings described in detail in the previous solution.
  3. Move on to the Monitoring option.
  4. Verify the Battery entry, it should say OK.

Battery Check and Replacement 

If it does, then the reason behind your blink camera blinking red problem is not your battery. The app should also tell you if your battery is being overused. This is to help you understand the battery life of your camera. It also gives you ample time to replace the batteries before the camera dies. 

Anything other than OK in the Battery entry requires a replacement to be done. This is how you can go about it:

  1. Open the battery compartment of your camera. You can do this by sliding the latch to the side you will find on the bottom of your camera.
  2. Remove the batteries already present. Make sure that the batteries are disposed of properly.
  3. Now, choose a good quality battery to replace the ones you threw away. It is important to note that Blink itself recommends Lithium AA batteries. So, avoid using others like Alkaline or rechargeable Lithium-Ion ones and stick to the ones recommended
  4. Insert the new batteries in the compartment. Ensure that you align the positive and negative terminals of the battery properly. 
  5. Slide the latch back into place, and just like that, you are done. Cross-verify the battery status on your Blink app to ensure the battery situation has been rectified.

Blink camera flashing red with new batteries? This means that the cause of your blink camera blinking red was not its battery situation but something else. Do not fret and continue reading; we still have a couple more blink red light solutions.

Connecting to the Wi-Fi

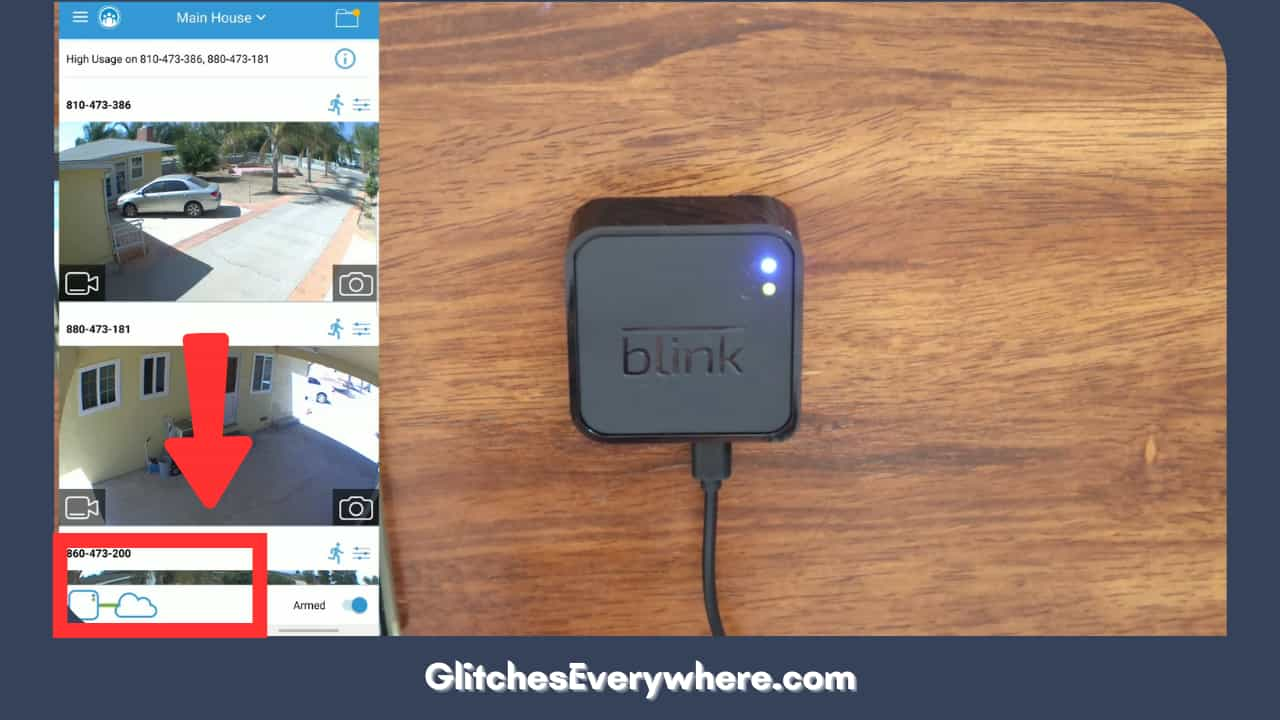
If your blink camera flashes red, it might indicate that it is facing some connectivity issues. You can connect or reconnect your Wifi network to your camera to verify this possibility; here is a detailed guide on how to do it:

1. Before launching the Blink mobile app, ensure the Sync module and your smartphone or tablet are connected to the same Wifi network.

2. Once that is verified, open the Blink App.

3. Look at the bottom panel and choose the Settings option.

Look at the bottom panel and choose the Settings option.

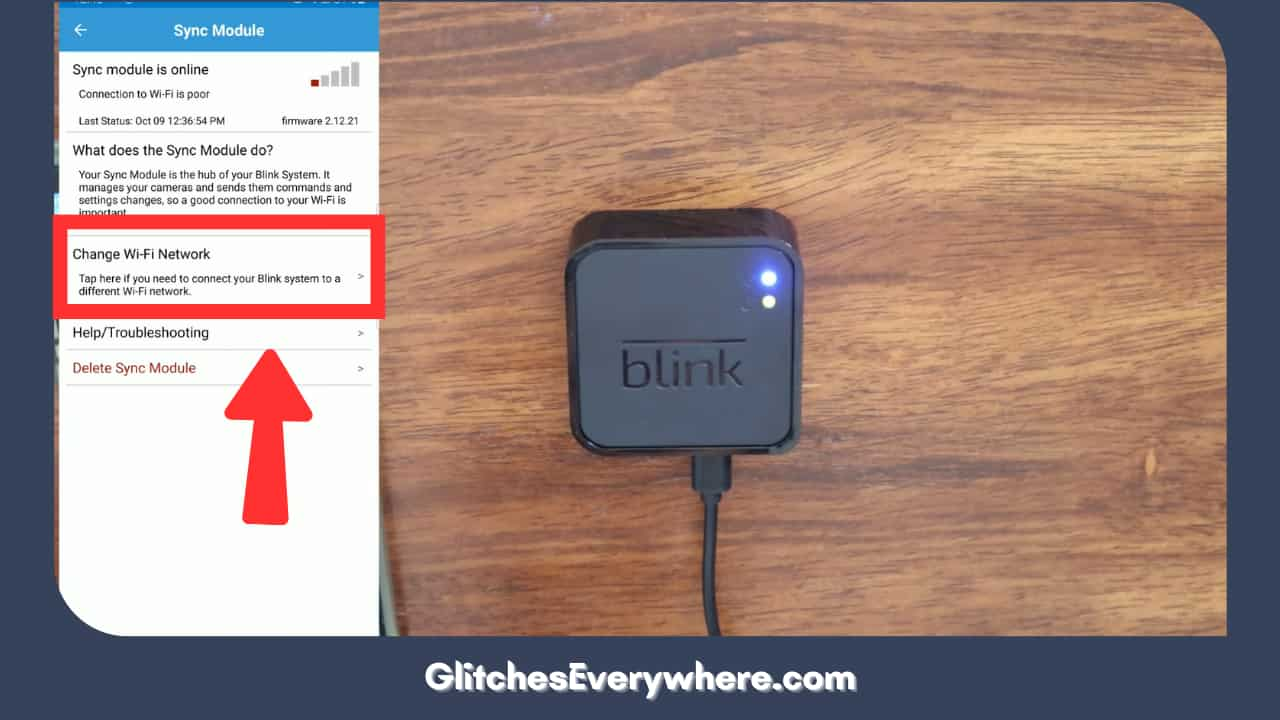
4. Go under the System Settings option. Locate and select the name of your system.

5. Then, proceed to select the Sync Module option.

6. Next, choose the Change Wi-Fi network option.

Look at the bottom panel and choose the Settings option. (1)

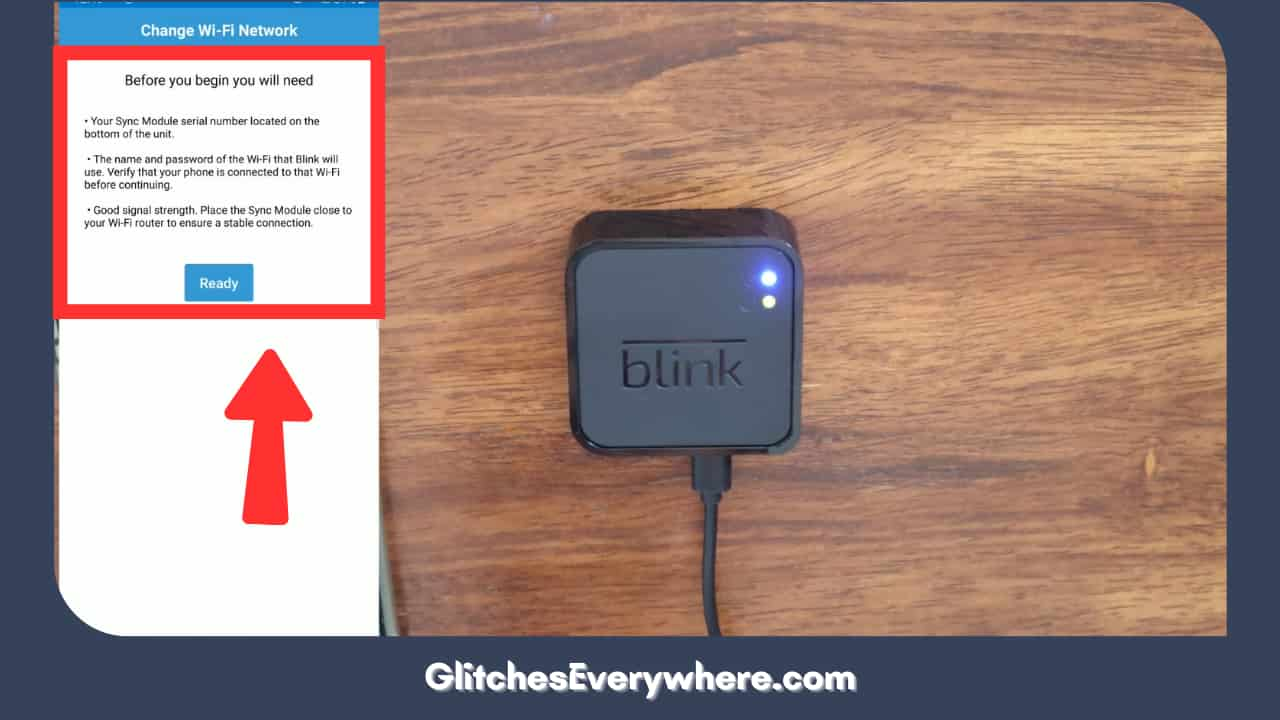
7. The app’s instructions that are required to be followed from here are pretty simple. Press the reset button on the Sync module carefully with something pointed out without damaging it.

The app's instructions that are required to be followed from here are pretty simple

8. Look at the lights on the Sync module. When it blinks blue and then turns green in a pattern, it is your cue to select the Discover Device option.

9. A prompt will pop up; select the Join option.

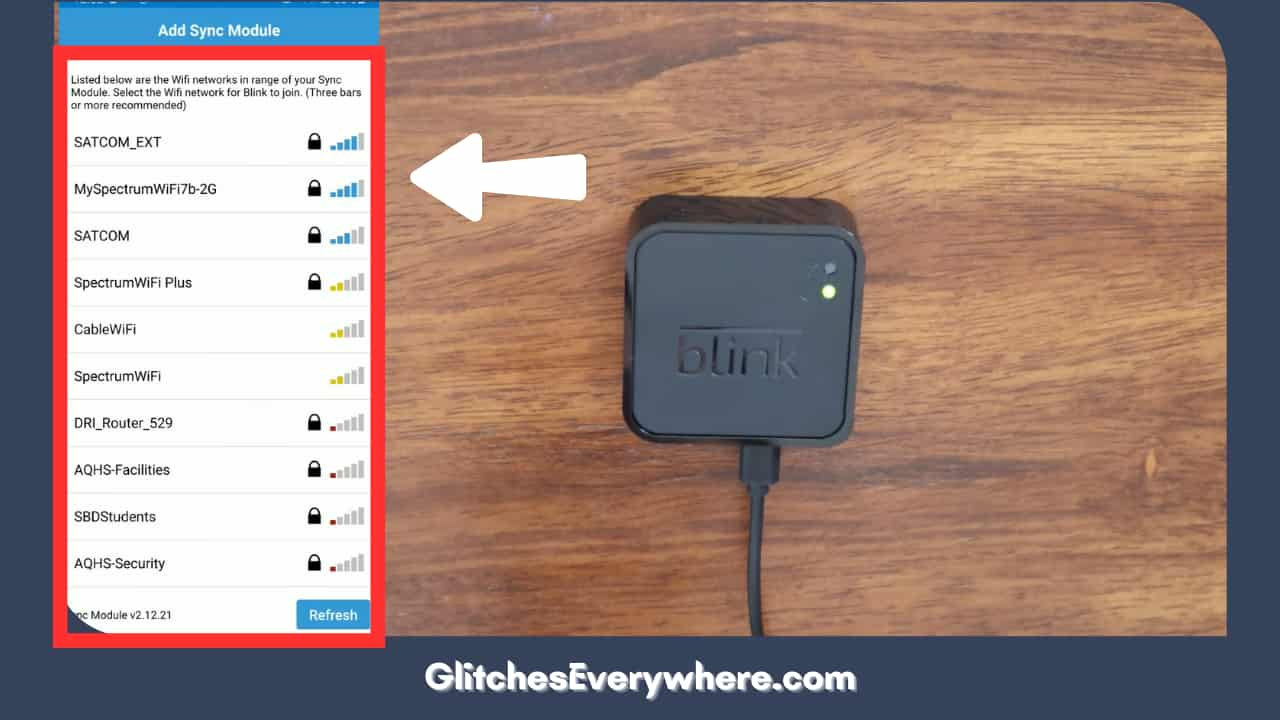
10. A list will come up on your screen; select your Wifi network of choice.

A list will come up on your screen, select your Wifi network of choice.

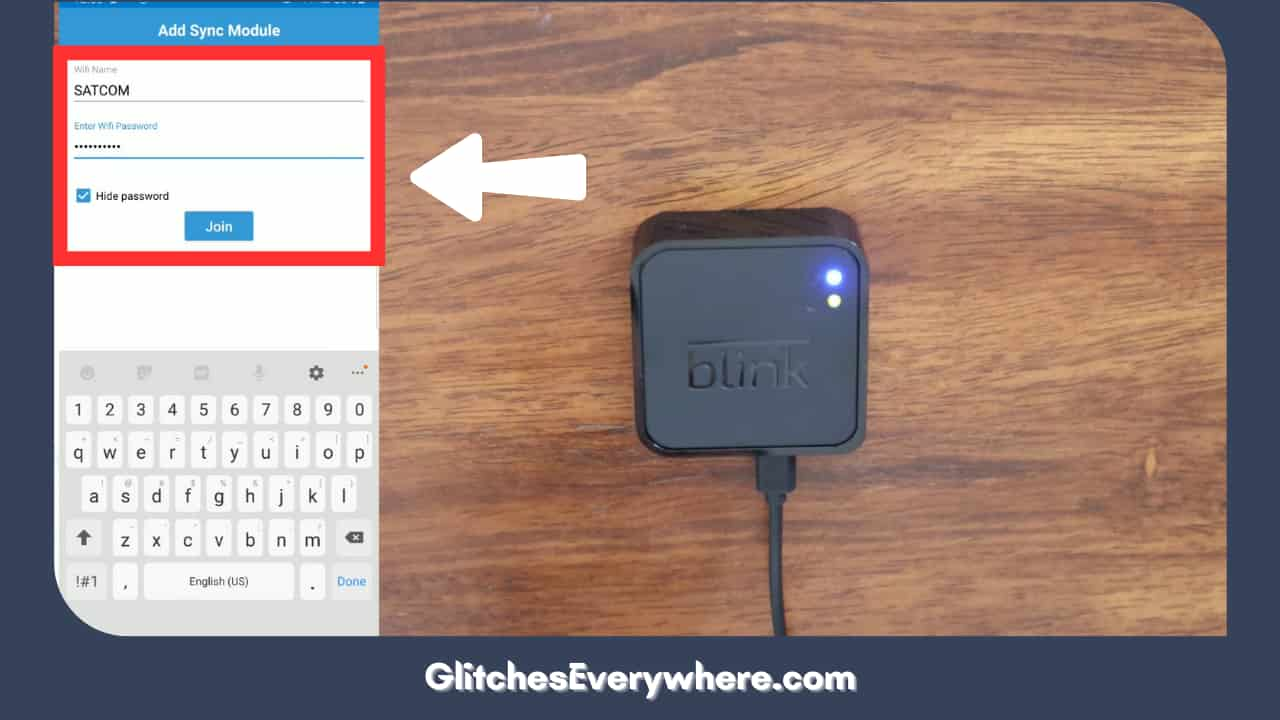
11. Put in the required password and choose Join again.

Put in the required password and choose Join again.

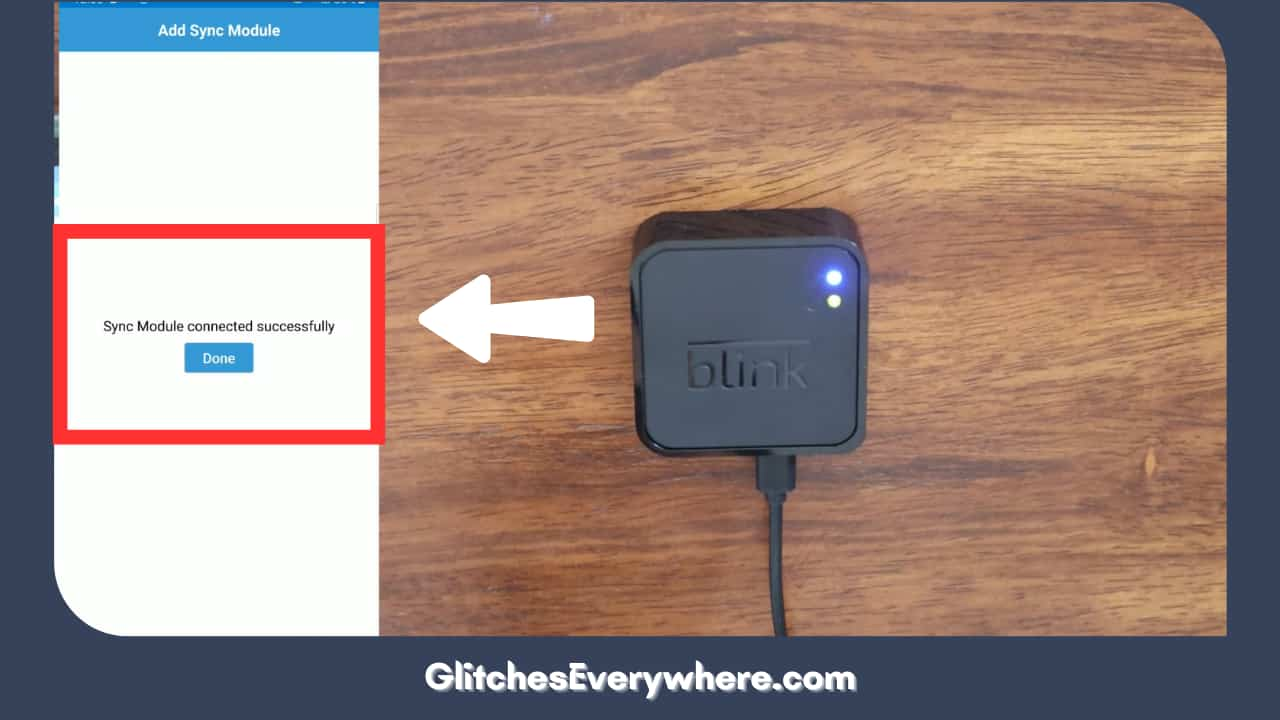
12. Give it a minute or two. When the device gets connected to the Wifi, you should be able to see the Sync Module added message.

you should be able to see the Sync Module added message.

This is your sign that you have followed through correctly. Reconnect your camera to your Wifi and then check if your blink camera blinking red headache has resolved itself. 

Sometimes, the blink red light due to connectivity is not due to the connection between your wifi and camera but the strength of your connection.

Go to your router and check if there is a red light on it or check the network strength to make sure that is proper. Checking for the read light on the router will also work for emerson TV Talk to your network service provider in order to resolve the issue if necessary. 

Reset Your Blink Camera

We are coming to our last resort for the blink camera flashing red headache. This is the hard resetting of your blink camera.

This is like rejuvenating your device but one should bear in mind that resetting the camera does remove it from the Sync module and your account. Use our guide above in order to set up your device after the reset is completed. The guide will work for Ecobee sensors as well.

Now let us come to the actual resetting process; here is how you can do it:

  1. First of all, press and hold the reset button that you will find on the side of your Sync module. Do so until the light on it goes red. You might need something pointed to reach this button. Make sure that you do this step exceptionally carefully so you do not hurt yourself or damage your camera.
  2. Finally, release the pressed button so that the light alternates between blue and green colours.
  3. This is going to be an indication that the Sync Module has gone into setup mode. Here, remove all cameras.
  4. At this point, you should add the camera back again. You should follow the same process when you first brought the camera and set it up.

It is crucial to note that there are certain cameras that do not use a sync module. In these cases, you have the reset button.

This button is generally located on the side of the blink camera and can be reached through something sharp or pointed. Press and hold down this button for a while until you see the camera shut down and reset.

Blink Customer Care

If none of our blink camera blinking red solutions have worked for you, it may be time to get professional help. You can get in touch with the amazing and helpful blink customer care staff through their official website: https://support.blinkforhome.com/

There is also a dedicated section where you will find answers to commonly asked questions. You can also submit a question to them online via the Contact Us option at the bottom of the same page.

You can also get in touch with them via your phone which you will find on the website or you can look it up. Their customer service is available seven days a week! Explain your issue to them in detail and they can definitely help you get rid of your blink red light for good.

Wrapping Up

This brings us to the end of my how to turn off red light on blink camera guide. I hope its details help you break down and better understand your blink camera blinking red issue.

The list of solutions is pretty easy to follow, I had to go through restarting the device, cross-checking the Wifi connection, and exchanging my old batteries for new ones, which is a wise move from time to time regardless of the blink red light, before getting too hard resetting my camera which finally solved my problem. Hope you were able to solve yours too or get the help of their official customer care to do so!

Hulu Not Working on Smart TV: Fix in Seconds 2024

Hulu Not Working on Smart TV

You have reached the right destination. If you have any queries regarding Hulu Not Working on Smart TV, Fix them in Seconds. This detailed guide will equip you with all the information you need.

Is your Hulu not working on smart tv? Do not dwell on it too much. It is a common problem that can be tackled pretty easily. The cause of your problem can be broken down into the following possibilities: 1. Network Issue, 2. Problem with the Hulu App, 3. Problem with the Smart TV.

Each of these problems has been analyzed in detail, followed by a detailed guide to fix it as well. Still wondering: why is Hulu not working on my TV? Stop right away and get to fixing it with our help!

Hulu has become one of the most popular streaming platforms across the globe today. Its popularity and reach are a great reflection of its success but like any other platform, it is bound to run into its fair share of bugs and problems, and you might find your Hulu not working on smart tv. Read through the end of the article to fix this problem today itself!

Hulu Not Working on Smart TV: What is Hulu

What is Hulu

Before we can talk about Hulu not working on your tv problem, it is only apt that we first briefly discuss this global streaming platform. Hulu was launched in 2007 as an American-based streaming platform and displays a huge variety of films and tv shows.

They even have Hulu original programming. Currently, they have over seven million subscribers across the globe, which speaks volumes about its success. 

Is Hulu unable to start? Is it crashing on your TV? Do not worry; it is more common than you think. Read to the end to get to the bottom of the problem and solve it right away!

Recommended Reading – Roku Apps Not Working: Fix in Seconds

Hulu Not Working on Smart TV: Analyzing the Problem

Analyzing the Problem

Why is Hulu not working on my tv? As mentioned above, the root cause of the problem can be subdivided into the following issues:

  • Network Issues

A poor internet connection is one of the most common reasons for Hulu not working on smart tv.

  • Problem with Hulu App

There is a lot that can go wrong with the Hulu app itself. The cache data can be overloaded or corrupted. The servers may be down due to maintenance reasons. The app may be outdated and due for an update. Some common bugs can also cause the Hulu unable to start issue.

  • Problem with the Smart TV

Issues and updates with your Smart Hub can also be a leading cause of Hulu not working on smart tv.

Recommended Reading – How To Fix Hulu Black Screen Issue: Fix in Seconds

Hulu Not Working on Smart TV: A detailed Fix-Guide

A Detailed Fix-Guide

Now that we have analyzed the problem in detail let us get to the main topic of discussion, i.e., how to fix it. There are certain common ways of repair you can opt for if you are facing Hulu not working on your tv problem. They are:

  1. Power Cycle your tv
  2. Cold Boot your tv
  3. Deactivate and reactivate tv
  4. Update Samsung TV software
  5. Reset Samsung Smart Hub
  6. Update the Hulu app
  7. Remove and reinstall the Hulu app
  8. Clear Cache Data
  9. Check and fix your internet speed
  10. Factory Reset
  11. Disconnect other devices
  12. Customer Care

Let us take a deeper look into each of these solutions and get rid of your Hulu not working on your tv issue altogether!

Power Cycle Your TV (Same for All Brands)

Power Cycle Your Tv

Is your Hulu not working on smart TV? Maybe, there is something wrong with the Smart TV software. Glitches and bugs are quite common and can be tackled easily.

The most common way to fix this issue is to power cycle your TV as it helps to refresh the software and removes any temporary data that is corrupted. Here is how you can power cycle your Samsung Smart TV:

  1. Use the remote control to turn off the TV.
  2. After it has closed, unplug the power cord from the wall socket.
  3. Wait for five to ten minutes.
  4. Plug the power cord back into the socket.
  5. Turn on the Samsung TV again.
  6. Launch the Hulu App now and check if you are still facing the issue.

Cold Boot Your TV

Cold Boot Your Tv

This is a good solution to battle inadequate and inefficient performance caused due to hardware strain caused by prolonged use of the device. In these cases, several apps stop working properly and start to crash, which is a clear indication that you should try to cold boot it. Here is how you do it:

  1. Take your TV remote.
  2. Locate the power button and press it until the TV gets off and on its own.
  3. This process can take up to ten minutes, after which you need to launch Hulu again.

Check if you are still facing the Hulu not working on smart TV problem.

Deactivate and Reactivate TV

Deactivate And Reactivate Tv

Before using the Hulu app, you will be required to activate the device in the account. You would have done the same with your TV when you logged into your Hulu account there.

If you have not used the app for a long, there is a chance that the app has deactivated the device. The same issue can be caused by a few other issues but all can be fixed by deactivating and reactivating your TV. Follow the given step-by-step guide to fix the Hulu not working on smart TV issue:

  1. The first step will be to deactivate the TV from your current devices in Hulu. Open the Hulu app on your phone or tablet.
  2. Go to Account.
  3. Select the Watch Hulu on Your Devices.
  4. Now, click on Manage devices.
  5. Here you will find a list of activated devices. There will also be a remove option next to it.
  6. Locate your TV on the list and select remove.
  7. Wait five minutes before reactivating your device.
  8. Now, in order to reactivate, open the Hulu app again on your phone or tablet.
  9. Go to Account and then further to Watch Hulu on your devices portion.
  10. Open the Hulu App on your Samsung TV and find your unique activation code, which you are required to enter in your phone or tablet to activate it as a streaming device for your account. 

This should help you get rid of the issue.

Update the TV Software

Update The Tv Software

Delaying updating the system software for your streaming device can also cause Hulu not working on smart TV issues. Update your tv software through the following steps:

  1. Switch and turn on your TV.
  2. Ensure it is connected to the internet.
  3. Select Menu or Home on your remote.
  4. Click on the Settings menu.
  5. Locate Support in the left panel and open it.
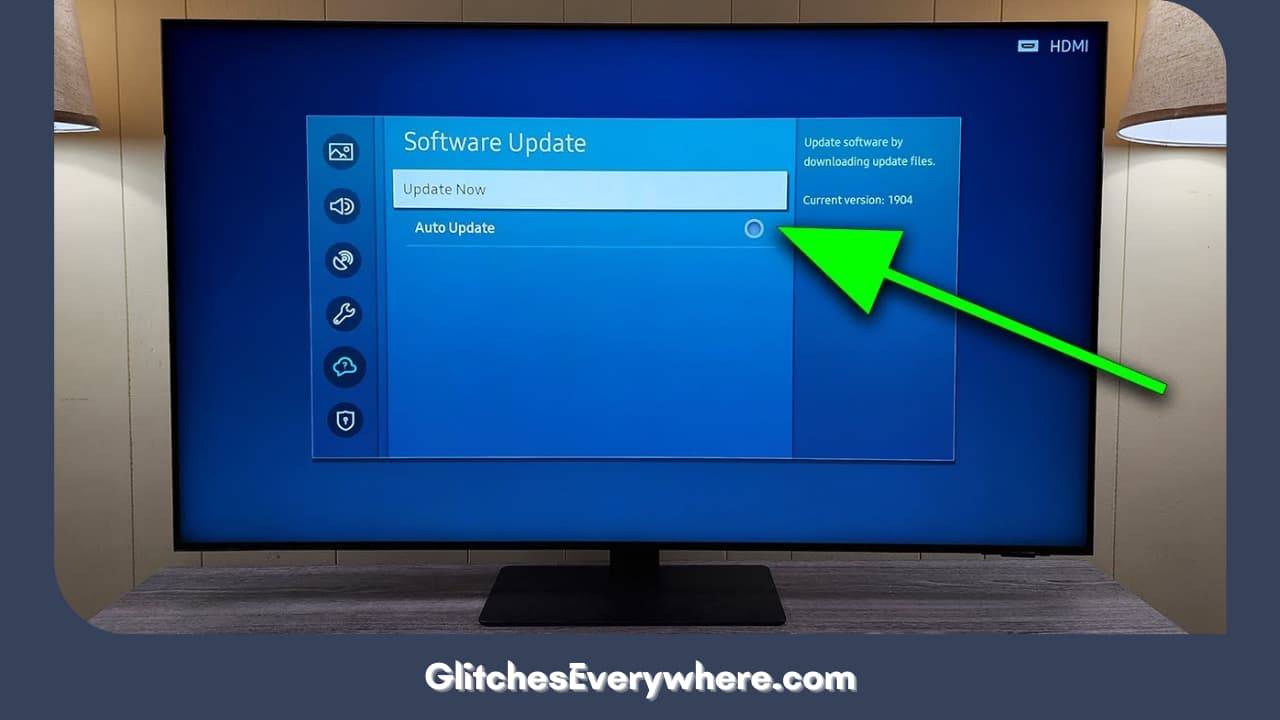
  6. Click on software update.
  7. Find the option of auto update and click on it.

Hulu not working on smart tv and fear it is the TV software. Try manually updating it with the help of the following steps:

  1. Go to the customer Support website and look up your TV model code.
  2. Download the Upgrade file provided there.
  3. Unzip the contents and transfer them to a USB drive.
  4. Locate the USB slot in your TV and insert the said drive.
  5. The update should begin automatically.

Update the Hulu App

Update The Hulu App


Wondering why is Hulu not working on my TV. Using older versions of apps and not updating them on time can lead to poor performance of the device altogether. Try updating the Hulu app on your TV to check if it removes the Hulu not working on smart TV problem. Here is a detailed instruction guide to help you update the Hulu app on your Smart TV:

  1. Find the Featured option and click on it.
  2. Locate Hulu from the list. 
  3. Press and hold the enter button on your remote here until the submenu pops up on the screen.
  4. Click on Update Apps from this menu.
  5. Choose Select All and then click on Update.
  6. Once the updates are finished, relaunch the Hulu app to check if the problem still persists.

Remove and Reinstall the Hulu App

Remove And Reinstall The Hulu App

Is Hulu not working on smart TV despite the six solutions provided above? Try this instead. Try reinstalling the Hulu app on your Smart TV. To do that you will be first required to uninstall the Hulu app, and this is how you can do it:

  1. Use your TV remote and press the Home Button. Launch the Smart Hub.
  2. Go to the Settings.
  3. Select the App option.
  4. From this menu, move on to the system app.
  5. Look up Hulu and select it.
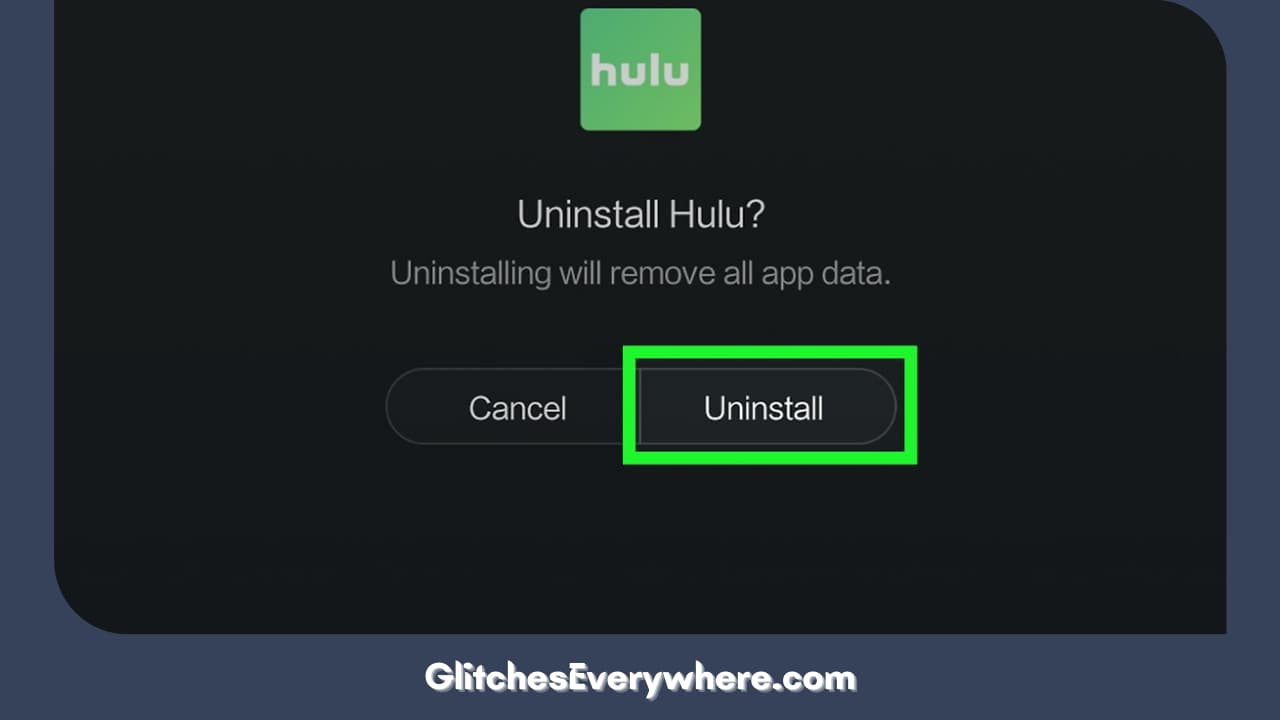
  6. Find Delete and click on it.
  7. Confirm by choosing OK.

This will successfully uninstall the Hulu app from your device. Before reinstalling it, wait for at least 5 minutes. Follow the given steps to reinstall Hulu on your Samsung Smart TV:

  1. Use your Samsung TV remote to click on the Home button.
  2. Find Settings.
  3. Go to Apps.
  4. Click on the search option.
  5. Type in Hulu.
  6. Click on install and wait for it to finish downloading.
  7. Select launch, and you are done!

Clear Cache Data of the Hulu App

Clear Cache Data Of The Hulu App

Before we can talk about how clearing the cache helps fix the Hulu not working problem, let us understand what it is. Whenever you visit any web page, information is saved on your device, which is further used to develop a more personalized and better online experience.

Your Hulu app holds this data as well. If left uncleared for a long time, it can add up to a lot and start affecting your streaming experience. Is Hulu not working on smart TV? It can very well be a result of this. Clear your cache to fix this problem.

Follow the given guide to clear the cache data of your Hulu app:

  1. Use your remote to press the Home button.
  2. Go to the Setting option.
  3. Select Support.
  4. Press Device Care.
  5. Choose Manage Storage from the list provided.
  6. A list of all the apps that are downloaded on your smart tv will be displayed here. Locate Hulu and then select View Details.
  7. Find the Clear Data option and click on it.
  8. Now finally, click on Clear Cache by pressing the enter key.

Is Hulu unable to start even now? Do not worry, and move on to the next step.

Check and Fix your Internet Connection

Your Internet Connection

Like every other popular streaming platform, Hulu also requires an active internet connection. Is Hulu unable to start?  This might be a result of poor internet access.

The first step of analysis is ensuring that it is the internet causing Hulu not working on smart TV issues. For this, you will need to check the connection speed of the network that your TV is connected to. This is how you can do it:

  1. Open your TV and open a browser.
  2. Use any free online speed tester. speedtest.net  is a reliable one.
  3. Click on Go and analyze the result.

This is the required internet speed for a smooth Hulu experience:

  1. 3.0 Mbps — Standard streaming.
  2. 8.0 Mbps — Live TV streaming.
  3. 16.0 Mbps —UHD (4K) streaming

Make sure your internet connection is up to the requirements and corresponds to your internet service provider’s plan that you have opted for. Try connecting to a stronger Wi-Fi for a better experience and get rid of your Hulu not working on your TV problem.

Factory Reset TV

Check And Fix Your Internet Connection

As the name itself suggests, following this step will bring back your TV to all its default settings and delete all existing data. This step can tackle any problems with the software or stored data. Following is a detailed guide on how to factory reset your Samsung TV to get rid of the ‘Hulu not working on smart tv’ problem.

  1. Power on your TV and go to Settings.
  2. Select the General option.
  3. You will be required to enter a PIN which is 0000 by default.
  4. Click on reset and then OK.

Your TV should restart and reset automatically, and you will get rid of your Hulu not working on smart TV problems.

Disconnect Hulu Account on Other Devices

Disconnect Hulu Account On Other Devices

Why is Hulu not working on my TV? Sometimes, having multiple devices logged into the same account can cause issues and prevent a smooth streaming experience. Try deactivating and logging out of all other devices other than your Samsung TV. This is how you can do it:

  1. Open Hulu on your phone or tablet.
  2. Go to your Account Page.
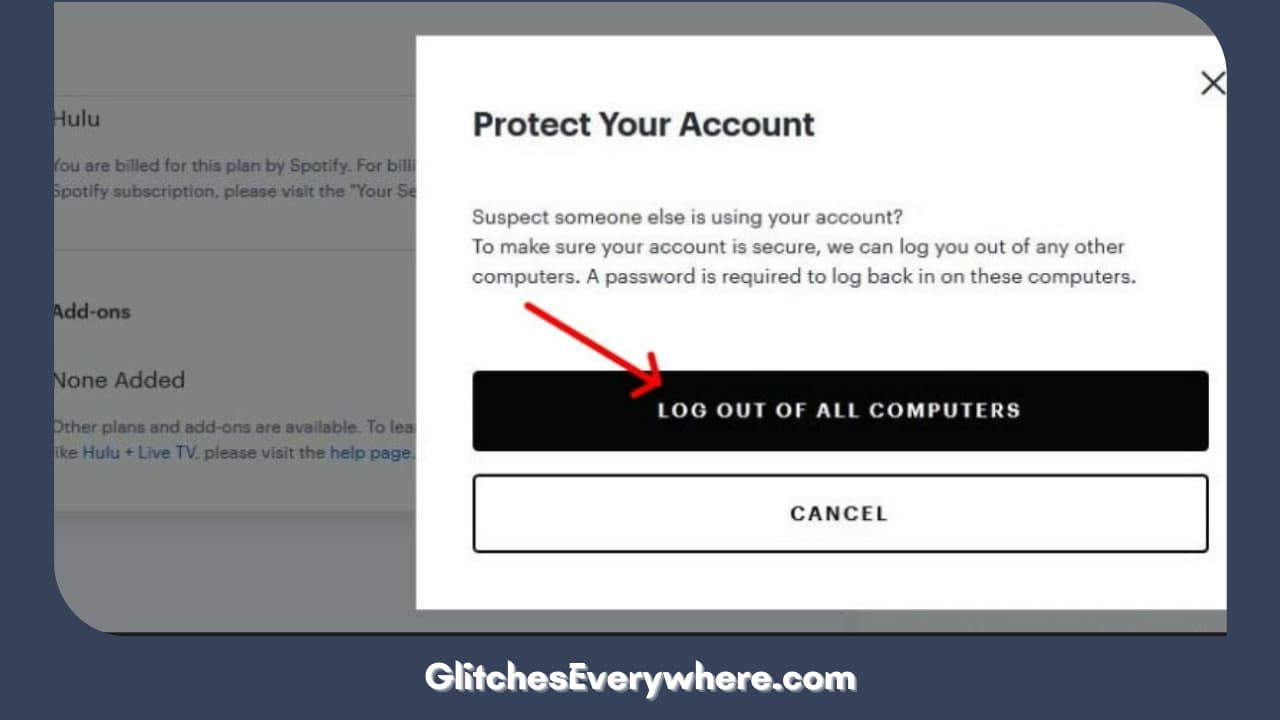
  3. Select Log Out of All Computers.
  4. Log into your TV again.

Contact Customer Support

Contact Support

Is your Hulu not working on Smart TV despite following all these steps? Try to get in touch with the Customer Support of Hulu and Samsung to get to the bottom of it.

Hulu also has a community page online where Hulu users talk about their problems and how they fixed them in the form of a discussion forum. This can be a great source of help.

Reset Samsung Smart Hub

Reset Samsung Smart Hub

This is a method to be used for Samsung TVs. Why Am I sharing a different method for Samsung altogether? Because it is the leading TV brand in North America and the TV on which you’re watching your favourite HBO show might probably be a Samsung TV

Before we can see how resetting your Samsung smart hub can help you get rid of your Hulu not working on smart TV issue, let us talk about what it exactly is.

The Samsung Smart Hub can be best understood as a menu system. It is utilized by your TV to allow you to access all the functions and options it provides, which include the use of various apps, browsing the net, viewing photos, and listening to music.

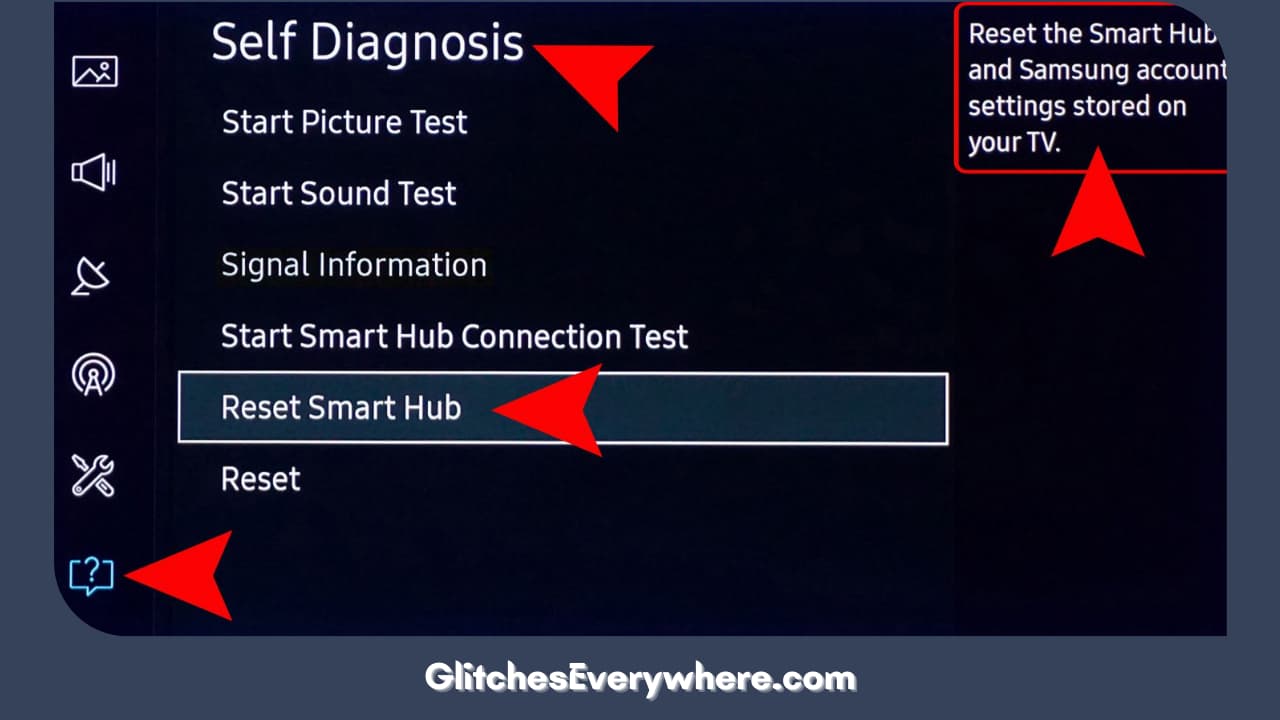
Any bug or glitch with your Smart Hub can cause Hulu not working on the Samsung TV issue, which can be fixed by resetting it. Here is how you can do it:

  1. Turn on your Samsung Smart TV.
  2. Locate the Smart Hub button on your remote control and press it.
  3. Find the button of the blue letter D on your remote and press it. This will open the Setting option in Smart Hub.
  4. Select the reset option.
  5. Press enter from the remote.
  6. You will be asked for a password. The default one is 0000.
  7. It will automatically reset from here and will show the confirmation as a ‘Reset Complete’ on the screen.
  8. Select the ‘OK’ button to finish the process.

This should help to get rid of the Hulu not working on Samsung TV problem.

Wrapping Up

Still wondering why is Hulu not working on my TV. Use this article and analyze your problem well. The detailed step-by-step guide that follows is bound to help you out. Know the application you are steaming well to avoid running into difficulties.

Like every other OTT platform out there, Hulu does run into technical glitches and bugs from time to time, but they are looked into and fixed almost immediately by their team.

There are certain things that you can do to avoid being prey to Hulu not working on smart tv problems, like keeping the app updated, cleaning the cache data regularly, and keeping the network connections in check. Continue enjoying Hulu and all it has to offer!

Why is My Roku TV So Slow: (Don’t Panic, Easy Fix in 2024!)

0

Why Is My Roku Tv So Slow

You have reached the right destination if you have any queries regarding Why Is My Roku Tv So Slow. This detailed guide will equip you with all the information you need.

Wondering why is my Roku so Slow. Look no further, we got you! This article has everything you need in order to fix this issue for good on your own.

Begin by resetting your router and changing to a broader bandwidth. Try using a wired connection to see if it helps. Try restarting your device and then check for any pending firmware updates. Change the batteries of your remote and re-pair it with your TV. Clear the cache of your device or try to remove it and then re-add the problematic channel or app. Lastly, try to factory reset your device before turning to Roku support for further assistance. 

Now, how to factory reset Roku? How can I change to a broader bandwidth? Can I find out if I have pending firmware updates? Why is Roku TV lagging in the first place? All these are excellent questions and we have answered them all and more in the rest of the article. This is in addition to more solutions than the ones listed above with detailed steps that are easy to follow for all.

If you try every single one of these methods in chronological order, I am pretty sure, one of them will work for you.

Recommended Reading – Vizio HDMI Not Working: (Here’s Why & How to STOP It!)

Why is my Roku So Slow

Why Is My Roku So Slow

Wondering why your Roku is slow? Could be a result of a few things. The most common ones have been listed below:

  1. Outdated Roku firmware
  2. Damaged hardware: TV or remote
  3. A slow or unstable internet
  4. Network congestion 
  5. Overburdened cache 
  6. Problem with particular channels or apps

Recommended Reading – Why Does My Vizio TV Keep Turning Off? (Try This Fix First!)

Roku Lagging: Solution Guide

Solution Guide

We are finally looking at the multiple ways you can use to fix your Roku TV slow problem.

These are tried and tested solutions that work for a variety of causes and have helped a lot of Roku users. It’s time you use them to your benefit as well!

If you have already been able to figure out why you are facing this ‘Roku slow’ trouble, you can directly skip to the steps or steps that correspond to that particular problem.

If not, nothing to fret over, follow these steps in chronological order and by the end, I am positive that you will have gotten rid of this Roku lagging issue for good.

So, without further ado, let’s dive into it!

Check your Internet Connection

Check your Internet Connection

Hands down one of the most common reasons for your general ‘Roku is slow’ dilemma is a poor internet network connection. It is common knowledge that Roku requires a strong and stable internet in order to work seamlessly. 

So, it is only fair that we begin by checking the strength of your Roku’s network connection. Follow these steps in order to find out for yourself:

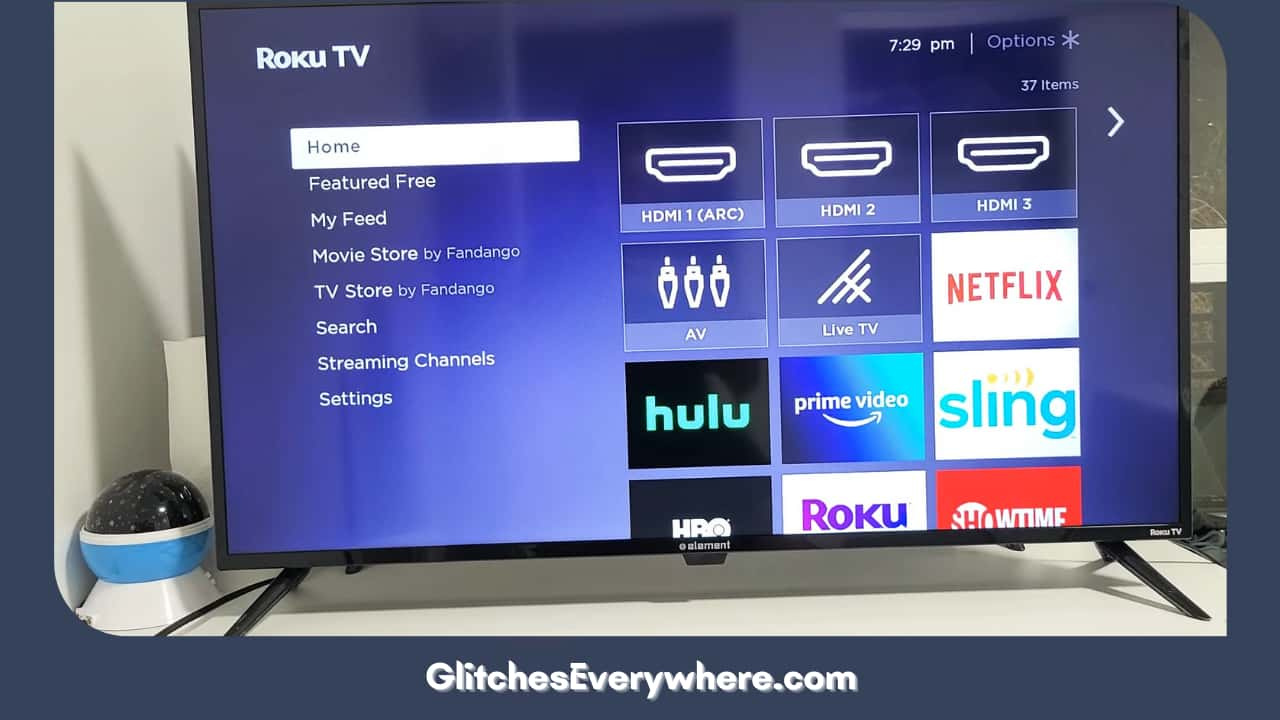
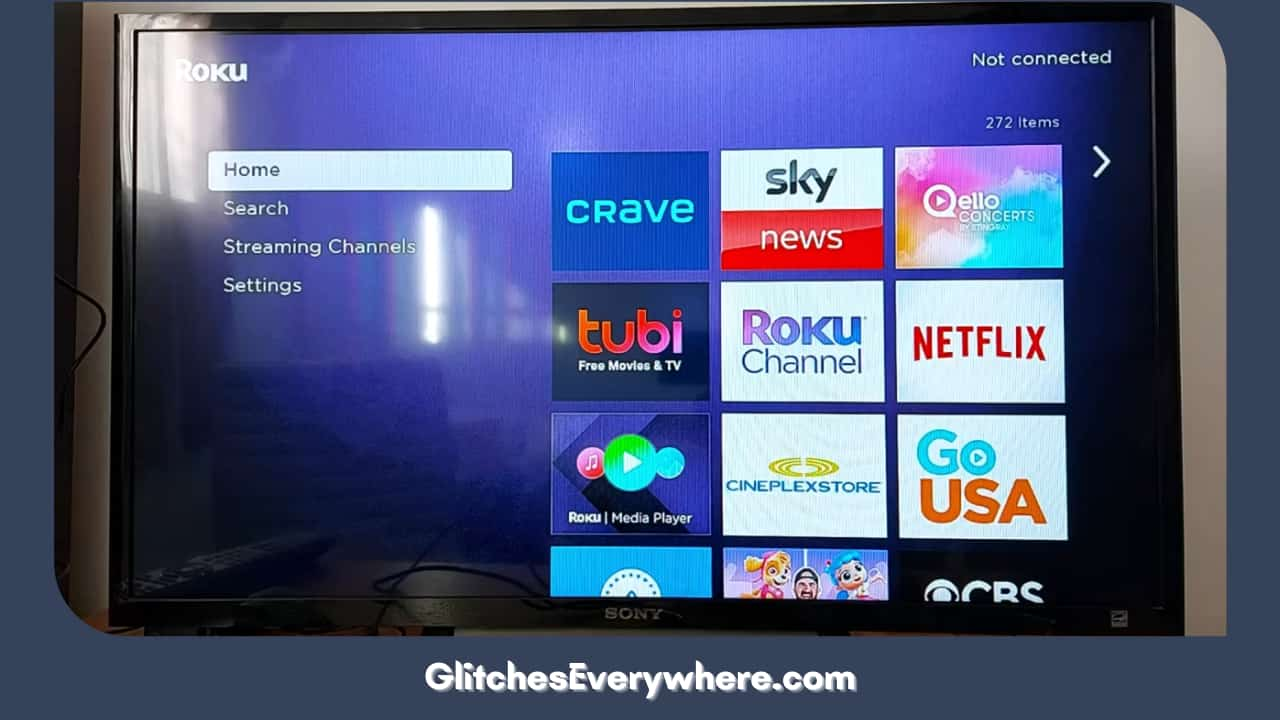
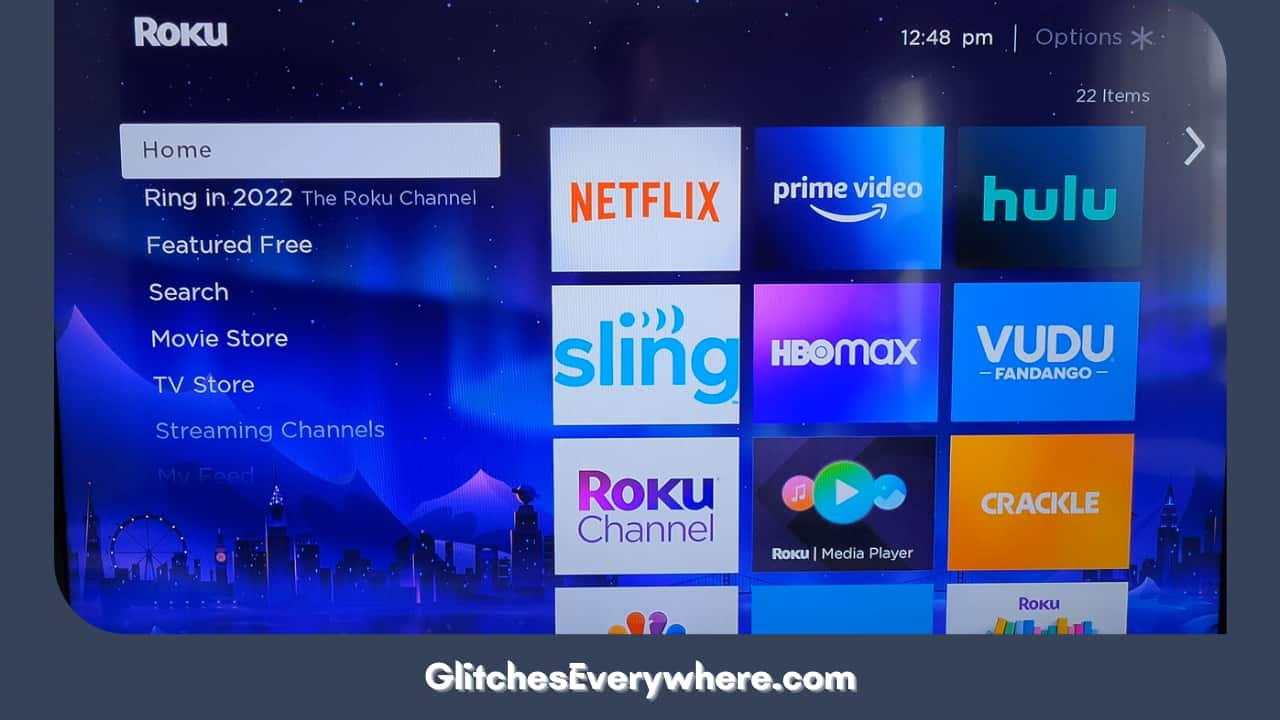
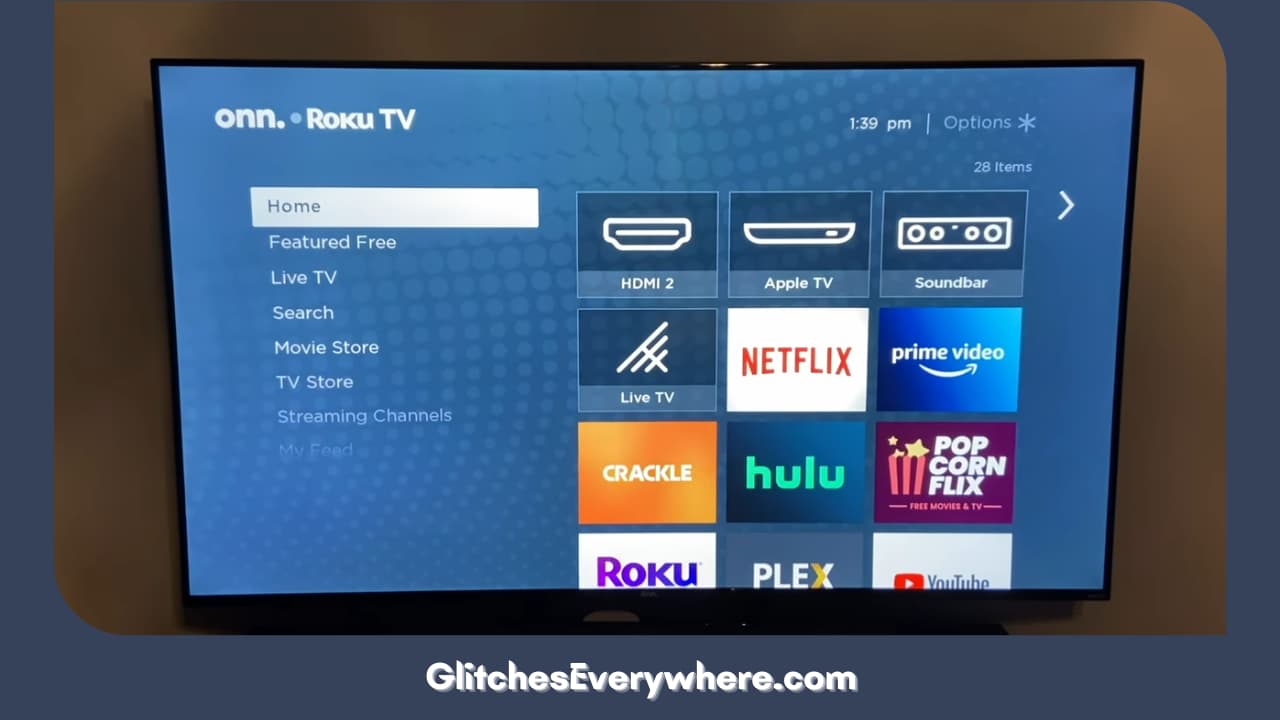
1. Press the Home button on your Roku remote. This will prompt the Home screen.

Press The Home Button On Your Roku Remote

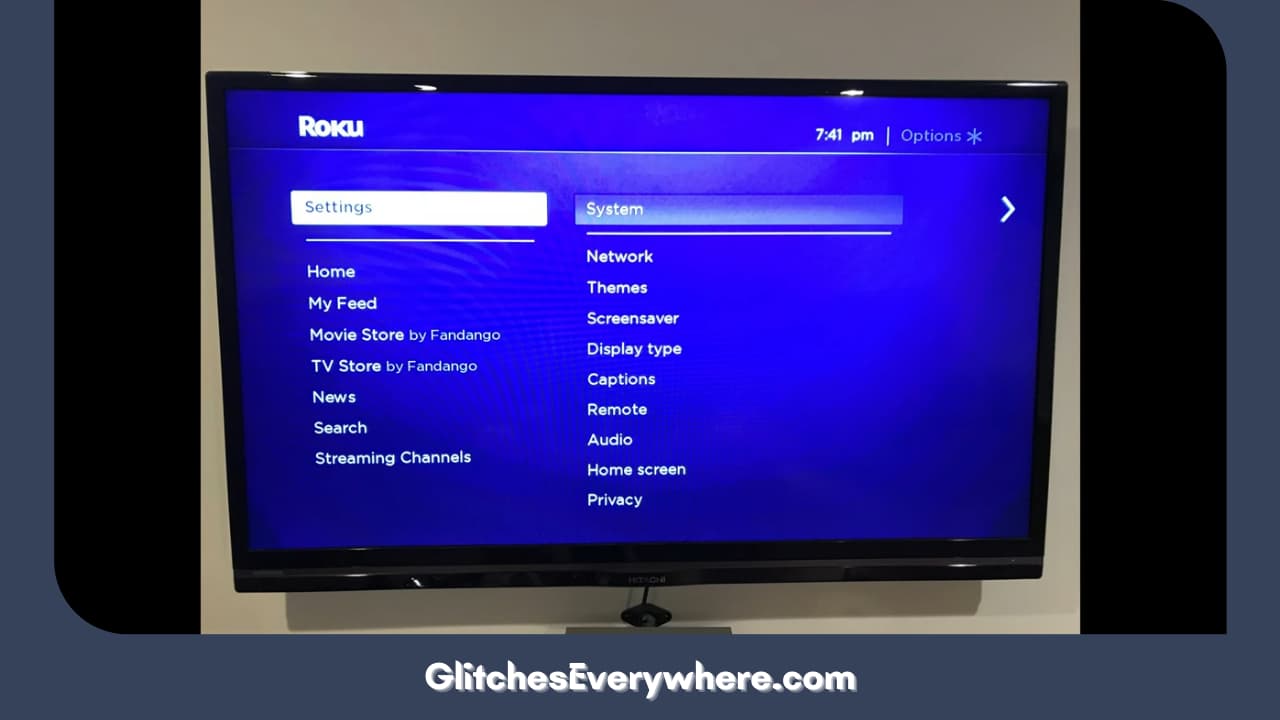
2. Locate and click on the Settings icon. It is the one that will have ‘gears’ as the icon.

Locate And Click On The Settings Icon

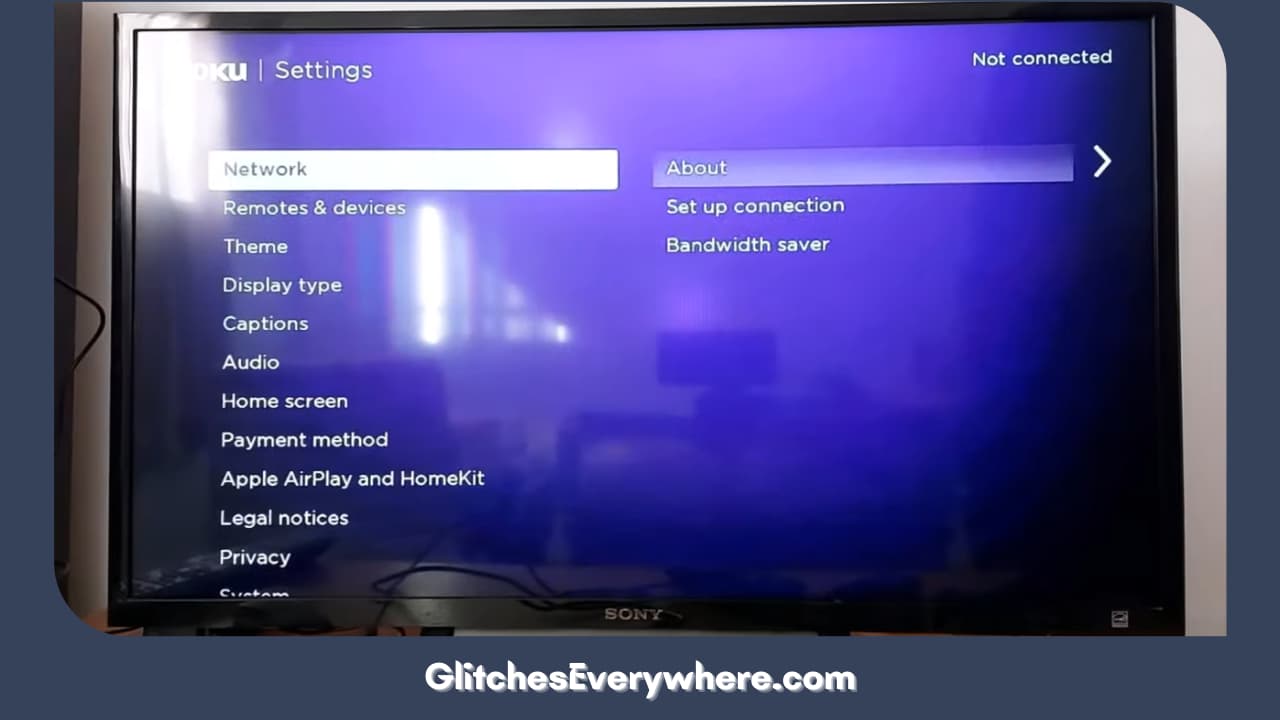
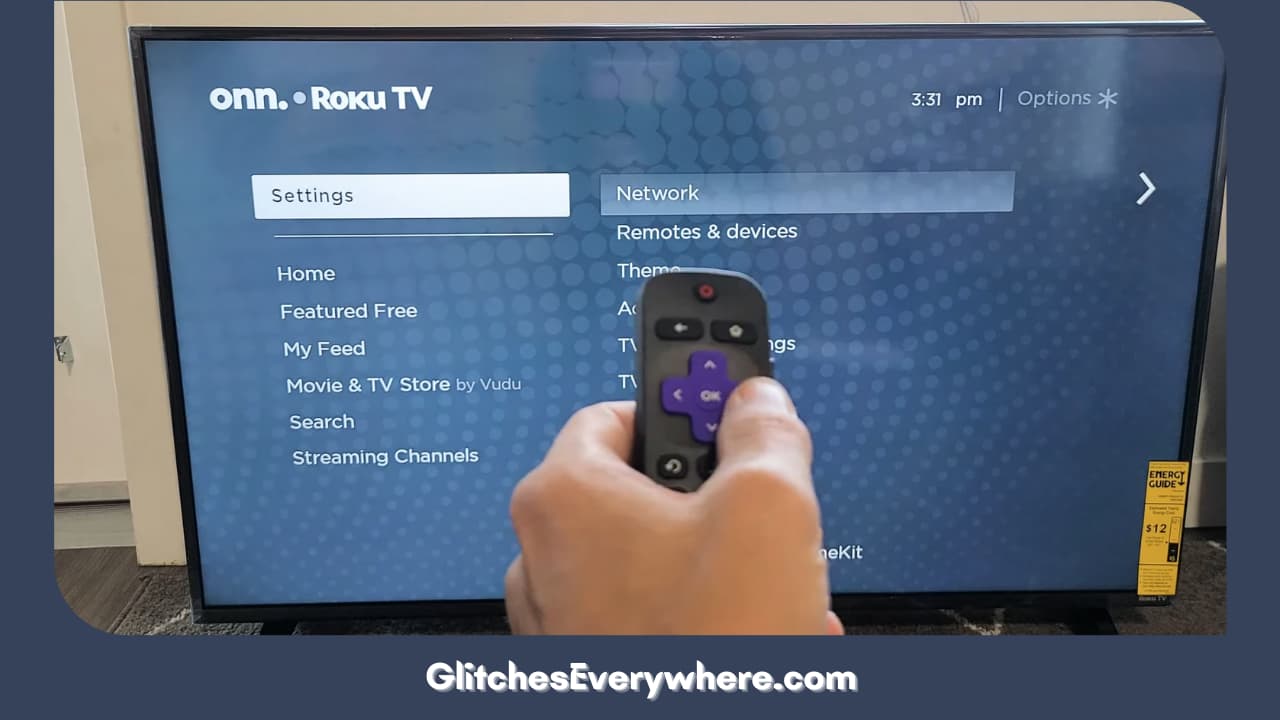
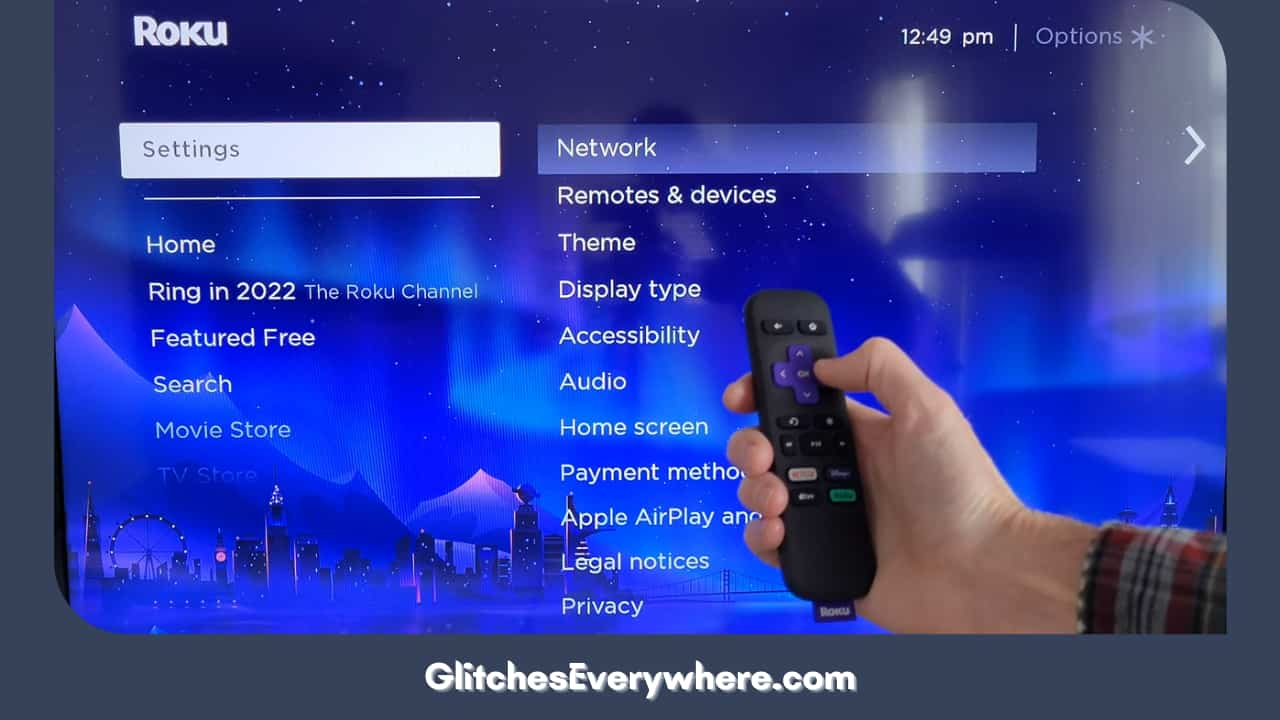
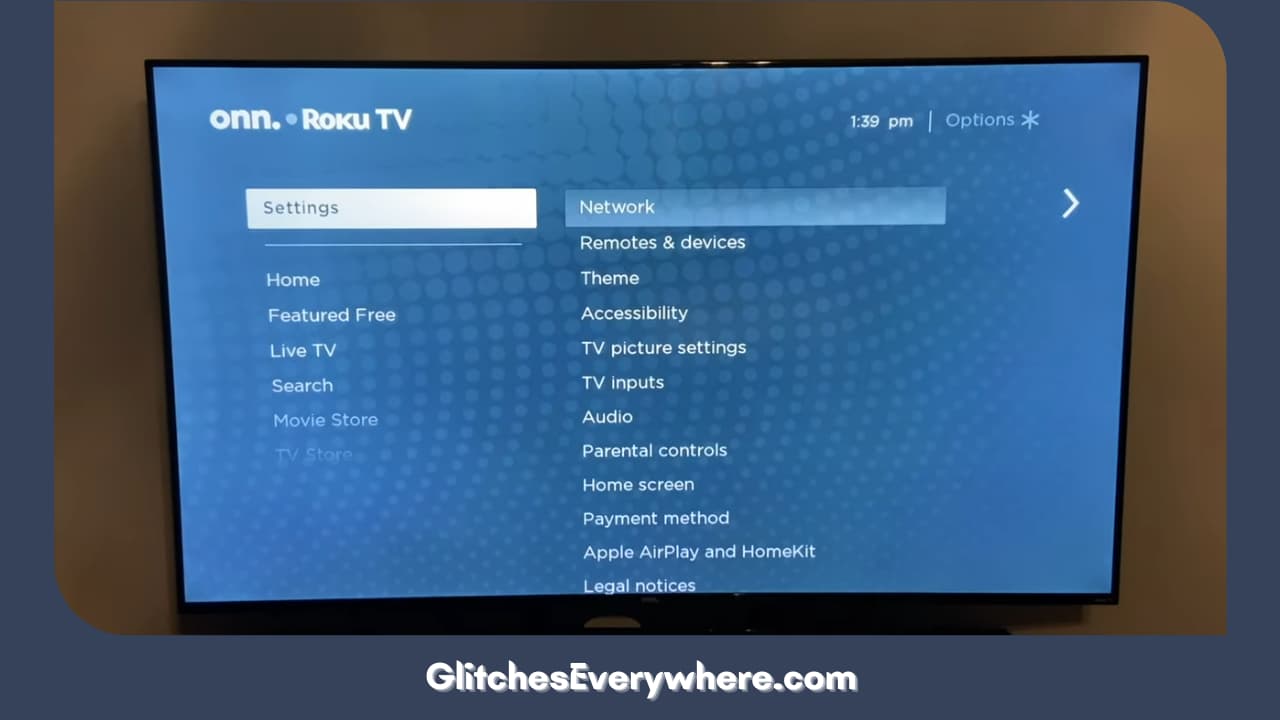
3. Find and click on the Network option.

Find And Click On The Network Option

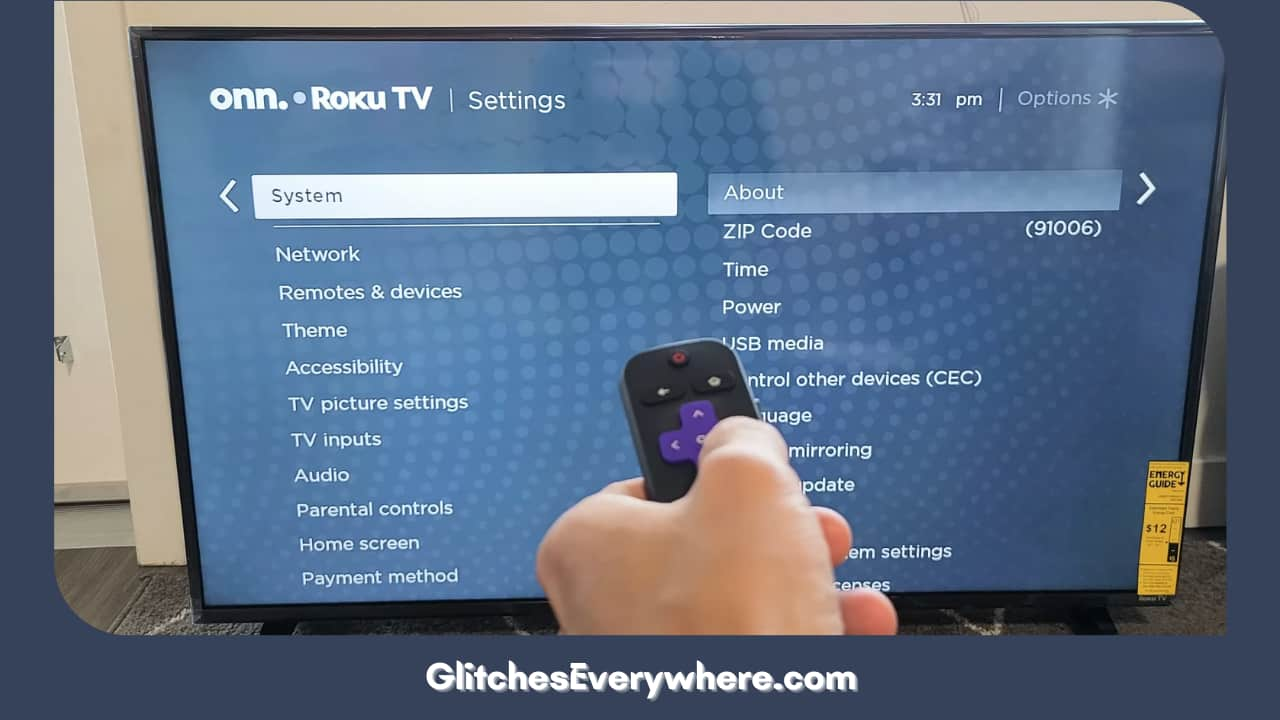
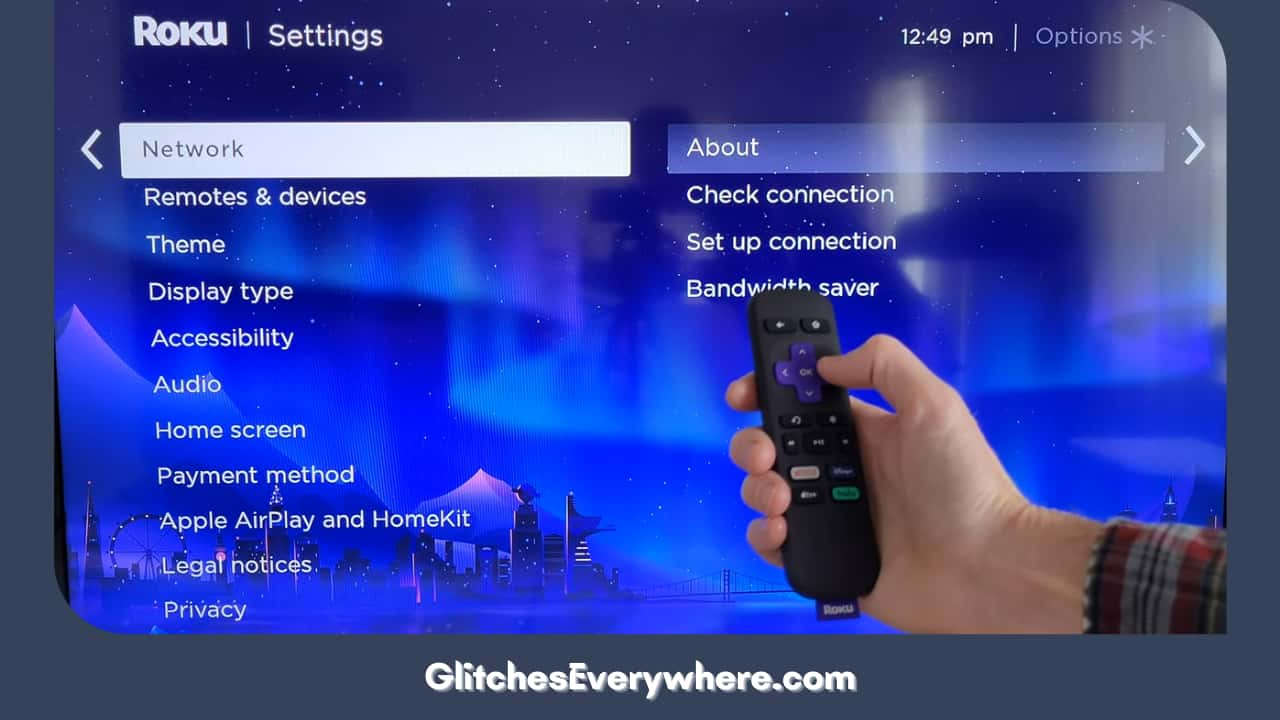
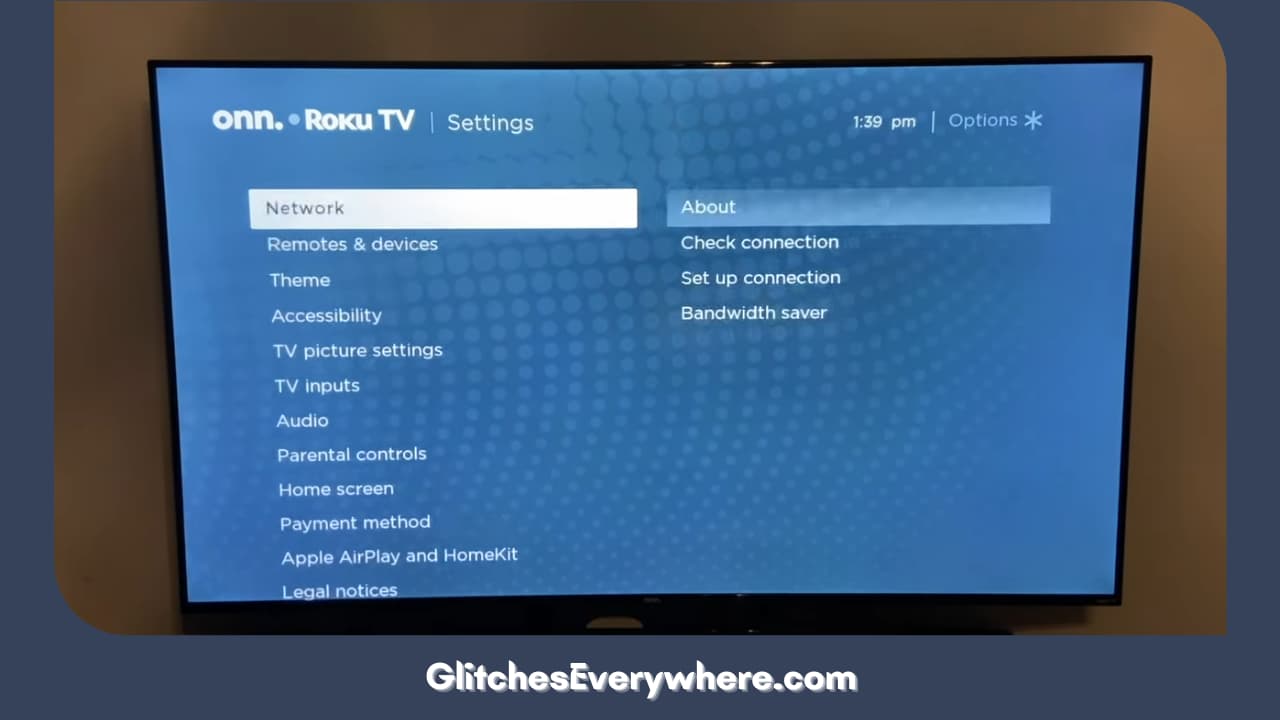
4. Further, select the About option.

And that’s it! This should help you see the details about your connected network. This includes but is not limited to downloading speed and signal strength. You will also have the option to Check the Connection. This will give you the correct analysis of your network strength.

Once you select the Check Connection option, this is what you need to take note of. You need to keep an eye out for feedback on the downloading speed. If it comes out to be good or excellent, you are in the clear.

The issue begins with the fair or bad outcome. It is an indication of a poor network connection and can thus be a reason behind a bunch of performance issues that include the answer to your Why is my Roku TV so slow question as well.

I’d say give your network connection another test before moving further. Connect your smartphone or tablet to the same Wi-Fi and then use a speed tester. You can do this through a website or an application. There are many easy ones available online.

If the final readings continue to indicate that your Roku is experiencing a poor network connection, follow the steps that follow this point which can help you fix this ‘Roku TV slow’ issue on your own!

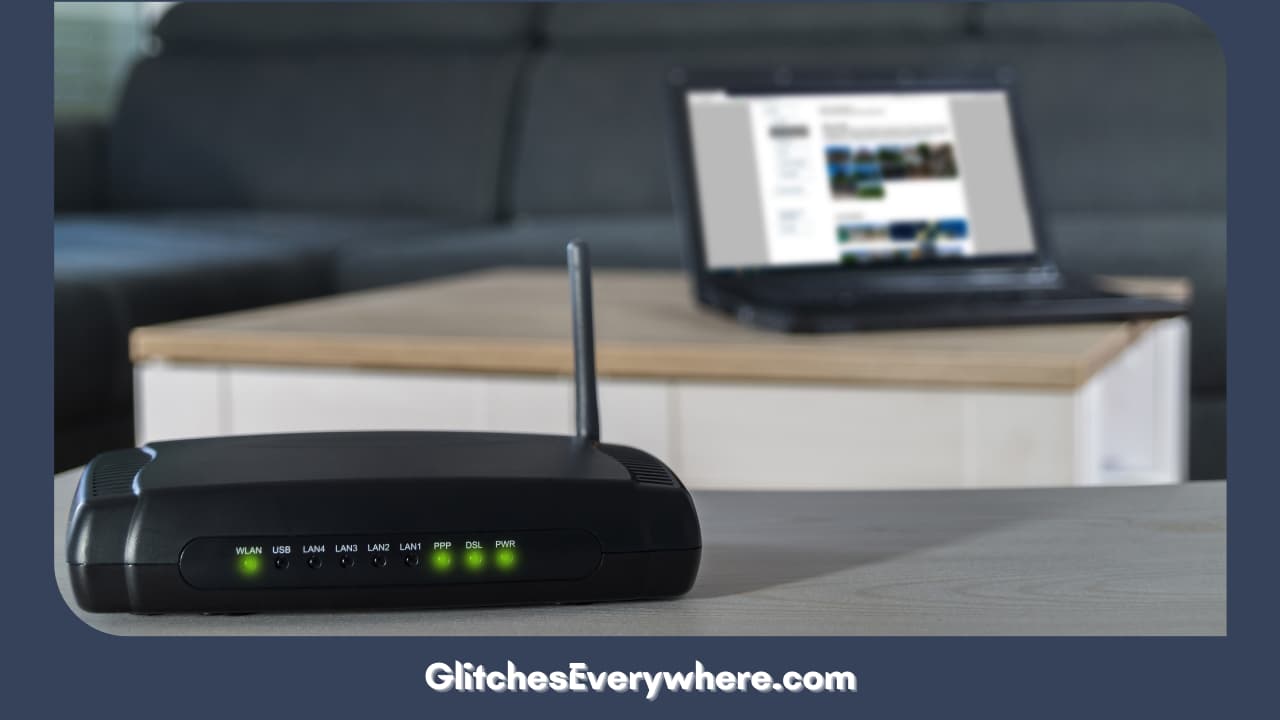
Refresh Your Router

Check And Fix Your Internet Connection

Observe the network speed for a bit, if you see it jumping, try refreshing the router. This also works for almost all router-based issues so my suggestion is that you do not skip this step.

This is how you can reset your router:

  1. Unplug your router or modem from its main power source.
  2. Wait for a bit, I’d say at least for half a minute.
  3. Plug it back again and let it restart.

Use the steps from the above point to check the strength of the network now. Roku is slow even now, What can I do? No worries, we are just getting started, Continue reading.

Change to a Wider Bandwidth

Change To A Wider Bandwidth

This is to opt for better latency. What does that do? It helps during times of network congestion which is a major reason for many network-based malfunctions.

In layman’s terms, it simply means that in case your network is going through high traffic at the time, problems of buffering and lagging are common. The technical reason behind the same is the insufficient allocation of bandwidth.

This is why you should try moving on to a wider bandwidth. You can opt for this solution if your router has the option for dual-band networks. 

Now, almost all Roku TV devices have the option of dual-band connections. This means you can connect to 5 GHz bands with ease. This will give you better latency and might help you solve your Roku TV lagging problem too.

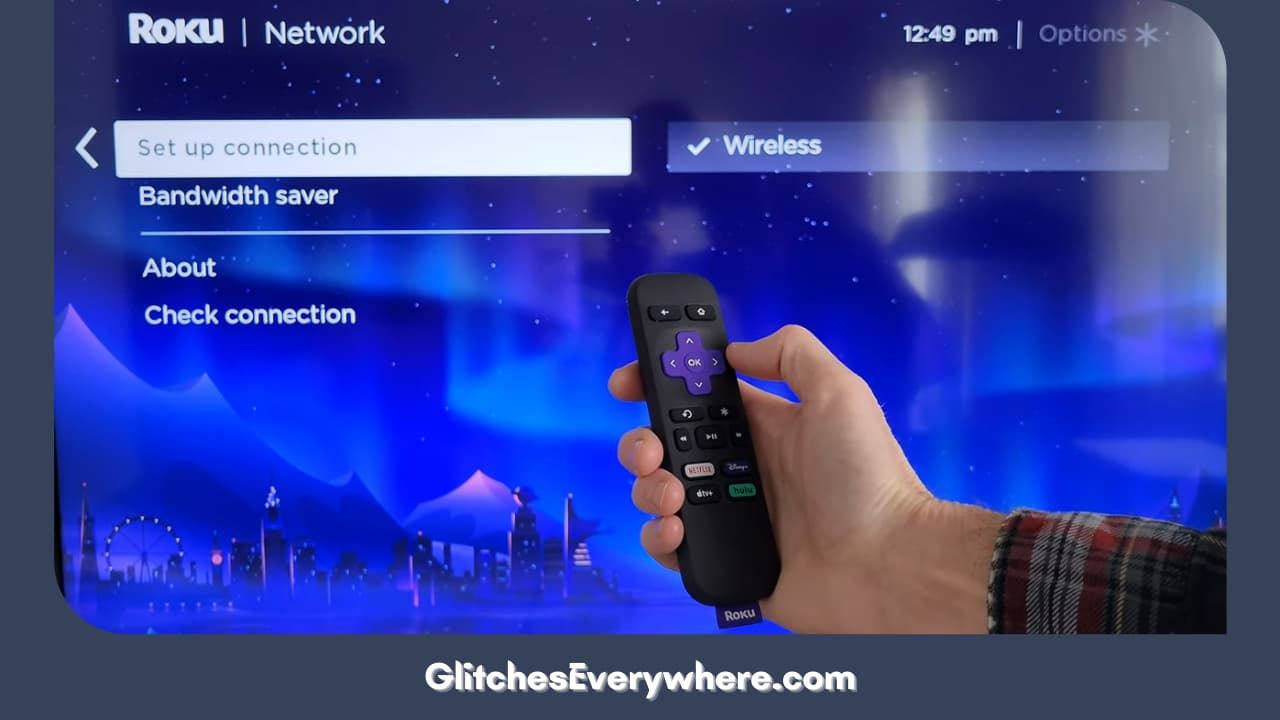
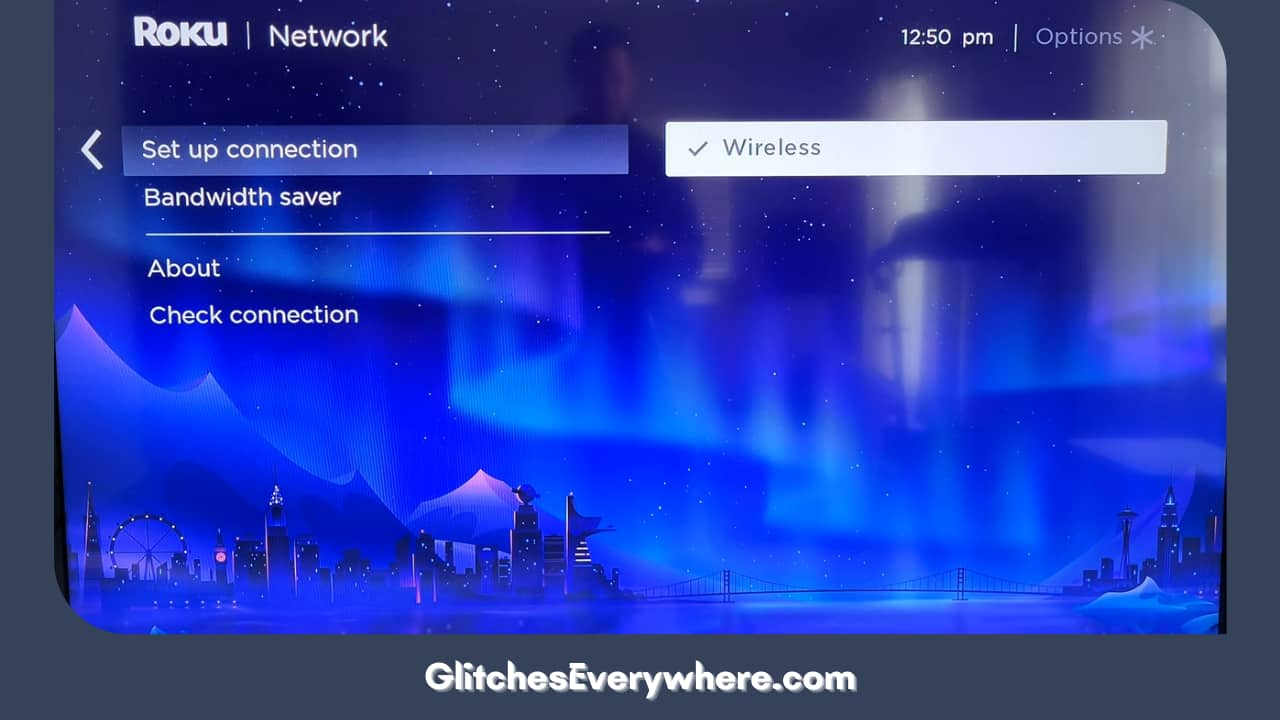
You can then change the network of your Roku TV through the following easy steps:

  1. Go to the Home screen by pressing the Home button on your Roku remote.
  2. Then proceed to go to Settings.
  3. Further, select Network.
  4. Find the option of Set up connection and select it.
  5. Further, select the Wireless option.
  6. Find the network with a 5GHx band and enter its password as needed.

Switch the Wi-Fi Channel on the Router

A Wi-Fi network gives channels to connected devices. If your network has given you a channel that has high latency and thus more interference trouble, you can very well experience this Roku TV slow situation.

In order to fix this, try changing the said channel on the portal of your router. That seems like such a technical thing! Can you do it yourself?

Yes, you absolutely can! Use these given steps in order to switch the Wi-Fi channel according to need:

  1. Using an ethernet or USB cable connect your router to your PC.
  2. You will now be required to enter the IP address of your router.
  3. The portal screen will soon pop up. Now, enter the user ID and password of your account.
  4. Go to the advanced settings and find the wireless channel menu.
  5. Now, make sure that the 2.4 GHz band is in the 1, 6 or 11 numbered channel. 
  6. Select the lowest channel for a band with 5GHz.
  7. Save the changes you have made.
  8. Log out of the portal at this point.
  9. Restart the modem, and use the steps described in the above point.
  10. Connect to your Roku TV once your modem or router has restarted.

Is Roku TV lagging still? Let us try one more network-based solution before moving on.

Change to a Wired Connection Instead

Change To A Wired Connection Instead

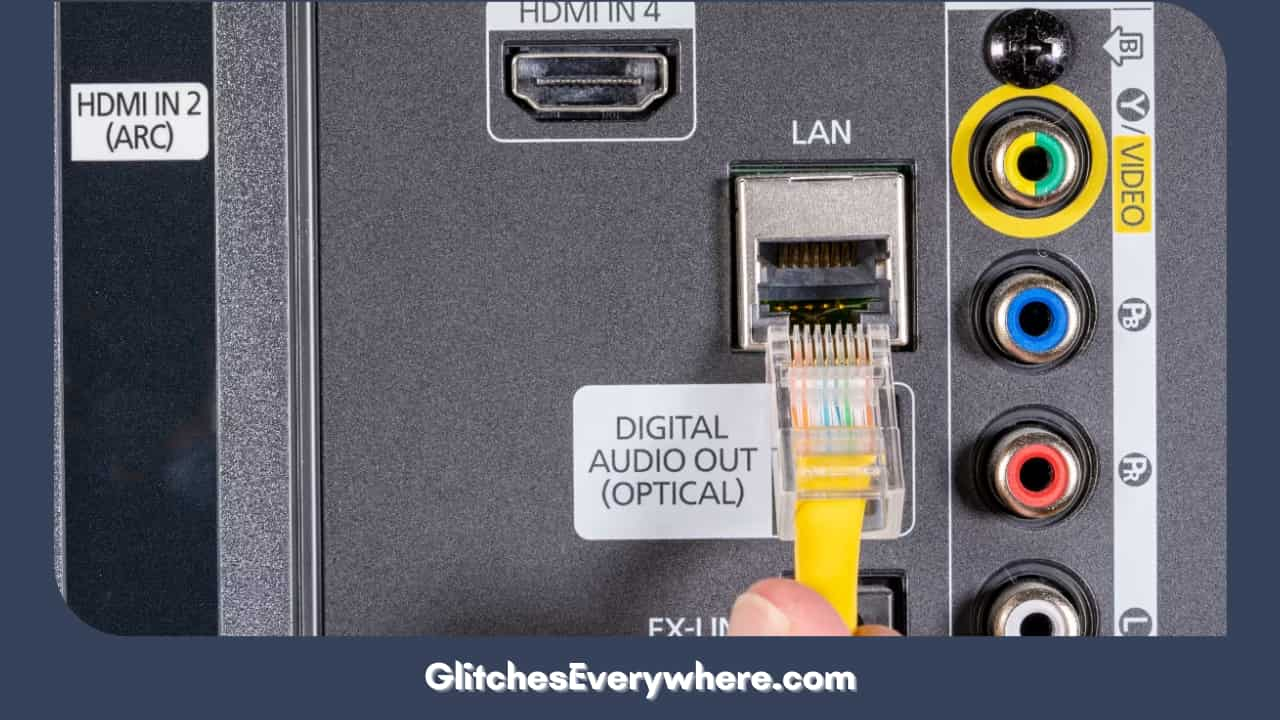
This option is great if you have an ethernet cable handy and are facing the Roku lagging scene. The thing is that a wired connection doesn’t face the bad repercussions of network interference and traffic issues.

Before I get to the step-by-step instructions on establishing a wired connection, it should be noted that not all Roku TV models have an Ethernet port. So, check if your model has this port, If it does, move on and use these steps in order to establish the required wired connection yourself:

  1. Carefully connect the Ethernet cable to your TV.
  2. Press the Home button on your remote.
  3. Find the Settings menu and enter it.
  4. Now click on Network.
  5. Find and select the option to Set a new connection.
  6. Further, click on Wired and then the device should connect on its own.

Updates Roku TV Firmware 

Roku, like many other platforms, comes up with firmware updates every now and then to improve its overall performance. Wondering: Why is my Roku TV so slow? Could be it!

If you fail to keep up with your firmware updates, your device is highly susceptible to facing lagging and other running issues. This is why you should keep up with your system updates and this is how you can do it in less than a minute:

1. Go to your Home screen.

Go To The Home Screen

2. Enter the Settings menu.

Now, Enter The Settings Menu

3. Find and select the System option.

Locate And Select The System Option

4. Further, find System Update.

Now, Press System Update

5. Then locate the option of Check Now and select it. This will run a manual check for any pending firmware updates.

Find The Check Now Option And Press It

If you find any updates after the scan is done, install them immediately. Once the update is done, let the device restart and then check if the Roku slow situation still persists.

Restart Roku TV

I totally understand how this can seem like a waste of time and a solution given for almost all technical issues. Hear me out, there is a reason why!

Restarting your device gives it a quick internal cleanse which helps you get rid of small bugs and helps the device run smoother. Roku TV lagging and don’t know what to do? What is the harm in trying?

There are a couple of ways you can go about doing this. This is the first one:

1. Go to your Home screen.

Go To The Home Screen

2. Go to the Settings menu from there.

Navigate The Screen And Select The Settings Option

3. Find and open the System option.

From There, Go And Select System

4. Locate Power and then further find System Restart.

Select The Option That Says System Restart

5. Click on this Restart option in order to confirm the prompt and that’s it!

Finally Hit Restart And It's Done

Alternatively, you can try this method. It is a combination of your remote buttons and gives you the same effect. Follow these instructions in order:

  1. Press the Home button on your remote five times.
  2. Now, press the Up button.
  3. Press the rewind button two times now.
  4. Lastly, locate and press the fast-forward button two times.

That should do it! Wait for the device to restart and then cross-check if your Roku TV slow scene is still hanging on.

Try Clearing the Roku Cache

Try Clearing The Roku Cache

Corrupt cache files or built-up files can put a strain on your device and can cause issues like this Roku slow one. You might want to clear this cache from time to time, take this as a sign to do it now too.

Follow these steps to do so:

  1. To begin with, select the Home tab.
  2. Press the Home button on the TV remote five times.
  3. Press the Up arrow button on your remote next.
  4. Now, press the rewind button two times.
  5. Press the fast-forward button twice as well.

Check Your Remote

Check The Remote Particulars

Now is the time to move to the next category of solutions, they correspond with issues with your remote. Yes, your remote could be the answer to your Why is my Roku so slow dilemma.

One of the most common reasons for a malfunctioning remote or a poor connection between the remote and TV is insufficient power or drained batteries. Pop the battery compartment out and take out the batteries. Replace them with fresh ones and make sure the polarity and placement are correctly done.

Your next step is closely connected to the previous one. In addition to placing the batteries in the correct order, you also need to ensure that they are in contact with the terminal springs. Check for corrosion or dirt accumulation on the same and clean it if needed.  

Re-Pair your Remote

At This Point, You Will Be Able To See A Status Light On Your Roku Remote. This Light Is An Indication That The Roku Remote Is Now In Pairing Mode.

Next, you can try to unpair and then repair your remote again in hopes of fixing this Roku lagging issue. Follow the given steps in order to do so:

  1. First, turn off the TV.
  2. Remove the batteries from the Roku remote.
  3. Now, turn the TV back on.
  4. Put the batteries back in at this point.
  5. Locate and press the pairing button. You will find it next to the battery compartment only.
  6. The blinking LED light is going to be the indication that the process has started. Just wait for the on-screen pairing prompt.
  7. Follow the instructions on the screen to finish the process.

If there is no response to your remote at all, check for physical damage to your remote. At this point, the only option you’ll have is replacement.

In case you have a universal remote, try it on your TV. If it works, then you can successfully conclude that the issue lies with your remote and not the TV itself.

Alter the Bit Rate

Alter The Bit Rate

You can use this secret menu in order to change the bit rate which can help you get over this ‘Roku TV slow’ scenario. Let’s break it down first.

Some apps take more data than others and thus use a higher bandwidth. If you have multiple devices connected to the same network, this issue can get worse and show up like these symptoms.

Now, in the case of some of these channels or apps, you have the option to make network-based auto adjustments and fix the issue as much as you can. 

You can try out these steps in order to override the bit rate menu on your Roku device today:

  1. Press the Home button five times on your Roku remote
  2. Now, press the fast-forward button twice.
  3. Press the reverse button three times now.
  4. This will open the Roku secret menu. Navigate the screen and find the Bit Rate Override menu.
  5. Alter the rate, however, you need after entering this menu.

Keep in mind that the automatic option can help you out but the 3 Mbps is not a bad option either.

Remove and Re-Add the Problematic Channel

If you are facing the ‘Roku slow situation’ with just one channel, this step is for you. You should try removing it and then adding it again. You can do both easily through the Roku channel store.

On the plus side, doing this process will get rid of any bugs on the back end of these apps and help you get rid of these errors.

Follow these steps in order to perform this solution yourself in less than a couple of minutes:

1. Go to your Home screen.

Go To The Home Screen

2. Find the channel that’s causing you trouble.

Find The Channel That's Causing You Trouble

3. Press the * button once you are on the channel. This will show the channel options menu that you need.

Press The Button Once You Are On The Channel

4. Find the Remove Channel option. It’s generally located near the end.

Then Choose The Remove Channel Option

5. Select Remove and the channel will be deleted.

Confirm Your Action One Last Time As The Remove Box Comes Again To Finish The Roku Hide Channels Trick

6. Once removed, restart your device. 

7. Go to your channel store.

8. Search for the channel you just removed in the section of Streaming Channels and download it again.

Factory Reset Roku TV

Before I begin with the ways to perform a factory reset, I would like to say that this should be your last resort.

This is because it completely wipes out the memory of your device and gets it back to its original or factory settings. It’ll not be possible to get this data back. Additionally, keep in mind that you’ll have to set up the device all over again.

Follow these steps in order to do so:

1. Go to your Home screen.

Press Home On Your Roku Remote

2. Enter Settings.

Choose And Enter Your Settings Menu

3. Click open System.

Find The System Option And Click On It

4. Find and click the Advanced System option.

Move On To Advanced System Settings

5. Find and select Factory Reset.

Find The Factory Reset Option And Click On It

6. You’ll have to enter your PIN and then confirm the reset.

Allow your device to restart now. You can also perform this step through the built-in reset button. It’s generally located at the back or side of your TV. Use a paperclip or pen to press and hold it down. 

After setting up and logging into your device, check if the Roku TV lagging problem is over or not.

Contact Roku Support

Contact Support

If none of the above ‘fix Roku TV slow’ steps have worked for you, it is time to go to the source. Once you go to the official site of Roku support, you’ll get the option to select the cause of your discomfort and then be met with a bunch of helpful articles. 

You will also be given a chance to get in touch with a customer service executive through call, text or email. Choose accordingly and explain your problem to them in detail. They will assist you in fixing it as needed!

Recommended Reading – How to Download Apps on Vizio Smart TV? (EASY!)

Wrapping Up

This brings me to the end of my take on fixing Roku TV lagging. Don’t settle for less, fix these small technical issues yourself.

Use this article as a guide and get rid of your menial streaming troubles in minutes. Continue streaming your favourite shows and movies seamlessly!
Roku Won’t Connect to WiFi (Don’t Panic, Easy Fix in 2024!)

0

Roku Won’t Connect To Wifi

You have reached the right destination if you have any queries regarding Roku Won’t Connect to WiFi. This detailed guide will equip you with all the information you need.

Roku says not connected? I understand how that can be so frustrating. And those many error screens and codes, how does one even make sense of that? With our help! This article contains all you need to know in order to understand: why won’t my Roku connect to the internet and how can I fix it.

You can try reconnecting to your network through the Settings menu. Reset your router and then power-cycle your Roku device to see if it helps. Switch to a mobile hotspot if needed. Switch to an ethernet cable or third-party adapter. Use a 5GHz connection or then switch to a different network channel. You can try switching the location of your router as well.

There are so many questions left to be answered, and we have them all. Read the whole article to get done with your Roku TV wont connect to internet issues for good and get back to your favorite shows, movies, and sports on networks like NBC, and Bally sports as soon as possible. 

Recommended Reading – Vizio Smartcast Not Working: (Don’t Panic, Easy Fix)

Roku Not Connecting: Role of the Internet From the Start

Role Of The Internet From The Start

Some may think what is the big deal if one’s Roku won’t connect to the internet anyway? US users know that all too well! Roku needs an internet connection from the beginning and then in various aspects of its streaming. 

This section discusses it all before we address the Why won’t my Roku connect to the internet question and see how we can fix it as easily. 

Let’s get some lingo out of the way, your Roku device is called the home network, and you need to connect it to the internet, which allows you to stream audio, video or both online. 

Starting from the beginning, when you turn on your Roku system for the first time, your device will indicate that you need to establish a connection immediately. 

Keep in mind there are two ways to go about this, you can establish a wireless connection or use an Ethernet cable to establish a wired one.

First of all, you need to figure out if your Roku device supports wired or wireless connections. You can do so through their product comparison chart. Use the following link to be directed to the same and find out for yourself: https://www.Roku.com/products/compare

It should be noted that some TVs that run on Roku OS also need a stable internet connection to finish setting up. Once this is done, the latest software is received on your device.

Keep up to date with this software by changing inputs since it ensures the smoothest streaming experience. If Roku won’t connect to WiFi, how can you even begin streaming before setting up? So, we need to get that fixed; the further sections will deal with this in detail

Once the network thing gets sorted, you can use the Guided Setup to finish setting up, personalize your settings and preferences, and activate your device. 

Now, keep in mind that once setup is done, you can indeed use Roku without the internet, but you can only stream the over-air broadcasts, cable, or through HDMI. 

You will still need the stable internet connection we have been talking about to watch your shows on your streaming platforms that you have not downloaded already. Roku not connected to WiFi? Continue reading to understand how to establish a connection from scratch.

Recommended Reading – Vizio Airplay Not Working: (Try THIS Fix First!)

Roku Won’t Connect to WiFi: How to Connect

How To Connect

Roku says not connected. Do not worry; we are scaling back to the basics. First, note down the name of your network and password because it does come in handy.

Keep in mind this password is case-sensitive and thus should be entered correctly, use the shift button to capitalize whenever needed.

While dealing with wired connections, attach one end to the ethernet port of your Roku and the other to the router. If your device does not have an ethernet port, you will need a third-party adapter to do the same. 

During Guided Setup, select wired as your choice, and the connection will be made once the ports are properly inserted on both ends.

Trying to set up your device, but Roku TV won’t connect to the internet? Try out these simple steps to establish the needed connection quickly:

  1. Connect Wireless as your preference during guided setup.
  2. Remember I asked you to note down the details of your wireless network? Find yours in the list of horrific devices on your screen. If you are unable to see it, scan for networks again.
  3. Now, enter your password; Select Show to ensure that the password matches what you have written down.
  4. Finally, select the Connect option.

Once your network connection is established, the latest version of the Roku software should download on its own if needed. Then, you should be good to go!

Oh no! Roku says not connected still? Try updating your current network setting; read more to know more!

Recommended Reading – Activate the Soap2day on Roku (Effortlessly in Seconds)

Roku Won’t Connect to the Internet: Update Network Settings

Update Network Settings

Now, let us look at how to change your network situation if your Roku TV won’t connect to the internet or cannot access the internet. 

If your network is not strong or you wish to change your initial wired or wireless choice, it’s quite simple, and you can do so in just a couple of minutes:

1. Press the Home button on your Roku remote. This will prompt open the Home screen.

Press Home Button On Your Roku Remote

2. Find and press open the Settings menu.

Find And Press Open The Settings Menu

3. Next, find the Network option and select it.

Next, Find The Network Option And Select It

4. Now find the option to Set up a connection and choose it.

Now Find The Option To Set Up A Connection And Choose It

5. Next pick between Wired and Wireless.

6. If you select Wired, ensure you have already inserted the Ethernet cable in the TV port and router by this time. Make sure that the connections are made tight.

7. If you choose Wireless you will be given the list of available networks. Find the one that works for you and select it.

If You Choose Wireless You Will Be Given The List Of Networks That Are Available.

8. Carefully enter the password and then select Connect to finish up!

To sum it up, is Roku not connected to WiFi? Try another network source instead!

Recommended Reading – Vizio TV Freezes Randomly (or Flickering Black Screen): FIXED!

Roku Not Connecting: Troubleshoot Existing Network Connections

Troubleshoot Existing Network Connections

Now, let us look at the most common issue people face with the ‘Roku not connecting to WiFi ’ problem, i.e., connectivity problems with the network you are already connected to. 

This section deals with why won’t my Roku connect to the internet and how to fix it as a whole. Here they are:

One of the most common culprits behind this Roku not connecting scenario is something or the other being wrong with your router. Try connecting to another network, maybe your mobile hotspot, if the issues are resolved, there is a chance that there is something wrong with your router. 

Try rebooting your router. It simply means disconnecting it from its main power source and waiting for about a minute before plugging it back to its power source.

The next potential cause of your ‘Roku not connected to WiFi’ issue could be the strength of your wireless connection. Here are a few things you can do to help the quality of your signal:

  1. Remove any wireless interference. Make sure that there are no other wireless devices near your router. These include cordless phones and microwave ovens. Etc.
  2. Check with your ISP or internet service provider for network lags or shortages.
  3. Your WiFi may be connected to multiple devices. Do not use the internet through these devices for a bit, and check if it helps. If it does, make sure that you do not use all these devices at once.
  4. Try beginning the router closer to your Roku device but not too close. Remove obstructions between the two devices. Adjust the antennas according to need. You can try relocating your router to a higher level. 

If you use a wireless connection and are facing the Roku not connecting situation, try using an ethernet cable or a third-party adapter.

Try power cycling your Roku device. It is nothing fancy but just means shutting off your device fully and then restarting it. You can directly unplug your Roku’s power cord or use the Settings menu to restart it. Use the given steps to do the same:

1. Press the Home button on your Roku remote. This will direct you to the home screen.

Press The Home Button On Your Roku Remote

2. Now locate and enter your Settings menu.

Now Locate And Enter Your Settings Menu

3. Now, enter System.

Now, Enter System

4. Find Power and select it, if you do not see it, move on to the next step.

5. Finally, select System restart.

Finally, Select System Restart

Check if Roku won’t connect to WiFi even now.

Connect to the 5GHz Network

If both your Roku device and router support 5GHz, you can try this step. Make sure to enable this setting on your router and then try to connect to your 5GHz wireless network.

Switch your Wireless Channel 

Your router tends to select a wireless channel on its own, and it can sometimes result in slow connectivity because of interferences from other devices that can often go undetected, resulting in Roku keeps restarting

You will need to disable this setting on your router and then manually choose a wireless channel that works for you. Wondering how to find uncongested wireless channels? You can download a wireless analyzer app on your smartphone, which can really help you out!

This should help you get rid of your ‘Roku says not connected’ headache, but here is an alternative while you figure things out.

Recommended Reading – Vizio TV Not Connecting to WiFi: (Don’t Panic, Easy Fix!)

Roku won’t Connect to Wi-Fi: Turn to Mobile Hotspot

Turn To Mobile Hotspot

Roku TV won’t connect to the internet? You can try connecting your Roku to your mobile hotspot to see if it helps. There are a couple of things you should note when it comes to this. The capability and strength of your hotspot will depend purely on your mobile network service provider.

It is important to note that downloading updates does require a considerable amount of data and using a hotspot can wipe it up. So do look into your service plan, corresponding data limits and hotspot policy if required.

Use this following link to set up your phone’s hotspot network if you have an iOS device: https://support.apple.com/en-us/HT204023

In case of an Android device, use this link instead: https://support.google.com/android/answer/9059108

Roku won’t connect to the Internet: Error Screens and Solutions

Error Screens And Solutions

Roku TV won’t connect to internet? Time to get more specific. Check if any of the given error screens apply to you and try to fix them yourself as guided.

Unable to Connect to a Wireless Network

This screen is most common during the initial setup. Reset and try to follow the on-screen prompts that instruct you. Make sure you are entering the password right, click the Show button to ensure the same before submitting it. 

Checking Wireless Connection

This is commonly seen after you have entered the details of your WiFi connection. Let the loading finish up and check if the connection has been successfully established or not. 

If you see a red X, it indicates that the connection was not made. You’ll have to try again. Use our guide above to do so!

Not Connected to the Internet

This is the most common one with the Roku not connected to WiFi scenes. It happens during the launching a streaming channel or loading content because the network is suddenly lost. 

Go to Settings to establish the connection again and check its strength. You might want to reset your router to see if it helps.

Loading, Please Wait.

When the connection is lost during playback, you’ll see this prompt. Roku tries to re-establish the connection itself but you might need to pay your Settings and Network menu a visit again.

We are not done with our Roku TV won’t connect to internet information, one more crucial step to go, move on to the next section!

Roku says not connected: Error Codes and Solutions

Error Codes And Solutions

Many times, our Roku screens prompt numeric error codes to tell you that something is wrong and we are unable to understand what. We are here to help you out with the same. 

The most common error codes corresponding to the ‘why won’t my Roku connect to the internet’ distress have been listed below along with their cause so you can take the required troubleshooting methods on your own.

Error codes 14.40 and 14.41

This is a result of a password problem. You should re-enter your password and establish a connection again.

Error codes 14.20, 14.62, 14.64, 016, 017

This is shown due to issues with the strength of your WiFi connection. A common solution is to move your router closer to your device, but not too close! If you 

Error codes 012 and 013

Ethernet cable issues show these error codes. Remove them and then plug them back again, maybe in a different compartment if possible.

Error codes 018

This is caused due to slow internet speed. Try connecting to a faster connection. If your current network does not correspond to the plan you have chosen or paid for, get in touch with your network service provider.

Error codes 009, 14, 14.10, 14.11, 14.30, 14.50, 14.62, 14.64

They are indicators of connectivity trouble. There is not a lot that you can do with this. Try restarting your router as well as your Roku device to see if it helps the Roku says not connected situation.

Recommended Reading – How to Connect Bluetooth Speaker to Roku TV: (EASY!)

Wrapping Up

This concludes why won’t my Roku connect to the internet guide. Do not be stuck by technical issues, be well-read to become your own tech guide! It does not need to be that difficult, use our step-by-step instructions and act on your own like a pro! 

Do not let a technical issue come between you and your favourite movies and TV shows, fix it and get back to your favourite media, just like that. Happy streaming y’all!

Activate the TNT on Roku (Effortlessly in Seconds in 2024)

0

Activate The Tnt On Roku

Wondering how to get all the TNT drama on Roku? We got you, many users have the same query which is why we have provided the only answer you’ll need.

Now, TNT does have an official app that you easily download from the Roku Channel Store itself. You will then have to activate it and sign in with your TV Provider account. You can also screencast TNT content from your smartphone to your Roku screen for a similar effect. You can also get a streaming service that has TNT in it and then use their app to watch your movies and shows!

Now, how to download the TNT Roku channel? What channel is TNT on Roku? is TNT free on Roku? How do I activate TNR Roku once the app is downloaded? 

All are crucial questions in the setting up process, and I have answered them all in the following sections. Not just initializing TNT, but these methods will also work on setting up Soap2day and Xfinity. Sit back, relax, and read to know all about the Roku TNT channel.

If you try every single one of these quick fixes in chronological order, I am pretty sure, one of them will work for you.

Recommended Reading – Vizio TV Turns On By Itself (Here’s Why & How to STOP It!)

TNT on Roku

Tnt On Roku

Before we can talk about the Roku TNT channel installation and activation process, let us discuss the platform briefly. TNT Roku can act as your one-stop shop for on-demand entertainment titles and live streams. 

Before we can talk about downloading and activating the Roku TNT channel, let us explore the perks you get with TNT on Roku. A few highlights are as follows:

  1. You can stream your favorite shows and movies seamlessly
  2. TNT Roku also offers a skew of TNR Originals which gives you a wider choice of options when you are stuck on what you want to watch.
  3. Importantly, you can get TNT without a cable TV subscription since it is a part of many combined streaming services.

You can gain access to all these TNT Roku features, too, install today!

Wondering what channel is TNT on Roku? Another thing to note about the TNT channel is that its channel number can vary concerning the user’s TV provider or location. 

If you have gotten access to TNT Roku and Bally Sports and NBC for your convenience through a streaming service, you can get it quickly on the Roku Home screen by pressing the TNT channel.

That being said, allow me to address some more essential features of the TNT drama on Roku.

Recommended Reading – Roku Won’t Connect to WiFi (Don’t Panic, Easy Fix!)

Is TNT Free on Roku

Is Tnt Free On Roku

This section of our TNT Roku Channel guide addresses one of the most common questions regarding the Roku TNT channel: is it free or how much does it cost? Now, the TNT Roku app does not have an annual or monthly membership or subscription.

Then how to get it? You just need to find a cable TV provider that supports the TNT channel and log in with that account. This does have an annual or monthly subscription pack. 

But it typically includes a wide variety of other channels, too so it is a good deal for your buck. Once you do so, you gain access to the endless entertainment provided by TNT on Roku for free!

So, what are you waiting for? Get it today! Wondering how? Continue reading to find out!

Recommended Reading – Vizio Smartcast Not Working: (Don’t Panic, Easy Fix)

Installation Process for Roku TNT Channel

There are two steps to enjoying TNT on Roku. The first is installing the channel and the second is the TNT drama activate Roku step, both of which have been covered in this and the following section. 

Use the following steps to install the Roku TNT channel:

1. Turn on your Roku device and ensure you are connected to a strong Wi-Fi network.

2. Now, press the Home button on your Roku remote, this will prompt open the Home screen.

Press The Home Button Or Go To The Home Screen

3. Navigate the screen find the Streaming Channels option and select the same.

Locate And Select The Streaming Channels Option

4. Once it opens, select the option to Search Channels.

Further, Find The Search Channels Option

5. Now, using the virtual keyboard on the screen, search for Watch TNT and prompt a search.

6. From the list of options that show up, choose the Watch TNT option; this is the TNT Roku one you are looking for.

7. Next, locate the Add Channel button and select it.

8. Wait for a few seconds for the channel to get added. It should be noted that this process can take a little longer concerning the strength of your network.

9. Once the channel has been added, you must select the OK button from the prompt displayed on your Roku screen.

10. All you need to do now is select the option to Go to Channel. This will prompt the Roku TNT channel to launch.

Success! You now have TNT on Roku, just like that! But we are only halfway through, wondering what I mean. THE TNT drama activate Roku step is still left, continue reading to know more!

Activate Your Roku TNT Channel

Activate Your Roku Tnt Channel

Now that you have the channel with you, let us get into the activation. This is, again a relatively simple process; follow these steps in chronological order and get done within a matter of a few minutes:

  1. First, launch the Roku TNT channel that you just downloaded.
  2. Next, click on the Sign in button. Once you do so, an activation code will pop up on the screen. It is really crucial for this step so carefully note it down somewhere before moving on.
  3. Now you need the help of another device. Open up any PC, laptop, smartphone or tablet. Then fire up the browser of your choice.
  4. Once you do that, go to the following link: TNTdrama.com/activate/Roku
  5. Once the site loads successfully, locate where to enter the activation code. Enter the code you noted from your Roku TNT channel screen here.
  6. After entering it, select submit.
  7. Once that’s done, you will be required to then log in with your TV provider account, do so.
  8. Sign in and that’s it! Your TNT on Roku is all setup and ready to go!

There is a chance that your Roku TNT channel will not update right away. In this case, try restarting the TNT Roku channel or app and then check the activation status. Begin streaming your favorite shows and movies and get the best TNT experience!

Troubleshooting TNT Roku Activation Issues

Troubleshooting Tnt Roku Activation Issues

Now that you have covered getting the Roku TNT channel already let us go over the most common issues that users use while doing so. They also cause issues once the channel is installed and set up, so go through these steps and use them according to need.

Your browser’s cookies might be why your activation isn’t going through and might also make your Roku TV slow. The process is quite simple, go to your Settings and clean your cookies from there.

If you are facing issues while streaming the Roku TNT channel, you might want to clear its cache too. It helps with a bunch of performance issues.

Another common issue that causes issues with both activation and streaming is the internet, especially the strength of the used wireless connection. Use the given steps to check the strength of your network right now:

1. Press the Home button on your remote to be directed to your Home screen.

Press The Home Button On Your Remote

2. Find your way to your Settings.

Find Your Way To Your Settings

3. Further, go to Network.

Further, Go To Network

4. You will find the signal strength there. Excellent, good, or satisfactory work but poor or satisfactory can cause trouble.

5. Try resetting your router to check if it helps. Contact your network service provider if nothing seems to help.

6. Some people also prefer a wired connection through an Ethernet cable since the chances of disturbances are significantly reduced.

The next common step to solve issues is to perform a power cycle. This technical term simply refers to turning off your device and then turning it back on. 

Power off your Roku device and then unplug the main cable as well. Wait for thirty seconds, and then plug it back in to power it up. Check if the TNT drama on Roku has cleared up or not.

Another quick fix to many streaming issues is to reinstall the channel itself and do the same with TNT on Roku. 

Go to the channel and highlight it. Once highlighted, press the star button on your remote and then remove the channel. Once removed, use the same steps given in the previous sections to install and activate it again! 

The last step is to factory reset your Roku device. Consider this your last resort since you permanently lose all saved data on your Roku. 

You can simply do it from the Advanced System Settings in your Settings menu. You’ll be asked for a pin and to confirm the process. Do it if you wish to. Once done, you’ll have to set up your device again.

If nothing, you can try to contact Roku customer service to ensure there is nothing wrong with your Roku device itself. If not, try contacting the TNT service center as well.

Now, you are fully equipped to set up your Roku TNT channel, yet we have discussed an alternate way to do it in the next section.

Screencast TNT Roku

Screencast Tnt Roku

This is an alternative way to get TNT Roku content on your screen. You can screencast or screen-mirror content from your smartphone to your Roku device. It’s an easy process and can be really helpful. 

This is how you can do it yourself:

  1. Begin by making sure that the smartphone you are using to screen mirror is connected to the same Wi-Fi as your Roku device. If not, change it to do so.
  2. Now, open up the Apple Store or Play Store and search for the Watch TNT app.
  3. Find the official one and download it.
  4. Now, click on the Home button and then move on to Settings.
  5. In case you are an Android user, scroll down the menu and find System. Once you find it, select it.

Then go to Screen Mirroring and press okay on your remote.

Once you select the screen mirroring mode, press the prompt.

  1. In the case of an iOS device, go to Settings and then select Apple Airplay and Homekit.
  2. You can also cast from your smartphone by tapping on the cast icon on your screen. Once you do this, your device will scan for available devices, select your Roku device and establish a connection. 

And now you have TNT on Roku through screen mirroring. Remember you can do so much more with this feature, make sure you make the most out of it.

Recommended Reading – Vizio Airplay Not Working: (Try THIS Fix First!)

Get TNT Roku Without Cable

Get Tnt Roku Without Cable

While discussing the perks of the TNT Roku channel, we talked about how you can get your hands on it without cable. That was through streaming services that offer it within its package.

To help you out, we have listed the most famous ones below for your convenience:

DirecTV Stream

Directv Stream

The famous DirecTV entertainment plan includes the TNT channel in its monthly plan as well. This plan costs around 74.99 dollars a month. 

Hear me out, it can prove to be a great deal! In this package, you get more than seventy-five live TV channels as well as unlimited cloud DVR storage! It is a popular choice for getting TNT on Roku.

Hulu+ Live TV

Hulu+ Live Tv

This needs no introduction, I am sure you have heard of Hulu already. You guessed it, you can get the TNT Roku channel through their Hulu+ Live TV package. It will cost you 69.99 dollars a month but you can get it add-free by bumping the plan to 83.99 dollars a month. 

In this plan, you not only get TNT but also more than sixty other live tv channel options in addition to unlimited cloud DVR storage as well. 

An additional perk to this is that two people can stream a Hulu account together without it being a problem.

Sling TV

Sling Tv

Another common choice for obtaining the TNT Roku channel is a subscription to Sling TV. It also offers more than thirty TV channels. It is known for having affordable pricing in many of their plans. 

For instance, their Sling Orange Plan is famous among users since it costs just forty dollars a month! This comes with TNT Roku as well as a fifty-hour cloud DVR storage. 

This allows you to record your favourite movies and shows and re-watch them according to need and want.

YouTube TV

Youtube Tv

Finally, we cannot forget YouTube TV while discussing streaming services that provide TNT. With that, they also offer more than a hundred channels across various networks. 

The membership costs 72.99 dollars a month but that’s not the end of it. If you subscribe to them for the first time, you can get a trial period from anything ranging between five to twenty-one days!

If you are not looking to spend as much on cable, one of these subscriptions is not a bad idea at all! Find one that works for you and begin your TNT on Roku streaming journey today!

Wrapping Up

This brings me to the end of my intensive guide to TNT Roku. Watch your favourite shows, movies and sports in style, get your hands on TNT today! The installation process is just like any other channel and the activation process has never been easier. 

Do not waste time, use our easy steps to set up your TNT channel and catch up with your favourite shows, movies and more, starting today! 

Ring Motion Warning: What It Is For, and Is It Safe? 2024

0

Ring Motion Warning

You have reached the right destination if you have any queries regarding Ring Motion Warning: What It Is For, and Is It Safe? This detailed guide will equip you with all the information you need.

Still, trying to figure out your ring camera motion warning? Do not worry, you are not alone, these cameras have so many features, it can be a little hard to wrap one’s head around them. We got you, this article details everything you need to know about ring motion warning in an understandable and compressive way.

In one simple go, the ring motion warning feature can be understood as a security feature that allows visitors to get notified that the camera is recording them once they have been detected.

This helpful feature is currently accessible in wired Ring cameras in the US and can be turned on and off according to need, as discussed in the later sections.

Read through the end to answer any doubts that you have regarding the ring motion warning features that include the type of devices they can be accessed from along with a side-by-side comparison between ring motion alert vs motion warning.

I got my ring camera around a year ago due to the fantastic views and recommendations, For me whether it was ring or blink camera, I chose the former as my friends were more enthusiastic about it. Their affordability and accessibility as home security systems have added to their popularity.

Today we are going to break it down so you can utilize all its amazing features to the fullest, which includes the ring camera motion warning too.

Ring Camera Features

Ring Camera Features

Your Ring camera is equipped with many amazing features other than the ring camera motion warning one that we are going to be exploring in detail further in the article. These features vary from model to model. I have discussed Ring’s most helpful features in this section. 

This includes the live video streaming option that lets you watch live feeds from your prosperity on your phone or other devices in addition to cloud storage. The night vision option increases its usability and makes it more truth worthy as a whole day-around safety monitoring device.

The two-way audio is another feature that makes it one of the most popular security camera systems in the market today.

One of the most essential features, i.e., ring motion warning, has been discussed in detail below!

Recommended Reading – How to Turn On a Vizio TV Without The Remote: FIXED

Motion Warning: Definition 

Motion Warning Definition 

Let us begin with the most fundamental question: what is motion warning on ring? As discussed above, specific Ring cameras provide a security feature. When these cameras detect visitors, this ring motion warning gets triggered and alerts the visitors that they are being recorded.

Once the camera detects motion in front of it, particulars discussed below, it starts recording them and ensures they are alerted about the same through the speaker. It speaks the following audio: Hi, you are currently being recorded.

In addition to alerting the visitor, it also sends you a notification regarding the same, so you can check the activity if you want to.

I found this feature especially lovely as it made me feel more comfortable knowing that my friends and family were being alerted if they were being recorded. It felt less like an invasion of privacy. It also reassured me that I was notified whenever any motion was detected, making me feel much safer.

Recommended Reading – How to Reset Hisense TV: Step-by-Step Guide for

Ring Motion Warning: Range

Ring Motion Warning Range

Another thing to be discussed while talking about ring camera motion warning is how far this camera can detect any motion.

It should be noted that this particular feature is subject to change with the model of the camera itself as well as the place it has been installed. That being said, these cameras can detect motion up to a good range of around thirty feet. This changes with the camera’s field of view and the environment.

I find it a good fit for my house safety, but I have learned to make sure to check the view of the camera from time to time to ensure that no obstacles obstruct the view for the best results of the security system.

Technicality Behind the Motion Warning Ring

Before we discuss the ring camera motion warning further, let us briefly discuss how it works. Use of ADT or Active Deterrence Technology motion sensor work in Ring cameras. It uses PIR or passive infrared technology to detect motion through a particular area.

The sensor has a lens that uses infrared energy from heat from the objects in motion onto the detector. From here, the infrared energy is converted into a mixed signal which, when intensified sends an alarm signal.

This system is common in many Ring cameras and helps execute the ring motion warning feature.

Devices That Support the Ring Motion Warning

As briefly discussed before, the ring camera motion warning feature is not supported in all devices. It is only accessible in the US right now. In addition to that, ring cameras powered by AC adaptors and not through batteries can access the ring motion warning.

Here are a few devices that support the ring camera motion warning: Spotlight Cam Wired, Spotlight Cam Mount, Floodlight Cam, Floodlight Cam Wired Pro, Stick Up Cam Elite, Ring Video Doorbell Pro, and a few more.

If you are unable to see your device in the above list, do not worry, I have another way for you to know if your device supports ring motion warning or not. Here is how you can do it yourself:

  1. Open the Ring app on your smartphone or tablet.
  2. Locate the three lines icon on the top left side of your screen.
  3. From here, move on to the Devices option.
  4. Choose the specific device on your app.
  5. Go on to Device Health.
  6. Scroll down to navigate the Product Name under the Device details.
  7. Find the exact name of your device and then cross-check with the list if you can locate it.

If you find the name of your device on the ring motion warning list, you can use this feature to your advantage.

Possible Issue with Ring Camera Motion Warning

The best way to understand a feature is to additionally take a look at all the possible issues you can face and be ready for them! This is exactly why we have discussed the possible drawback of this feature which many users have talked about.

The option to schedule this motion warning is being talked about. The message that is played every time a person is detected can be intrusive and even irritating, which is also applicable on Ecobee, especially at times when you are already home or expecting guests.

Another issue is that you cannot control this message’s volume, making it more of a headache.

The sound of the message made my dog go crazy and bark like crazy for a while, so I resorted to shutting off this option through the app whenever I was home or was expecting people over. Hopefully, you can do the same until they come up with this update for the feature.

Turning on Motion Warning Ring

Now that we thoroughly talked about what motion warning is on ring devices let’s move on to how to activate it. This detailed step-by-step guide is going to help you do that with ease:

1. Open the Ring app on your device of choice.

Open the Ring app on your device of choice

2. Go to the top left of your screen and select the three lines.

Go to the top left of your screen and select the three lines.

3. Go to Devices and select your device from that list.

Go to Devices and select your device from that list.

4. You’ll see a toggle option on Motion Warning and use it to activate it.

Turning on Motion Warning Ring

5. You’ll hear a message alerting you that it has been activated.

You'll hear a message alerting you that it has been activated.

Ring Camera Motion Warning: Updates

Ring Camera Motion Warning Updates

Another common issue that people face is not finding motion warning ring features on their devices that claim to support the feature.

This might be a common result of a pending update since the Ring motion warning is a relatively new feature. Here is how you can do it, we have explained it for Android as well as iOS.

Let’s get into it:

For Android

  1. Open the device you have the Ring app on and go to Google Play Store.
  2. Type in the Ring app and open the official one.
  3. If you see the Update button, click on it and wait.
  4. After a couple of minutes, the Ring app would’ve updated itself.

For iOS

  1. First, open the App Store.
  2. Instead of searching the Ring app directly, select your profile picture on the top right.
  3. Scroll down until you find the incoming updates option.
  4. Locate the Ring app here and select the update option next to it.
  5. In a couple of minutes, your ring update should be done.

Keep in mind that you should keep checking the app for updates, not just regarding the camera motion warning reason. It always makes your experience better.

This brings us to the technical guide to ‘What is motion warning on ring devices and how to use it.’ I’ve been using my Ring camera for over a year now and I’ve had little to no complaints. The security system is reliable with a bunch of features that help. 

The Ring app is direct access to the technicalities, so I would recommend that you take a good look at your app and take a couple of days to learn how to use it well; it will make handling your security system much easier and make you feel that much safer.

Wrapping Up

One gets a security camera and system to feel at ease and safer. Ring cameras have been doing that for thousands of households. They are well known for the amazing work they’ve been doing.

You can make the most use of your security system if you are well-informed about it, even if you do not consider yourself as a technical person. The Ring motion warning is just one of the many features you should acquaint yourself with in case you are a Ring camera owner yourself. Make the best of it!

Remote For DirecTV Not Working: Fix in Seconds 2024

Remote For DirecTV Not Working

You have reached the right destination if you have any queries regarding Remote For DirecTV Not Working. This detailed guide will equip you with all the information you need.

Introduction

Introduction

Is your remote for DirecTV not working? Do not worry, and it is more common than you may think. If you are facing such an issue, you can diagnose it and try to fix it yourself before giving it up.

The solution for DirecTv not working can be broadly divided into 1. DirecTV remote reset, 2. Battery Check, 3. Physically Check the Remote, 4. Check the Connection.

Each of the given solutions, alongside an analysis of Directv, has been done below. Read through the end to understand DirecTV remote reset completely.

What is DirecTV

What is DirecTV

Before we can dive into how to reset remote for DirecTV, let us begin by discussing DirecTV itself. It is an American video programming distributor which provides multiple channels to its users. It is based in El Segundo in, California. It was launched in 1944 and is still running and serving many nationwide.

They have various pricing tiers that a user can subscribe to. Each of these tiers has different channel lineups corresponding to the plan chosen.

Types of Remote

If you are thinking about how to reset DirecTV remote, you are bound to be facing some issues with it. The course of action depends on the type of remote you own. Generally, there are the following types of remotes available. They are:

  1. DirecTV Universal Remote
  2. DirecTV Genie Remote
  3. DirecTV RF Remote

Wondering how to reset remote for DirecTV? Read through the end to find out!

Remote for DirecTV not working: Solutions

Remote for DirecTV not working Solutions

DirecTV Remote Reset

Is your remote for DirecTV not working? Figure out the type of remote you have and use the following guide to fix it. The first step, as mentioned above, is the DirecTV remote reset. This is how you can do it:

In Case of a Universal Remote

In Case Of A Universal Remote

If your Remote for DirecTV is not working properly? First, check if you can access and use the front panel of your receiver. If you can, follow the steps given below:

  1. Select Menu.
  2. Arrow and move down to the Settings and Help section and press Select.
  3. Go to Settings and press Select.
  4. Go to Remote Control and press Select.
  5. Highlight Reset Remote and finally press Select again.

This should do the trick! According to how you set your TV up, the reset will happen automatically or ask you to enter certain codes through your remote. The method will also work immaculate if you want to start Vizio TV without remote

Now, how to reset DirecTV remote if the receiver is not responsive at all? Here is how you can do the DirecTV remote reset manually:

  1. Press and hold the Mute and Select button at the same time.
  2. Continue doing the same till you observe light flashes three times.
  3. Press 9 8 1 and Select.
  4. Observe the remote and check if it has flashed four times.

This is a sign that the DirecTV remote reset is successful! 

RF Mode Remotes

How to reset remote for DirecTV? Is your receiver set to RF mode? You must reset the remote back to RF or change it to IR mode. This is how you can do it:

  1. Ensure that the top slider is on the far left in the Direcrtv mode.
  2. Press the Select and Mute button simultaneously until the remote light flashes two times.
  3. Press 9 6 1 and the Channel Up button.
  4. Put in the last six digits of your receiver ID and press Select.
  5. Press Select again.

Do you not know what your receiver ID is? It is on the green sticker on the receiver. You can also get it from the ‘My Equipment’ section on DirecTV’s website.

Genie Remotes

Genie Remotes

The standard Genie remote has been the same for all its hardware since 2014 and stands out. Most of these devices do not have front panel buttons. Wondering how to reset remote for DirecTV in these cases? Check if you can use the remote at all. If you can, try the following steps:

  1. Press the Menu button.
  2. Go to Settings.
  3. Move on to Remote Control and press Select.
  4. Go to Program Remote and press Select again.
  5. Highlight Reset Remote and finally press Select again.

Holding the remote close to the DirecTV box through this process can also help. Try the manual method explained in the Universal remote section to successfully finish the Directv remote reset. 

Still facing the Remote for DirecTV not working issue? Read forward to finding other issues and their corresponding solutions!

  • Battery Check

Is the remote for DirecTV not working? Are you looking up how to reset DirecTV remote? Wait! You may not have to! Sometimes, the remote is not working because of issues with the battery. Test it before you go down the DirecTV remote reset path. This is how you can easily check and test your batteries:

Press and hold any one button on your remote and check the light on it. If you see a solid green light, the batteries are strong. In the case of a fast-blinking green light, it is an indication that the batteries are okay at the moment but will need a replacement soon. If the blinking is extremely slow or there is no light at all, remove and replace your current batteries and try working the remove again.

  • Physical Problems with the Remote

There may be no need for a DirecTV remote reset if a physical problem with your remote is causing the problem. The first step is to check the remote for any stuck buttons. A constant light indicates the same, even when not touching the remote.

Run your fingers across the remote to check for stuck buttons. Sometimes, dirt accumulates between the buttons and around the remote, causing issues in its smooth functioning. A similar issue is evident in Samsung remote as well. Give your remote a thorough and dry cleaning. Wipe the top of your remote and receiver gently and try working it again.

  • Check the Connection

If you are using an IR remote, ensure it is within the signal range of the box. Please ensure there are no obstacles between the two, as they can block the transmitted signals. Using a DirecTV IR extender can be used in these cases. 

Is your remote for DirecTV not working even after trying all this? Try resetting your receiver and pairing your remote again. Go to the receiver and press Guide on the front panel. If there is a response, use the following guide or troubleshoot your receiver first.

The first step is to pair your remote; you can do that by:

  1. Press the Menu button on your remote.
  2. Go to Settings.
  3. Move on to Remote Control.
  4. Select the IR/RF Setup option.
  5. If your remote is in RF mode, change it to IR and select Continue.
  6. Finally, press the exit button.

You should be able to switch between various modes smoothly now. If not, try resetting your receiver. Most receivers have a red button, including the Apple remote. It is located inside the access card door.

It may also be on the side of the receiver. Press this button to restart the Directv receiver. Unplug the receiver from the electrical outlet if you cannot find this button. Wait for at least 15 seconds before plugging it back in.

The DirecTV App

The Directv App

Is remote for DirecTV not working even now? Try using the Directv app instead. You can use it to control your system from your phone. Find the app on play or apple store and install it on your device.

Once done, click on Browse for TV, and you will find a remote control icon. It should be located in the top right corner, click on it and select the Receiver pair or Connect your device option. Follow the simple prompts to finish the process and start using your phone as your remote until you can fix the problem.

Remember that this should not be your permanent solution but a temporary fix until you fix or replace your remote.

Remote for DirecTV not Working: Reassemble the Parts

Reassemble the Parts

Did you go through the DirecTV remote reset process completely and still cannot fix the problem? If none of the other courses of action help, take a last chance to repair it yourself before throwing it away and replacing it. This is what you should do:

  1. Remove the battery cover and batters.
  2. Proceed to remove the screams holding the remote together.
  3. Remove the top of the panel with the buttons.
  4. Take a soft cloth and clean the panel gently.
  5. Make sure that the buttons are properly lubricated.
  6. Ensure that all the buttons are connected properly to the green board of the remote.
  7. Try putting some pencil lead powder on the back of the button without spreading it everywhere.
  8. Finally, assemble everything: the panel, screws, batteries, and cover.
  9. Try working on it again. 

 The above methods work very well with Roku Remote Flashing Green Light. If your remote is still not working, hard luck! Try getting a professional to look at it before moving on to a replacement.

Consider Replacement

Consider Replacement

Is your remote for DirecTV not working even after trying all the above steps? This is a bad sign and indicates that the remote is gone for good.

It would be a good time to buy a new remote. You can get one from the DirecTV website or a retailer selling their official products.

This generally happens when the remote is used roughly and dropped repeatedly. Make sure that you clean your remote regularly, check the battery life, and replace them as needed to ensure a good lifespan for your remote. 

Try contacting Customer Service from their official site before giving up completely. 

Wrapping up

DirecTV has many amazing features for your ideal entertainment needs, and your remote is your way to navigate through the countless options it offers.

Your remote for DirecTV not working can pose a huge problem but do not worry; it is extremely common and can generally be fixed easily. You might just be a DirecTV remote reset away from a brand new-type working remote again.

If that does not work for you, use our detailed guide to get to the bottom of the problem and continue enjoying it!