Home Blog Page 8

How to Tell if iPad Is Charging or Not: Quick and Easy 2024

0

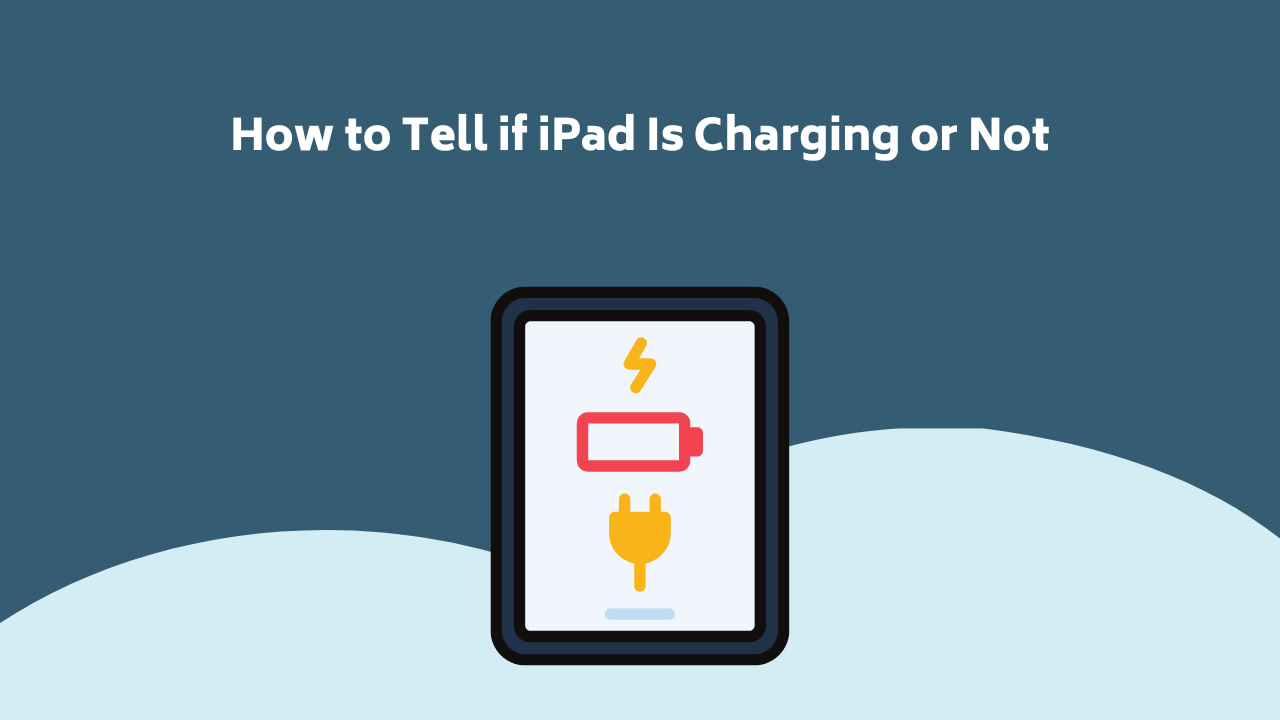
How to Tell if iPad Is Charging or Not

You have reached the right destination if you have any queries regarding How to Tell if iPad Is Charging or Not. This detailed guide will equip you with all the information you need.

Wondering how to know if iPad is charging or not? You are not the only one. This is a common problem when one gets back to our iPads after a break and the device seems dead it can get really confusing. Today, I am going to be breaking down the common how do I know if my iPad is charging dilemma in detail.

In this article, we have covered everything you need to know to answer how to tell if dead iPad is charging efficiently. From discussing the iPad charging symbol list to multiple fixes for the issue, we have covered it all.

If you want to tell if your iPad is charging, make sure that you are using the original Apple charger and adapter. Then, ensure that the charging socket is clean. Plug your device in charging and leave it for a while and wait for the iPad charging symbol to pop up. Keep an eye out for the battery and charger symbol as it is an indication that the device is receiving power. If not, use our solution guide to fix the issue!

I was given an old iPad by my sister a couple of months ago and she claimed that it was in perfect condition but had not been turned on in a while. I grabbed the opportunity and took it but was unable to see the iPad charging symbol as soon as I plugged it in. This led me to believe that the iPad had gone dead.

It was not until I researched and found out all this information which helped me revive it. I’ve been using that very iPad ever since! Do not make the same mistake and waste more time, read to the end to figure out for yourself: how do I know if my iPad is charging.

The iPad Charging Symbol Guide
The iPad Charging Symbol Guide

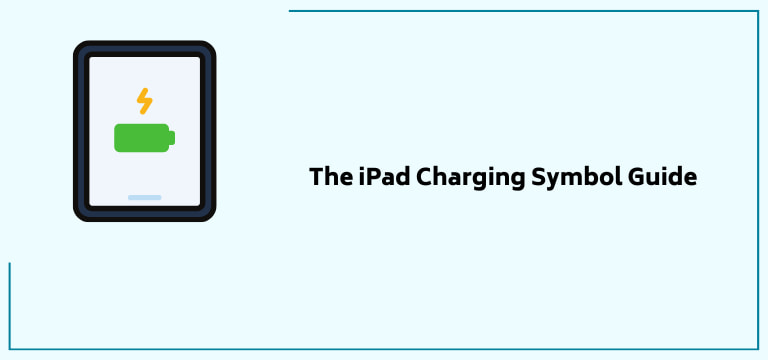
The first and most important step to figuring out how to know if iPad is charging is understanding the various charging symbols in the device. It is how your iPad communicates the condition of its battery to you. Let’s break it down.

The most common one is the lightning bolt on the top right corner of your screen when you plug it into charging. Another common one is the green color on the battery level which indicates that the battery has been sufficiently charged.

  • Moving on to the ones you need to keep in mind while looking for the iPad charging symbol when dead. The first one that you need to keep an eye out for is the battery sign with the red line. First of all, the red battery icon means that the device has not been charged in a while and is an indication that you should charge it immediately. 
  • Just the red colour, in contrast to the green, as discussed above, means that there is less battery in the device but enough to function for a bit. Take this as buffer time to plug it into a power outlet. 
  • If the red line present on the battery flashes three times right before it powers off, it is a sign that your device has not received enough power in order to be charged the way it should. This problem may be a result of not using the original Apple charger which is why it is advised to stick to it.
  • The last iPad charging symbol we should talk about before moving on to is the charging plug. What does that mean? This symbol is commonly seen when a device that has been kept inactive for a very long time is put in charge again. That symbol, by the way, is also useful when using iPad as HDMI monitor It is an indication that your iPad is currently connected and getting power, but it needs more charge before it can show you the battery signal.

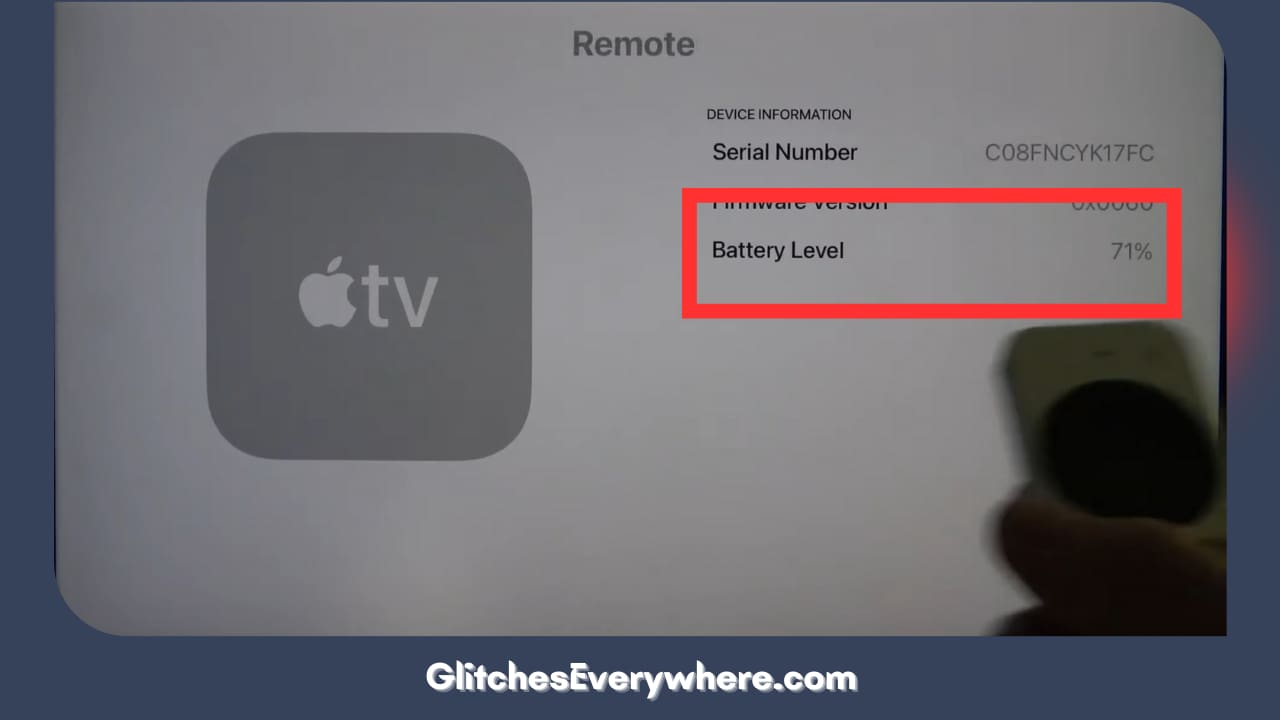
Sometimes, the exact battery percentage is not visible but you can find that out from your Settings.

Let us move on to the next step of our ‘how to tell if dead iPad is charging’ guide which is what to do about it.

Recommended Reading – Ring Motion Warning: What It Is For, and Is It Safe?

Solutions

Remote for DirecTV not working Solutions

Now that we have discussed how to tell if iPad is charging, we should now move on to what we can do about it. Beginning with the most basic and obvious ones before moving on to the more technical stuff. 

Check the Adapter and Charger
Check The Adapter And Charger

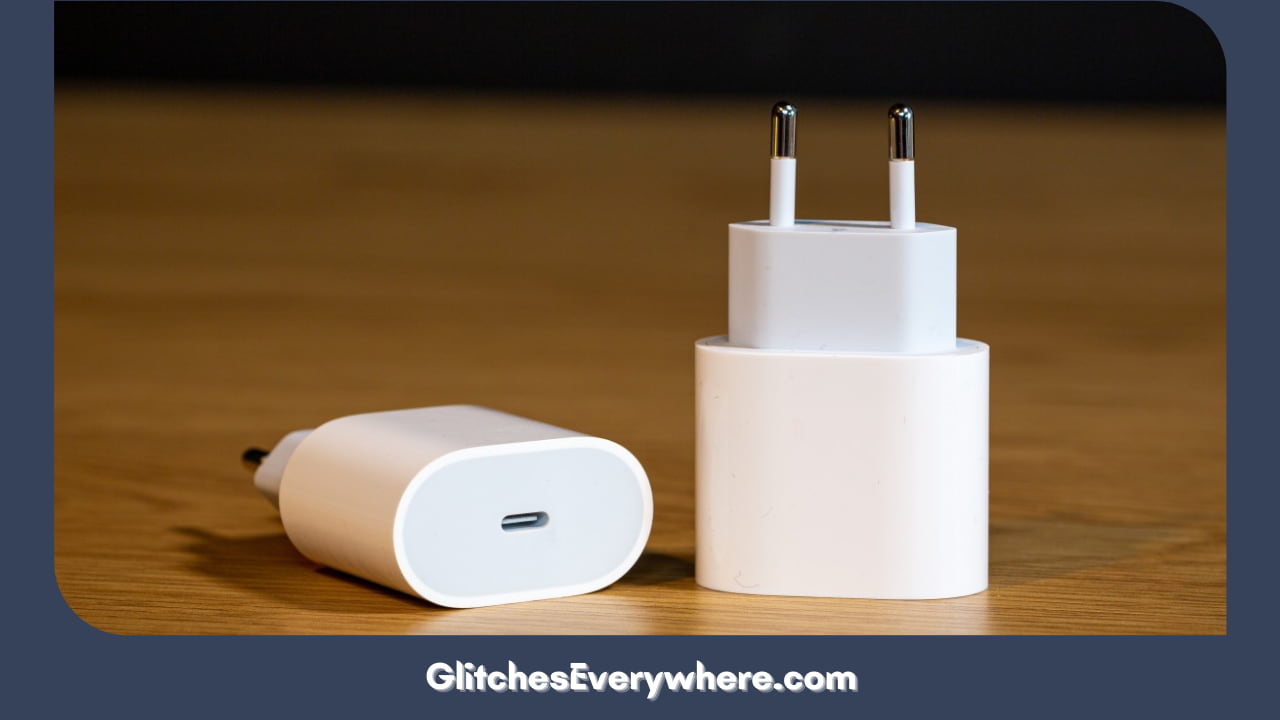
The first thought that comes to mind when you hear ‘how to tell if dead iPad is charging’ is if it is broken. There might be something wrong with the charger itself. So, let’s begin with a few tips you should keep in mind:

  1. Remember that it is best that you stick to using your original charger and adapter that is provided by Apple at the time of purchase.
  2. If you do not, there is a chance that the devices you are using fail to give your iPad the power it needs. There is also a chance that these chargers may damage your battery over time. This is also a nod towards the fact that one should minimize plugging in one’s iPad to a computer or laptop in order to charge it too.
  3. In case of emergencies or special circumstances, you may need to use a USB power adapter but keep in mind that the charging process will be slow compared to normal. It is crucial to note that this should be a temporary fix. While you charge your iPad through your laptop or computer, the latter should be kept on throughout and not on sleep or standby mode and keep an eye out for the iPad charging symbol.

Check and Clean Your Charging Port
Check And Clean Your Charging Port

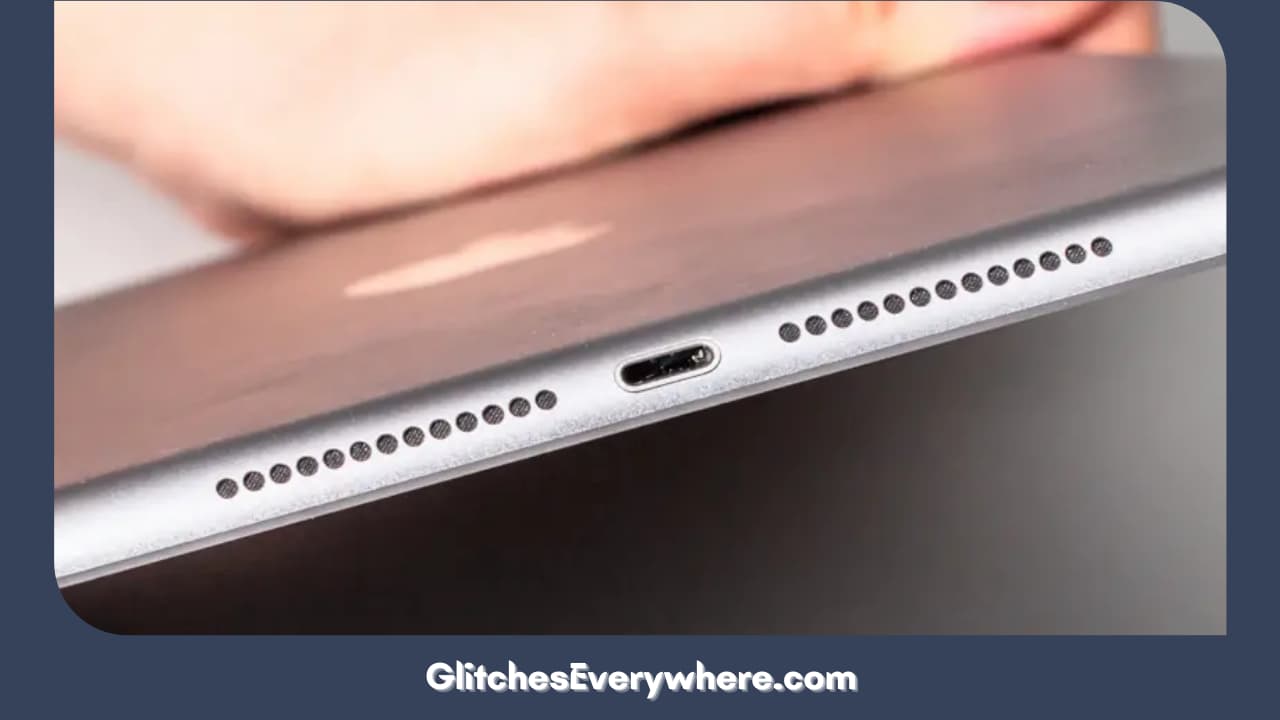
Let’s say you’ve figured out the ‘how to know if iPad is charging’ dilemma, and the answer is no. Additionally, you have checked your adapter and charger and they are working fine, the next suspect is the charging port of your device. 

Over time, these sockets tend to get partially blocked by accumulated dirt. This hinders the charging process due to the clogging created by this dust. If you have not cleaned your charging port in a while, you can take a small toothbrush or something to remove this dirt. 

Plug in the charging socket again and look for the iPad charging symbol.

Force Reboot your iPad

How do I know if my iPad is charging? I think it’s broken! Calm down and take a deep breath. This charging issue can be a result of software bugs or internal glitches which is why this rebooting option is worth a shot. It’s similar to rebooting your Apple TV when it exhibits inexplicable issues. It flushes out your iPad’s internal mess and might help you get rid of this issue.

Here is how you should go about it:

1. If your iPad has the Home button. Press and hold down the Home and Power buttons at the same time. Continue doing this until the Apple logo pops up on your screen.
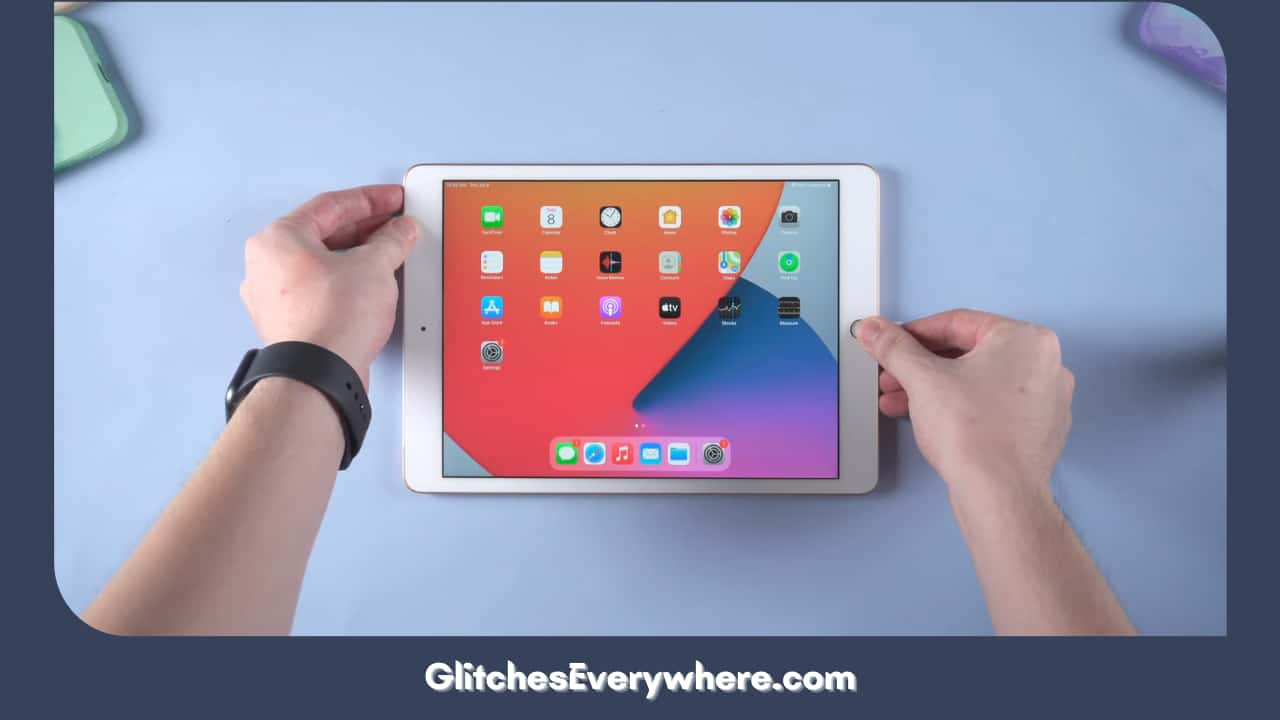
Press and hold down the Home and Power buttons

2. When it comes to those iPads that do not have a Home button, press and then leave the Volume Up button and then do the same to the Volume Down button. Then move on to the Power button and hold it down until you are able to see the Apple logo on your screen.
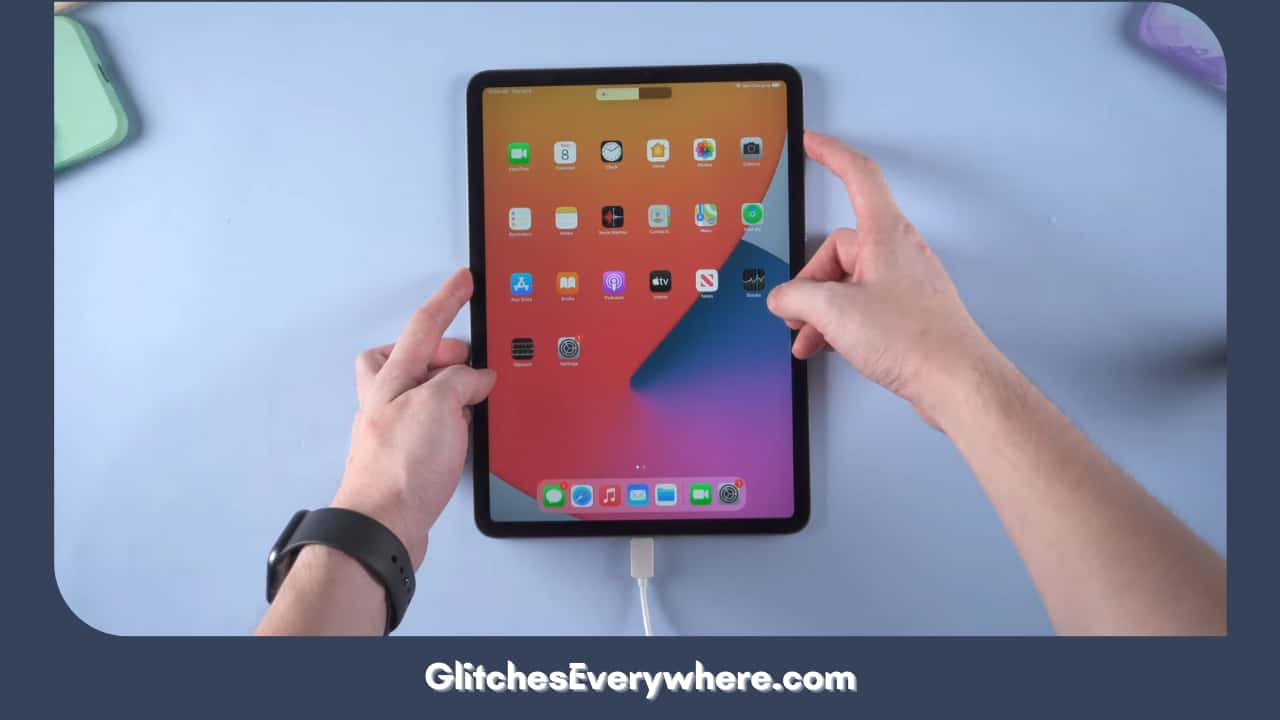
press and then leave the Volume Up button and then do the same

3. Restart your Device.

You can try to fix this problem by this too! Let us see how you want to restart your device:

  1. Hold down the sleep and home buttons together. Continue doing this until you see the red slider. 
  2. If you want to turn it off, move the slider. 
  3. Now coming to the restarting process, do the same thing again.

If you want to force restart the device, try this: 

Hold down the sleep and home button together for ten seconds until you see the Apple logo and red slider on your screen.

Another way to do so is

  1. Go to your Settings. 
  2. Move on to General. 
  3. Then reset all settings for a full internal cleanse of your device. 

Look for the iPad charging symbol once you plug your device into the charge after this. 

Use iTunes in Recovery Mode 

This process is going to restore your device completely, meaning it will factory reset your device to its default settings. Bear in mind that this means you are going to lose the data on your iPad which is why make sure you back it up before doing this process. 

Now, here we have a step-by-step instruction guide on how you can do the same and answer the how to tell if iPad is charging question through it:

1. Begin by making sure that your iTunes Is fully up to date with no pending updates.
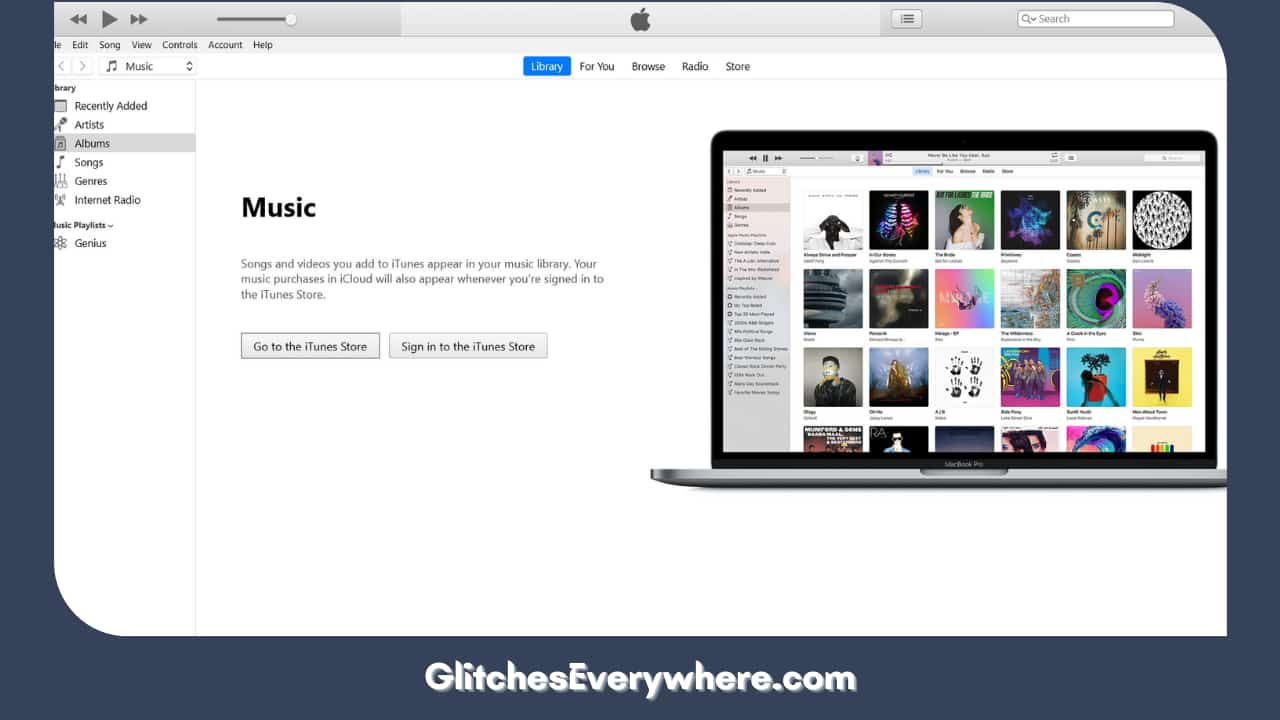
iTunes

2. Launch iTunes and then plug your iPad into your computer through the lightning USB.
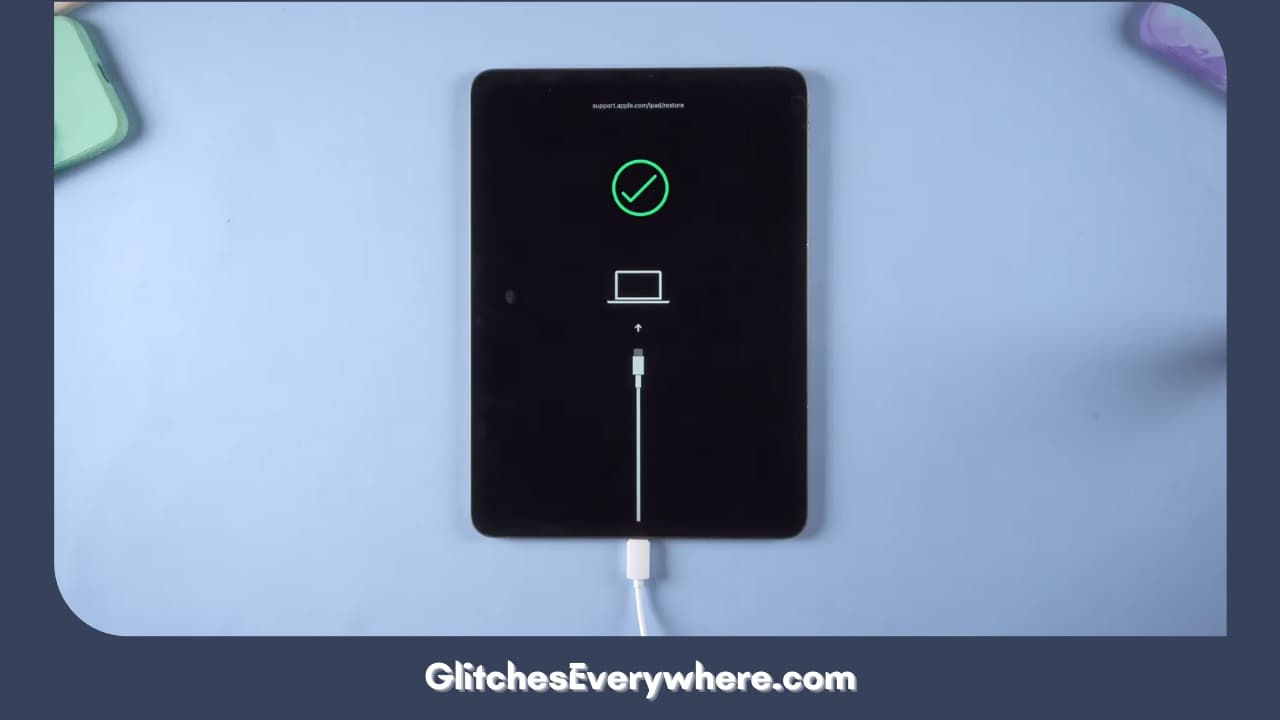
Launch iTunes and then plug your iPad into your computer through the lightning USB.

3. The next step is to put your iPad into recovery mode.

If your iPad has a home button: Press and hold down your top or side buttons along with your Home button. Continue doing so until the recovery mode screen pops up.

In case your iPad does not have a home button: locate the volume button closest to the Top button, press and release it. Then, do the same with the other volume button. Finally, press and hold the top button till you see the recovery mode on your screen.

  1. Locate the Restore option in your pop-up window.
  2. Once the process has finished, check if the iPad is able to charge normally and only then unplug it.

Plug your iPad into your Apple charger and look out for the iPad charging symbol to see if the method worked or not.

Use iOS System Recovery
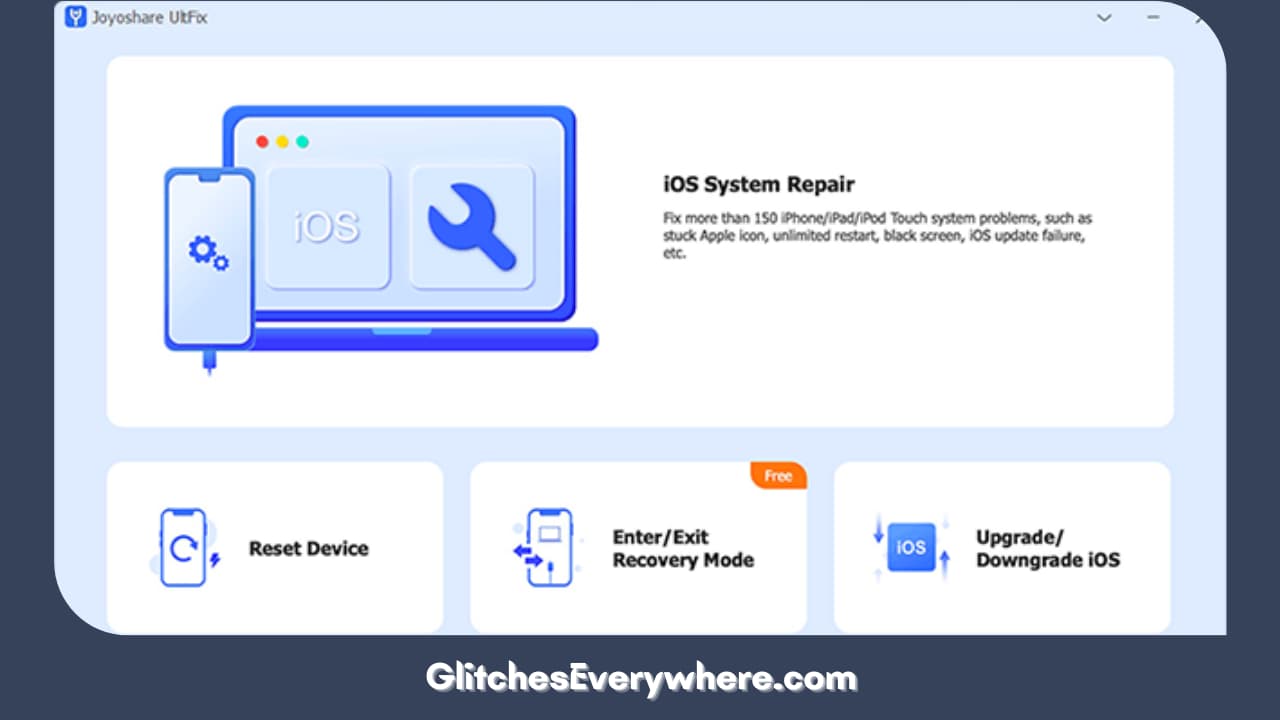
Use Ios System Recovery

As mentioned above, this ‘how to tell if dead iPad is charging’ battery can be the result of some software issues.

In such cases, you can try using a professional system repair tool. I have described how to use a system repair tool that I found to be extremely useful: Joyoshare UltFix. I ran into it while browsing for solutions, and it is incredibly easy to use.

This app claims to be an expert in repairing all iOS software issues, and it includes the charging issue as well. App fixes like these are easy to use, and you can apply it without any technical assistance. 

We are going to take a more in-depth look into it; here is how you can use it to fix your ‘how do I know if my iPad is charging’ issue:

  1. Open the Joyoshare UltFix software.
  2. Connect your iPad to your computer. Make sure that you are using an original Apple USB cable in this step.
  3. Once your iPad gets connected and then detected by the program, locate and press the iOS System Repair option.
  4. Press the Start button next to move further with the troubleshooting problem.
  5. Then, move on to the Standard Repair option.

In case your device was not detected, you can enter it into the program manually. Choose the model of your iPad and then boot the same into recovery mode. You can also choose the DFU mode.

A simple skew of steps should be followed, which will be displayed on the screen. Watch for the arrow icon near the lower right corner to turn blue. Once it does, press the continue option.

  1. This program displays all the basic information regarding the iPad. Cross-check if something is wrong, and then select the Download option. While doing this, make it a point to check the latest firmware package. 
  2. Finally, press the Repair button. This is going to unzip the firmware package that you just verified. 
  3. Once this process is finished, the Joyoshare ULtFix is going to repair the issue. It can take up to several minutes, so be patient. 

If this works, the big how to tell if iPad is charging question will automatically be answered!

Recommended Reading – Blink Camera Blinking Red: Fix With This Simple Hack

Get in touch with Apple Support Center

Get in touch with Apple Support Center

If none of the fixes given above has worked for you, it could mean that your battery has died or your device has some other hardware or software malfunction. This would be your cue to connect to the Apple Support Center, you can easily do this online. 

You can do this in a couple of ways:

  1. Go to their official website, i.e. https://support.apple.com/
  2. Enter your details and choose phone, email or chatting assistance according to your preference.
  3. You can download their Apple Support App on your iOS device and get personalized aid. 
  4. Their Twitter handle @AppleSupport can also be used to get their attention to your problem.
  5. You can go to your nearest Apple store and get in-person assistance too.

Keep in mind that if none of the above solutions have worked for you, there is a chance that your battery has probably died and you will need to get it replaced. This brings us to the end of our How do I know if my iPad is charging guide.

Recommended Reading – How to Turn On a Vizio TV Without The Remote: FIXED

Wrapping Up

I was able to get a lot of use out of my old iPad through the methods described above and would advise you to take a look at them too.

Incorporate some practices like regular cleaning of the charging socket in addition to only using the official Apple charging supplies for the best battery life and results. Don’t let the how-to tell if dead iPad is charging question haunt you and get all your answers today!
Samsung Soundbar Remote Not Working: Fix in Seconds 2024

Samsung Soundbar Remote Not Working

You have reached the right destination if you have any queries regarding Samsung Soundbar Remote Not Working. This detailed guide will equip you with all the information you need.

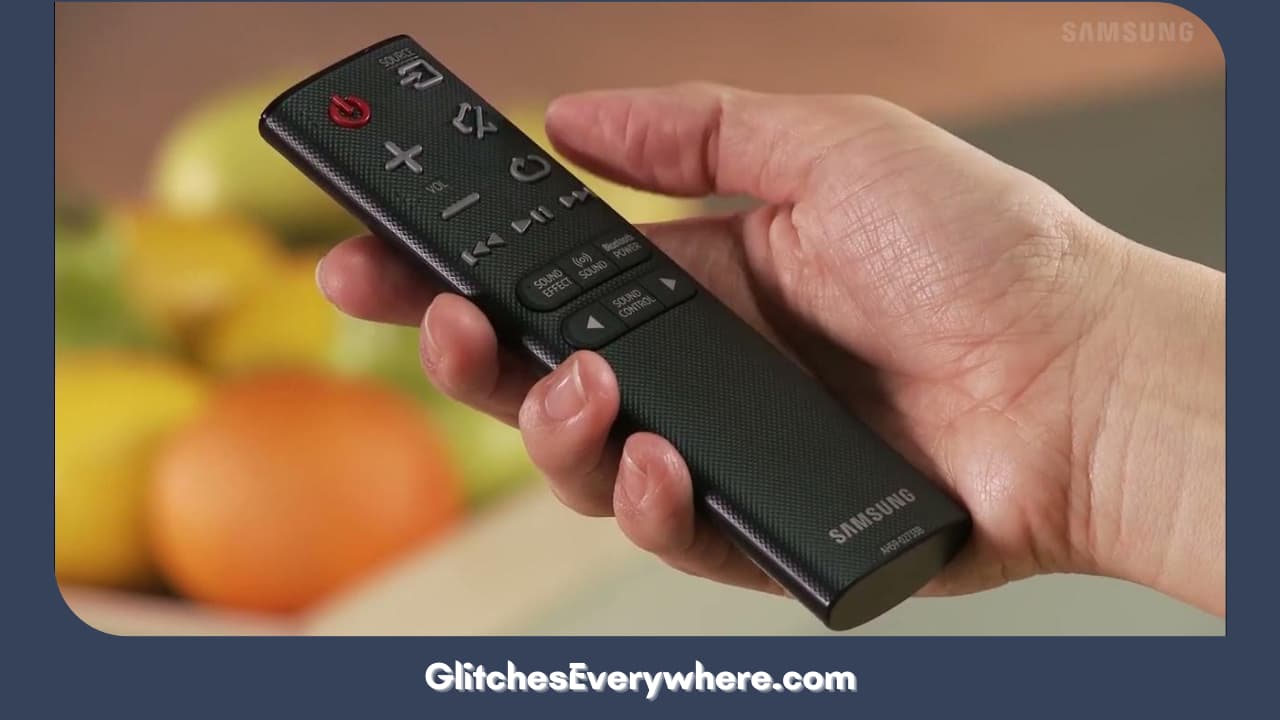
Has your Samsung soundbar remote stopped working? No worries, we got you! This is a common issue and can be mostly tackled at home with ease. Though it can be a result of a variety of problems, they can be narrowed down to either of the following:

  1. Problems with the remote itself
  2. Problem with the connection between the remote and the soundbar.

In order to get rid of your Samsung soundbar remote stopped working problem, begin by ensuring the connection between the soundbar and TV, checking the remote and its batteries, verifying the default device of your TV, resetting the soundbar’s settings before moving on to more particular troubleshooting methods.

Continue reading to get rid of your Samsung soundbar remote not working’ problem right away. Following is a detailed guide which explains the various ways you can get rid of your soundbar remote issues. You can do all these things by yourself and fix your technical issues with ease!

Let’s get into it!

Recommended Reading – Disney Plus Not Working on Samsung TV: Fix in Seconds

Samsung Soundbar Remote Not Working: Basic Fixes

Samsung Soundbar Remote Not Working Basic Fixes

Samsung soundbars are famous for their incredible quality and popularity. So, it is only natural that one expects a lot from these devices, but it should be kept in mind that like all devices, these amazing soundbars run into their fair share of technical issues and malfunctions. But, this is nothing to worry about as, most times, the core causes of these issues are straightforward and can be easily tackled.

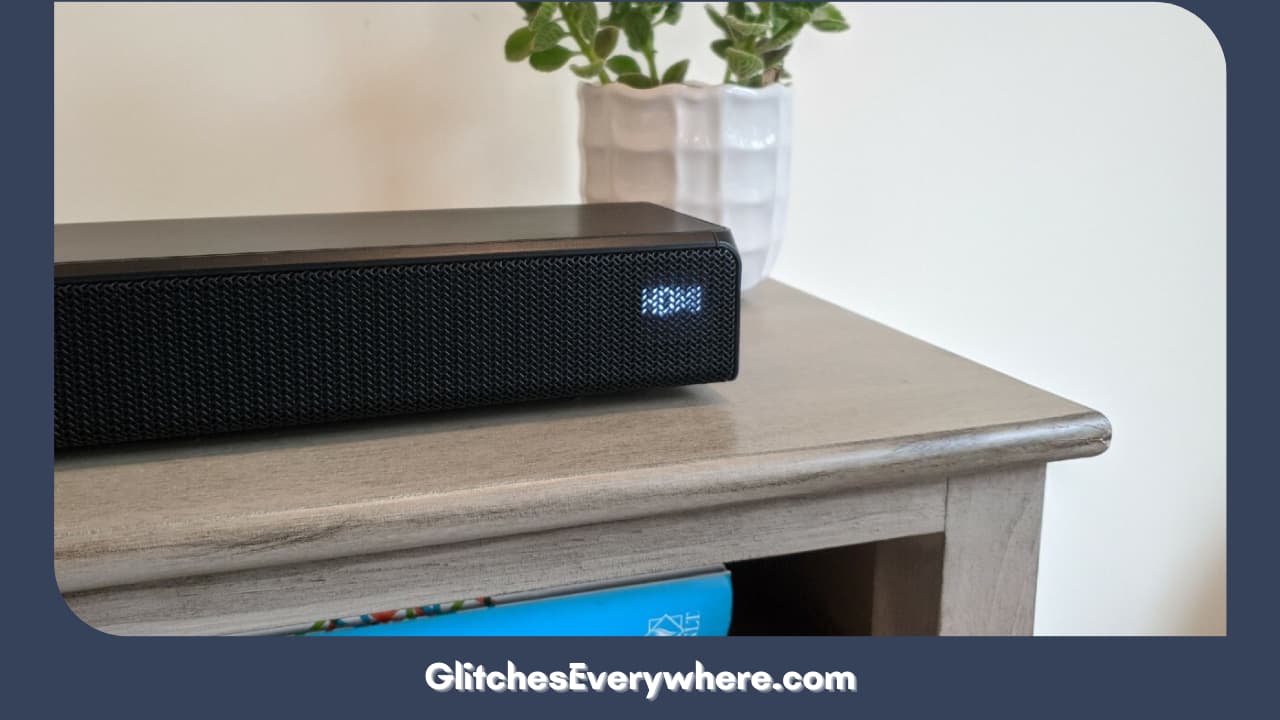
Samsung tv remote not controlling soundbar? Do not worry! Let us begin with the most obvious fixes. Ensure that your TV and soundbar are properly connected to their sources. Start by ensuring that all cables are connected tightly and correctly and that none is worn out or in bad condition.

Make sure that you do not touch any weary cables with your bare hands for your own safety!

Has your Samsung soundbar remote stopped working, but the exterior hardware looks perfect? Think a little more complicated. The most common reason for remotes not working is their batteries. Check your batteries to see if they have enough charge and if they are correctly placed. Always keep spare batteries in your home and use them to replace old ones whenever needed.

Another common reason that the Samsung soundbar remote stopped working’ issue takes place is another obvious one: Bluetooth! This simply means that one needs to make sure that the soundbar and TV are connected too! Double-check if the Bluetooth option for your remote, as well as your soundbar, is on.

Once that is done, press your controller’s input button until a blue light appears. Proceed to press the TV button. Another thing to remember is that one also needs to look at the TV/AV Receiver button. Once you locate it, press and hold it until you can see a blue light.

Now, move on to the Input Select Option and look for your other device on the list of available connections and successfully connect! and then uninterruptedly watch Disney Plus on Samsung TV.

Samsung soundbar remote not working despite having followed the above fixes? Do not lose heart; let us move on to more particular troubleshooting solutions regarding this problem!

Reset your Soundbar Settings

Reset Your Soundbar Settings

The Samsung soundbar remote stopped working, and you do not know what to do. Begin with simply resetting your soundbar back to its default settings.

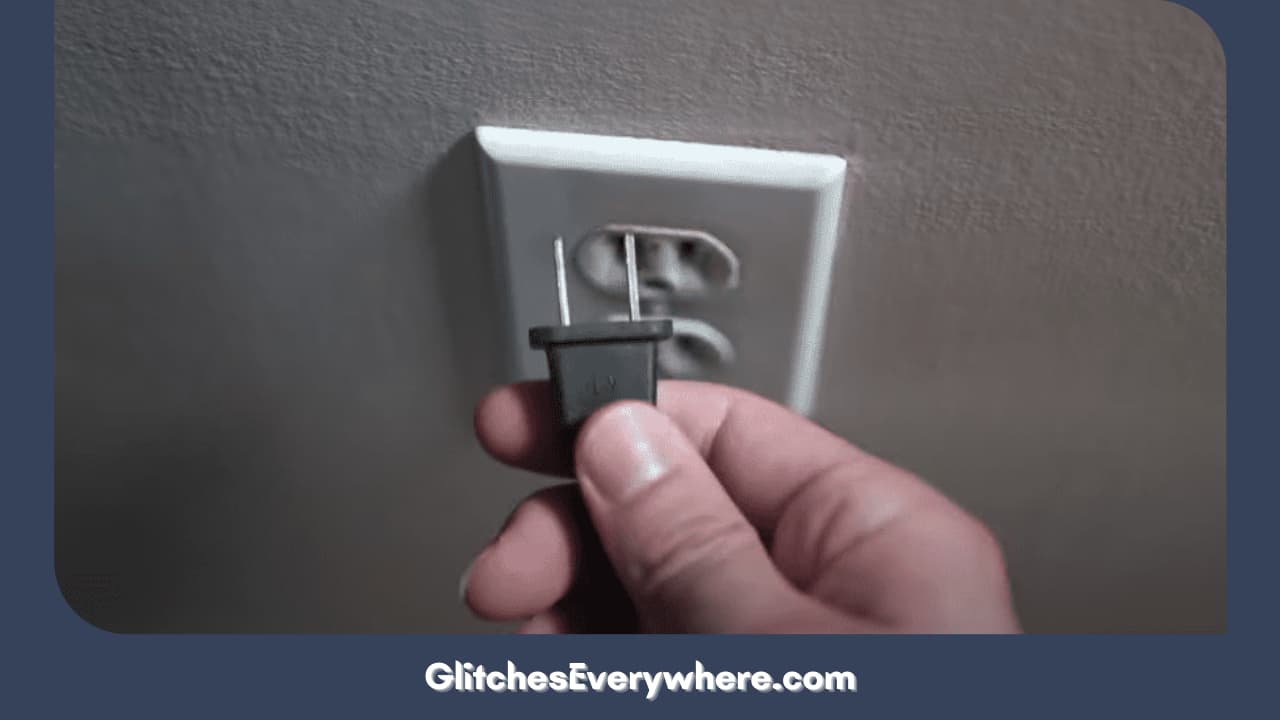
In order to do so, start by turning on the power of your device and then pressing and holding the power and volume buttons on the remote. Do this continuously for at least a few seconds before you unplug its power cable.

Wait for a full ten minutes before plugging it back in. Though a simple way, resetting your device is a viable option to eliminate fundamental technical issues. The technique can also work for Apple Remote. 

Power Cycle your TV

Power Cycle Your Tv

Samsung soundbar remote not working even now? Repeat the previous step but this time, with your Samsung TV. Consider it as giving your TV a short break.

The same process applies. Use your TV’s remote to ensure that it is fully shut down before you take its cables out. It is advisable to wait fifteen minutes before you reassemble your setup. Begin by plugging the cables back in before restarting the device and checking if the problem has resolved. 

Check your Default Device

Check Your Default Device

Samsung TV remote not controlling soundbar? Maybe there is something wrong with its connection with your TV. The most common problem is that your soundbar may not be connected as your Samsung TV’s default device. How can one do that?

You can begin by checking out your TV’s configuration and particulates. Find more about the Output Audio Device feature of your device. Once you brief yourself, follow these two steps: Find the menu, scroll, find, and select the Samsung Soundbar device connection. That’s it! This will help your TV identify the soundbar as its primary source of audio, which might fix your issue!

Is your Samsung soundbar not responding to the remote despite this method? Do not worry; we have many more troubleshooting methods to go through, continue reading!

Remote Control and Surrounding Devices

Remote Control And Surrounding Devices

Samsung soundbar volume control not working? Maybe it is not your TV but your remote. Though not very common, it is possible that your remote has linked itself to other Samsung devices around you, which is why it is not answering your prompts concerning your TV.

You can fix this small issue by pressing your controller’s Auto Power button. This is going to turn the option of power linking off.

Samsung soundbar volume control not working even after this? Do not worry; continue reading to find the best solution.

Remote and SoundConnect

Remote And Soundconnect

Samsung soundbar remote not working? This could be a result of Soundconnect! Let us see how! 

So, what does SoundConnect do? It enables your TV to establish wireless connections to your soundbar, making it an essential component of your setup. The common issue is that it can keep connecting to the wrong devices. How to get rid of this annoying technical mistake? This is how:

Begin by going to your Smart Hub Panel. Locate and select the Sound option. Choose your Expert Settings, select Wireless Speaker Management, and double-check your requirements.

ID Set with Remote

Id Set With Remote

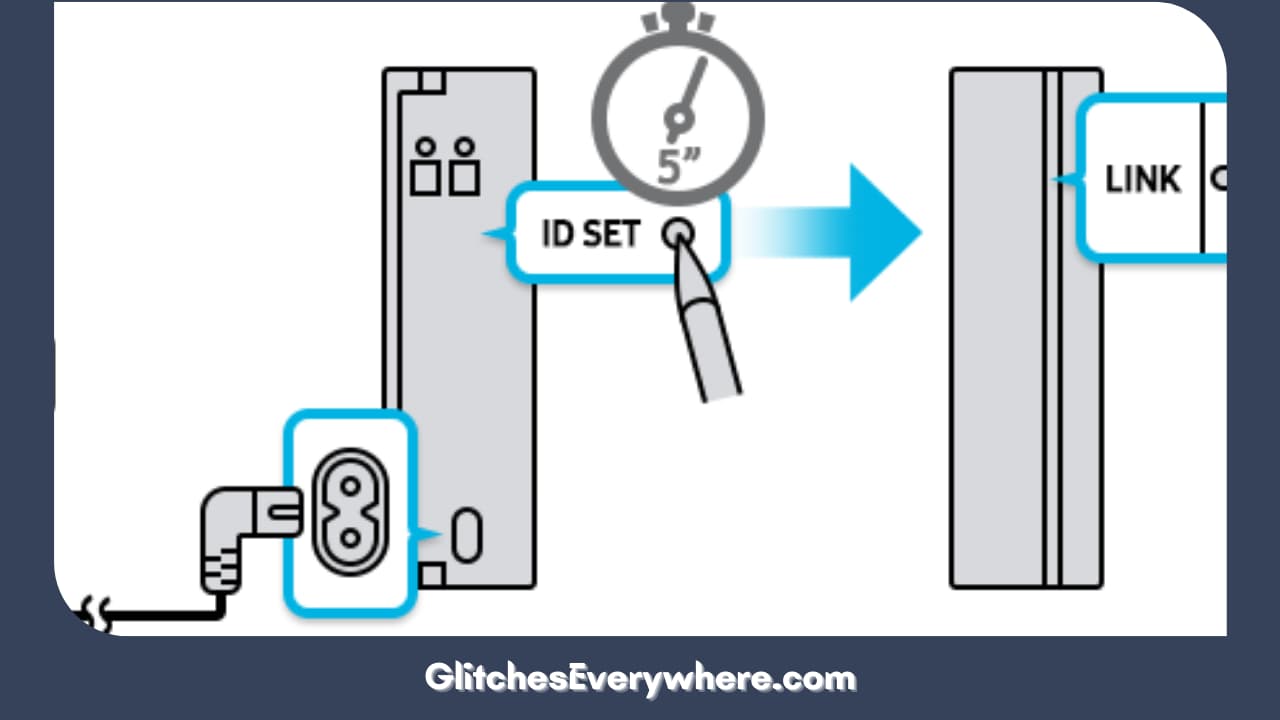
Has your Samsung soundbar remote stopped working suddenly? This can happen when your soundbar remote doesn’t set the required ID. Let us break this down. This remote control issue arises when a connection gap exists between the subwoofer and the soundbar.

This is how you fix this complicated-sounding problem. Turn off the device, press the up volume button on your remote, and hold it for at least six to ten seconds. Continue doing this until you see the ID set message on your screen, and double-check or change the required particulars.

Take a Look at Your Infrared Receiver

Take A Look At Your Infrared Receiver

Samsung soundbar remote not working despite all these steps? Sometimes, the simplest explanation is the right one.

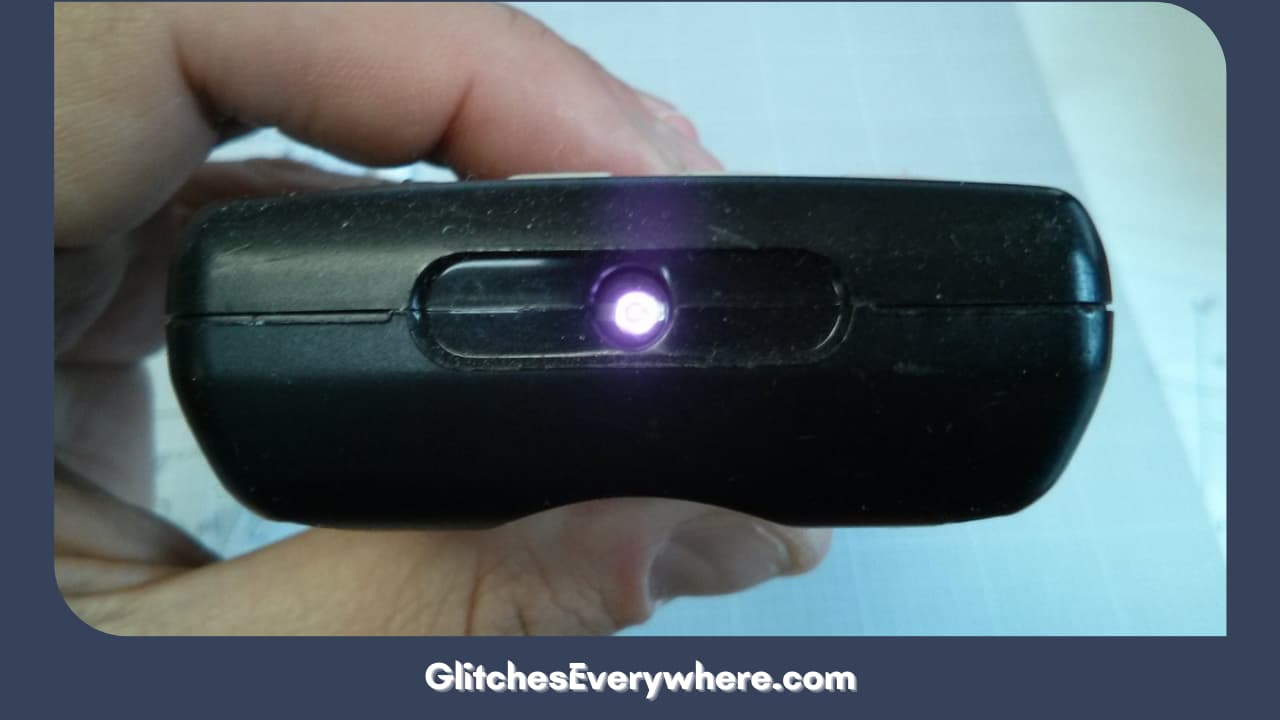
Maybe your soundbar’s infrared receiver is facing some issue that does not allow it to respond to your remote commands, causing your Samsung soundbar volume control to not work. Ensure that the receiver is not blocked by anything.

Also, make sure that it is clean by using a soft, dry, and clean cloth to wipe it gently.

Using a Universal Remote

Using A Universal Remote

Samsung soundbar not responding to remote still? Do you suspect it is your remote causing the issue? Try using a universal remote to give commands to your soundbar and see if the problem still persists.

While doing so, ensure the universal remote is compatible with your device. Or else it will confuse you even further.

Remote Sensor Not Working

Remote Sensor Not Working

Have you narrowed down your faulty remote sensor as the root cause of your Samsung soundbar remote not working issue? You may need to check the battery life or trade it for a new remote!

Samsung TV remote not controlling soundbar even now? It is time to call for professional help! You will find the Samsung Customer Service number online, Call them and describe your issue and get help. You can even locate an authorized repair center around you and take your soundbar there to get it fixed! 

Tips:

Does this Samsung soundbar remote not working headaches happen often? Here are some tips you should follow to avoid this problem:

  1. Avoid rough handling of your remote and devices. Ensure that you do not drop it and cause it physical harm as it does damage the remote.
  2. Ensure that you regularly change the batteries in your remote with fresh ones.
  3. Ensure the path between your soundbar and remote remains clear with no obstructions.
  4. Make sure that you do not leave the power on for your Samsung soundbar throughout the day. Keep unplugging it from the outlet from time to time.
  5. Look out for weary and worn-out cables and repair them as and when necessary. 

Recommended Reading – ESPN Plus Not Working: Fix in Seconds

Wrapping Up

Facing issues with your Samsung soundbar is a common headache but is never a big deal. You can fix it pretty quickly using our detailed guide.

By following the step-by-step guide described above, you can get rid of your Samsung tv remote not controlling soundbar problem’ and continue enjoying your favourite music, movies, and shows with comfort!

Fix Apple TV No Signal: In Seconds 2024 (Black Screen)

0

Fix Apple Tv No Signal

You have reached the right destination if you have any queries regarding Fix Apple TV No Signal;. This detailed guide will equip you with all the information you need.

It’s one of your all-time soothing movies with the best song you always crave and boom! The TV says the signal is lost… I am damn sure that is very annoying to any person on Earth! Are you tired of this issue too and are a sufferer with me? Well, let us suffer no more as this article is the solution!

The problem of Apple TV abruptly showing No Signal is not uncommon, and this article will guide you to the ultimate solutions. Waiting for a while, turning the device on and off, and setting the HDMI settings are common troubleshooting issues. However, if the problem persists, you must read this article until the end. 

Apple’s tvOS offers an ad-free streaming experience on Apple TV. A smooth integration of AirPlay with all your iPhone devices is another prime reason to get an Apple TV. But, all your interest goes into vain when Apple TV starts to be problematic in the first place. Let us hope for no more issues as we now have the not-so-tech-savvy solutions!

Recommended Reading – Vizio TV With No Sound? Easy Fix Tutorial for Audio Issues

Apple TV No Signal: Causes

Causes

Though the reasons might differ from device to device, there are specific common reasons for this issue. They are listed as under:

  • Antenna Signal Failure.
  • The HDMI-enhanced format setting might not be turned on for Apple TV 4K, resulting in an unreliable signal.
  • The device is not working correctly due to a network problem.
  • In rare cases, an error with the product. 
  • Device overloading due to other ongoing downloads and storage.

All these are very normal and easy to fix. For easy solutions, let us go by them one by one.

Recommended Reading – Why is Roku Remote Not Working: Fix in Seconds

Apple TV No Signal: Solutions

Solutions

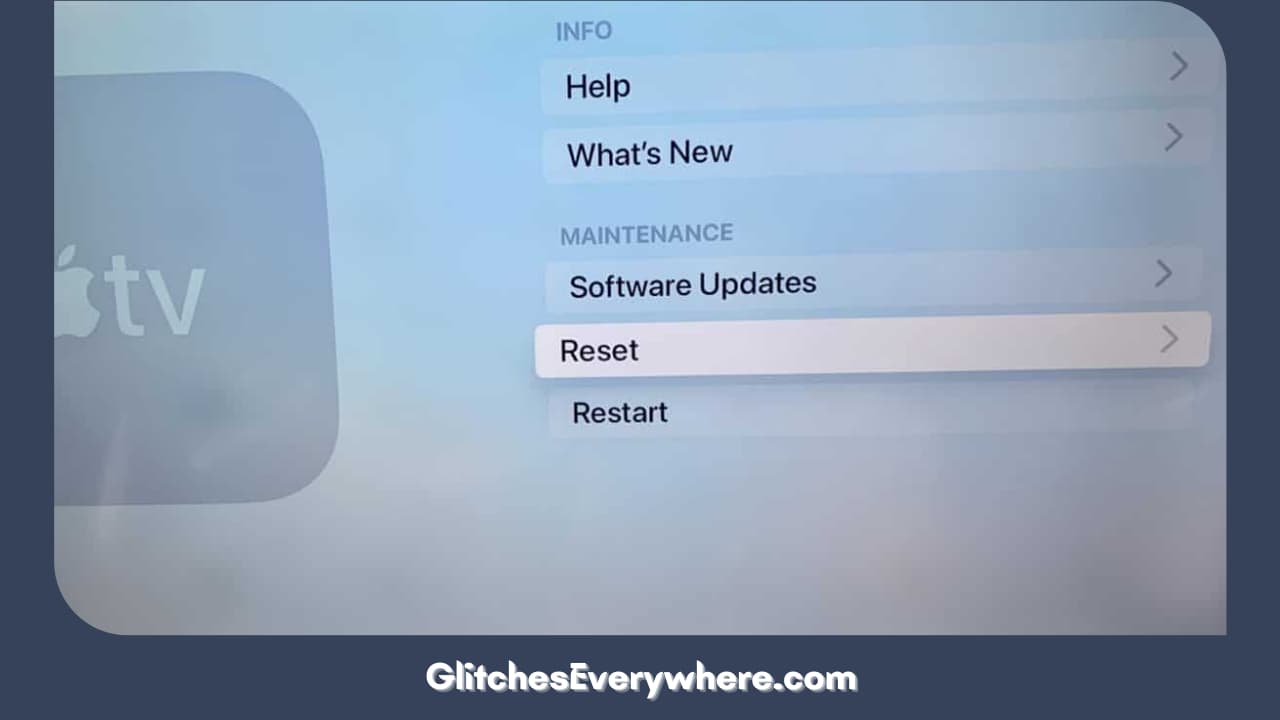
Reset your Apple TV to Factory Settings

Reset Your Apple Tv To Factory Settings

e cables do not have any issues, or if they do, you changed them and still cannot see a picture after connection, then you may need to reset your device’s settings to factory settings. As with any other iOS device, this could mean you will lose all the data on the device.

To be on the safe side, you must back up all the data on the device before attempting a reset. Once all your data is secure, follow these simple steps to reset your Apple TV:

  • Go to ‘Settings’ from the menu of your Apple TV and look for General Settings.
  • From the options available, click on ‘Reset.’

Now click ‘Restore.’ The device will now take its time to download and upgrade the software. Keep the power connection stable during this entire process to avoid issues. 

This often helps solve the issue, though if it does not, go to the next solution.

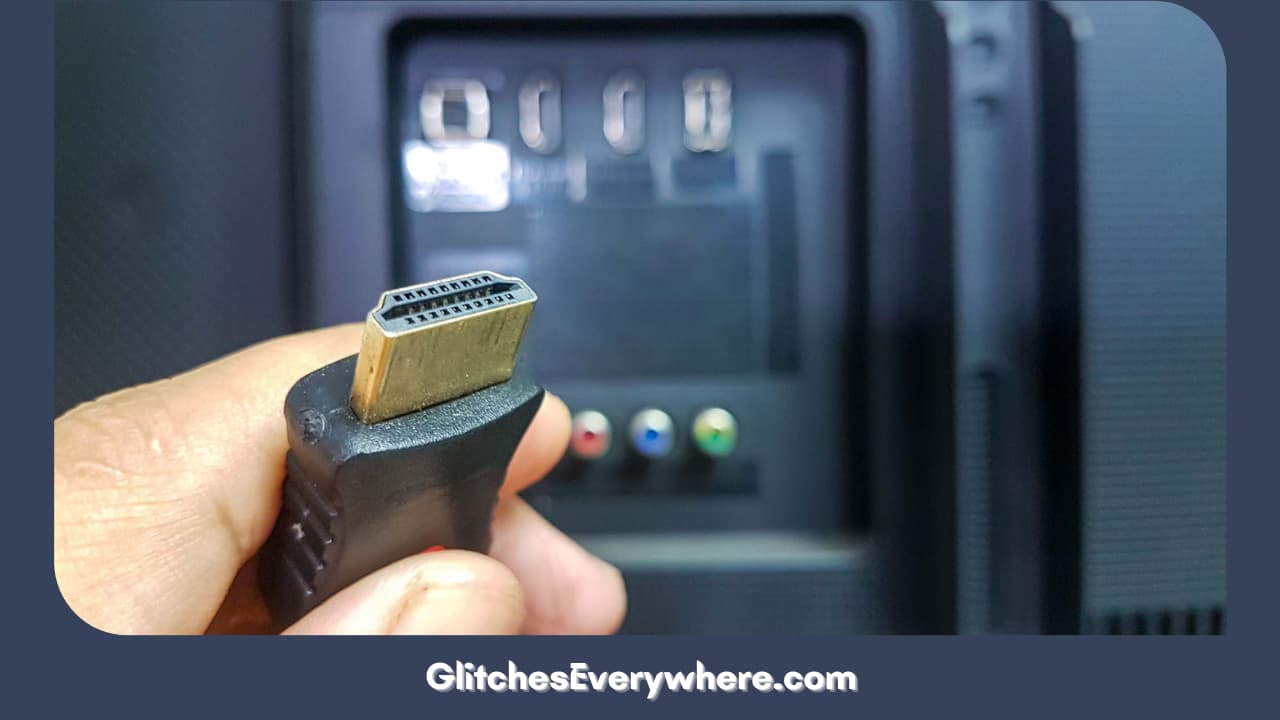
Check the HDMI Cable

Check The Hdmi Cable

Many times, the Apple TV No signal is caused due to improper wire connections. Try confirming if the HDMI cable is working correctly or not. A simple, easy way is connecting any other device with the same cable or connecting your different machine using a separate HDMI cable.

This way will help you figure out where the problem lies.

You can look for the next solution if this does not work. 

Wait for Some Time

This might sound not very reassuring, but it is the most basic advice to deal with any Apple product. This gives space to the device to function and load things. 

If the issue continues for a long, move to the next. 

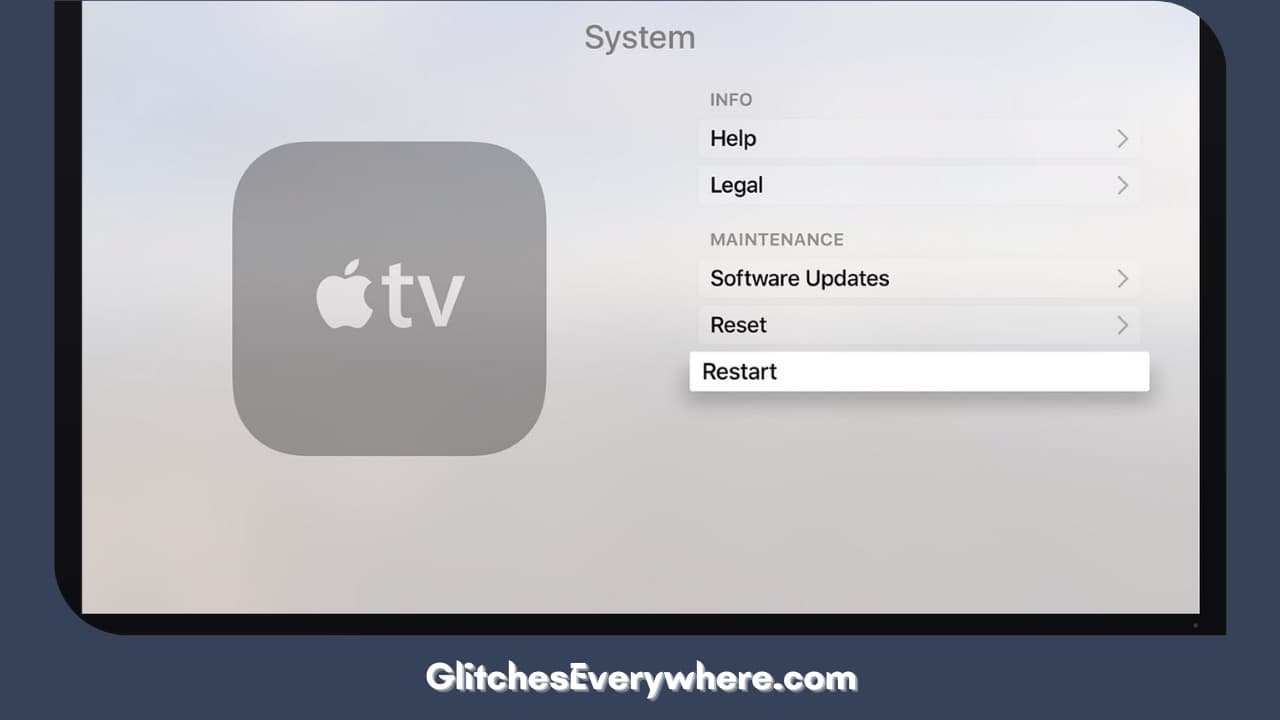
Restart your Apple TV

Restart Your Apple Tv

The best place to begin when you have a problem with any Apple device is to restart it. A restart assists in deleting any bugs present and gives a smooth touch to the device. To renew your Apple TV, follow these simple steps:

  • Go to your Apple TV settings and select ‘General.’
  • Choose ‘ Restart’ from the options presented, and the device will reboot, hopefully eliminating the problem. 

If something else is needed, let us look to the next solution.

Check the HDMI Output

Check The Hdmi Output

There is more than one option available when choosing your HDMI Output. If you have selected the correct one, you will face issues. You’ll need to use your TV’s remote and switch to the proper HDMI output option from your TV’s settings. Simultaneously, keep the power button turned on on the Apple TV. 

If you still see no signal, move to other tricks in the list. 

Check Power Cord

Check Power Cord

This sounds very kiddish to me, but it is the simplest solution. Many users must remember to connect their devices to a power source. 

Ensure your Apple TV and box are connected and plugged into a power source. Check to see whether the devices are typically turned on. If not, the power cord could be faulty, and replacement would be replacing it. Besides this, check if they are connected to a Wi-Fi network. 

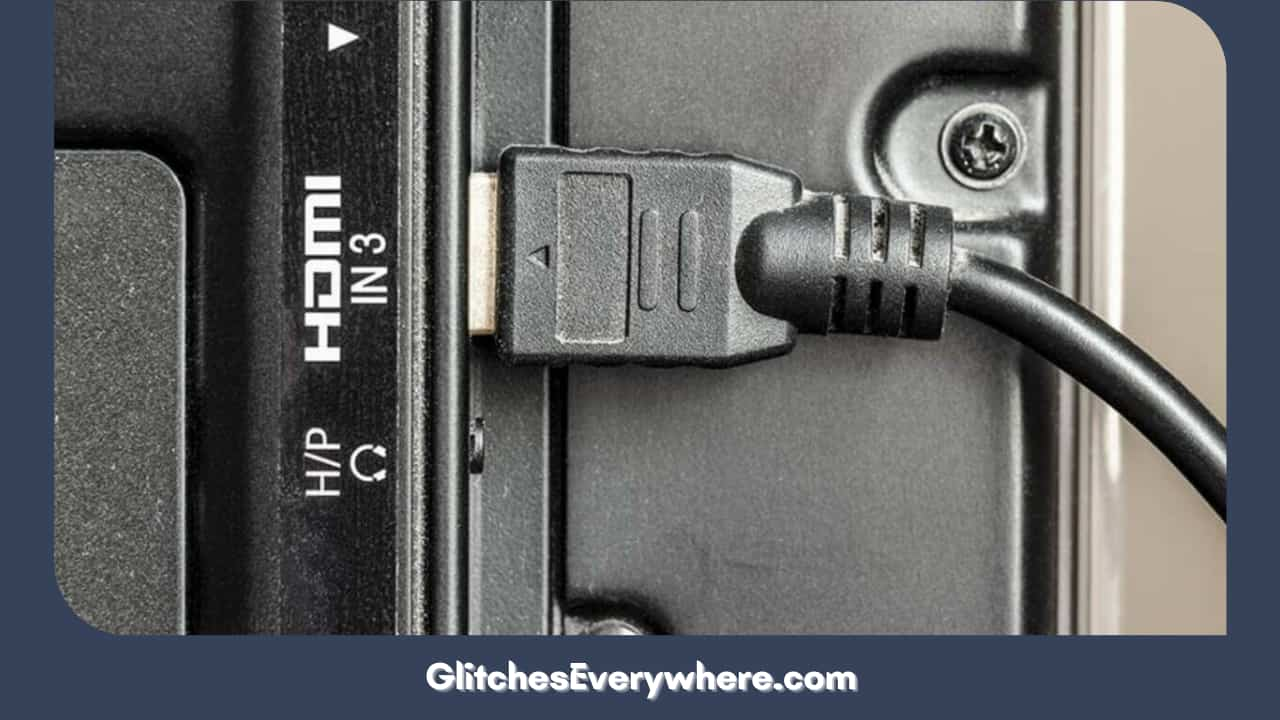
Plug your HDMI Cable to another Port

Plug Your Hdmi Cable To Another Port

Modern devices now come with several HDMI ports to utilize. This includes TVs, Monitors, Playstations, etc. You can also connect your PlayStation, Home Theatre System, and a streaming device like your Apple TV to witness a great entertainment setup at your home!

When one of the HDMI ports starts to act up, Apple TV may get buffered with no signal error. Remove the HDMI pin for Apple TV from the TV’s port and then connect it to another port. 

Were you still facing issues? Let us move to the next possible solution.

Fix Apple TV No Signal without any Data Loss

Fix Apple Tv No Signal Without Any Data Loss

More straightforward methods often demand data loss, which is only preferable to some. Adding to it, these basic methods might not solve severe problems of software-related issues, and there is a high chance your Apple TV is problematic because of software glitches!

Hence, it is essential to protect your data before solving this issue. For this, you need iMyFone Fixppo. iMyFone Fixppo is a very professional iOS system recovery software that can help fix various iOS issues without even causing the threat of data loss on your iPhone or iPad.

It provides two modes, Standard Mode and Advanced Mode, to deal with familiar and severe iOS problems.

The standard mode will help fix the common tvOS issues without any data loss. Follow the steps given below carefully to resolve the problem successfully. The steps for the same are given below:

  • Click on standard mode from the Home page of Fixppo. Now, connect the Apple TV device to your computer and click Next. The program will go for further steps once the device is recognized.
  • The program will detect your Apple TV and show you the available firmware versions. Choose the one you want and click download.
  • After downloading, the firmware will be verified, and the software will be extracted. Now, you can start focusing on the fixation of the iOS issue. Before clicking the Start button, check if all the information shown is accurate. As soon as you press ‘Start,’ the procedure for fixing will kick start. In a bit of time, the process will be complete.

If you need assistance, there is one last thing you can look for.

Contact the Apple Support Centre

Contact The Apple Support Centre

When none of the above has worked, it is advised to contact the Apple Support Centre now. Because the hardware might be wrong, they will understand your issue better than anyone and give the corresponding solutions.

Recommended Reading – Why is Vizio Remote Is Not Working: Fix in Seconds

Helpful Answers

Helpful Answers

How do I manually restart my Apple TV?

If the iPhone is not responding, and you can not turn it off then on, try forcing it to restart.

  • Press and then quickly release the volume ‘up’ button.
  • Now, repeat the process with the volume down button.
  • Press and hold the side button.
  • When the iOS logo appears, release the side button.

Why is my Apple TV connection hanging?

There are several reasons for this. However, try to Restart your Apple TV, router, modem, or any other connected device.

After you restart each device:

  1. See if you still need help.
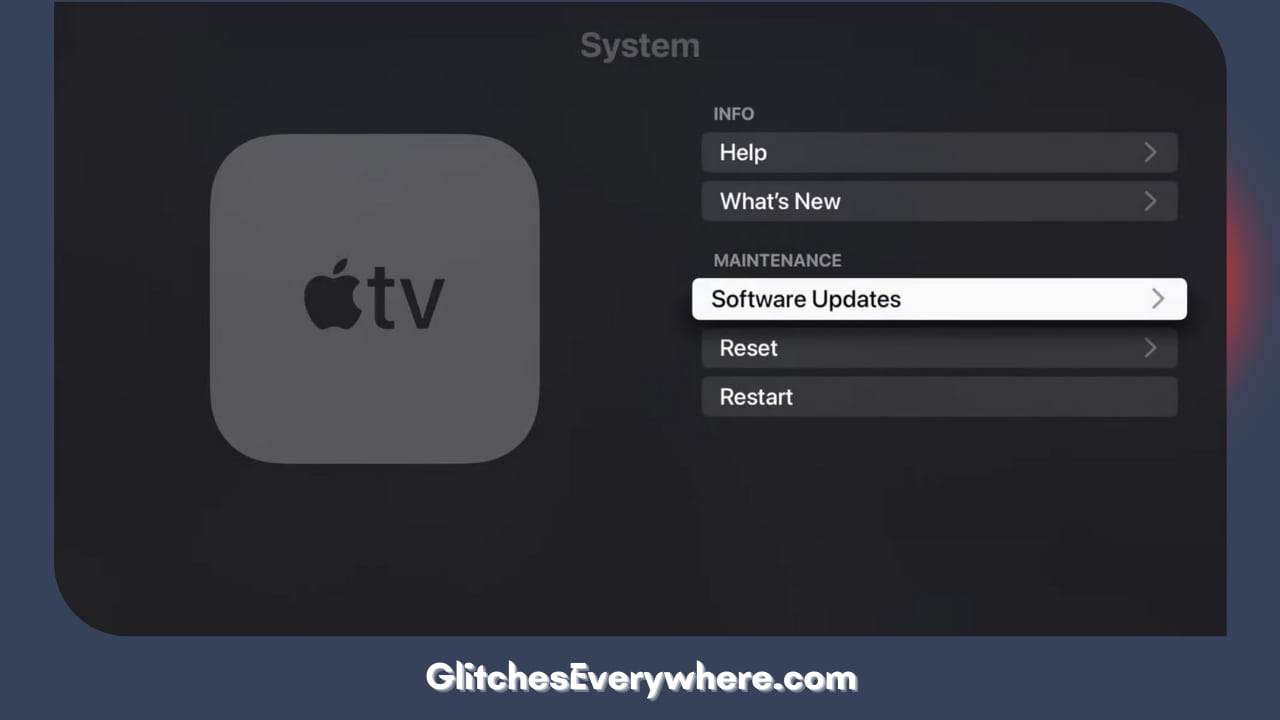
  2. On the Apple TV menu, go to Settings, look for System, and select Restart.
  3. Unplug your router and your cable or modem from power.
  4. Plug them back in. 

This will solve your issue!

What are the essential solutions for my Apple TV showing no signal?

Below given are the essential solutions for your issue:

  • Unplug both ends of the HDMI cable, and then firmly plug them back in.
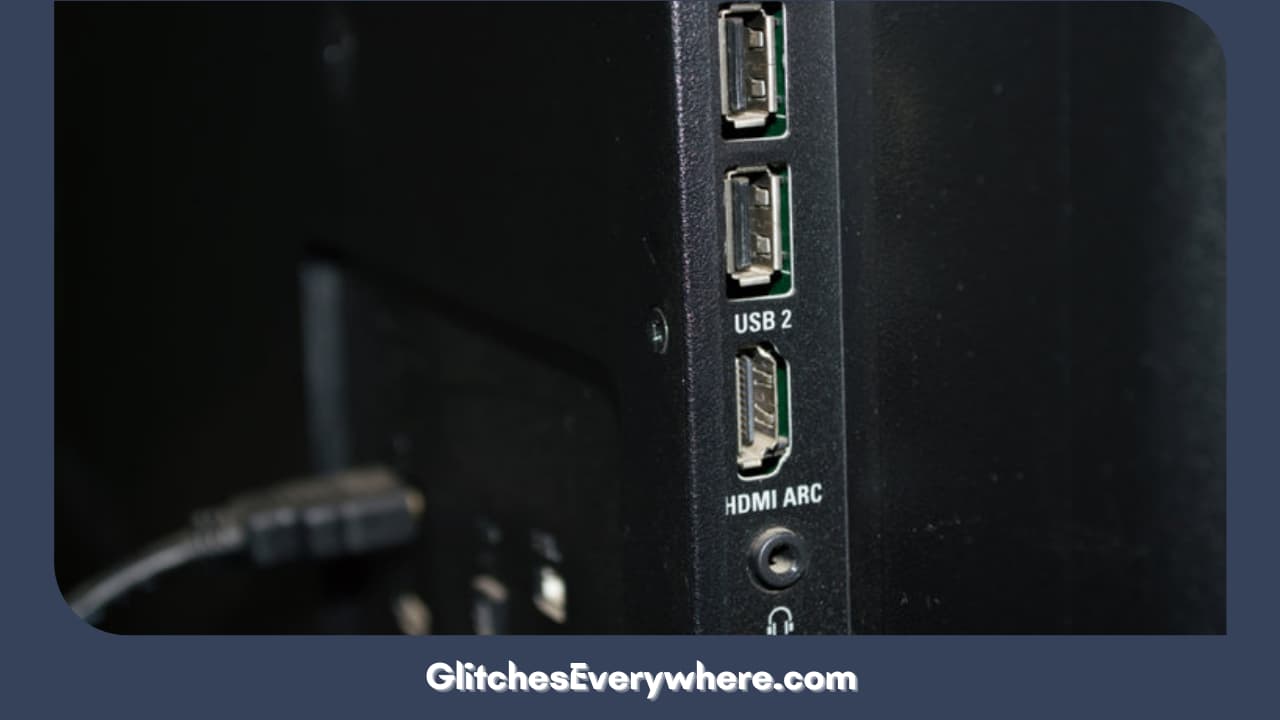
  • Unplug your TV and your Apple TV from the power source, then plug both back in.
  • Try a different HDMI port for your Apple TV, starting with HDMI 1 or Input 1.
  • One of these might be the issue if you’re using a receiver or an HDMI switch.

However, if these do not work, refer to the article for more solutions. 

What causes Apple TV’s No Signal issue? 

A ‘No Signal,’ ‘No Source,’ or ‘No Input’ message will be visible on your TV screen if your TV is not receiving enough signal from your TV box. This is often due to either the TV box being powered off, incorrectly connected to the TV, or the TV being set to the wrong input.

Recommended Reading – Why is YouTube Not Working on Roku: Fix in Seconds

Wrapping Up

The steps mentioned in the article will be of help to you! Please read them carefully and apply them for easy, spontaneous solutions. You can continue binge-watching your favourite movie without any issues now!

 Thank you for reading the article till the end!

How to Activate TVONE Channel on Your Streaming Devices: 2024

0

Did you know that TVOne reaches roughly 59 million households nationwide? If you’re part of this statistic or hoping to join, you’re in the right place.

How To Activate Tvone Channel On Your Streaming Devices 2024

This guide will walk you through unlocking your TVOne channel, no matter what device you’re using. But there’s more to it than just activation. Stick around to discover the essentials about your cable provider, Roku compatibility, and the support TVOne offers to guarantee a smooth viewing experience.

Ready to start? Let’s get started.

Understanding the Activation Process

To activate your TVOne channel, start by visiting tvone.tv/activate on a web browser of your choice. You’ll enter the activation code displayed on your TV screen. Follow the on-screen instructions to complete the process.

Now, if you’re facing common errors during activation, don’t panic. Here are some troubleshooting tips. Check your internet connection first. A critical connection is important for successful activation. If the problem persists, try rebooting your device or clearing your browser’s cache.

If an error message appears, note it down as it can help identify the issue. Remember, activation troubleshooting is part of the process, so don’t get frustrated. If all else fails, don’t hesitate to contact TVOne support for further assistance.

Also Read – How to Activate Your Destiny MasterCard Online

Steps for Roku Device Activation

After understanding the general activation process, let’s now focus on the specific steps you’ll need to take to activate your TVOne channel on a Roku device.

Start by scrolling down on your Roku home screen and select ‘Streaming Channels’. Search for the TVOne app, then add the channel. Launch the TVOne app on your Roku device. Within the app, generate a registration code.

Visit tvone.tv/activate on a web browser, enter the code, select your provider, and sign in to activate. Make sure your Roku device is compatible with the TVOne app.

If you encounter any issues during this process, remember there are troubleshooting tips available online to help you resolve them quickly and effectively.

Activating TVOne on FireStick

Moving onto the FireStick, the process of activating TVOne involves several simple steps.

  • First, locate the TVOne app using your FireStick’s ‘Find’ option.
  • Next, hit ‘Get’ to install the application.
  • After installation, launch the TVOne app to generate a registration code that will be displayed on your TV screen.
  • Using a separate device, visit tvone.tv/activate, enter the displayed code, select your provider, and sign in to activate.

Sometimes, you might encounter common activation issues while trying to activate TVOne on FireStick. In such cases, troubleshooting FireStick activation becomes necessary. Make sure a stable internet connection, verify your activation code, and don’t hesitate to reach out to TVOne support if problems persist.

Procedure for Apple TV Activation

Just as with the FireStick, activating TVOne on your Apple TV also involves a few simple steps. Start by going to the App Store from your Apple TV home screen. Search for the TVOne app and click on ‘Get’ to install it. Once installed, launch the app and a registration code will be displayed on your screen.

Next, grab a separate device and visit tvone.tv/activate. Input the registration code, choose your provider, and sign in to complete the activation. If you encounter hiccups during this process, don’t panic. There are troubleshooting tips available on the TVOne website to assist you. Additionally, compatibility checks can make sure your Apple TV model works with the TVOne app. With these steps, you should be good to go!

Guide for Android TV Activation

Activating TVOne on your Android TV involves a straightforward process that begins with opening the Play Store on your device.

Here’s a step-by-step guide:

  • Search for the TVOne app in the Play Store and install it.
  • After installation, launch the app. A unique activation code will be displayed.
  • Visit tvone.tv/activate on a web browser. Input the displayed activation code.
  • Confirm your TV provider and follow the prompts to complete activation.

If you’re experiencing activation code issues or need troubleshooting Android TV, don’t panic. Verify if the code is correctly entered or restart your TV and try again. If problems persist, reach out to TVOne support. They’re equipped to handle any technical issues you may encounter.

Also Read – How to Activate Fox Nation on Your Streaming Devices

Activating on Android or Ios Devices

While Android TV allows you to experience TVOne on a larger screen, you can also enjoy the same content on your Android or iOS smartphone or tablet. To do this, you’ll need to carry out mobile app activation. Let’s start with device compatibility. The TVOne app is compatible with devices running Android 5.0 and up, or iOS 11.0 and later. If you run into issues, troubleshooting steps include checking your device’s software version and ensuring you have the latest version of the TVOne app.

Action Android iOS
Download Google Play Store App Store
Install Click “Install” Click “Get”
Open Locate app on your device Locate app on your device
Activate Follow in-app instructions Follow in-app instructions

Navigating Through Support and Assistance

Exploring through support and assistance options can greatly improve your TVOne viewing experience by offering solutions to common issues and responses to frequently asked questions. The support team provides various troubleshooting tips to help you resolve any technical issues you might encounter. They also value customer engagement, making it a point to respond to your queries promptly and effectively.

Here are some ways to navigate through the support and assistance options:

  • Access the help center on the TVOne website for a compilation of FAQs.
  • Engage with the TVOne community on the forum.
  • Contact customer service for personalized assistance.
  • Check for updates on their social media platforms.
  • Visit the TVOne blog for tips and tricks.

Interacting on TVOne Platform

After familiarizing yourself with the support and assistance options, you might find it beneficial to engage more directly with the TVOne platform itself. This interaction can take the form of various engagement strategies such as participating in forums, providing community feedback, or contributing to discussions.

These actions allow you to voice your opinions, share your experiences, and learn from other viewers. To do this, simply navigate to the community section of the platform, where you’ll find areas for discussion and feedback.

Also Read – How to Activate Your Sears MasterCard

Details on Cable Provider and Payment

Understanding your cable provider compatibility and payment requirements is important when activating your TVOne channel. To make sure a smooth process, consider these essential steps:

  • Confirm that your cable provider is compatible with TVOne. If not, cable troubleshooting may be necessary.
  • Cross verify your activation code. Incorrect entries could lead to activation troubleshooting.
  • Make sure your cable subscription includes TVOne. If unsure, seek subscription confirmation.
  • If facing activation issues, don’t hesitate to contact your cable provider for support.
  • Remember, your activation code is private. Don’t share it with anyone unauthorized.

For payment verification, know that TVOne activation typically doesn’t involve additional charges. However, if you encounter any unexpected payment requests, report them immediately to TVOne.

Specifics for Roku Compatibility

Now, let’s shift our focus to the specifics of activating TVOne on your Roku device. To start, add the TVOne channel from the Roku’s streaming channels menu. Once added, launch the TVOne app on your Roku. You’ll see an activation code on your TV screen. Remember, this code is unique to your device and session. For activation code security, it’s important not to share this code with anyone.

Next, visit tvone.tv/activate on a separate device, enter the activation code, and follow the instructions. During this process, make sure your Roku maintains steady connectivity. If you encounter issues, perform some basic Roku troubleshooting like checking your internet connection or restarting your Roku. Always exercise precautions to make sure a smooth and secure activation process.

Conclusion

That’s all, folks! You’re now fully equipped to enable TVOne on your device of choice.

Remember, Rome wasn’t built in a day, so take your time and follow these steps carefully.

With a little patience, you’ll be binging your favorite shows in no time.

If you hit a snag, don’t forget TVOne’s robust support and assistance.

Happy viewing!

How to Activate FreeForm on Your Streaming Devices: 2024

0

Imagine a world where your favorite movies and TV shows are unlocked up, and you’re the only one who can set them free. With Freeform, that’s exactly what you get—a veritable key to your entertainment desires.

How to Activate FreeForm on Your Streaming Devices: 2024

But how does one unshackle such a treasure? You can start by activating Freeform on your device. Intrigued? Brace yourself as we guide you through the steps to unshackle your boundless amusement.

Understanding Freeform Activation Steps

So, how do you activate Freeform on your device? It’s important to understand the steps to guarantee a smooth user experience.

First, add the Freeform channel to your device. Next, sign in using your account details. You’ll receive an activation code – note it down. Visit freeform.com/activate on a web browser, enter the code, and voila! Freeform is activated.

However, the process isn’t always glitch-free. Activation troubleshooting may be required. If you encounter issues, try restarting your device or checking your internet connection. Incorrect code entry is a common problem, so always double-check. If problems persist, don’t hesitate to seek support from Freeform’s help center.

Also Read – How to Activate CBS on Your Streaming Devices

Activation Process for Various Devices

While understanding the general steps for activating Freeform is important, knowing the specific process for your device can streamline your experience. Whether you’re using Roku, Firestick, Apple TV, or a smart TV like TCL or Hisense, the activation process involves downloading the Freeform app, signing in, and entering the activation code provided at freeform.com/activate.

However, troubleshooting network issues may arise during this process. In such cases, simple steps like restarting your device and router or clearing cache and cookies can often rectify the problem.

For added safety, setting up parental controls is also a part of the activation process. This allows you to manage and restrict the content available, offering a personalized and worry-free viewing experience.

Freeform Compatibility and Device Support

Before diving into the activation process, it’s essential to confirm that your device is compatible with the Freeform channel and updated to the latest software version. Device compatibility and software updates are critical for a smooth activation and viewing experience.

Here’s a simple table featuring some compatible devices and their necessary software versions:

DeviceRequired Software Version
Roku9.1.0 and later
FirestickFire OS 5 and later
Apple TVtvOS 11 and later
TCL Smart TVAndroid 8.0 and later
Hisense TVVidaa 2.0 and later

For other devices, or more detailed requirements, it’s best to visit the official Freeform website or contact Freeform’s customer support.

Also Read – How to Activate SoundCloud on Your Streaming Devices

Keeping Devices Updated for Freeform

Maintaining your devices with the latest software updates isn’t only important for compatibility with Freeform, but it also guarantees a seamless viewing experience. Device maintenance is critical, so here are three steps to make sure your device’s software is up-to-date:

  1. Regularly check for updates: Most devices automatically notify you of available updates. If not, manually check in the device settings.
  2. Install updates: Once an update is available, install it promptly. Delaying software updates can jeopardize your Freeform experience.
  3. Reboot your device: After installing updates, reboot your device to make sure the new software is properly integrated.

Exploring Benefits of Freeform Channel

Exploring the benefits of the Freeform channel, you’ll find a broad range of varied content that caters to various preferences and tastes. The channel bridges the gap between viewers and producers, offering exclusive content access to popular series and films.

Beyond providing entertainment, Freeform also focuses on improved user engagement. They’ve integrated interactive features like live chats, polls, and quizzes during shows, keeping you engaged and connected with other viewers.

Additionally, Freeform’s personalized recommendations and watchlists enrich your viewing experience, tailoring content to your unique preferences. The channel’s commitment to varied, engaging content and user-centric features position it as a leading choice for viewers seeking a comprehensive and interactive entertainment platform.

Also Read – How to Activate Beachbody On Demand (BODi)

Genres Available on Freeform

While acknowledging the interactive features and personalized recommendations that Freeform provides, it’s also important to highlight the variety of genres available on the platform. You’ll discover a vast array of popular categories at your fingertips.

  1. Thriller: Freeform is recognized for its broad range of thrilling shows, spanning from adolescent thrillers to tension-filled suspense series. These shows are crafted to keep you at the edge of your seat, enhancing viewer engagement.
  2. Humor: If you’re seeking a good chuckle, the humor category on Freeform won’t let you down. With sitcoms and comedy-dramas, there’s something for everyone.
  3. Love: Romance tales are timeless, and Freeform provides a collection of romantic dramas and comedies that pull at your heartstrings.

In short, Freeform’s diverse genre selections cater to a variety of preferences, ensuring a dynamic viewing experience.

Troubleshooting Common Activation Issues

Exploring the labyrinth of activation issues can be frustrating, but don’t worry, there are several steps you can take to troubleshoot common problems.

The most common issues revolve around network connectivity and code entry errors. If you’re experiencing delays or failures in activation, it might be due to poor or interrupted network connectivity. Check your internet connection and make sure it’s stable.

On the other hand, code entry errors occur when you input the wrong activation code or make typographical errors. Make sure you’re entering the code as displayed on your TV screen, paying close attention to similar-looking characters.

If you’ve tried these steps and are still facing issues, it may be time to seek professional help.

Solutions for Activation Errors

When faced with activation errors on Freeform, there’s a series of steps you can take to troubleshoot and resolve these issues.

  1. Network Troubleshooting: Start by checking your internet connection. Are you connected to a stable network? If not, reset your router or try connecting to a different network.
  2. Code Entry Errors: When entering your activation code, make sure you’re doing so accurately. Miskeying even a single digit can result in activation errors.
  3. Device Restart: If the above solutions don’t work, try restarting your device. Sometimes, a simple reboot can clear temporary issues causing these errors.

Also Read – How to Activate Your Destiny MasterCard Online

Additional Features of Freeform Channel

Beyond its varied content, Freeform’s distinct features significantly enrich your viewing experience, offering interactive elements such as polls, quizzes, and live chats during shows. These features foster user engagement, making you a part of the story rather than just a passive observer.

Additionally, you’ll find app customization options that allow you to tailor your viewing experience to your liking. You can create a personalized watchlist, adjust viewing settings, and set up parental controls, among other things.

Here’s a quick look at these features:

FeatureDescription
Interactive ElementsPolls, quizzes, and live chats during shows boost user engagement.
App CustomizationPersonalize your viewing experience with adjustable settings.
Parental ControlsSet viewing restrictions for family-friendly viewing.
Personalized WatchlistCreate a list of your favorite shows for easy access.

Premium Content Access on Freeform

In addition to its standard offerings, if you’re a subscriber to certain TV providers, you’ll gain access to premium content on Freeform. This premium content selection not only broadens your viewing options but also improves viewer engagement.

  1. Improved Viewer Experience: With the premium content, you can watch exclusive shows, boosting your viewing experience. The interactive features of these shows further encourage engagement.
  2. Exclusive Content: Premium access reveals exclusive shows available only to certain subscribers. These exclusive offerings cater to a variety of interests and tastes.
  3. Interactive Features: Freeform’s premium service offers interactive features. These include live chats, polls, and quizzes during shows, providing a dynamic and immersive viewer experience.

Take advantage of these features and enjoy the full extent of Freeform’s offerings.

Conclusion

In wrapping up, activating Freeform on your device opens up a world of high-quality entertainment. Surprisingly, around 92% of users claim a smoother streaming experience post activation.

So, tackle any activation issues head-on with our guide, and explore the interactive and personalized content that Freeform offers.

Remember, keeping your device updated guarantees a seamless Freeform experience. Now, sit back and enjoy your entertainment journey with Freeform!

How to Add, Activate, and Watch Bally Sports on Roku: 2024

0

How To Add, Activate, And Watch Bally Sports On Roku

You have reached the right destination if you have any queries regarding How to Add, Activate, and Watch Bally Sports on Roku. This detailed guide will equip you with all the information you need.

Are you a sports fanatic and a Roku user? Bally Sports is something totally up your alley and we are here to guide you through all of it.

Bally Sports on Roku provides an immersive sports viewing platform with 20+ leagues, live scorecards, interviews and much more. You can easily download it on your Roku device through the Search Channel option. Use or generate an activation code in order to activate it on their official website and you will be all done!

We have explained the platform, its advantages, and how to set it up and activate it, all below! And that’s not the end of it, we have also covered the common problems you may face and how to fix them in the last section. Continue reading to figure out Bally Sports on Roku devices all on yourself so you enter this platform with all the information you need.

If you try every single one of these methods in chronological order, I am pretty sure, one of them will work for you.

Recommended Reading – Vizio TV Flickering (or Flickering Black Screen) – Easy Fix!

What is Bally Sports on Roku

What Is Bally Sports On Roku

Bally Sports is a platform that allows its users to get an enriching sports viewing experience. It includes a wide range of sports which include but are not limited to NBA, NHL, MLB, WNBA and even NFL.

These leagues come from more than twelve regions. And that’s not even the whole of it! You also gain access to scorecards that are updated live along with analysis, interviews and so much more. Continue reading to discover the easy ballysports.com/activate Roku way!
Recommended Reading – How to Connect Bluetooth Speaker to Roku TV: (EASY!)

Bally Sports Activate on Roku: Requirements

Requirements

The good news is that this platform is highly compatible with Roku. It can be easily downloaded and activated through ballysports.com/activate on Roku devices of many kinds.

There is just one criteria that you need to fulfill and it is a really easy one. You just need to have a 9.0 or above firmware on your Roku device and then you are good to go!

Continue reading to find out what all you can find on Bally Sports and further to understand how to activate it. What is the ballysports.com activate Roku process exactly? Just wait, find out the perks of the platform before we get to that, in just a second!

Recommended Reading – Why Is My Roku Tv So Slow: (Don’t Panic, Easy Fix in!)

Bally Sports on Roku: Perks

Perks

This section details the features you will get when you are through the activation process. Take a look for yourself:

  1. Using Bally Sports on Roku allows you to watch highlights of your favourite games.
  2. You can watch games live on the app on your TV as well!
  3. You can stream together on two different devices.
  4. It is not just about games, you can also get on-demand stuff like original shows which diversifies the content.
  5. You can easily get real-time updates on players, matches and teams on the same app!

Don’t these features sound super appealing? After setting up everything on the ballysports.com/activate Roku link, you can easily use the platform through your TV provider or even their subscription plan, namely Bally Sports Plus.

You can get this subscription easily through their official website. The good news is that it is not very expensive either. As of now, the rate per month for the membership is 19.99 dollars only!
Recommended Reading – Vizio HDMI Not Working: (Here’s Why & How to STOP It!)

Set It Up Yourself: ballysports.com Activate Roku

Activate Roku

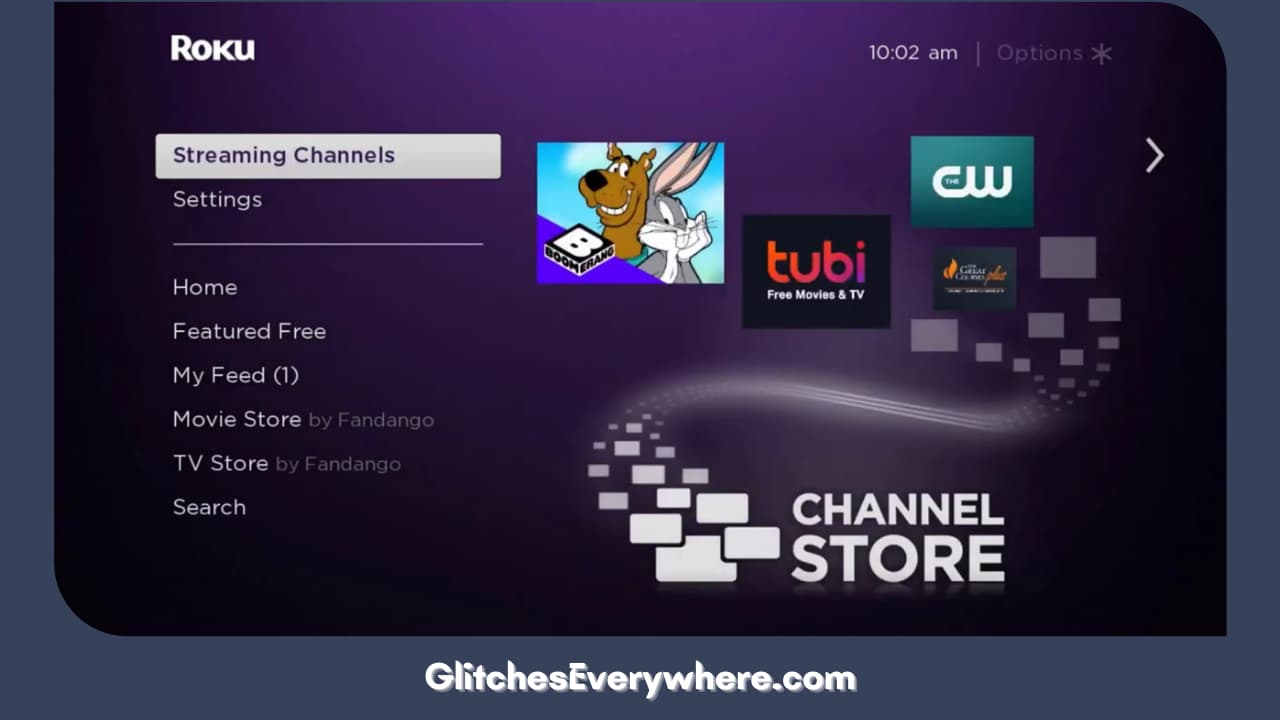
Lastly, before we can talk about ballysports.com/activate on Roku, let us first set it up. It is a quick and easy process and we have explained it in detail below. Consider it the first step! Use the given steps chronologically: 
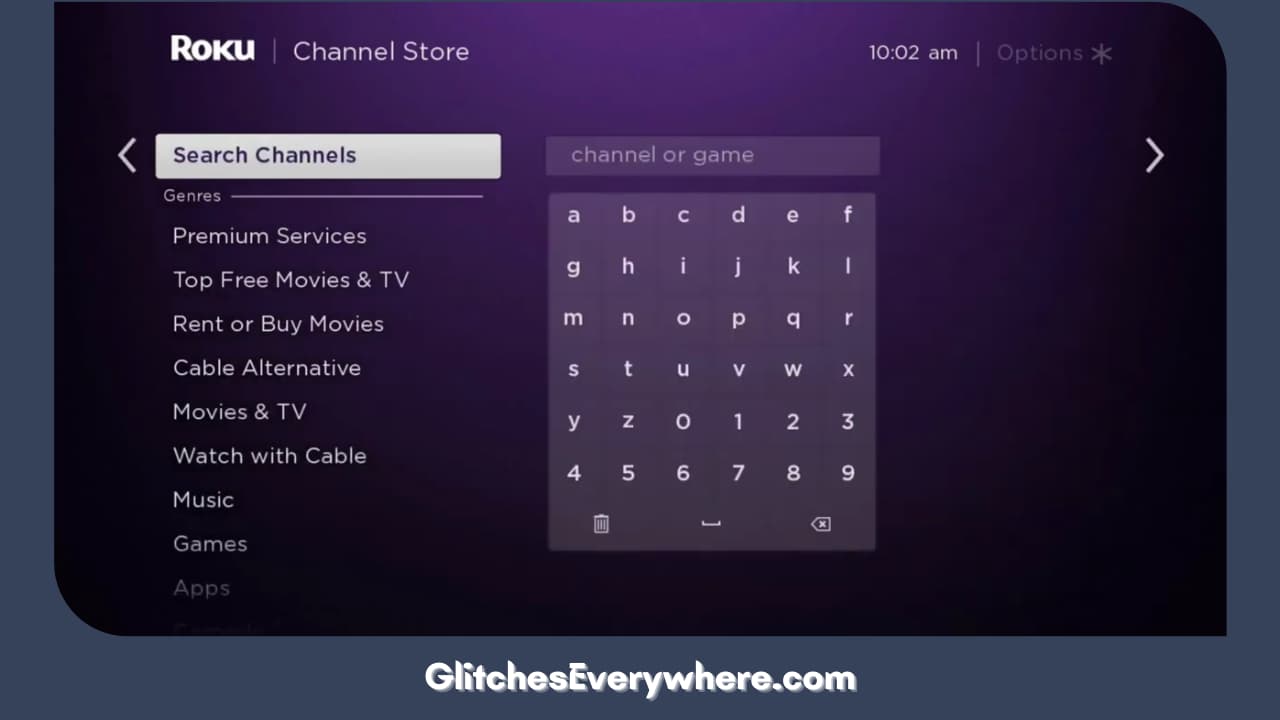
1. The first step is to switch on your Roku device and then connect to the internet. Make sure that the connection is strong and stable.

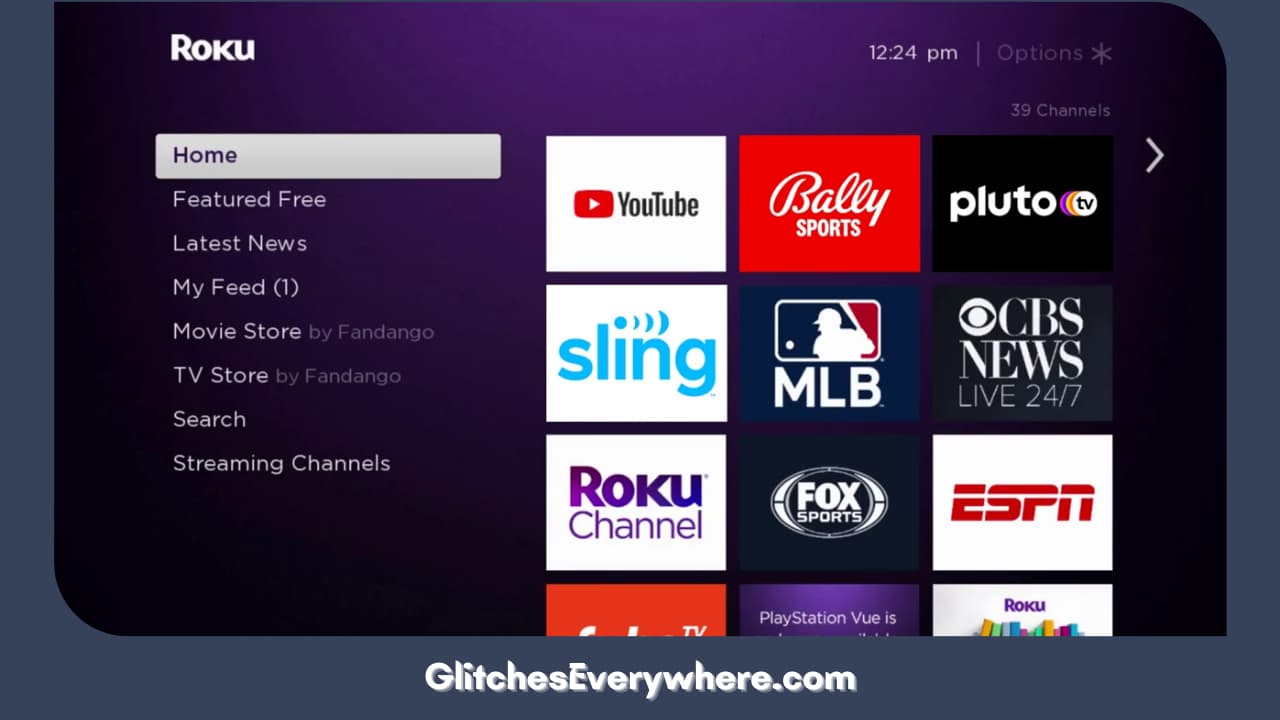
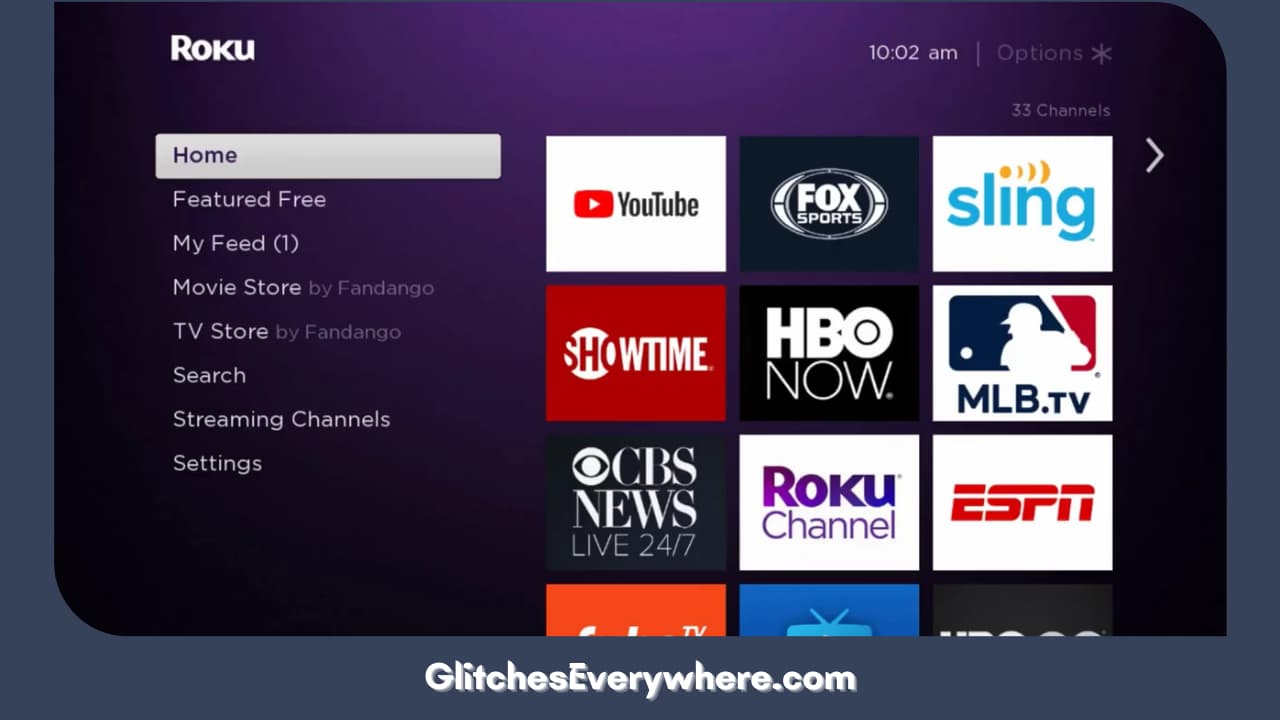
2. Now, press the Home button or go to the Home screen.

Press The Home Button Or Go To The Home Screen

3. Locate and select the Streaming Channels option.

Locate And Select The Streaming Channels Option

4. Further, find the Search Channels option. You will easily find it on the menu.

Further, Find The Search Channels Option

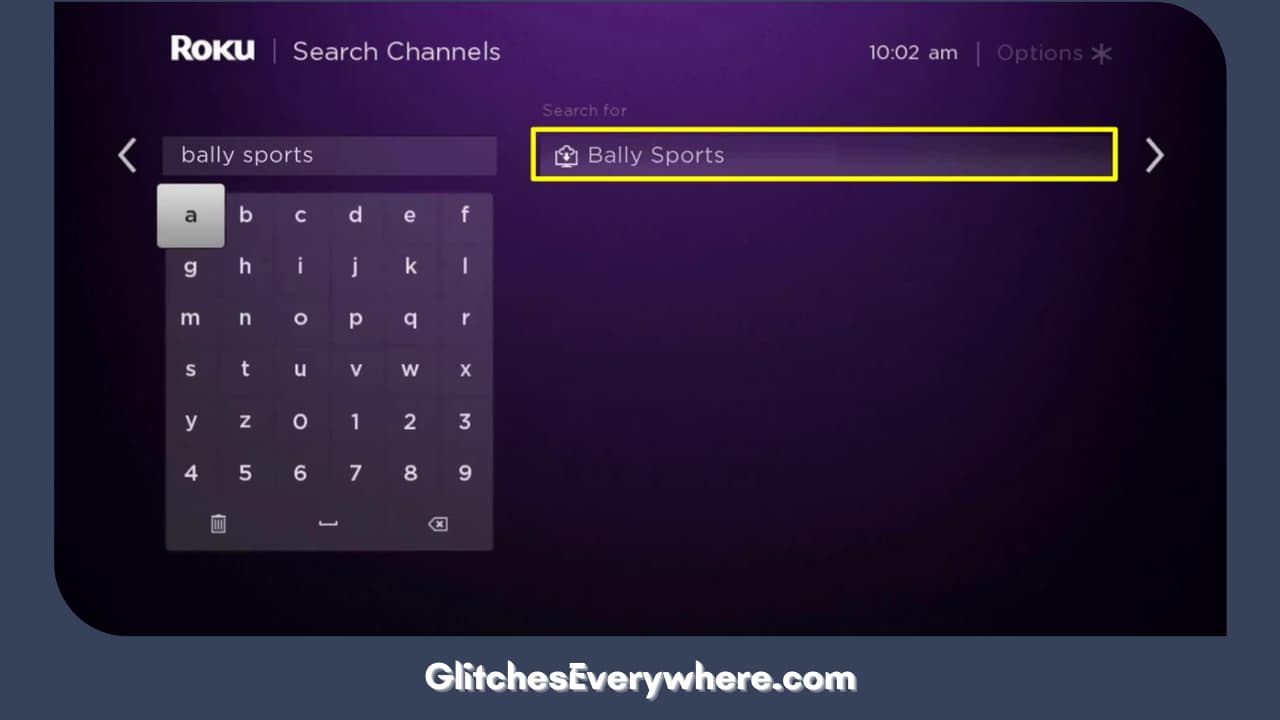
5. Using the on-screen keyboard, type in Bally Sports and prompt a search.

6. Choose the Bally Sports channel from the results.

Choose The Bally Sports Channel From The Results

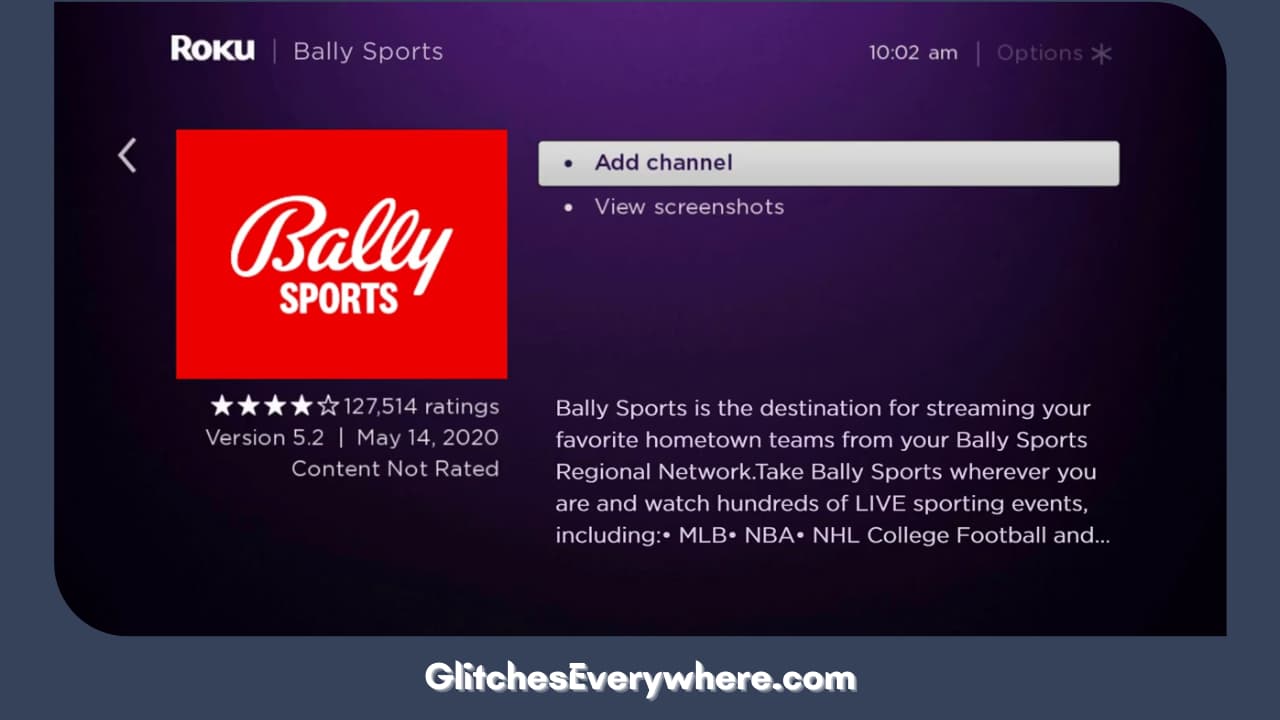
7. Once at the channel info page, locate and select Add Channel.

Once At The Channel Info Page, Locate And Select Add Channel

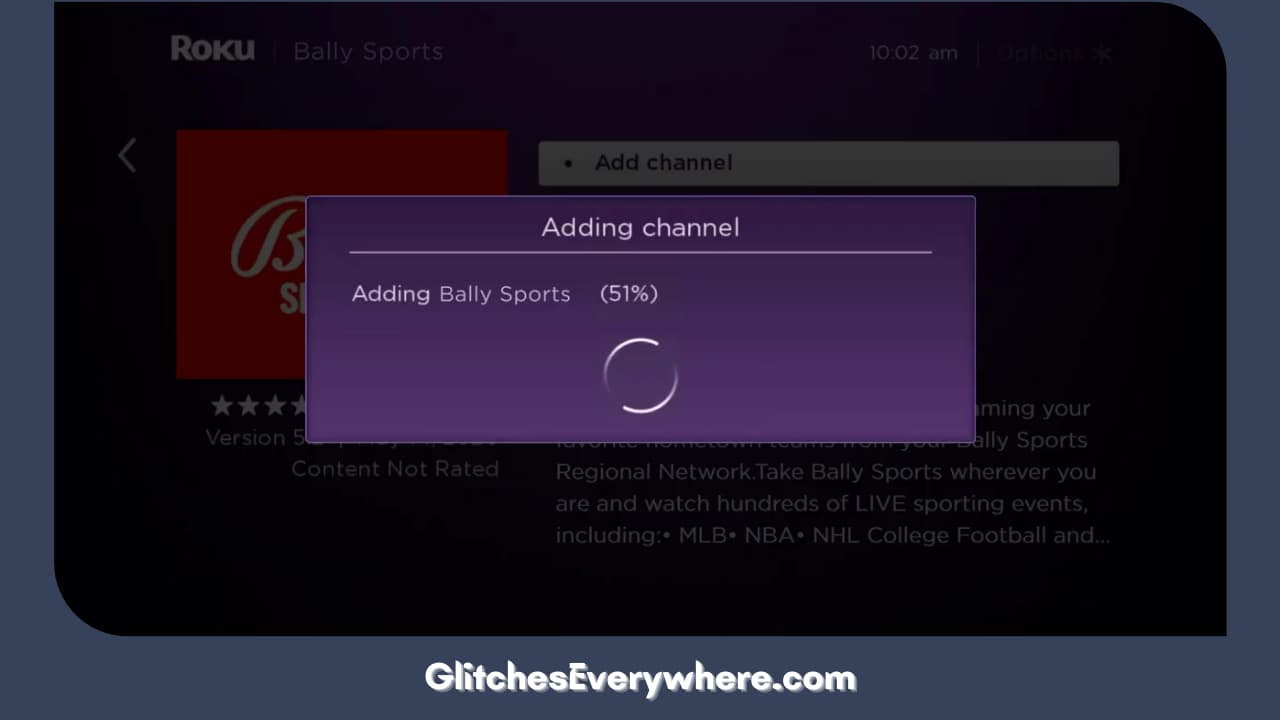
8. Let the channel be added, it might take a little time.

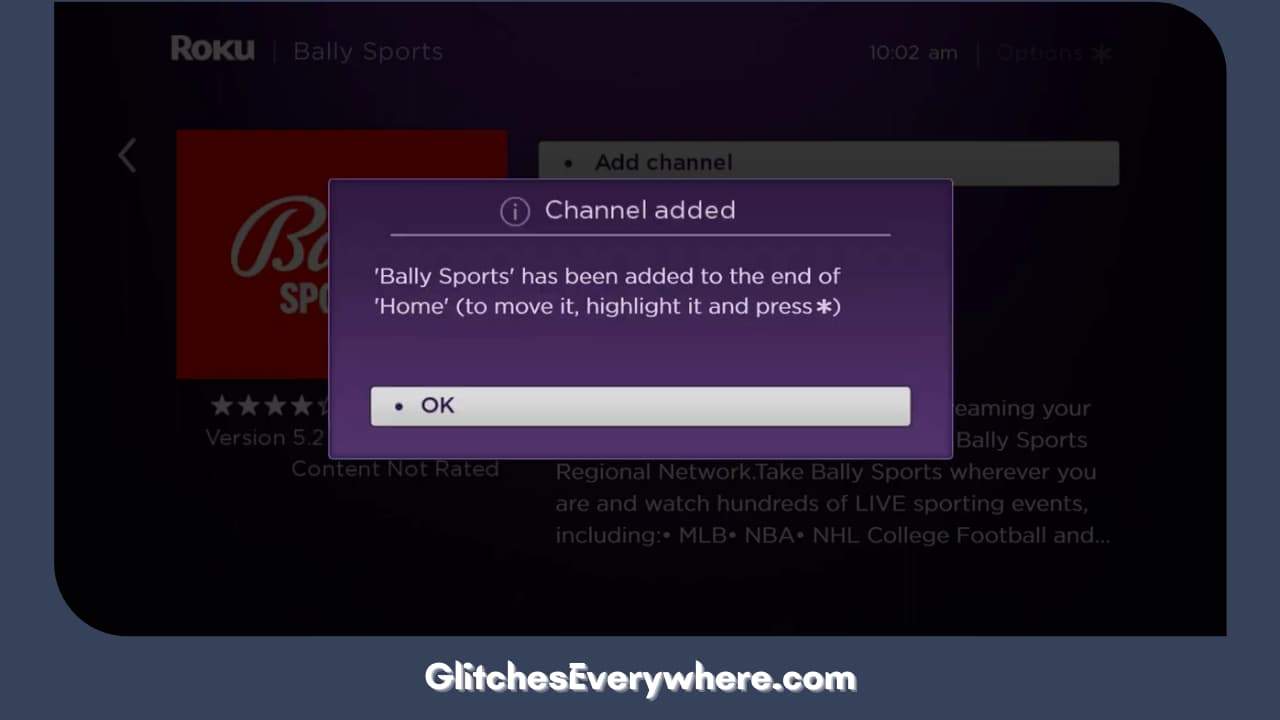
Let The Channel Be Added, It Might Take A Little Time

9. Once added, select OK on the displayed prompt.

Once Added, Select Ok On The Displayed Prompt

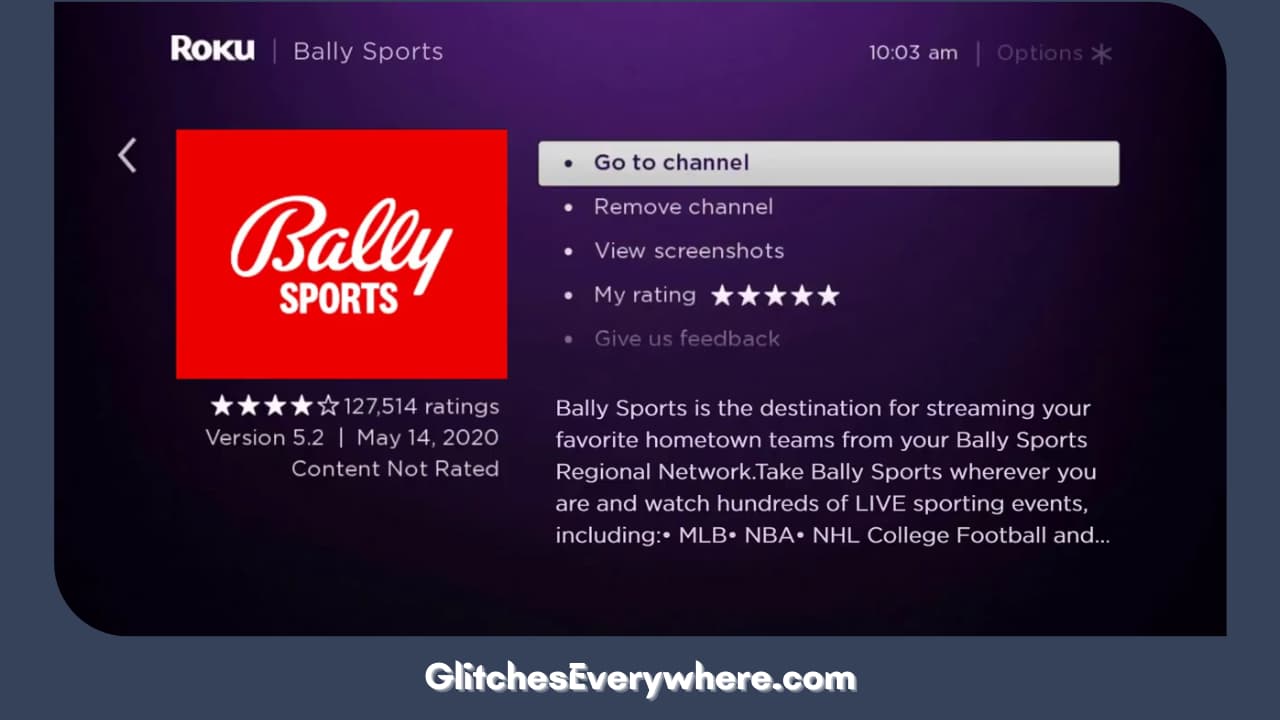
10. Lastly, find and select the option to Go to the Channel.

Lastly, Find And Select The Option To Go To The Channel

11. Finally, open the Bally Sports Channel on your Roku device.

In the previous section, we talked about Bally Sports Plus, i.e. a subscription plan for the same platform. It is important to note that there is not a separate app for it and you can easily find the content on your regular app for Bally Sports on Roku.

Time to go to ballysports.com to activate the Roku process, continue reading!

Recommended Reading – Why Does My Vizio TV Keep Turning Off? (Try This Fix First!)

Ballysports Activate on Roku

Simply installing the Bally Sports on Roku is not enough. You have to go down the ballysports.com/activate Roku route to finish the process completely. This is how you can easily ballysports.com activate Roku today itself:

1. Press the Home button of your Roku remote to prompt open the Home screen.

Press The Home Button Or Go To The Home Screen

2. Locate and then open the Bally Sports on Roku.

Locate And Then Open The Bally Sports On Roku

3. Once opened, find an activation code. If you are unable to find it, click on the Login button. This is going to generate the needed activation code.

4. Next, open your choice of browser on your laptop, PC or smartphone.

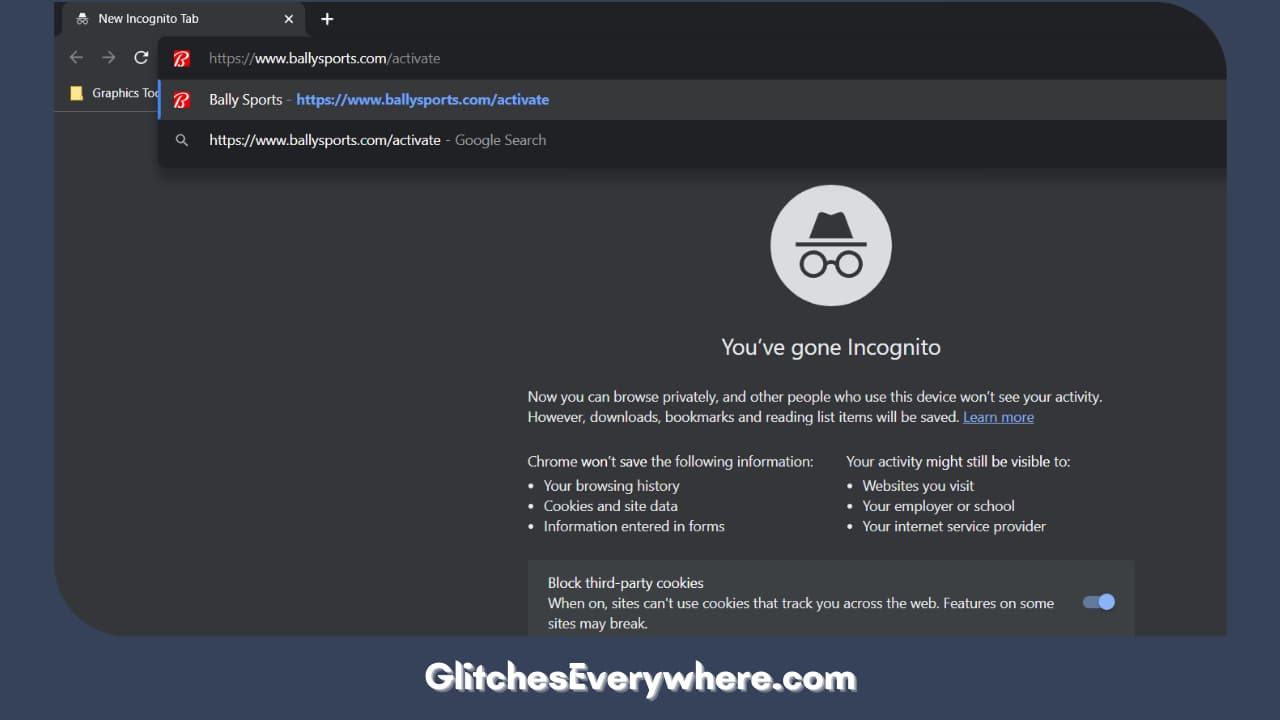
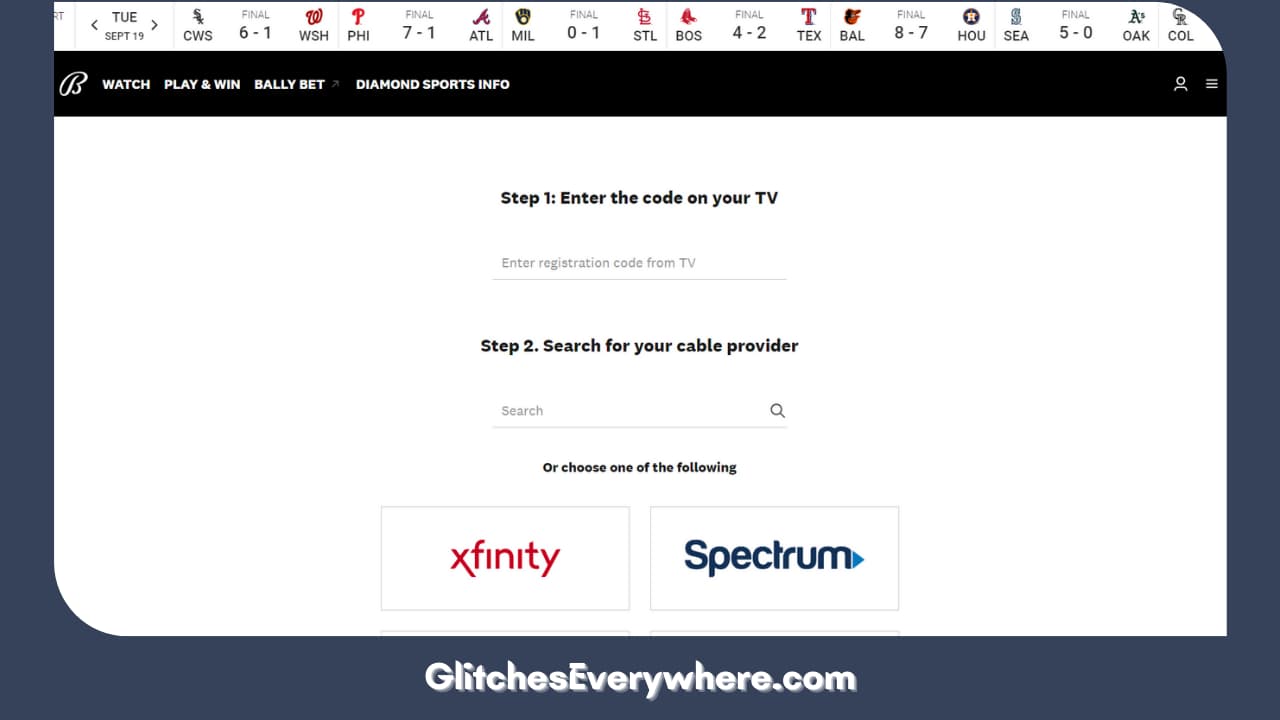
5. Go to the official website of Bally Sports. Use the given link: www.ballysports.com/activate

Go To The Official Website Of Bally Sports

6. Find the activation code on your screen and enter it as needed.

Find The Activation Code On Your Screen And Enter It As Needed

7. Then, choose your cable TV provider.

8. Enter the details as necessary next. Finally, select the option to log in.

9. Once you get the prompt that you are successfully logged in, that should be it. Your Bally Sports on Roku should be activated now. Simply, go to the app on your Roku device and begin streaming!

Wasn’t the ‘ballysports activate on Roku’ process so easy? So, what are you waiting for? Get it done and set it all up right away!
Recommended Reading – How to Download Apps on Vizio Smart TV? (EASY!)

Fix Bally Sports on Roku: Streaming Issues

Streaming Issues

That is not the end, there are some things you should keep in mind. Here are some troubleshooting tips you should take note of as you give into the ballysports.com/activate on Roku route for yourself. 

They are common reasons why Bally Sports on Roku faces trouble along with how to fix it. They are as follows :

Poor Internet Connection

Poor Internet Connection

It is common knowledge that Roku requires a strong and stable internet connection in order to run smoothly. If not, it runs into its fair share of problems. So, make sure your connection with your internet is strong and stable. This stands true for the process as well as after it. 

If you are looking to fix it, try resetting your router or directly contacting your internet service provider. Another common reason why you might be facing an issue could be because too many devices are connected to the same Wi-Fi source. Try another strong internet connection to see if it helps.

  1. Does your Bally Sports on Roku get stuck on the logo screen whenever you try to open it? Could be a result of a software bug or some minor inner technical issue. In order to fix it, restart the app.
  2. For other similar bugs, you can try removing the Bally Sports app on Roku and then installing it once again.
  3. If it is freezing a lot, an easy attempt to fix it would be to reboot Roku itself.
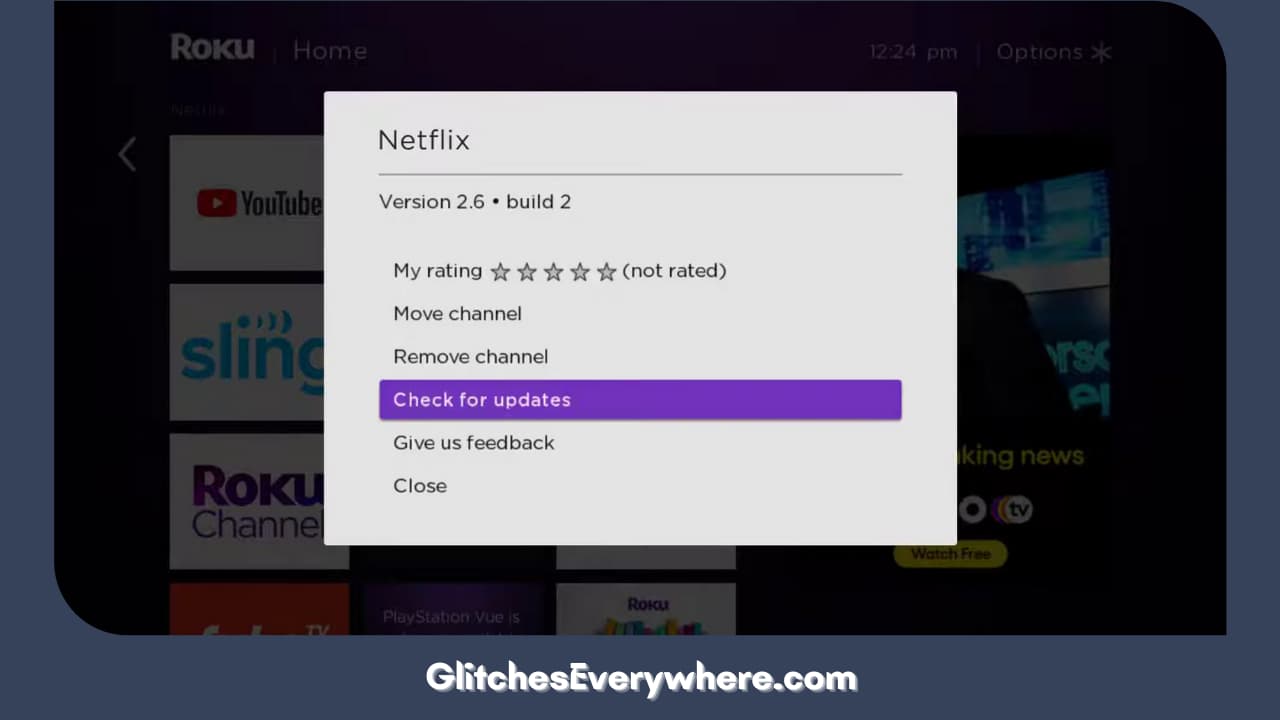
  4. Bally Sports, like other platforms, comes up with system updates every now and then as they improve their software in terms of convenience and performance. If you are not up to date with these updates, they can cause issues with performance. So check for any pending updates of your Bally Sports on Roku and finish them up.
  5. The above concept holds true for Roku itself. Check if your Roku TV has any firmware software updates left to be downloaded and finish them as well.

Keep these tips in mind. Finish up the ballysports.com/activate Roku process and begin streaming your favourite sports events in the best way possible!

Recommended Reading – Roku TV Won’t Turn On (60 Second Fix)

Wrapping Up

Why should you not have it all? Another app on your Roku that particularly targets your sports interest and it does it so well.

It’s easy to install and activate with its features that are every fan’s perfect aid! Download Bally Sports on Roku today, set it up using our guide and watch your games with style!


Apple TV No Sound: Fix in Seconds 2024

0

Apple Tv No Sound

You have reached the right destination if you have any queries regarding Apple TV No Sound. This detailed guide will equip you with all the information you need.

Do you also suffer from the issue of your Apple TV playing no sound suddenly? Does the Apple TV not supporting audio in the middle of your favourite show irritate you too? Don’t worry; we are all victims of it! That’s why I’ve taken this step to put this process up in the form of an article.

This article will lead you to the ultimate easy-going solution to the Apple TV not playing sound issue. This might result from the audio settings of the video, but it majorly results from the audio settings/hardware issues of the Apple TV.

But these will not trouble you or me anymore! Though the Apple TV streaming service has made watching any of your favourite shows much more convenient without interruption, it also has the above-mentioned drawbacks. For this, we first need to dig deep into its various reasons and possible solutions. The process/steps are apparent and do not require you to be tech-savvy.

While restarting your Apple TV and checking for the audio devices and their settings are some standard troubleshooting issues, you might require digging deep if the issue continues. Now there are various problems and separate solutions for them. These issues are discussed in detail below.

Recommended Reading – Why is Roku Remote Volume Not Working: Fix in Seconds

Using the TunesKit iOS System Recovery

This TunesKit iOS System Recovery tool helps recover the tvOS and repair system issues efficiently. The most beneficial part is that it does not cause any data loss! Below are the steps for its implementation:

  • Download and install the TunesKit System on your computer.
  • Connect your laptop and Apple TV using a USB-C cable.
  • Launch TunesKit and select the ‘Audio Repair’ tab.
  • Click the ‘Add’ button and select the audio file with the ‘no sound’ issue on your Apple TV.
  • Click on the ‘Repair’ button, and it will start doing the magic to fix your no-sound issue.
  • Wait for the repair process to complete. This may take a few minutes, depending on the audio file size.
  • Once the repair process is complete, click the ‘Preview’ button to listen to the repaired audio file and check if the ‘no sound’ issue has been fixed.

Click ‘Save’ to now save the repaired audio file. If the issue still needs to be solved, move to the next problem.

Hard Reset your Apple TV Box

To fix the No Sound on Apple TV by hard resetting it, follow these steps:

  • Your Apple TV should be unplugged from the wall outlet, and its power cord should be disconnected.
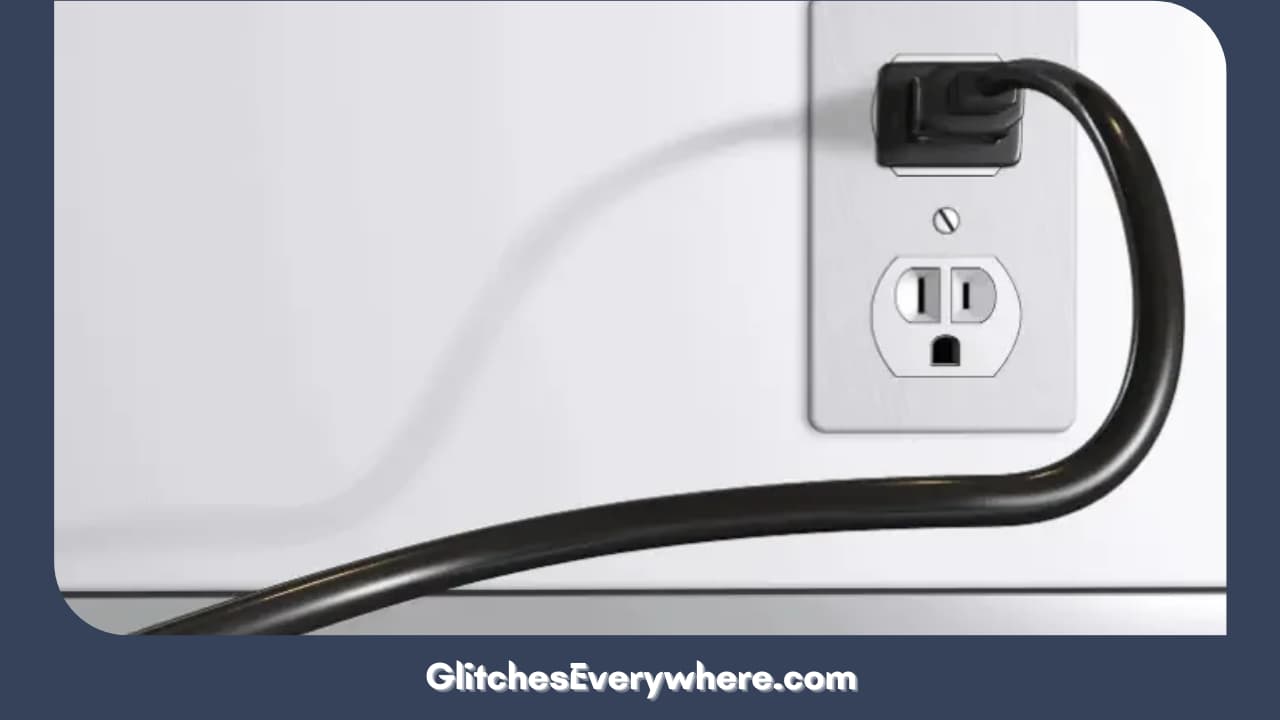
  • After waiting a few minutes, reconnect your Apple TV’s power cord and plug it back into the wall outlet.
  • Wait for your Apple TV to restart, then check if the ‘no sound’ issue has been resolved.

If the issue persists after hard resetting your Apple TV, you may need to try a different method or seek further assistance. If your Apple TV keeps freezing then, It’s worth noting that hard resetting your Apple TV will restore it to its factory settings, so you will need to set it up again and install any apps or content you previously added.

Check your Cable Connections

The cable connection not adequately configured could be why the Apple TV plays no sound. Check if all the cable connections are put well in place. Here is a list of things to take care of:

  • Ensure the TV and other hardware devices are turned on for the current flow.
  • Ensure that your Apple TV and other audio device are connected to the same network, and correct input for both is selected.
  • If still facing the issue, try unplugging and replugging all the cables to confirm they are correctly seated.

These simple mistakes may lead to the Apple TV having no sound issue, and verifying them is an effortless first task. If the issue persists, move to the next possible problem and its solution.

Adjust the Volume of your Apple TV

A simple mistake of muted TV will result in no sound problem. Hence it would be best if you turned it on. The quick steps to do so are here:

  • Find the ‘Settings’ and go to it.
  • ‘Video and Audio’ and then ‘Audio Output’
  • Adjust the volume to a higher level.

Disable Dolby Digital

The no audio on your Apple TV could also result from your TV not picking up enough signals. Turning this Dolby Digital off from your settings will strengthen your TV’s signals. Here are quick steps for the same:

  • Open ‘Settings’ from the Apple TV menu.
  • Go for ‘Video and Audio’ and then ‘Audio Output.’
  • Disable the ‘Digital Dolby’ option.

Similar steps can be followed Apple TV remote volume not working. At times, even this might not be enough. Don’t stop if this doesn’t work; try for the other issues mentioned next.

Change your Audio Settings

Changing the Audio settings of your device might also help you enable the surrounding sound. To fix the no-sound issue on your Apple TV, follow the below-given steps:

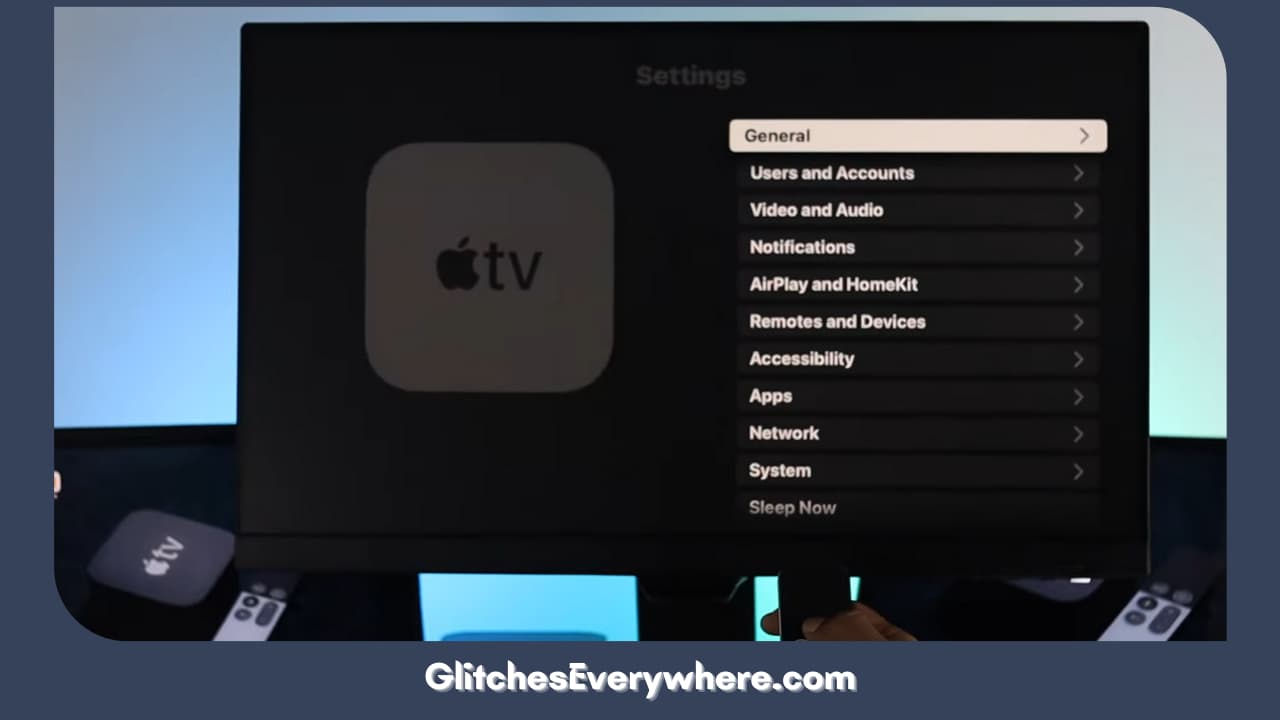
1. Go to ‘Settings’ on your Apple TV.

Go To ‘settings’ On Your Apple Tv.

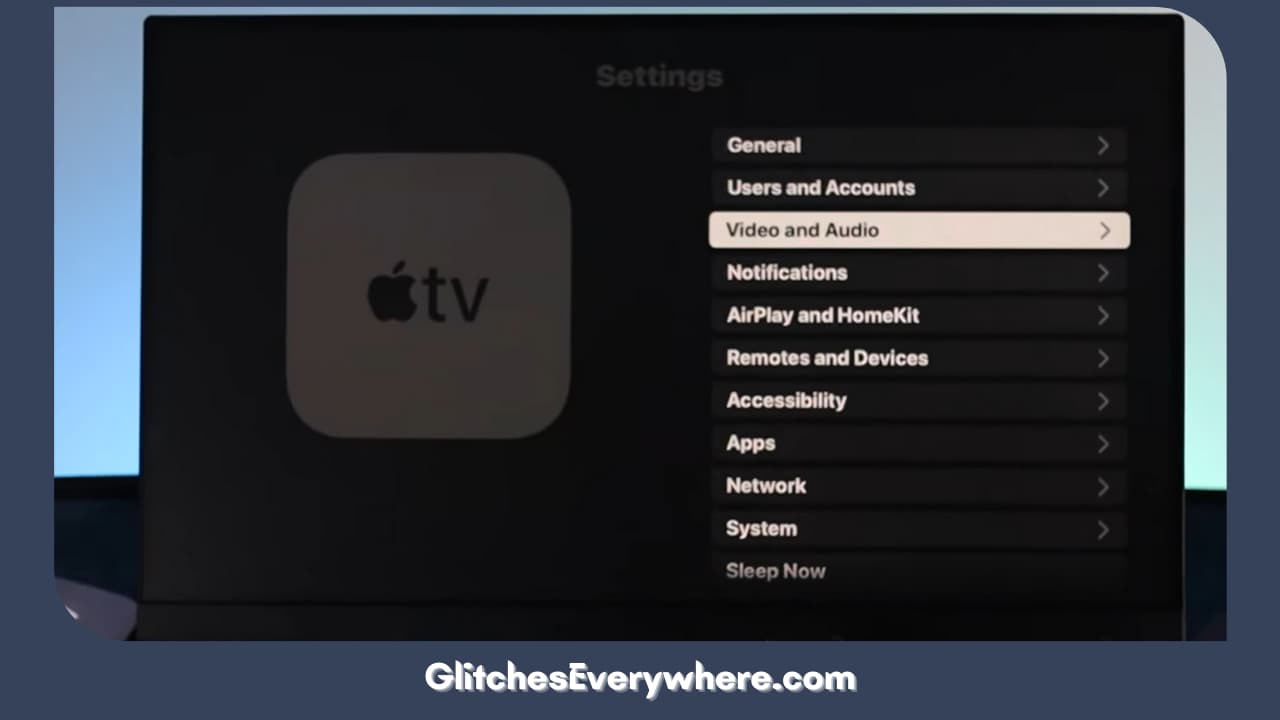
2. Select ‘Video and audio’ and then select ‘Audio Output.’

Select 'video And Audio' And Then Select 'audio Output

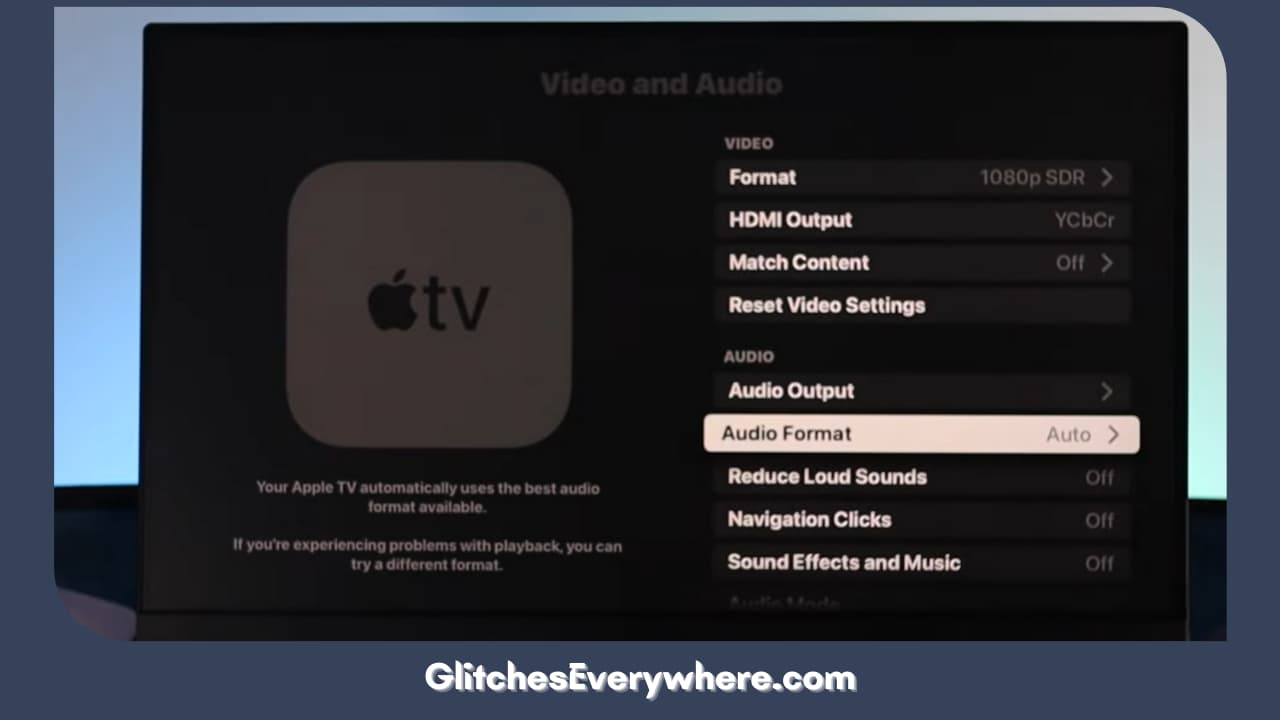
3. Change the ‘Audio Format’ and ‘Audio Output’ settings to different options and check if the ‘no sound’ issue has been resolved.

4. You can also change the ‘Audio Output’ settings to ‘Best Quality Available’ or ‘Stereo’ and check if the issue is resolved.

Set ‘Audio’ mode to Auto

An Apple TV has a lot of settings, and a minor change in the audio modes might also become a reason for the problem of the Apple TV’s no sound. The following should be done to set the ‘Auto Audio’ way:

1. Go to the Settings option

Go To ‘settings’ On Your Apple Tv.

2. Then click on the Audio and Video option.

Select 'video And Audio' And Then Select 'audio Output

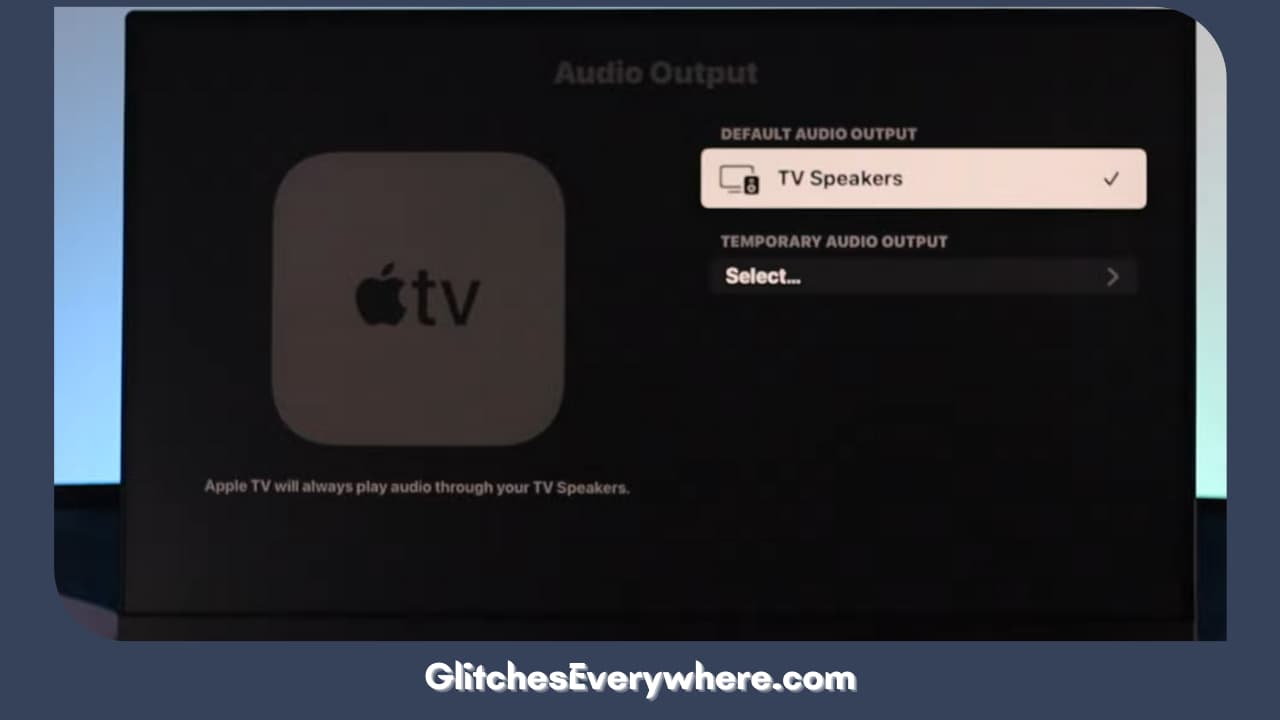
3. Check that the corresponding speakers are selected for audio output.

Check That The Corresponding Speakers Are Selected For Audio Output

4. Lastly, set the Audio mode to Auto.

Lastly, Set The Audio Mode To Auto

Reboot your Apple TV

At times, due to storage issues and the recent installation of a driver, the Apple TV might not produce sound and even become glitchy. The best solution for this is to reboot your device at once. It will refresh all the apps and give your software a clean, fresh start.

Rebooting your device is a straightforward process that needs you to follow the given fundamental steps for better results: However, not related, rebooting your device can is also helpful; in solving Airplay related problems.

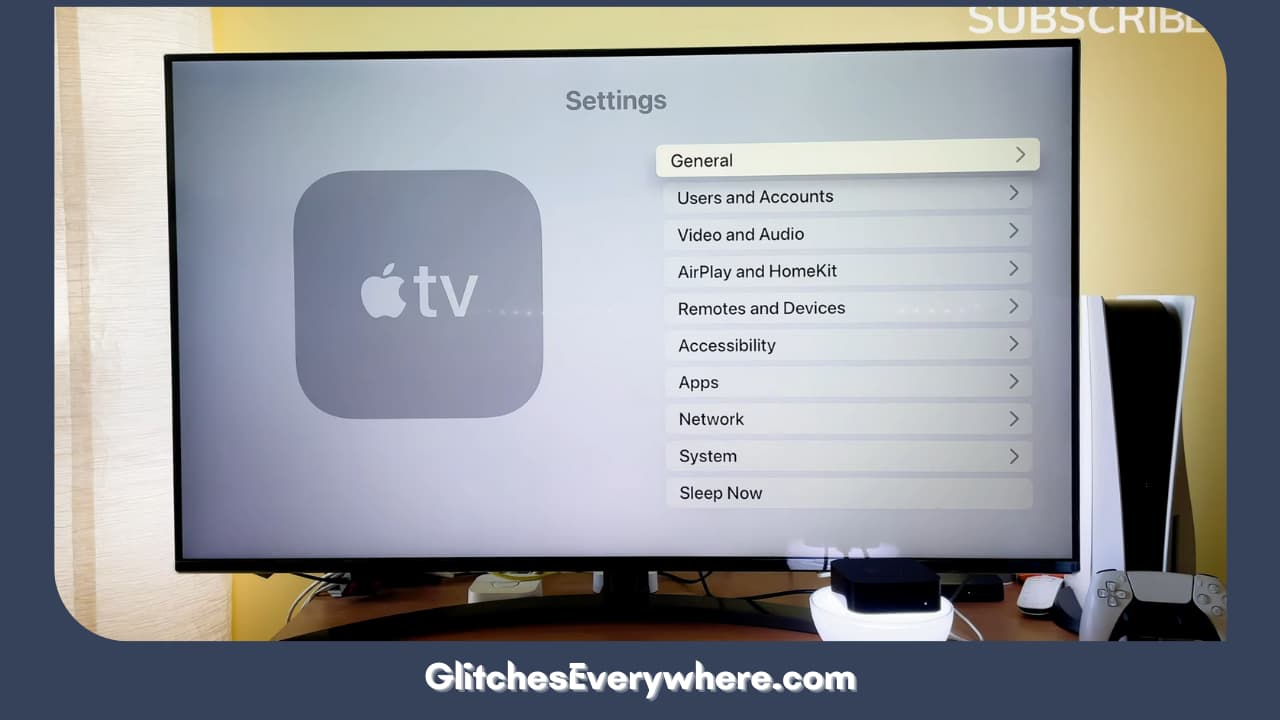
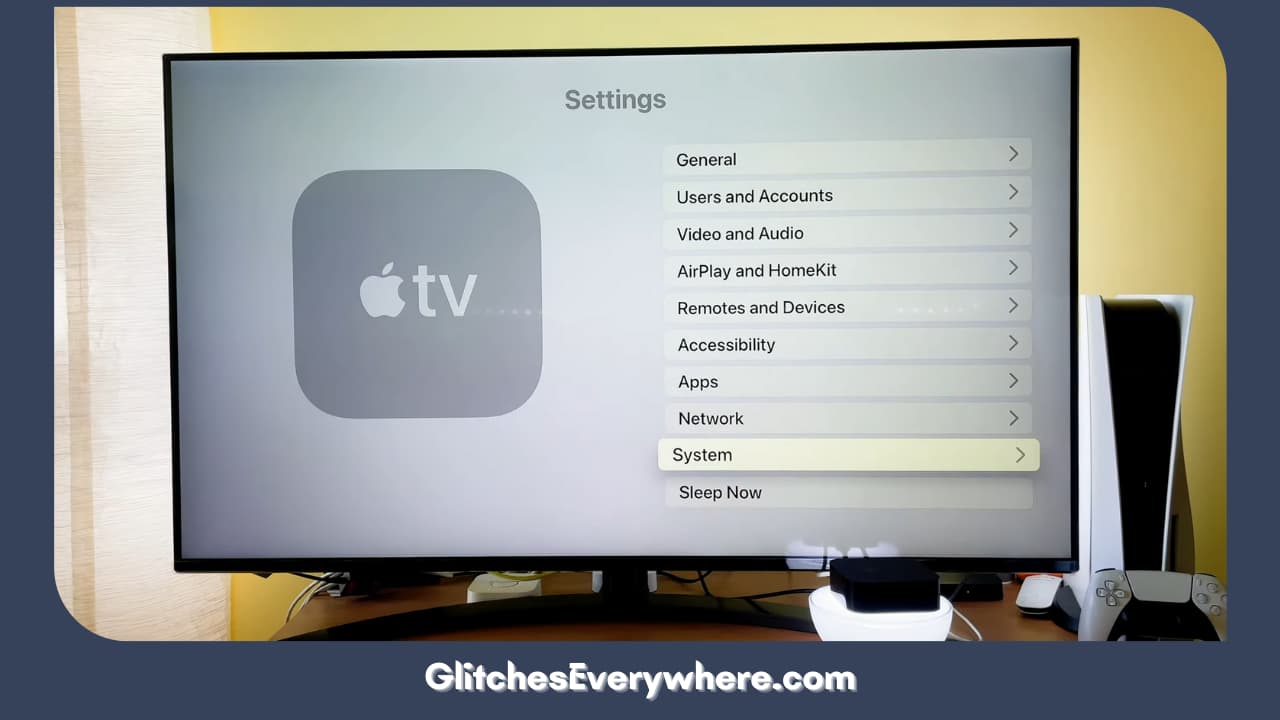
1. Go to settings from the Apple Menu.

Go To Settings From The Apple Menu

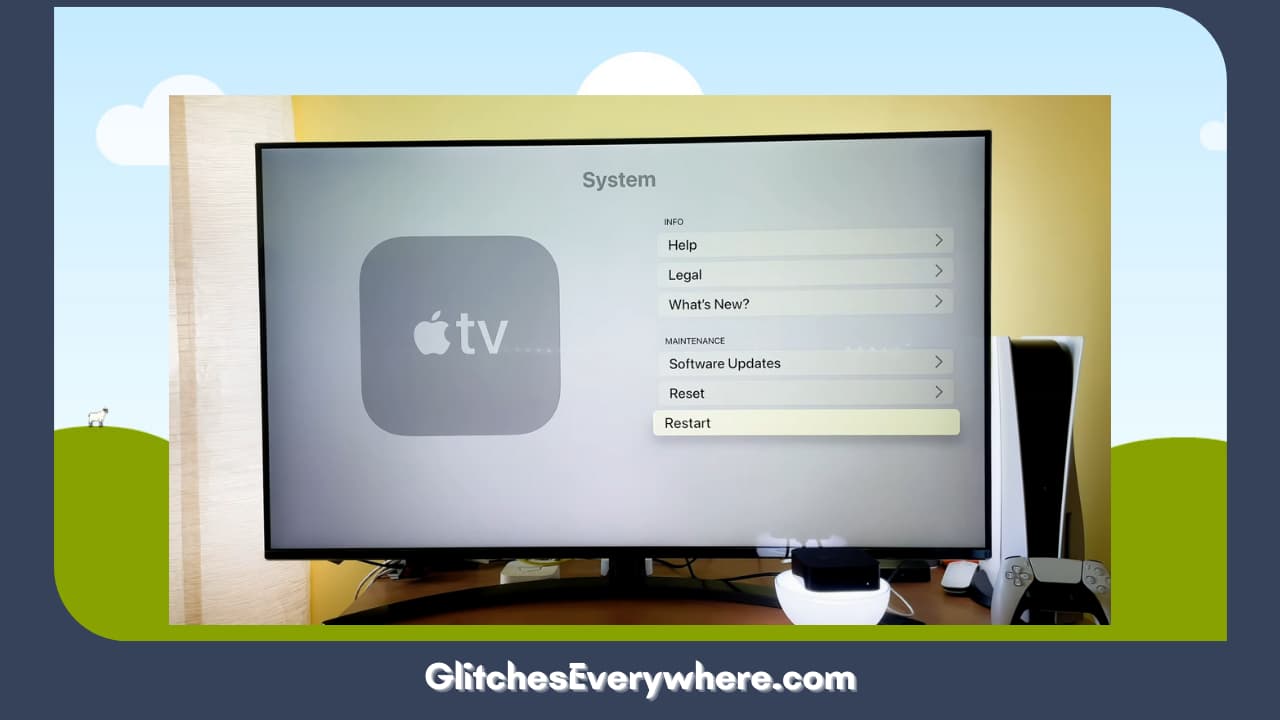
2. Then scroll to the Systems category.


Then Scroll To The Systems Category

3. Lastly, click the Restart button to enable your TV to reboot.

Click The Restart Button To Enable Your Tv To Reboot

Soft Reset your Apple TV Box

Soft Resetting is yet another way to help you with your problem. Do not worry; it will not wipe out the data! Here are the steps:

  • Doing a soft reset for your Apple TV is easy – turn off your device and unplug the power cable from the back of the Apple TV.
  • After unplugging the device, wait a full minute before reconnecting it and continuing to the next step.
  • If you can’t solve the issue by soft resetting your Apple TV, it’s time to try something else.

Do you still need help figuring out the problem with your Apple TV no sound issue? Here is the last step to receive assistance from the device’s help center.

Seek help

If you have tried all the above-given methods and are still facing issues with your Apple TV having no sound, it is recommended that you contact the Apple Support System now.

Chances are there is a hiccup from that bunch of devices that require only the manufacturer’s attention. Likewise, the Apple support team can help you solve any underlying issues. Otherwise, seeking assistance from a technician will also do you good. Any help from these groups is worth pursuing.

Helpful Answers

Helpful Answers

Why does my Apple TV have no sound while streaming?

First, check your TV’s volume level and mute settings. Verify that the Mute is off and the audio level from the grounds is of audible range. If you need help, the article will help you with various issues and their solutions. If it continues, you can always seek help from the Apple Support System.

How do I unmute my Apple TV?

Go the Settings from the Apple Menu bar, and look for the mute button from the audio options. Clicking it once will mute your device, and connecting it twice will unmute it. Not all audio setups support this button. You should use the volume controls on the remote that came with your TV.

Why is there no sound on my Apple TV Trailers?

The Apple app allows you to turn the sound on or off for the background videos, previews, or trailers that Auto plays anywhere on the Apple TV. This setting only applies to the device you’re currently using. navigate to Settings. Go to Auto Play Video Sound, then turn it on or off.

What causes the TV to have no sound?

Loose connectivity is one of the prevalent reasons for a device having sound issues. To fix this, disconnect your TV’s HDMI cable and check for any obvious signs of damage. Reconnect the HDMI cable and check whether the problem has been resolved and if everything appears in order.

What if I still have issues after trying all the solutions?

If your device still faces issues with the audio after trying all the solutions, your next step should be to reach out to the Apple Support System immediately.

They will further guide you and will recommend you if you need a new device or not. You can also refer to any documentation you received with the device or consult any professional.

Recommended Reading – How to Sync Roku Remote without Pairing Button: FIXED

Wrapping Up

All Apple TV users must be aware of this not-uncommon problem of no audio and the various reasons behind it. If you were unaware of the same, you absolutely do not need expert guidance or consultation and can solve the issue yourselves! This article proved worthy enough for the time you invested!

How to Activate PS Vue on Your Roku Device: 2024

0

To activate PS Vue on your Roku device, log into your Roku account first. Navigate to the Roku Channel Store using the ‘home’ button on your remote. From there, use the search function to find PlayStation Vue and click on ‘Add Channel’. Now, you can retrieve your unique activation code by opening the PlayStation Vue app.

How To Activate Ps Vue On Your Roku Device

Finally, visit www.psvue.com/activate, enter the code as directed, follow the ensuing prompts, and settle any required subscription charges. Should you experience any hitches, the problem might be as simple as a poor internet connection or regional restrictions on availability. Exploring further, you’ll figure out even more troubleshooting strategies and solutions.

Key Takeaways

  • Download the PlayStation Vue app from the Roku Channel Store and add it to your device.
  • Open the PlayStation Vue app on your Roku device to retrieve an activation code.
  • Visit www.psvue.com/activate on a separate device like a computer or smartphone.
  • Input the activation code you obtained from the PlayStation Vue app on your Roku device.
  • Follow the on-screen prompts to confirm your subscription and pay the required charges.

Also Read – How to Activate Willow TV on on Smart Devices

Downloading PlayStation Vue on Roku

To download the PlayStation Vue on your Roku device, first, log into your Roku account. Next, navigate to the Roku Channel Store by pressing the ‘home’ button on your remote. Once there, use the search function to find the PlayStation Vue app. Remember, proper spelling matters for a successful search. After locating the app, click on ‘Add Channel’ to download it.

During this download process, you may encounter some troubleshooting issues. Don’t worry, they’re usually easy to solve. A slow or unresponsive download might mean you need to check your internet connection. If the app doesn’t appear in the search results, make sure you’re in the correct region since availability may vary.

Once you’ve successfully downloaded the PlayStation Vue app on your Roku device, it’s time to activate it for viewing your favorite channels. Start the setting up by pressing the home button on your Roku remote. From the Menu, navigate to ‘Streaming Channels’ and look for the PlayStation Vue channel. Add this to your Roku device.

Next, open the PlayStation Vue app to retrieve an activation code. Visit www.psvue.com/activate and input this code. Follow the prompts and pay the channel subscription charges. You’ll receive a success message indicating the completion of the activation process.

This guide simplifies the process, but if you encounter issues, don’t panic. There are troubleshooting tips available to help you resolve any hindrances. Now, you’re all set to enjoy your PlayStation Vue on Roku!

Also Read – How to Activate Your Cricket Service at CricketWireless

Additional Activation Information

Besides activating PlayStation Vue on your Roku, you can also activate other services like Showtime Anytime, iHeartRadio, and the Spectrum TV App on various supporting devices. Just like PlayStation Vue, these services require you to visit their respective activation pages, input the code displayed on your streaming device, and confirm your channel subscriptions.

Remember, each service has its own subscription cost which you’ll need to pay after activation. Activating these services allows you to enjoy a range of entertainment on your Roku device.

Conclusion

So, you see, activating PlayStation Vue on your Roku device is as easy as pie.

With this guide, you’re now well-equipped to explore a world of endless live TV, sports, and on-demand content.

And remember, this is just the start – the entrance to a multitude of streaming apps.

So, grab the popcorn, relax, and immerse yourself in the vibrant world of digital entertainment.

Happy streaming!

Apple TV Remote Volume Not Working: Fix in Seconds 2024

Apple TV Remote Volume Not Working

If you have any queries regarding Apple TV Remote Volume Not Working, you have reached the right destination. This detailed guide will equip you with all the information you need.

Is your Apple remote volume not working? Do not worry. It is a common and harmless issue that can be tackled easily. This can be a result of a variety of reasons. The most common reasons are

  1. Hardware issue with your Apple remote,
  2. Technical bug with the Apple TV software,
  3. A problem with the manual setup of the volume control
  4. The low battery of the remote.

These are all common issues, but there can be times when you cannot put your finger on why your apple tv remote volume stopped working. In any case, there is a standard troubleshooting process you can opt for.

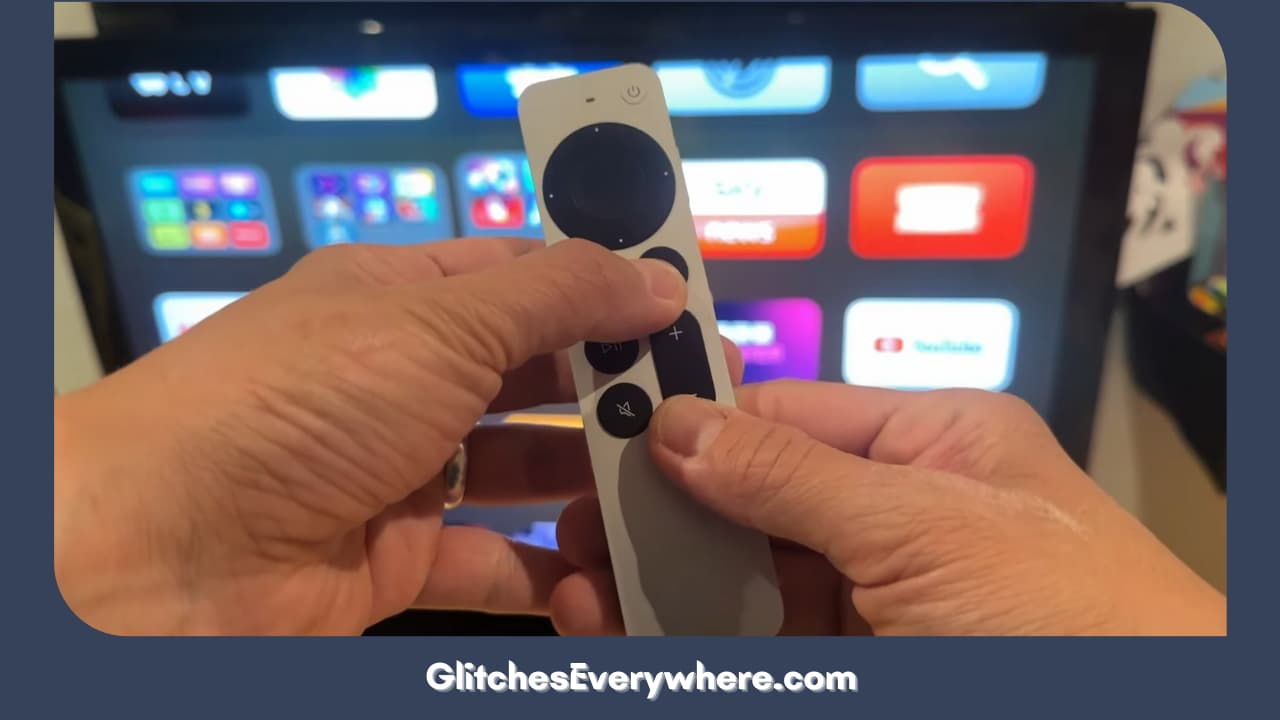
Has your apple tv remote stopped controlling the volume? Begin with coming closer to the tv, charging and restarting your remote, ensuring that HDMI-CEC is turned on, or using your Apple remote app on your iPhone to control it.

Let us get into it in detail and get rid of your apple tv remote volume not working headache right away!
Recommended Reading – Samsung Soundbar Remote Not Working: Fix in Seconds

 : Solutions

Volume Not Working on Apple TV Remote Solutions

Has your apple tv remote volume stopped working? You are at the right place! This section of the article details a step by step guide to fix this problem. Let us get straight into it!
Remote or App

Apple tv remote volume not working? The first order of business is to determine if the problem’s underlying cause is the remote or the app. To figure this out, check if this volume problem is happening in every app. Check it with various streaming platforms and channels.

If it is, then the issue is with the remote. If the problem only exists in a few apps, the problem may be with those apps. In these cases, you can update and reinstall the app to check if the problem gets fixed.

Recommended Reading – Disney Plus Not Working on Samsung TV: Fix in Seconds

Volume Not Working on Apple TV Remote Even Now? Continue Reading!

Volume Not Working on Apple TV Remote Even Now Continue Reading!


Restart Your Apple TV

Volume not working on apple TV remote? Sometimes the simplest solution is the right one. Try restarting your TV. This helps in clearing out any random glitch or problem. How can you do this?

Hold the Menu or Back buttons together along with the TV button to do so. Continue doing so until the indicator starts blinking rapidly. Once you see this, unplug the TV socket from the wall.

Wait for at least five seconds before plugging it back again. Turn the power on and wait for the Apple logo on the TV screen. This indicates that the reboot has successfully finished.

This should help you eliminate your apple tv remote volume not working problem. If not, continue reading; there are many more solutions to go.

Restart Your Remote

Apple tv remote volume stopped working suddenly? Another common step to fix it is to restart your remote. Here are step-by-step instructions as to how you can do it:

1. Press the TV and volume down buttons and hold them together for at least five seconds until you see the status light on your Apple TV turn off and on again.

Press The Tv And Volume Down Buttons

2. Release the help buttons and wait for the Connection Lost pop-up on the screen.

Press The Tv And Volume Down Buttons (1)

3. This will lead to the restarting of the remote.

4. You will know the remote is ready when you see the Connected notification.

You Will Know The Remote Is Ready When You See The Connected Notification

Check if the problem has resolved itself now. If not, move on to the other Apple remote volume not working solutions we have described below.

Charge the Remote

Is the volume not working on Apple tv remote? As mentioned above, a discharged remote is one of the most common reasons for this issue. How can you figure out that your remote has a low battery causing this issue? Here is how you can check it:

1. Go to Settings.

Go To Settings

2. Navigate and go to the Remotes and Devices option.

Navigate And Go To The Remotes And Devices Option

3. You can check the battery percentage here.

You Can Check The Battery Percentage Here

If you have a low battery percentage, it can be the cause for your apple tv remote volume not working issue. To fix this, charge your remote for at least thirty minutes to see a difference. 

Pair Your Remote Once Again

Is your Apple remote volume not working? Try re-pairing your remote to repair it! Here is how you can give this solution a shot:

1. Turn your Apple Tv on.

2. Check if you can see the Home Screen.

3. Bring your remote within at least three inches of your screen.

4. Press the Back or Menu button along with the volume up button for at least five seconds.

Press The Back Or Menu Button Along With The Volume Up Button

5. You may have to place your remote on top of your Apple TV.

Apple tv remote volume not working even now? Do not lose heart; continue reading! 

Move Closer to The Apple TV

Has your apple tv remote volume stopped working? Maybe it isn’t a complicated problem but just your proximity to your TV. The logic behind this is pretty simple, the remote uses Bluetooth or IR to function.

So, it should be ensured that you are close enough to the remote to ensure a proper connection. This seems like a trivial solution, but it can help you get rid of your apple tv remote volume stopped working headache.

Clean your IR Sensors

If your TV sensor is covered with dirt, it can cause IR connection-related issues. Such a problem does not occur with a Bluetooth-connected setup. Apple TV remote volume not working still? Let us move on to more technical solutions.

Finish All Software Updates

Has your apple tv remote volume stopped working? It can also be a result of a software issue. If your TV has received a firmware update, you must also update your Apple TV.

In case of a new update, your TV will generally show a notification about the same. In case you missed it, you can manually cross-check for an update. Here is how:

1. Go to Settings.

Go To Settings (1)

2. Open System.

Open System

3. Move on to Software Updates.

Move On To Software Updates

4. In case of availability for an update, you will be able to see the option to Download and Install, which you are required to select.

5. Wait for the update to finish and check the volume controls again.

If that does not help, continue reading!

Enable HDMI-CEC

Before we can dive into this solution, let us talk about HDMI-CEC. It is the technology that allows Apple TV to control your device directly. It does so using bi-directional communication on an HDMI cable.

If your TV supports HDMI CEC, make sure that it is enabled to avoid this apple tv remote volume not working problem. Here is how you can make sure that this is done:

  1. Go to Settings.
  2. Move on to Remotes and Devices.
  3. Find Control TVs and Receivers.
  4. Now, check that this HDMI-CEC setting is active and enabled.

Apple remote volume not working despite this method? Let us move on to our last-case scenario troubleshooting methods!

Try Another Remote

Borrow a remote and check if it is working with your Apple TV. If it doesn’t work, you can conclude that the problem may lie with Apple TV or device.

In such cases, one can try to factory reset the Apple TV altogether. It is important to note that this might lead you to lose some data, but it is still worth a shot if no other solutions have worked for you.

Use an iPhone or iPad As a Remote

Apple tv remote volume not working even now? The good thing is that you can use your iPhone or iPad for the same. Make sure you are connected to the same Wifi As your Apple TV to make it work. From the top right corner, swipe down; This will reveal the Control Center. Locate the remote icon and click on it now.

This is going to give you functionality on your device. You can use this unless your problem gets resolved. Remember, this temporary solution will not directly resolve your situation, but it takes time to get things in order.

Take Your Remote to Apple Support

Is the Apple TV remote volume not working despite all the solutions? This might mean that your remote has died. If you have narrowed down the problem to your remote. If you have a warranty replacement option, return it to Apple Support. A good option is to replace the remote and buy a new one. 

Recommended Reading – ESPN Plus Not Working: Fix in Seconds

A Few More Cases

A Few More Cases

Let us look at a few more particular cases:

Apple TV 4K Remote Volume Not Working

Apple tv remote volume not working? If you have an Apple TV 4k, you can follow the given steps:

1. Hold the Control center and volume down buttons for at least five seconds.

Press The Tv And Volume Down Buttons

2. You will soon notice that the status light on your Apple TV will start blinking on and off again.

3. You will notice the connection loss notification on your screen once you release the buttons.

Press The Tv And Volume Down Buttons (1)

4. Your remote will reconnect automatically after this.

5. You will then notice that a Connected notification will pop on the screen.

You Will Know The Remote Is Ready When You See The Connected Notification

6. This is your sign that the remote is ready for use.

Let us move on to some other apple tv remote volume not working cases!

Apple TV Remote Volume Not Working Sonos

Apple tv remote volume stopped working with your Sonos wireless speakers? Here is how you can fix this problem:

  1. Use your iPhone and download the Sonos app.
  2. Open it and find ‘System’.
  3. Find your Sonos arc product.
  4. Locate “Remote control setup” at the bottom of the page.
  5. Set up the volume buttons now.

Apple TV Remote Volume Not Working TCL

Has your tv remote stopped controlling the volume? This is how you fix this problem with your TCL TV:

  1. Your Apple TV will first send a signal to the set-top box.
  2. It will then send out a CEC common to the TCL TV.
  3. It should be noted that it may also send IR codes to the TCL TV. Keep in mind that this function depends on the IR function. 

This should help you get rid of your apple tv remote volume stopped working problem altogether!

Recommended Reading – Remote For DirecTV Not Working: Fix in Seconds

Wrapping Up

In conclusion, Apple TV remote volume not working is standard and nothing to worry about. You can quickly troubleshoot it on your own. Many things can cause your tv to stop responding to your remote, which can be very frustrating.

You will rarely need to replace your remote. You will often find the perfect solution to your problem in our solution guide above. So, what are you waiting for? Get rid of your apple tv volume not working headache right now to ensure a smooth streaming experience!

Netflix Not Working on Roku? (Here’s How To Fix It in 2024)

0

Netflix Not Working On Roku

You have reached the right destination if you have any queries regarding Netflix Not Working on Roku. This detailed guide will equip you with all the information you need.

Netflix Roku not working? Look no further, you have what you need! This article details everything you need to know about Netflix on Roku not working and how you can tackle it yourself.

Nothing is worse than being interrupted while watching your favourite shows or movies. And when that interruption is a technical error, it gets even more annoying, isn’t that right? What can you do to get rid of this Netflix Roku not working nightmare?

You can begin by checking if Netflix is down. Then reset Netflix and Roku. Then, try deleting and reinstalling the Netflix channel to see if it helps. Double-check all the details of your Netflix account for any inconsistency. Try resetting your router and disconnecting from VPN, if it applies to you. Also, check for any parental control settings. If nothing helps, contact Roku or Netflix support.

How can you check if Netflix is down? How do you remove a channel from your Roku device? How do I reset my Roku? So many questions and more but we have all the solutions right here. Read through the end to get rid of your Roku not working Netflix and to continue streaming effortlessly again.

Recommended Reading – Fix Apple TV No Signal: In Seconds (Black Screen)

Analyzing the Problem

Analyzing the Problem

The first step in solving a problem is understanding it well. That is exactly what we are going to be doing in this section. The Netflix on Roku not working issue can present itself in various ways. This is important to note as the solution to fix the issue will correspond to the form of the problem as well as the cause of the same. 

Roku Netflix not working? In what way? Is the video buffering way too much? Is the audio video sync off? You can’t hear the audio at all? Or is Netflix not opening or loading at all?

The most common way that the Roku not working issue is experienced is the last one. Most of the solutions described in the guide in the following sections are with respect to it.

The same fixes can be used for other forms as well but in these cases, you might have to go a step further or two. For instance, in case of an audio issue, you should begin by checking the audio section of the settings menu first and so on.

Recommended Reading – Vizio TV With No Sound? Easy Fix Tutorial for Audio Issues

Roku Netflix Not Working: Reasons

Reasons  

Just one more stop before I move on to the best solutions for Netflix issues on Roku. It is key that you understand why your device or platform is malfunctioning. This is instrumental in deciding what method of troubleshooting you chose for the Netflix not working Roku issue at large as well. 

If you are able to understand why you are facing the problem, you can save yourself a lot of time and skip to the solution that works for it. To make this process easy for you, I’ve listed the most common categories of causes of Roku not working with Netflix headaches. They are as follows:

  1. Roku Issues: Sometimes the simplest explanation is the right one. Netflix on Roku not working? There could be something wrong with Roku. This includes software issues or mismanaged settings.
  2. Netflix Issue: Another obvious and very common reason for the issue is Netflix’s trouble. This can exist in the form of server downs, overburdened cache, particular account issues with settings and so much more.
  3. Network Issue: Roku needs a strong internet to function well. Anything that interrupts can be a hindrance and thus be responsible for Netflix issues on Roku. 

Recommended Reading – Why is Roku Remote Not Working: Fix in Seconds

How to Fix Netflix Issues on Roku

How To Fix Netflix Issues On Roku

Let’s finally get into what you are here for. This section details multiple tried and tested solutions in order to fix your Netflix issues on Roku.

If you have already narrowed down the reason for the Netflix on Roku not working question, you can skip to the solution that responds to the same. If not, nothing to worry about, follow these solutions in order and by the end of this comprehensive guide, you’ll have said goodbye to your Roku not working Netflix issue for good!

Here is our fix ‘Netflix not working Roku’ yourself solution compilation:

Check if Netflix is Down

Check If Netflix Is Down

Netflix on Roku not working right? So many possibilities! Before we jump to the more complicated situations, it’s smart to get the basic things out of the way. There are some times that there is something wrong from Netflix’s side. Though rare, this is indeed a possibility.

In these cases, there is nothing you can do but wait for them to fix it, which they do in a day or two. Now, how do you find out if Netflix is down?

There are a couple of ways to find out the same, they are:

  1. Netflix itself has a status page. On it, you can easily check if their servers are properly running or not.
  2. You can go and check their social media pages. Platforms like Netflix update their users about situations like these through their official social media accounts.
  3. There are also pages like DownDetector that collect consumer reports to report if platforms like Netflix are experiencing issues overall.

Netflix seems to be working fine but the  Netflix not working Roku situation persists. We are just getting started, continue reading to find many more solutions.

Verify Netflix Account Limit

Verify Netflix Account Limit

This is a common mistake that can cause this Netflix not working Roku issue. Many users share their Netflix accounts with family and friends. On the basis of the plan that you have bought, you are given a certain number of screens or devices where media can be streamed together.

If you are one of these users, this is your sign to check how many people are using your account. If the number exceeds the number according to your bought plan, ask them to log out or change your password and log out of all other devices. Alternatively, you can also switch to a more premium plan and increase the number of such devices.

Restart your Roku

Restart Your Roku

Netflix on Roku not working even now? Let’s move to some technical solutions. In order to fix the Netflix Roku not working scenario, you might want to try restarting your device. No, I know it seems like a standard solution to any technical problem and may look fruitless but it can really help.

Restarting your device clears your temporary cache and gets rid of any small software glitches or bugs that might be responsible for ‘Roku not working Netflix’ too!

There are a couple of fixes to go about this. Refer to these multiple ways as described. Beginning with restarting your Roku through a remote first:

1. Using your Roku remote, press its Home button.

Go To The Home Screen

2. Navigate the screen and select the Settings option.

Navigate The Screen And Select The Settings Option

3. From there, go and select System.

From There, Go And Select System

4. Finally, find and select the option that says System Restart.

Select The Option That Says System Restart

5. Finally hit Restart and it’s done!

Finally Hit Restart And It's Done

But the above process will only work if you are able to access your screen. So, what can you do if your screen is frozen? 

Try these steps instead, they are a fun key combination: Begin by pressing the Home button around five times. Now, press the up arrow button once. Next, tap the rewind button two times before pressing the fast forward button twice as well.

Once your device has shut down, it might be a good idea to power cycle it as well. Do not get startled by a technical word, it simply means to cut the power supply before plugging the device back in too. 

Just remove the main cable from the port, wait for at least a minute and then plug in the connection back to start the device again!

Netflix on Roku not working despite following all these steps? Don’t you worry, we have a lot of other Roku Netflix not working tricks up the sleeve!

Finish all Updates: Netflix and Roku

Finish All Updates

Roku not working with Netflix? Could be a result of one or both software. 

Your Roku streaming efficiency greatly depends on the Roku system software. If there is an update, you should install it immediately to ensure problem-free streaming.

Your device does notify you about new or pending updates but it is a real possibility that you might just miss it. So, how can you check for this system update to fix your Netflix issues on Roku.

Here is how, Follow these steps to check and install your latest Roku system software:

1. Using your Roku remote, press the Home button.

Go To The Home Screen

2. Now, enter the Settings menu.

Now, Enter The Settings Menu

3. From here, locate and select the System option.

Locate And Select The System Option

4. Now, press System update.

Now, Press System Update


5. Find the Check Now option and press it.

Find The Check Now Option And Press It

6. In case of a pending update, you will find it on the screen. Just install it!

Keep in mind that this process is automatic. That being said, it is also important to note that you are not supposed to interrupt your device while the update is being installed. Once installed, check if the Netflix Roku not working issue still persists. 

Now that we have discussed the updates for your Roku system software, let us move on to updates of the particular Netflix channel. These apps come up with updates every now and then to improve performance and not keeping up with them often leads to lags and glitches. This is how you can check for your Netflix channel on a Roku device:

1. Using your Roku remote, press the Home button.

Press The Home Button

2. Go to your Channels and locate Netflix. When you reach it, you will notice that it is highlighted.

Go To Your Channels And Locate Netflix

3. Now, press the star button on your remote.

Press The Star Button On Your Remote

4. You will find the Check for Updates option, just press on the same to find out if you have any pending.

You Will Find The Check For Updates Option

Click to install the update, do not back off or disturb the screen when the update is getting installed. Once done, relaunch the Netflix channel. Roku not working with Netflix even now? Let’s take a deeper look at Netflix, especially our own account now.

Check your Netflix Account’s Particulars

Check Your Netflix Account’s Particulars

There is a good chance that if you are facing the Netflix not working on Roku problem, the issue lies with the former rather than the latter. Let us make sure that everything is alright with the account itself since there can be a lot of small things that can cause trouble.

Check if the plan has not expired. Verify if you have changed your payment method recently. If you are using a card for the payment, any issue with your card can also result in the issue of  Netflix not working on Roku devices.

If everything seems fine, move on to the next fixing Roku not working with Netflix step.

Delete and Reinstall Netflix 

Delete And Reinstall Netflix 

Another extremely common way to get rid of minor bugs, glitches or Netflix issues on Roku can be employed here. First, you need to delete the Netflix channel completely. Let us tackle this portion first. This is how you can remove it from your list of channels:

1. Use your Roku remote and press the Home button on it.

Press The Home Button

2. Now, from the list of Channels, locate Netflix. Open the channel.

Press The Star Button On Your Remote

3. Press the star button present on the Roku remote.

Press The Star Button On Your Remote

4. This will prompt open the options menu. From the list of options, find the Remove Channel option.

Find The Remove Channel Option

5. Select this Remove Channel option. Once you do, you will be asked to confirm if you want to remove it, give your confirmation.

Select This Remove Channel Option

You can remove the Netflix channel through this alternative method as well to fix the Netflix not working Roku problem. Follow these given steps:

  1. Press the Home button on your Roku remote before pressing the Streaming Channels button.
  2. This is going to open the store.
  3. Find Netflix from the menu there and once located, press the OK button.
  4. Now, select the Remove channel option.
  5. Give your confirmation when asked to finish the process!

Do not worry, this does not mean that you will lose any important data or status of your watched shows or movies. Now, all you need to do now is to install it again to fix Netflix not working Roku for good.

Check and Fix your Internet Connection

Check And Fix Your Internet Connection

Roku not working with Netflix? Could it be that neither Netflix nor Roku is at fault? How?

It is common knowledge that Roku requires a strong and stable connection to the internet to work properly. The most common issue is that the strength of the network is not as strong as it is supposed to be.

So, let us begin by checking the connection that is already established. Use these steps to check for yourself;

  1. Press the Home button on your device.
  2. Enter the Settings menu from there.
  3. From here, open the Network option. This section details all the technical information about your connectivity that you need to know.
  4. First, check the connectivity status, If it tells you that you are connected, click on the Check Connection option to find out the strength of the same.

Alternatively, if your phone or laptop is connected to the same Wi-Fi, check the network on the many websites online that tell you the strength and speed of one’s internet. Now, the next step to the Roku Netflix not working scenario.

If you are able to see a red blinking light or the network speed does not match the package that you have brought, try to reset your router. You can do so by unplugging your router. Now. wait for a couple of minutes before plugging it back in. This is the time it will take to reset and cool off. 

Once it is back online, it should connect back to your channels with ease. If the problem has still not been fixed, it is time to contact your network service provider and ask for a professional explanation and assistance.

Now, we are ending our Roku not working with Netflix solutions, hold on for a few more final fixes!

Turn off Your VPN

Turn Off Your Vpn

Netflix has different media with respect to different locations or countries. This means that certain shows or movies are only available in a few countries. This is why many users tend to use VPN to gain access to such shows. Are you one of these people too? 

If you are, this step is for you. Connecting to the VPN can cause many issues with your network and can thus cause performance issues with Netflix itself. So, you may want to try turning off your VPN. Then, connect to your regular internet connection and check if the Netflix issues on Roku have been fixed. 

Double-Check Parental Controls

Double Check Parental Controls

Parental controls allow certain channels to be locked or blocked by a pin or hidden so they can not be accessed. Both Roku and Netflix offer parental control options and can be used to hide or block content.

Roku not working with Netflix? Check the Roku parental control from settings. If that checks out, move on to check the parental controls of Netflix as well. 

Contact Support

Contact Support

If none of the above Roku not working with Netflix solutions have worked for you, it is time to get the answers from the creators themselves. You can easily get in touch with the customer service executives of both Roku and Netflix as well as get access to a bunch of troubleshooting articles for free!

Let’s begin with Roku. Here is how you can get their help. You should begin by going to their official website. Scroll down and find the Roku Support Center.

Once you open that page, you will be asked the topic of your problem. Once chosen, you will find a bunch of articles pertaining to that particular problem which you can read in order to get an idea on how you can fix it. If the articles are not able to help, you can get in touch with an executive through call, text or email.

A similar process can be undertaken on the Netflix help center page as well. From the articles to the choice of the method of contact, you can follow the same for issues with Netflix itself.

In both these cases, my advice to you would be to explain the Roku not working with Netflix problem in detail in addition to informing them about the troubleshooting methods that you have already undertaken. 

This will fasten the process of figuring out what to do for them too. You can check out their community pages as well where there are discussion forums where you can find out ways other users have dealt with similar or the same problem.

Recommended Reading – Why is Vizio Remote Is Not Working: Fix in Seconds

Wrapping Up

This brings me to the end of my detailed guide to fixing the Netflix not working Roku issue yourself. After covering the analysis, reasons as well and solutions, you are good to go!

Fix your problem in no time. Don’t get stressed due to small technical issues and let it stop your Netflix and chill when all you need to do is just be well-read about these platforms that you are paying for yourself! Continue streaming your favourite shows and movies without any trouble!